
Configuring the connector/pipeline in NiFi
After you create your custom connector in the Ingest service, you configure it to connect to the database server.
Procedure
-
Update the Ingest SQL in the
auth.xfields-_Template-DatabasePagingETLprocess group.-
Select the Properties tab and update the
ingest.database.sql property with the your
custom SQL code, depending on the custom fields that you would like to
include from a catalog table (such as CATENTRY.FIELD1).
For example,
SELECT field1, field2,catentry_id FROM catentry ${paging.prefix} ${param.offset} ${paging.link} ${param.pageSize} ${paging.suffix} For 9.1.15.0 and above, select the
Properties tab and update the Use
Custom SQL to YES and add the
custom SQL against Custom
SQL property, depending on the custom fields that you
would like to include from a catalog table (such as
CATENTRY.CATENTRY_ID, where CATENTRY_ID is one field in CATENTRY table).
For 9.1.15.0 and above, select the
Properties tab and update the Use
Custom SQL to YES and add the
custom SQL against Custom
SQL property, depending on the custom fields that you
would like to include from a catalog table (such as
CATENTRY.CATENTRY_ID, where CATENTRY_ID is one field in CATENTRY table).
-
Select the Properties tab and update the
ingest.database.sql property with the your
custom SQL code, depending on the custom fields that you would like to
include from a catalog table (such as CATENTRY.FIELD1).
-
Update the properties of the
Custom Connector Pipeprocessor for the Java processgroup.-
In the
Custom Connector Pipeprocess group, double-click on the Map Index Fields From Database process group.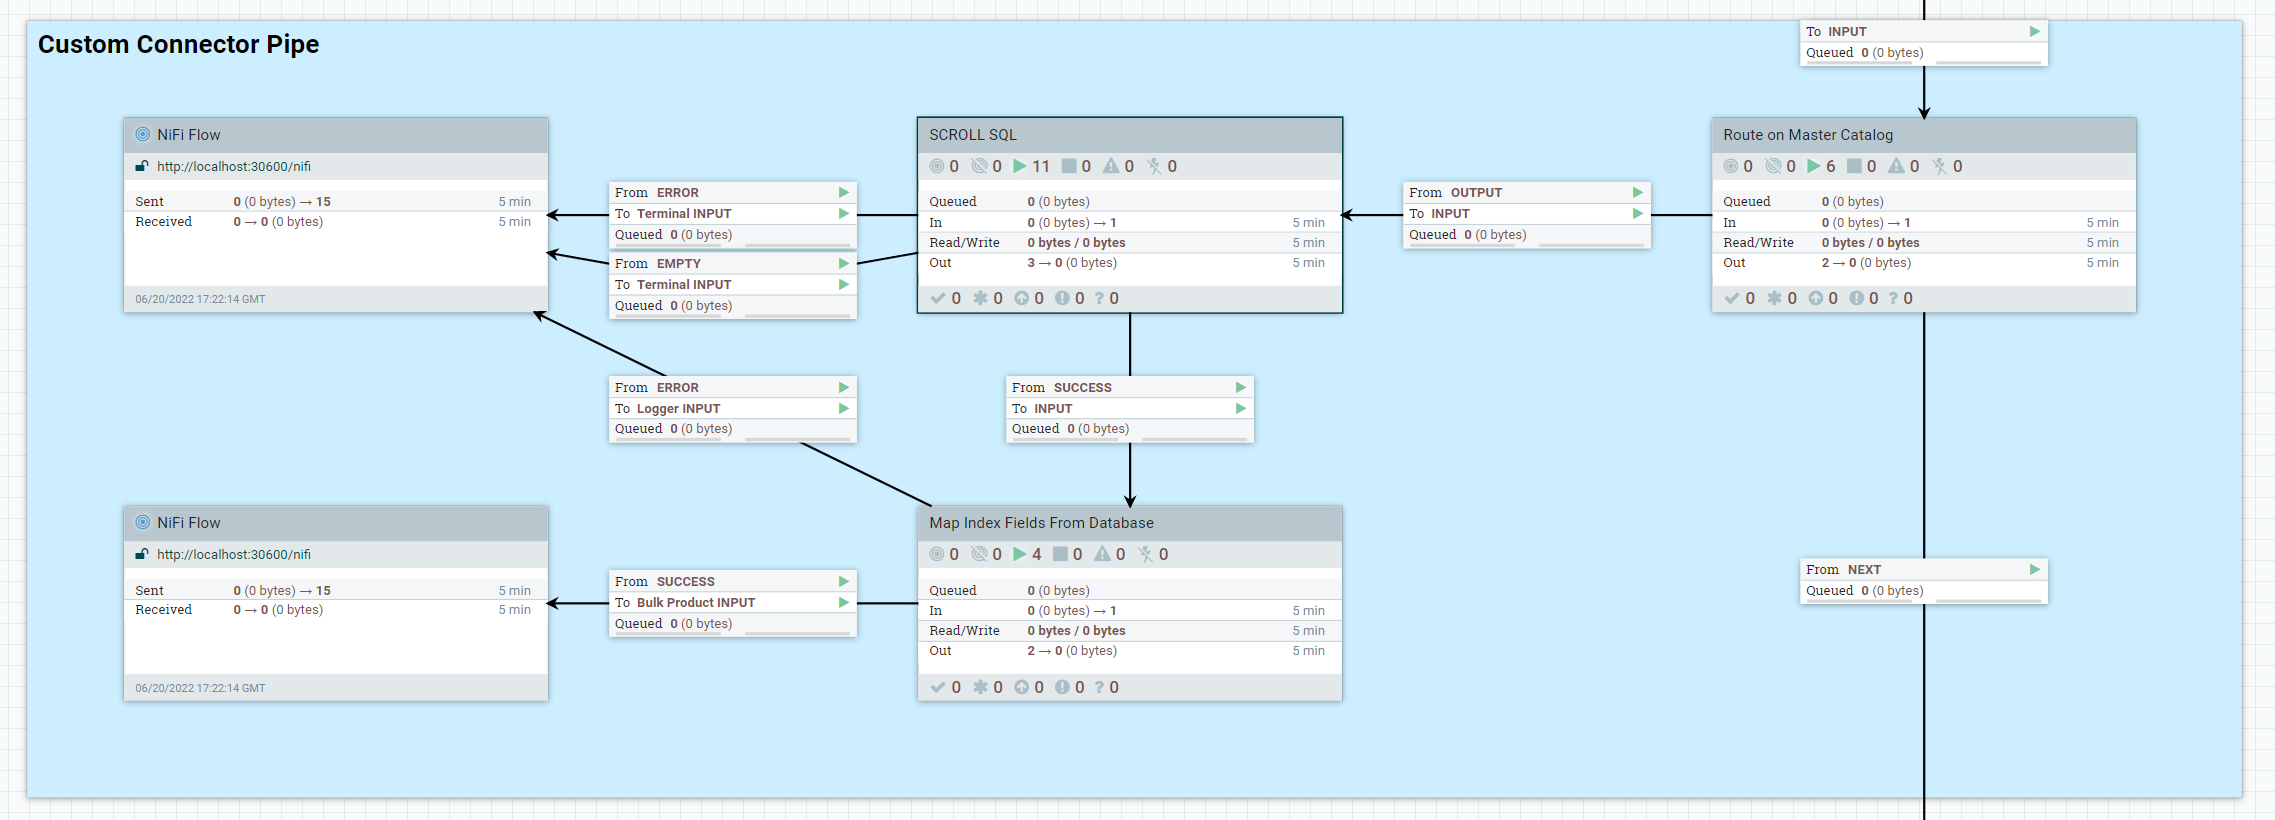
-
Note the following mandatory properties.
- Entry Identifier
- "Entry Identifier" in this processor is the key used for the
output document which will later be sent to Elasticsearch.
Internally it is mapped with the
field _idkey used for the output document. This identifier can be expressed using flowfile and registry variables, as well as using index field names in the search response surrounded by square brackets [ ]. -
Note:
In case a user wants to use any other field as the placeholder for the Entry Identifier which are not part of the flowfile and registry variables, users must set these values against the Property Name to the database table field name and set the Property Value to the corresponding search index field path.
If you are including the
[id.catentry]and[id.language]placeholders in the Entry Identifier, their values will not be set unless you add an additional mapping to the properties. For example, adding the property CATENTRY_ID with the valueid.catentryresults in the[id.catentry]placeholder being correctly substituted. For 9.1.16.0 and above, by
default, the field CATENTRY_ID is already present as the
property name and mapped with
For 9.1.16.0 and above, by
default, the field CATENTRY_ID is already present as the
property name and mapped with
id.catentryas the property value.By default the Entry Identifier value is set to
[id.catentry]-[id.language]. Users can change this value to (if required),${param.storeId}-${param.langId}-${param.catalogId}-[id.catentry]. For example, "11--1-11001-14206", where,param.storeId : 11,param.langId : -1,param.catalogId : 11001,id.catentry : 14206. - Index Type
- The type of search index in Elasticsearch, for example
ProductorCategory. This value should not be changed for this tutorial.
-
Define the mapping of custom database table fields to corresponding
index fields. Set the Property Name to the
database table field name and set the Property
Value to the corresponding search index field path. The
property value can be a multi-valued comma separated list to allow the
same database table field to be mapped to more than one search index
field name. For example:
Name:   FIELD1
Value:  custom.x_field1.raw, custom.x_field1.normalized
Note: Re-use the existing index schema mapping where possible, to simplify the customization logic.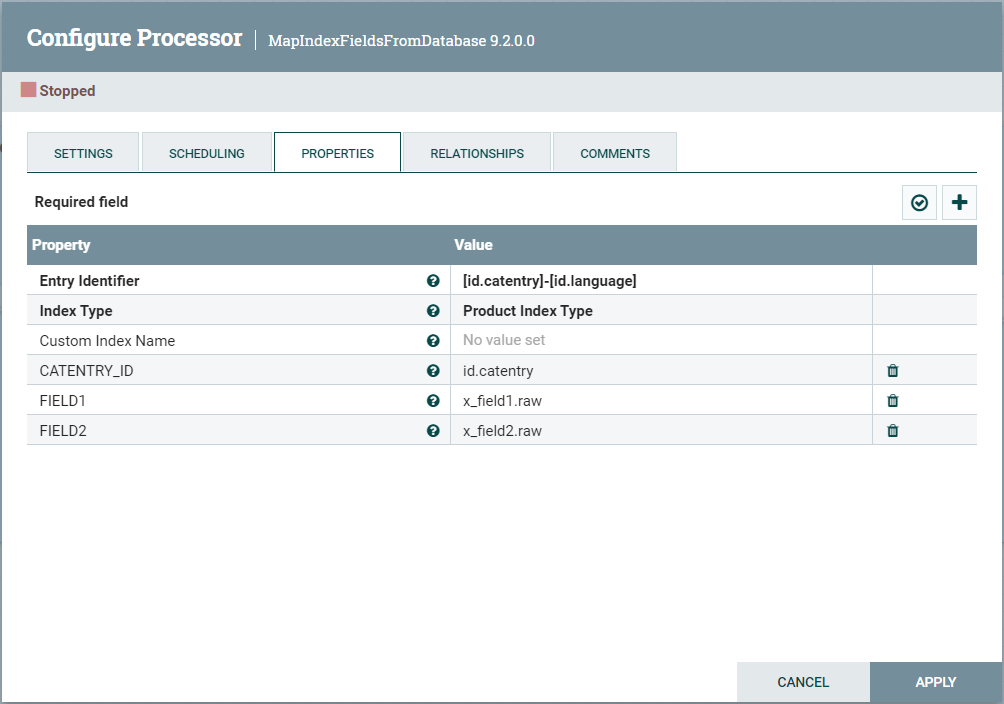
-
In the