Planning the user interface customization
In this lesson, you plan which parts of the Management Center user interface
you need to customize to support your new promotion type.
About this task
Procedure
-
Find an existing promotion type with a similar purchase and reward condition that you can use
as a base for your new promotion type.
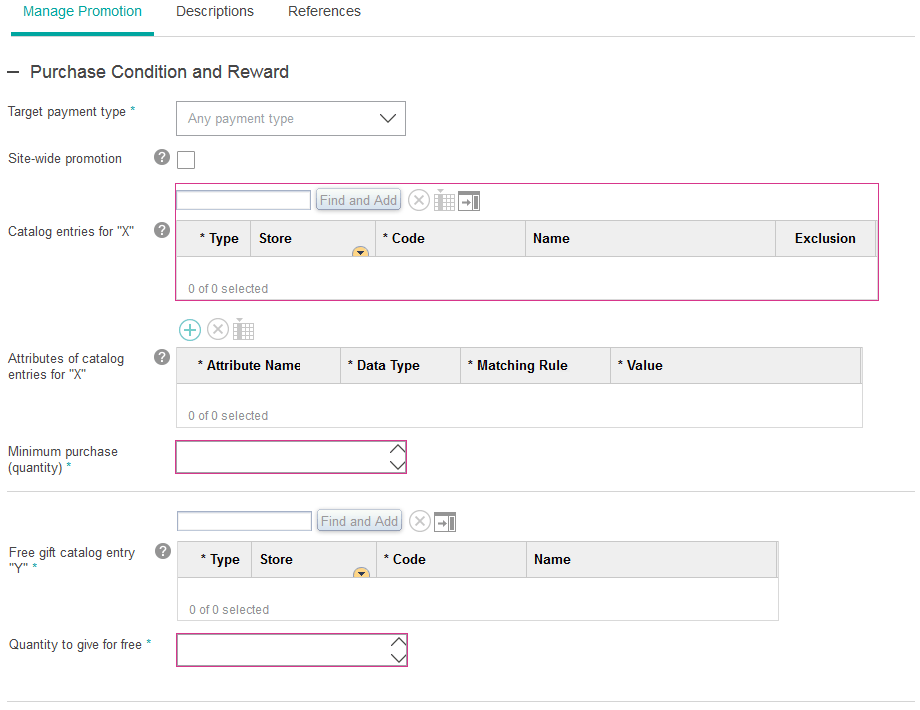
In this tutorial, you are basing your new promotion type on the existing promotion type titled "Buy catalog entry X, get catalog entry Y free," but you are changing the purchase condition and reward details. For this existing promotion type, the user interface for the Purchase Condition and Reward section looks like this:

-
Identify which user interface elements you need to modify or add in order to support your new
promotion.
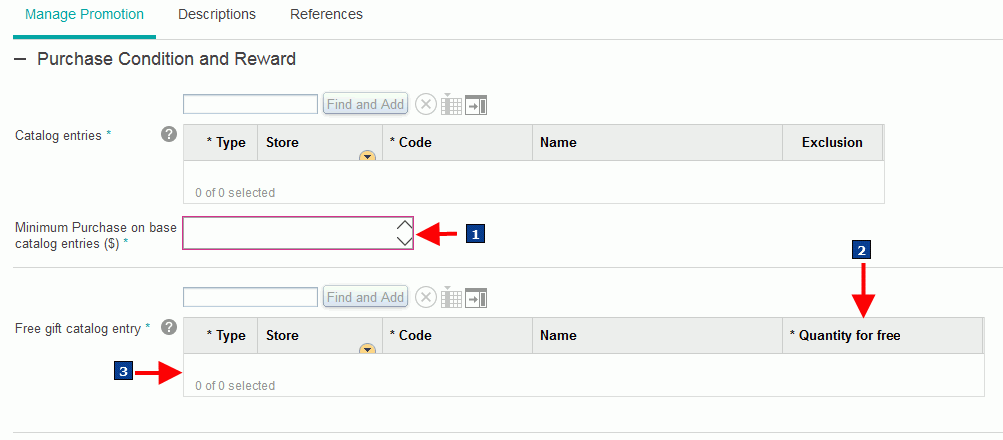
For your new promotion type, "Spend $ on catalog entry X, get catalog entry Y free," you can reuse most of the widgets and labels from the existing promotion in the previous screen capture; however you will need to make some changes so that your Purchase Condition and Reward section looks like this:

- 1 Add this widget and text string.
- 2 Add this column and text string.
- 3 Change this widget to allow additional table rows.
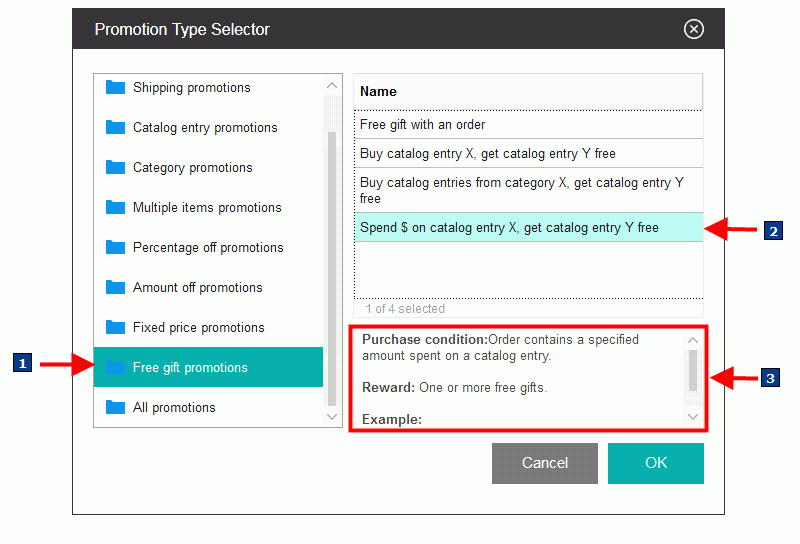
Note: You will not reuse the widget for "Minimum purchase (quantity)." You will add a new widget for 'Minimum Purchase on base catalog entries ($)."In addition, to allow business users to choose your new promotion type, you can display the following changes and information in the Promotion Type Selector menu:
- 1 Place the new promotion type in the existing Free gift promotions template folder.
- 2 Add its name to the Promotion Type Selector window.
- 3 Add a description and example to help business users identify the promotion type.