Enabling Windows ESU Patch functionality
Before you can start using the Windows ESU add-on, you should first enable it.
Procedure
-
Navigate to the BigFix License Key Center
and add the Windows ESU add-on license to a server.
-
Check for license updates.
-
Check if the BES Platform section notifies of any
site certificate updates. If it does not, click Check for
license update.

-
Check if the BES Platform section notifies of any
site certificate updates. If it does not, click Check for
license update.
-
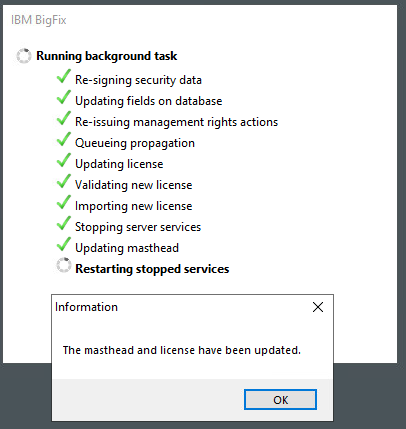
Update the masthead by using the BES Administration Tool.
-
Enter the private key password for your deployment and click
OK.
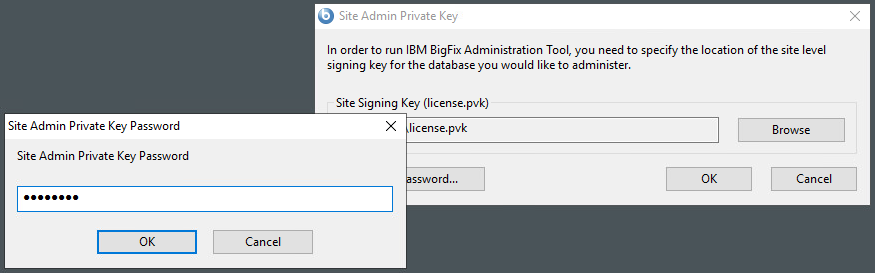
The BESAdmin updates the masthead of your deployment.
-
Enter the private key password for your deployment and click
OK.
-
Enable the ESU patch sites.
-
Click Refresh.
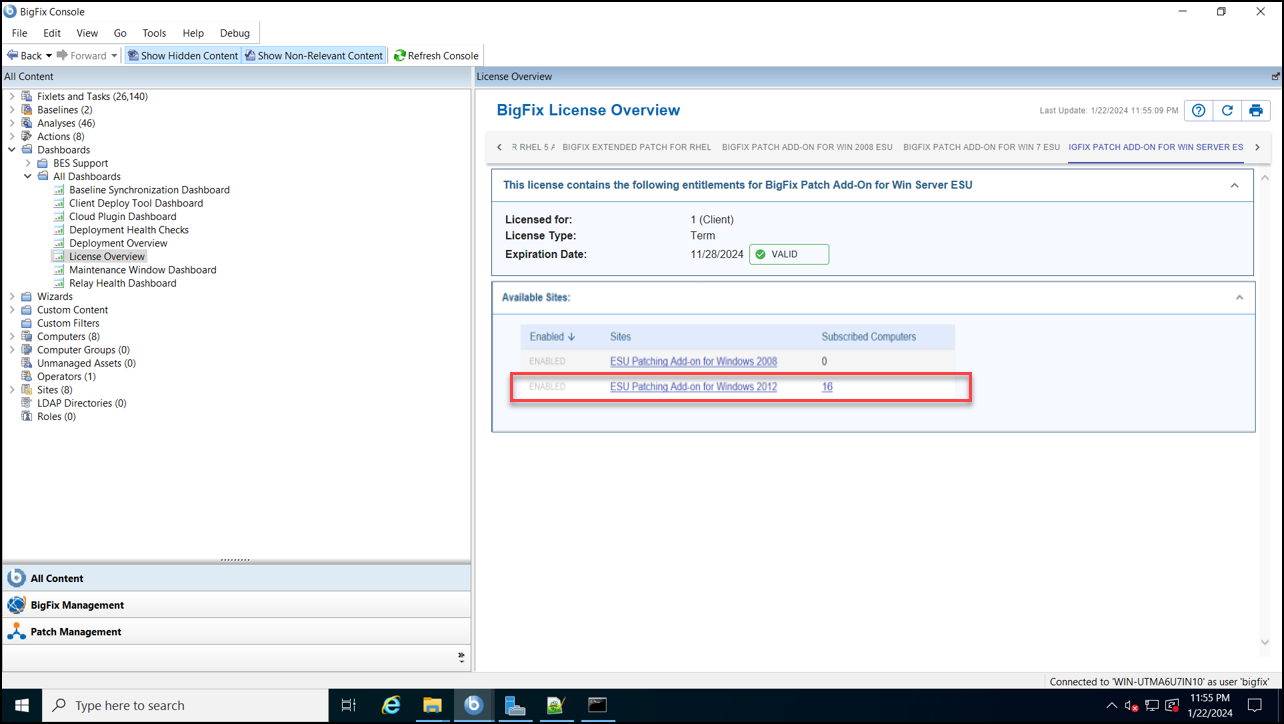
The ESU site(s) that you purchased are listed.
-
Click Refresh.
-
Subscribe your endpoints to the ESU sites.
Set each ESU site’s subscription Relevance to the correct OS and then save changes.
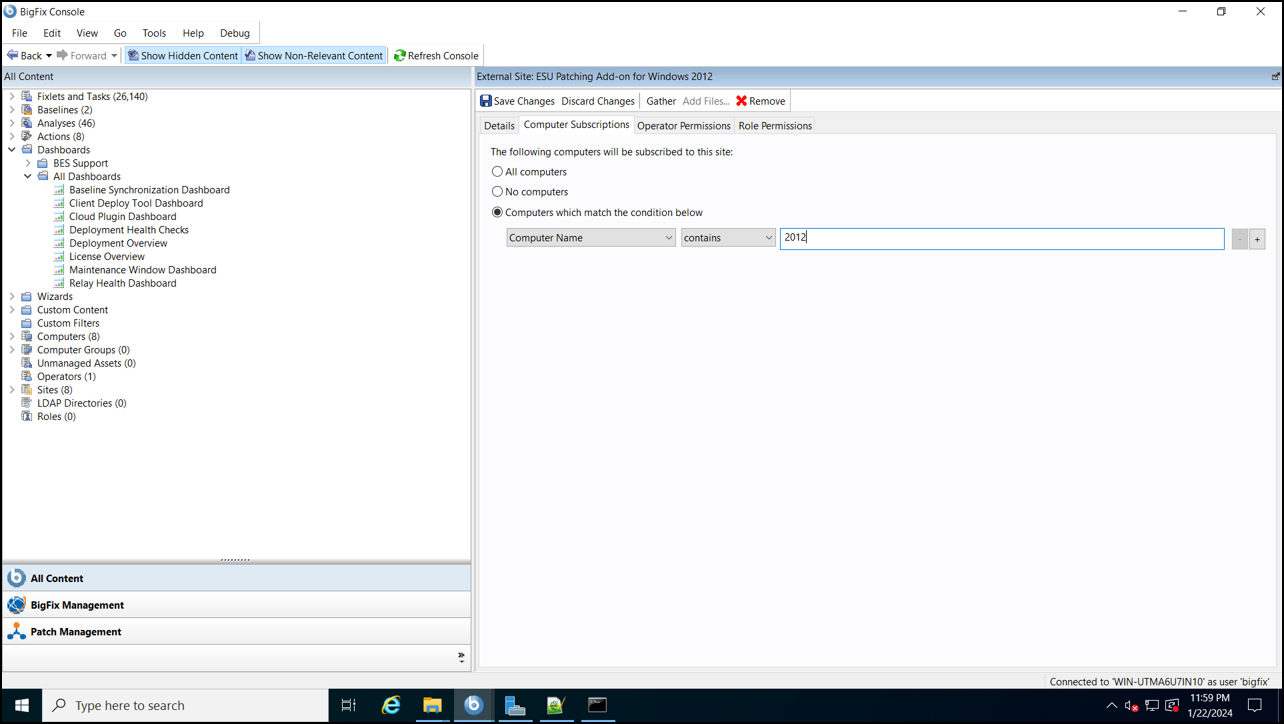
- Set the subscription relevance for each ESU site against an operating system as appropriate.
- Click Save Changes.