Setting up OS Deployment in an air-gapped network
You can choose to configure your OS Deployment and Bare Metal Imaging site in an air-gapped network.
To setup the OS Deployment and Bare Metal Imaging site in an air-gapped environment, you need to manually download and cache specific files on the machines where the IBM BigFix Console is installed as well as on the IBM BigFix Server. To set up your environment, you must perform the following steps.
1. Obtain OS Deployment and Bare Metal Imaging Site content
You must use the Make Mirror Archive utility, to download the OS Deployment and Bare Metal Imaging external site content from an internet connected machine. This utility requires the external site masthead file and cannot be run on the BigFix Server.
For details, see OSD in an Air-gapped environment
2. Pre-cache OS Deployment and Bare Metal Imaging Site downloads
To pre-cache the OS Deployment site files, you must obtain the OS Deployment and Bare Metal Imaging site masthead file, and create a cache folder for the pre-cached SHA1 files on an internet connected machine. Download and run the BES Download Cacher utility available on the Wiki Utilities page at the following link: Utilities . The utility copies files in the cache folder you specified. You must then transfer these files to the SHA1 download cache on the Endpoint Manager Server. The default location of the download cache is: ...\Program files (x86)\BigFix Enterprise\BES Server\wwwrootbes\bfmirror\downloads\sha1.
For more information, see OSD in an Air-gapped environment .
3. Pre-cache additional files on the IBM BigFix Server:
You must pre-cache additional files on the server. The following files must be downloaded to the SHA1 download cache on the BigFix Server.
The default location of the download cache is: ...\Program files (x86)\BigFix Enterprise\BES Servker\wwwrootbes\bfmirror\downloads\sha1
- http://software.bigfix.com/download/osd/rbagent.exe
- http://software.bigfix.com/download/osd/rbagent.pak
- http://software.bigfix.com/download/osd/rbagent64.exe
- http://software.bigfix.com/download/osd/rbagent.bin
- http://software.bigfix.com/download/osd/rbagent64.bin
- http://software.bigfix.com/download/osd/osdimageprovider.pak
- http://software.bigfix.com/download/osd/osdimageprovider.exe
- http://software.bigfix.com/download/osd/osdimageprovider64.exe
- http://software.bigfix.com/download/osd/RelayDownloader-1.2.exe
- http://software.bigfix.com/download/osd/RelayDownloader-1.2-x64.exe
- http://software.bigfix.com/download/osd/getLocaleName-2.0.exe
- http://software.bigfix.com/download/osd/modifyUnattend.exe
- http://software.bigfix.com/download/redist/unzip-6.0.exe
- http://software.bigfix.com/download/redist/unzip32-6.0.exe
- http://software.bigfix.com/download/redist/unzip64-6.0.exe

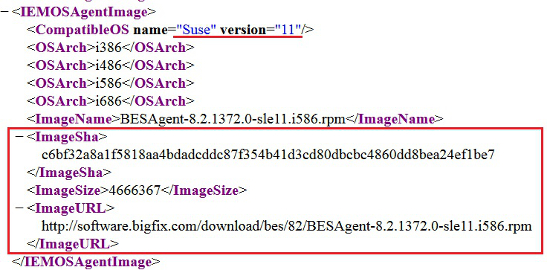
<IEMOSAgentImage>
  <CompatibleOS name="MicrosoftWindows" version="5.1" />
  <CompatibleOS name="MicrosoftWindows" version="5.2" />
  <CompatibleOS name="MicrosoftWindows" version="6.0" />
  <CompatibleOS name="MicrosoftWindows" version="6.1" />
  <CompatibleOS name="MicrosoftWindows" version="6.2" />
  <CompatibleOS name="MicrosoftWindows" version="6.3" />
  <ImageName>BigFix-BES-Client-9.1.1229.0.exe</ImageName>
  <ImageSha>ac13e360e122d2079f88628dfa6e89af71c29b599aa45917514938376809e884</ImageSha>
        <ImageSize>12136344</ImageSize>
        <ImageURL>http://software.bigfix.com/download/bes/91/
           BigFix-BES-Client-9.1.1229.0.exe</ImageURL>
 </IEMOSAgentImage>
For more information, see the Image catalog file at this link: TEMImageCatalog.xml
.(name of it, sha1 of it) of files of folder "c:\AirgapOSD" 4. Download additional files to the machines where the BigFix Console is installed:
The following files must be downloaded and placed within %USERPROFILE%\OSDeployment on the console machines. This step also applies if your console machines are behind a proxy.
