Creating Analyses
Analyses allow you to create and track specified properties of your managed BigFix Clients.
These properties can be extracted from any subset of your network, which simplifies the process of managing inventory, licensing, security, and policies. Using Web Reports, you can view a history of each analysis.
Analyses are also the only way for Non-Master Operators to create retrieved properties, because they do not have access to the Manage Properties Dialog.
To create your own custom Analysis, follow these steps:
- Select Tools > Create New Analysis
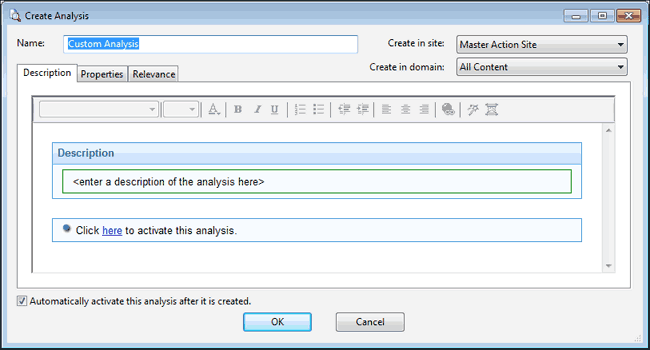
- This
opens the Create Analysis dialog with a text box for entering
the name of your new Analysis.

Because you can use the name for sorting and filtering, create a consistent naming convention to make your Analyses more accessible. Enter the name and then select the host site and domain for the Analysis from the drop-down menus at the right. The dialog contains three tabs. Click through each tab to define your Analysis:
- Description: In this dialog, you can enter the text that describes your Analysis. You can choose from the text editing tools at the top of the text box to create your custom content.
- Properties: Add the retrieved properties that form the core of your Analysis by clicking the Add Property button, then providing a name and a Relevance expression that is evaluated to create the returned property value.
- Relevance: Enter another Relevance expression that determines which computers are selected for this Analysis.
- Check the box at the bottom of the dialog if you want to automatically activate the Analysis. When you are satisfied with your Analysis definitions, click OK.
- Your Analysis must be propagated, so you are prompted for your private key password. When you enter it and click OK, your Analysis is sent to all the Clients, which evaluate it for relevance and report back their status. You can now monitor specific properties of your networked Clients from the Console.