Adding custom content to a site
Use the Create fixlet wizard to add a custom Fixlet to a site.
Before you begin
The Add custom content option is enabled only if you have the required access to the selected site, and your platform permissions allow you to create custom content.
Note:
The Add custom content option is
available only for custom sites.
About this task
The Create fixlet wizard guides you through four steps, shown in a progress indicator at the top of the wizard: Details, Detection rules, Actions, and Summary.
Procedure
-
Go to
and select the site to which you want to add content.

-
Select Add custom content.
The Create fixlet wizard opens at the Details step.
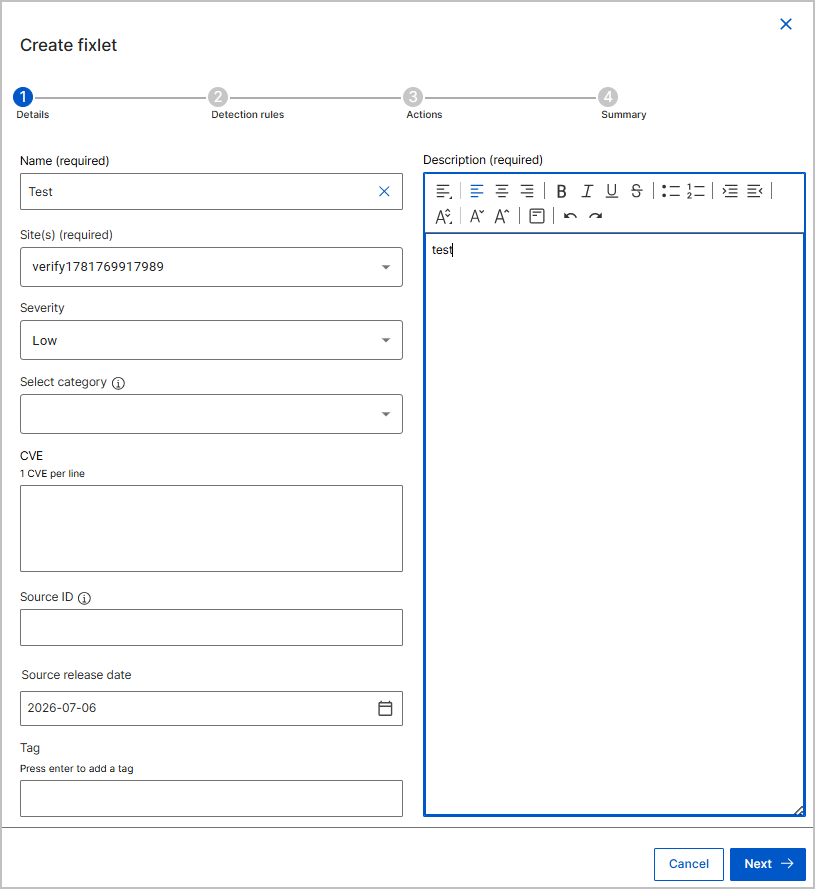
The Details step contains the following fields.
Table 1. Create fixlet - Details step fields Field Description Name The name of the Fixlet. Required. Site(s) The site that hosts the Fixlet. Required. The field is prefilled with the site from which you opened the wizard. Severity The severity to assign to the Fixlet, such as High. Select category The category to assign to the Fixlet, such as BES Client Setting. CVE The CVE identifiers that the Fixlet addresses. Enter one CVE per line. Source ID The identifier that the source assigned to the content, such as a vendor bulletin number. Source release date The date when the source of the Fixlet was released. Defaults to the current date. Tag One or more tags to assign to the Fixlet. Press Enter to add each tag. Description The description of the Fixlet. Required. Use the rich-text toolbar to format the text, for example with alignment, bold, italic, underline, strikethrough, lists, and indentation. -
On the Details step, complete the fields and select
Next.
- In the Name field, enter a name for the Fixlet (required).
- Verify the site in the Site(s) field (required).
- Optional: Select a Severity and a category from the Select category list.
- Optional: In the CVE field, enter CVE identifiers, one CVE per line.
- Optional: Enter a Source ID, a Source release date, and one or more Tag values. Press Enter to add a tag.
- In the Description editor, enter a description (required). You can format the text with the rich-text toolbar.
-
On the Detection rules step, specify the criteria that
BigFix uses to detect where the Fixlet is applicable, and select
Next.
- To target every device, select the All available devices check box.
- To target devices by property, turn on the Properties toggle, then define each condition by selecting a Property, an Operator, and a Value. Select Add Condition to add more conditions.
- To target existing device groups, turn on the Device groups toggle.
- To target devices with a relevance expression, turn on the Relevance expression toggle.
Use the top-level filter condition to combine the criteria. Select All conditions (Criteria: AND) to require every criterion, or ANY to require at least one. To clear the criteria, select Reset filters.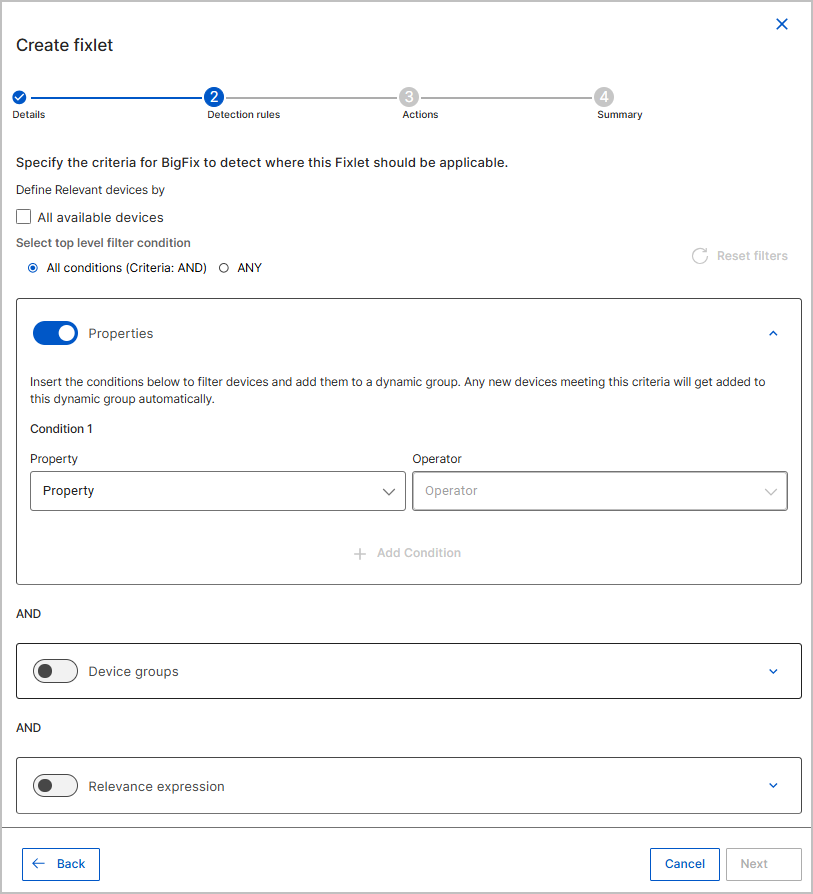
-
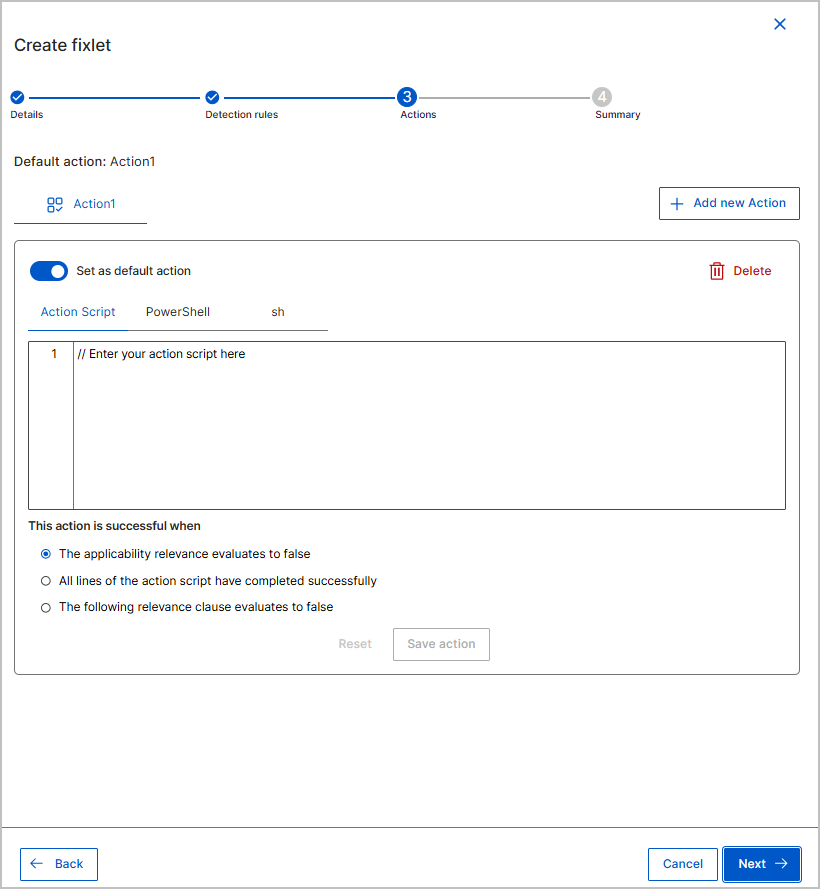
On the Actions step, define one or more actions and
select Next.
- Select the script type: Action Script, PowerShell, or sh.
- Enter the action script in the editor.
- Under This action is successful when, select one of the following success criteria: The applicability relevance evaluates to false, All lines of the action script have completed successfully, or The following relevance clause evaluates to false.
- Select Save action.
- Optional: Select Add new Action to define another action. Use the Set as default action toggle to choose the default action.
-
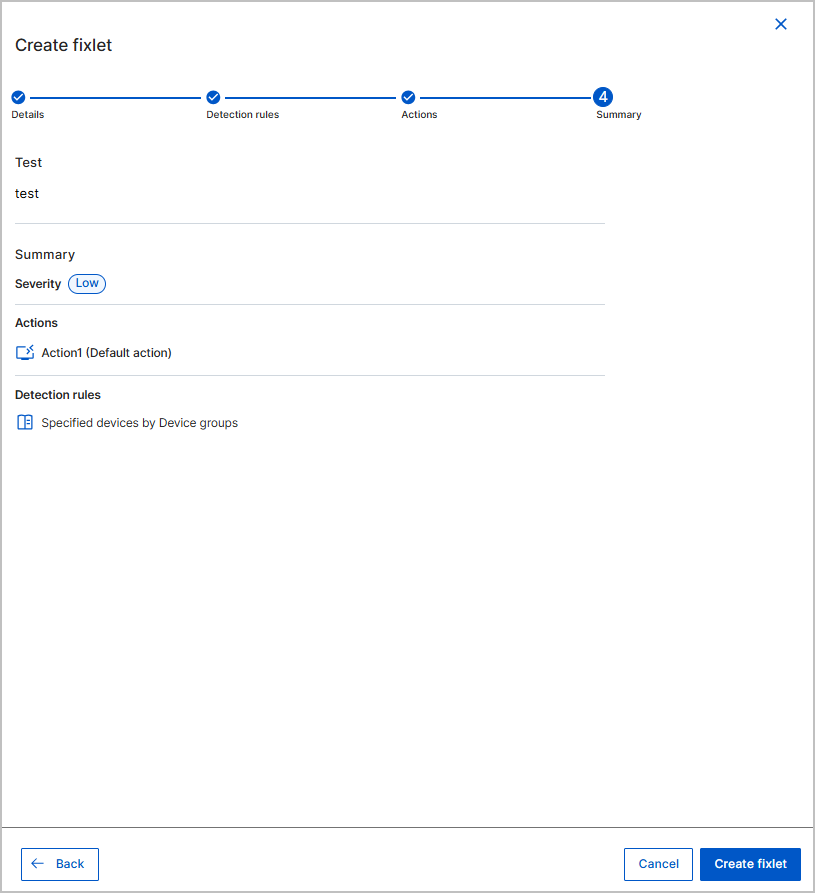
On the Summary step, review the Fixlet details, actions,
and detection rules, and then select Create fixlet.
Results
The message Your custom fixlet has been successfully created. appears, and the Fixlet appears on the Fixlets tab of the site. See Fixlets tab.