Manage Reports
Save, load, and organize the custom reports that you generate in BigFix UI. Use this feature to preserve a view that you use often, such as a set of filter conditions, columns, and charts, and to reopen it later.
The Manage Reports feature preserves frequently used report views or filter conditions in Device Explorer, Fixlet Explorer, Deployment Manager, and the Analyses app. Reports that you save in one application, for example Device Explorer, are listed on the All Reports page, which gives you central management and quick access.
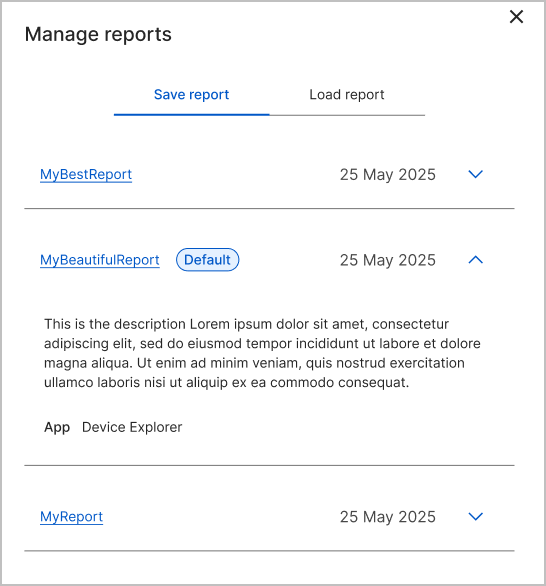
The Manage Reports panel slides out when you select Manage Reports from the upper-right corner of the List View. It provides two tabs:
- Save Report – Store a new report configuration.
- Load Report – View and reopen a report that you saved earlier.
With Manage Reports, you can:
- Save a report with a meaningful name and an optional description.
- Update or overwrite a report that you saved earlier.
- Load an existing report to reapply its saved filters or data views.
- Set or remove a report as your default view for the List View page.
- Manage reports across multiple BigFix UI applications.
- Access your own saved reports for personalized workflows.
Saving a report
- In the List View of Device Explorer, Fixlet Explorer, Deployment Manager, or the
Analyses app, select Manage Reports.
The Manage Reports panel slides out from the upper-right corner of the List View.
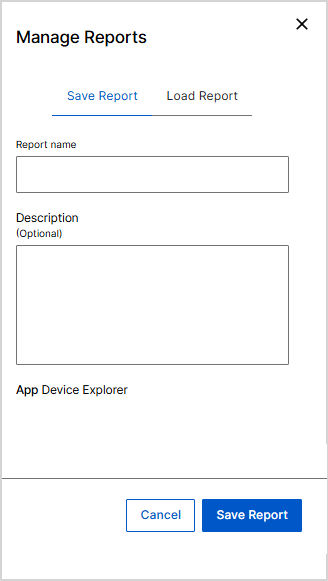
- Enter a Report name.
- Optional: Provide a Description to help identify the report's purpose or filter set.
- Verify the associated application, for example App Device Explorer.
- Select Save report.
If you opened a saved report and changed it, the button reads Update report. Select it to save your changes to the same report.
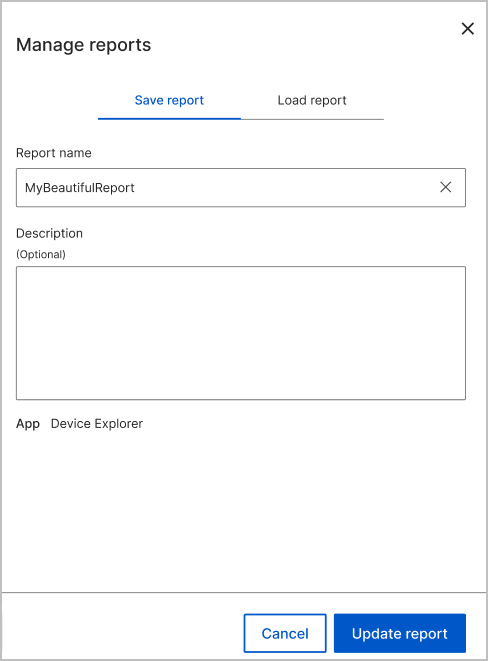
The report appears on the All Reports page for future access.
Overwriting an existing report
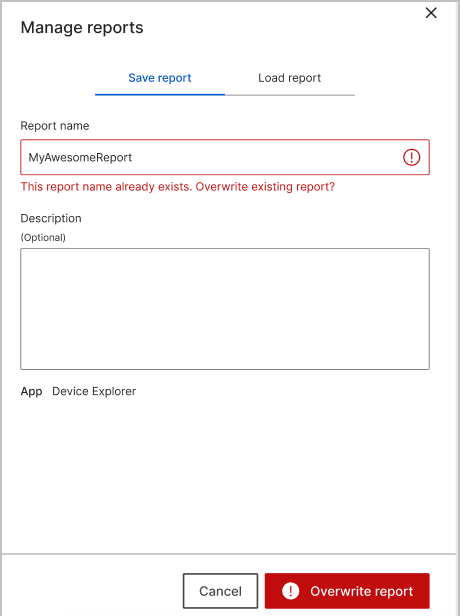
If you enter a report name that is already in use, the field shows the message This report name already exists. Overwrite existing report? and the button changes to Overwrite report.
- On the Save report tab, enter the name of the report that you want to replace.
- Optional: Update the Description.
- Select Overwrite report.
The current view replaces the saved report, and the drawer closes.
Loading a report
- Select Manage Reports on the List View toolbar, or open
the All Reports page.
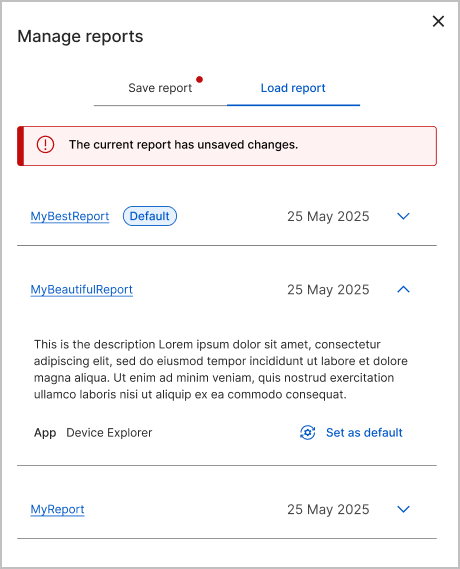
- Select the Load report tab.
- Review the list of available saved reports.
Each row shows the report name and the date it was last updated. Select the arrow at the end of a row to expand it and view the description, the application, and the default report actions.
- Select a report name to load it.
A tooltip opens. If the current report has unsaved changes, the tooltip warns you about them. Select the link in the tooltip to load the selected report.
The associated filters, columns, charts, and view settings are restored.
- Optional: Edit the filters or sorting, and then save the report again with a new name.
Setting a default report
A default report is the view that opens when you go to the List View page of a supported application, such as Device Explorer, Fixlet Explorer, and Deployment Manager apps. The default report restores its saved charts, columns, sorting, and filters. If you do not set a default report, the List View page opens with the standard columns and settings and no charts.
To set a default report:
- On the List View page, select Manage Reports, and then select the Load report tab.
- Expand the report that you want to use.
- Select Set as default.
The setting is saved automatically. A Default tag appears next to the report name, and the List View page reloads with that report.

To change the default, repeat these steps for a different report. The Default tag moves to the new report, and the previous report loses it. The reports keep their position in the list.
If you edit the default report and save it, the saved report stays the default.
Removing the default setting
You can remove the default setting from a report and keep the report itself.
- On the List View page, select Manage Reports, and then select the Load report tab.
- Expand the report that has the Default tag.
- Select Remove as default.
The Default tag is removed, and the List View page reloads with the standard columns and settings.

Deleting a default report
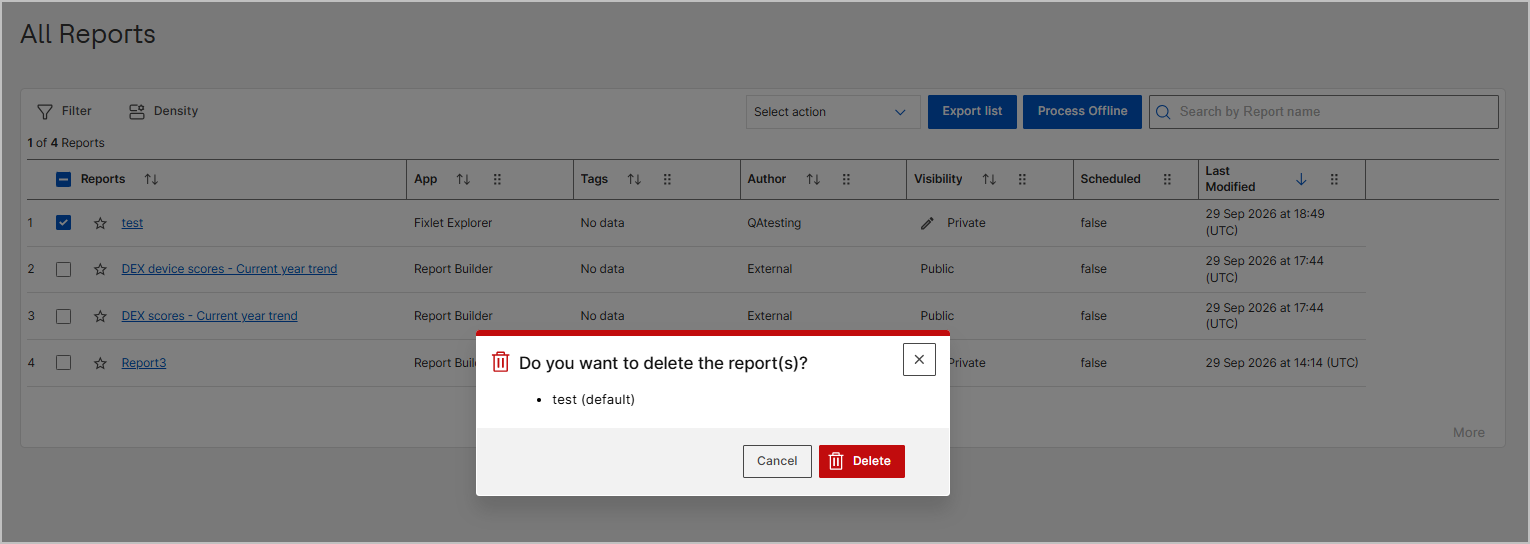
When you delete a report that is set as default, the confirmation window warns you that you are deleting the default report.
- Select Cancel to keep the report and the default setting.
- Confirm the deletion to remove the report permanently. The List View page then opens with the standard columns and settings.
Things to know
- Reports are saved per user and are not shared globally.
- When you load an older report, make sure that the related data sources, such as devices and Fixlets, are still available in your environment.
- Saved report names must be unique within each application. If you reuse a name, you can overwrite the existing report.
- Only one report can be the default for each application, and the default applies only to your user account.
- The default setting is saved automatically. You do not need to select a save button.