Configure Historical Reporting
Power Management allows for tracking historical power data trends and configuring historical reporting groups by installing the BES Server Plugin Service, configuring SOAP API credentials, and enabling history tracking on a server.
Power Management provides power information based on the current state of computers in your deployment. You can see historical data trends for power usage and capture historical data to address reporting needs.
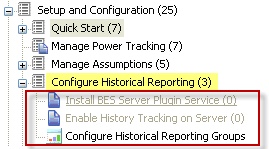
The Configure Historical Reporting subnode under Setup and Configuration includes tasks for installing the BES Server Plugin and enabling historical tracking on a server, and a task for configuring historical reporting groups.

Install BES Plugin Service
The BES Server Plugin Service facilitates communication and automation of the BigFix server and Web Reports components with server-side utilities. Several BigFix applications, such as Power Management, require this plug-in service to fully use the available functions.

You must install the BES Server Plugin service before you use the historical reporting feature.
Configure BES Plugin
Before configuring, ensure the BES Server Plugin is installed or updated as applicable.
- If the BES Plugin Service has not yet been installed, use the
Install
                        BES Server Plugin Service
task to install BES Plugin. or - If the BES Plugin Service has already been installed, use the
Update BES
                        Server Plugin Service
task to update.
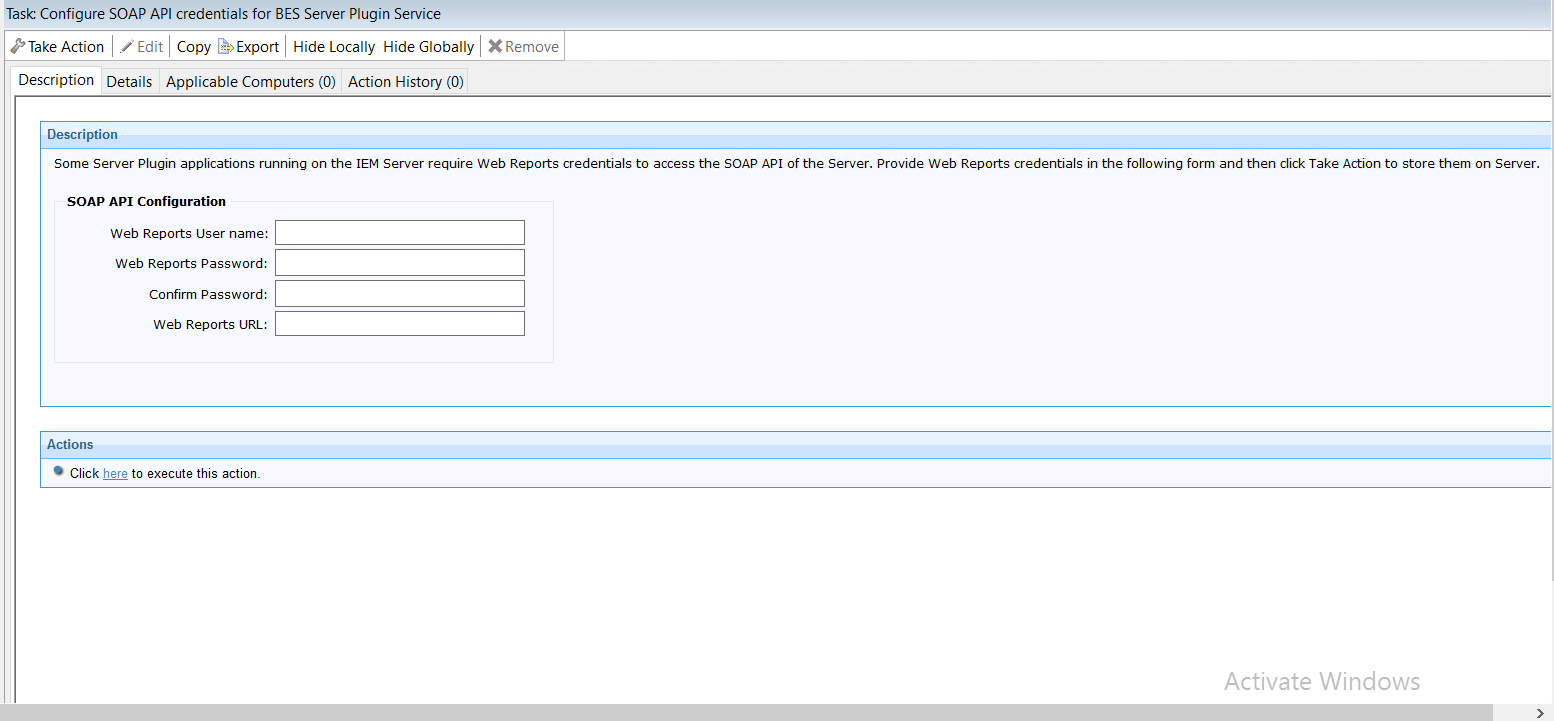
To configure BES Plugin, use the Configure SOAP API credentials for BES
Server Plugin Service task. To do this:
- Go to Setup and Configuration > Configure Historical Reporting > Install BES Server Plugin Service.
- In the description section, click the link Configure SOAP API
credentials for BES Server Plugin Service. The following screen
appears.

- Under
SOAP
API Configuration, fill in the following fields:
- Web Reports User name
- Web Reports Password
- Confirm Password
- Web Reports URL
- Click “here” to execute action.
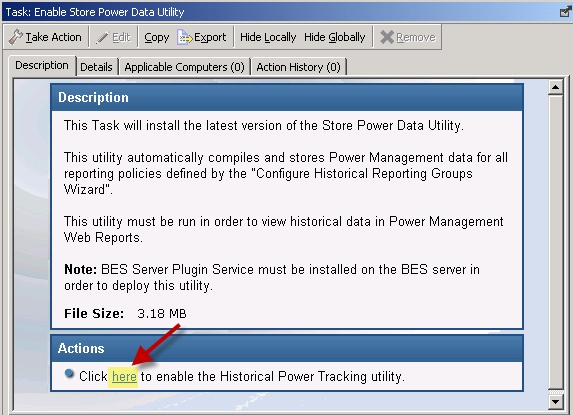
Enable History Tracking
To enable History Tracking on a server, click the appropriate task from the navigation tree. Click in the Actions box of the task window to enable the Store Power Data Utility.
