Data Masking
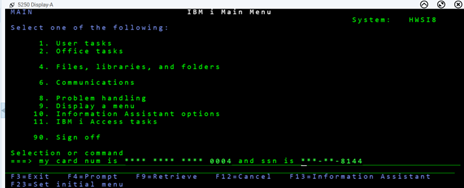
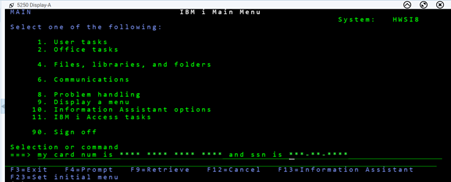
The Z and I Emulator for Windows supports the data masking feature, which protects sensitive information such as card numbers by masking the information as per the configurations. The data masking protects the original data from exposure during non-production activities such as software testing, user training, and data analysis.
- The card numbers and input fields.
- The custom regular expressions.
- Protection: Ensuring sensitive data is not exposed to unauthorized users.
- Usability: Keeping the masked data useful for legitimate purposes.
- Compliance: Adhering to regulatory requirements for data privacy and protection.
Data Masking Based on Card Numbers and Input Fields
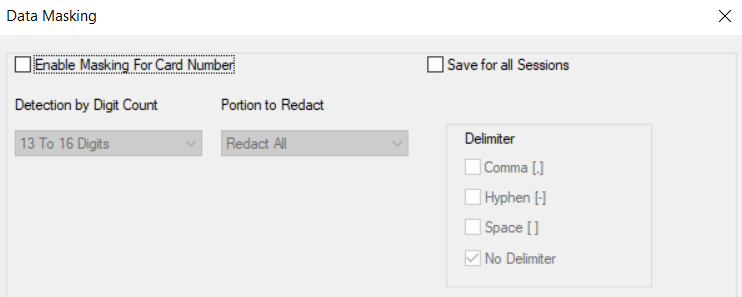
- Navigate to Settings→Data Masking.
- The Data Masking window appears.
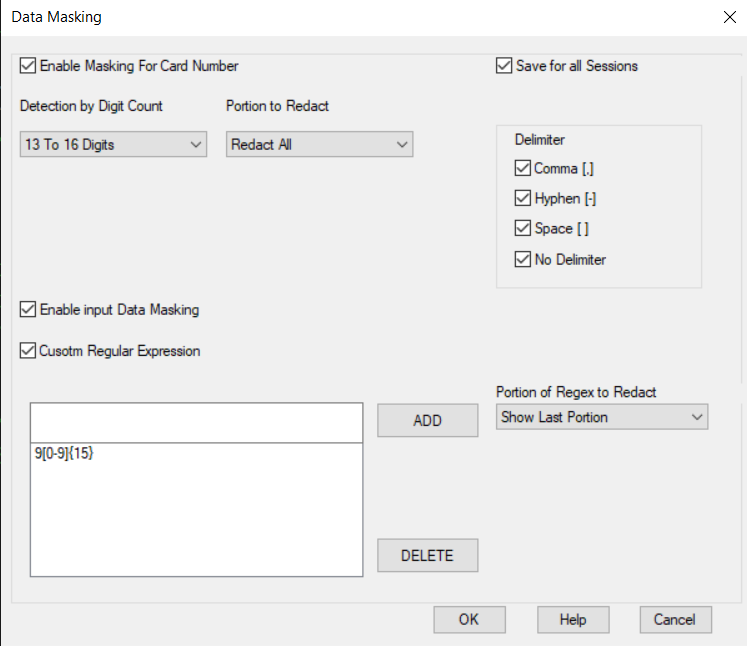
- Select the Enable Masking for Card Number check box.Note: The Enable Masking for Card Number option detects the card digits pattern based on the option selected under the Digit Count and Portion to Redact dropdown menu.
- Select any one of the following options from the Digit Count dropdown
menu:
- 16 digits: This option will mask the 16-digit card number.
- 14 digits: This option will mask the 14-digit card number.
- Both 14 and 16 digits: This option will mask both 14- and 16-digit card numbers.
- 13 to 16 digits: This option will mask 13 to 16-digit card
numbers.Note: By default, 13 to 16 digits option is selected.
- Select the required Delimiter(s) from the following options:
- Comma [,]
- Hyphen [-]
- Space [ ]
- No delimiter
Note:- Delimiter is a character used to separate groups of digits.
- By default, No delimiter option is selected.
- Select any one of the following options from the Portion to Redact dropdown
menu:
- Show last four digits: This option displays only last four digits of
the card number.
- Redact All: This option redacts all digits.
Note: By default, Redact All option is selected. - Show last four digits: This option displays only last four digits of
the card number.
- If required, select the Enable Data Masking for Unprotected Fields checkbox to mask the unprotected fields.
Data Masking Based on Custom Regular Expressions
- Navigate to Settings→Data Masking.
- The Data Masking window appears.
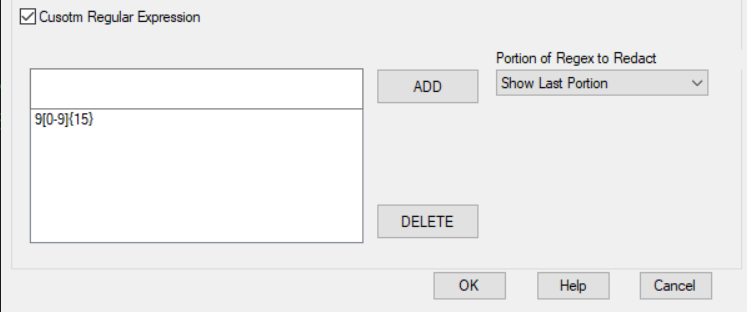
- Select the Custom Regular Expression check box.Note: The data will get masked on the screen based on the regular expression pattern.
- Enter the required expression in the text field and click the Add
button.Note:
- Only 5 custom regular expressions are allowed.
- More than 100 characters length are not allowed for custom regex.
- To delete the expression, select the required expression and click the Delete button.
- Select any one of the following options from the Portion of Regex to Redact
dropdown menu:
- Show Last Portion: If the number of digits in the regex is less than or equal to eight, the last two digits will be displayed, and the rest will be redacted. If the number of digits in the regex is more than eight, the last four digits will be displayed, and the rest will be redacted.
- Redact All: All digits will be redacted.
- Click OK to save the configuration.
Group Policy Restrictions
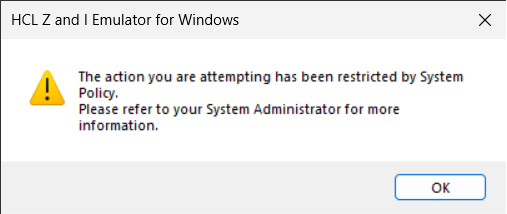
Administrators can now restrict users from configuring Data Masking settings via group policy. Additionally, any masked data displayed on the screen will remain masked in printed output, ensuring data security.
This Group Policy control over Data Masking settings allow administrators to restrict or permit users from enabling/disabling Data Masking.
The primary objective is to give administrators control over Data Masking via policy template file (ADM/ADMX), preventing unauthorized changes by users.
Disabling Data Masking through Group Policy Editor
- Launch Z and I Emulator for Windows and navigate to Settings→Data Masking.
- The Data Masking configuration is not accessible to the user.
- A system restriction pop-up appears, informing the user about
limitation.
Enabling Data Masking through Group Policy Editor
- Launch Z and I Emulator for Windows and navigate to Settings→Data Masking.
- Users can modify the Data Masking settings as needed.
- The system restriction pop-up will not appear.
Data Masking on Printed Outputs
Any masked data that appears on the terminal screen will also remain masked in printed outputs, thereby reinforcing data confidentiality and compliance.