Configuration of Email, SMS and WhatsApp Channels in the Engagement Server
This section walks you through the steps to configure the Email Server, the SMS provider and WhatsApp provider so that you can send email and notifications to the application on your device. The instructions to install the application on your device will be covered in the later chapters of this tutorial.
Configuration of the Email Server
-
After logging into the Engagement Server, click Configuration under the Settings section.

-
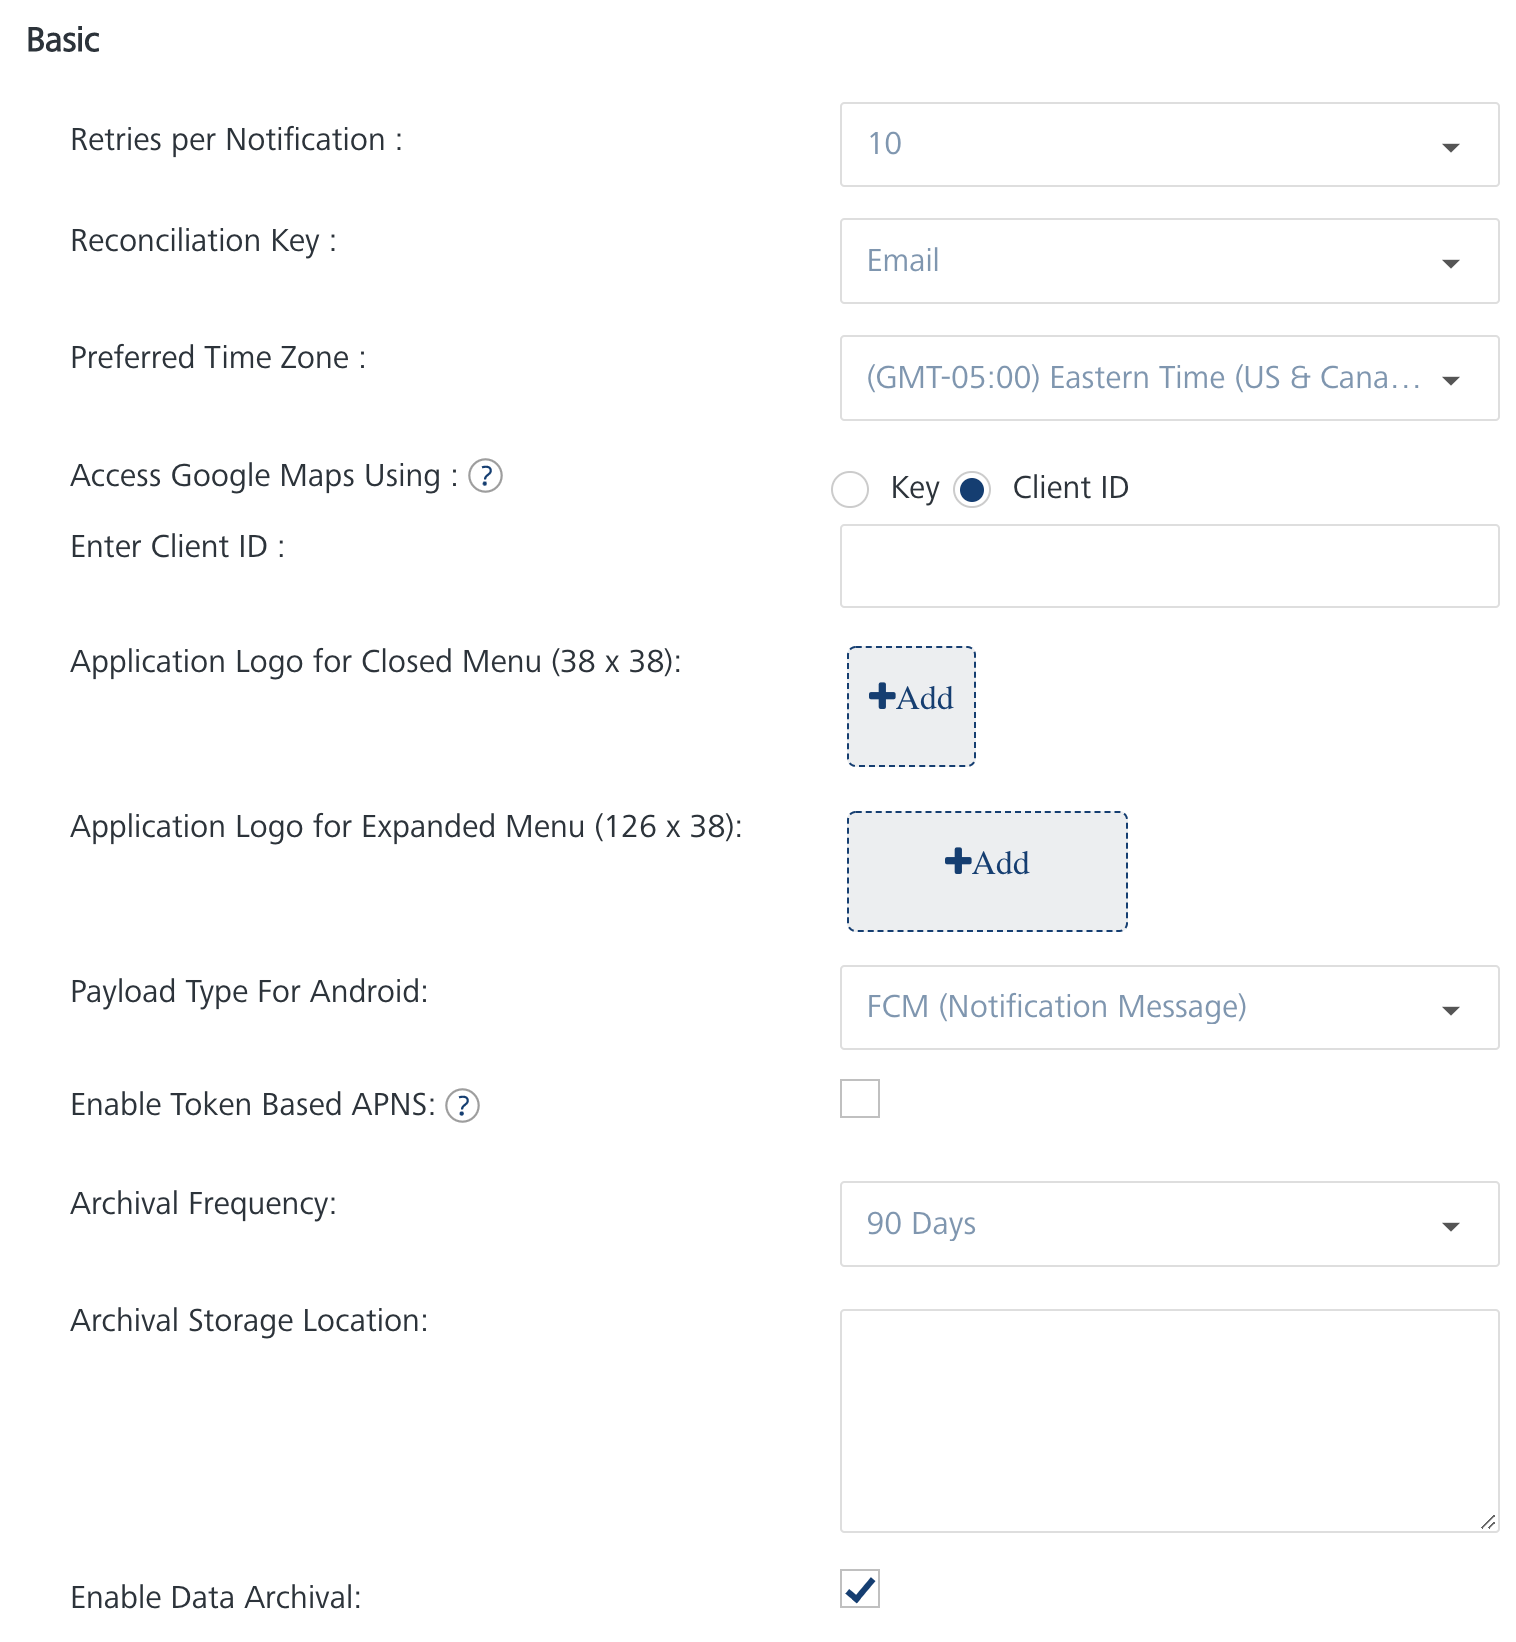
In the screen below, click Email Configuration to view the Email Server settings. You will notice that by default the General option is clicked.
-
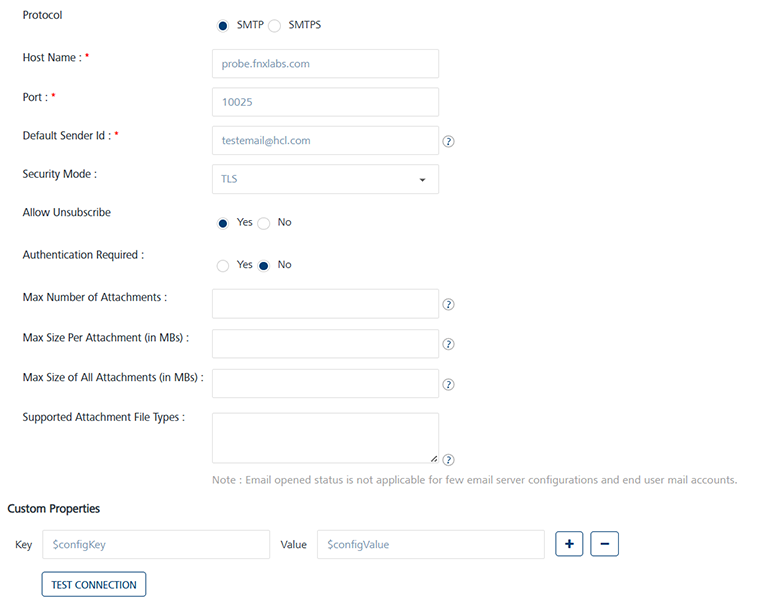
In the Email Configuration screen, enter the data as needed. For the Protocol, choose SMTP or SMTPS based on the email Server that you will configure. In this example, SMTP is chosen.
- The Host Name will be the name of the SMTP Server that you will be configuring.
- The Port number is associated with the SMTP or the SMTPS Server that you will configure. In this example, the port number is 25 as SMTP Server was chosen.
- The Default Sender Id is needed for the SMTP Server that you will configure. Contact the Server admin and enter the value.
- Choose the Security Mode as applicable for the Server that you will configure. If not sure, contact the Server admin and select the value.
-
Setting the value of Allow Unsubscribe to Yes allows a user to unsubscribe from email notifications.
-
In continuation of the screen discussed above, the Custom Properties can be ignored as they are not needed for this tutorial. Click Test Connection to test the SMTP Server. Once the connection is successful, click Save to save the email configuration.
That’s it! Now you have successfully configured the email Server that can be used to send notifications.
Configuration of SMS Providers
This section walks you through the steps that are needed to configure a SMS provider that can used to the user. The Engagement Server supports three SMS aggregators that can be used to send notifications. These are Nexmo, Twilio, and Clickatell. Though any of the SMS aggregators can be used to send the SMS notifications, this document provide details about how to use Nexmo to send SMS messages.
If not already done, do sign up for a trial account of Nexmo.
- After logging into the Engagement Server, click Configuration in the Settings section.
-
In the screen below, click SMS Configuration to view the SMS aggregator settings. You will notice that by default the General option is set to active.

-
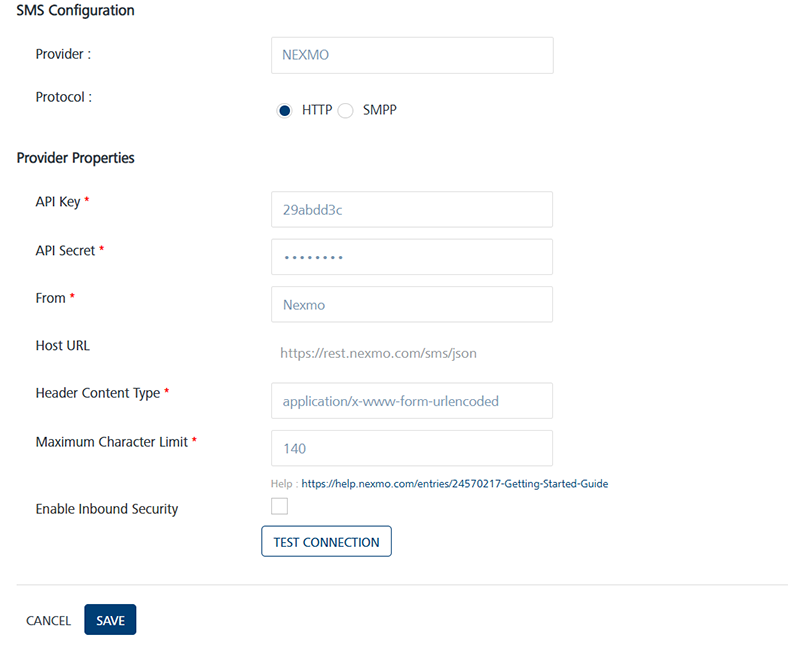
From the Provider drop-down list, choose Nexmo. Enter the value of API Key and the API secret assigned to your trail account when you signed up with Nexmo. TheFrom will be the phone number that Nexmo assigns to your trial account. The Header Content Type and the Maximum Character Limit will be the same as shown in the screen below.
-
Click Test Connection to test the credentials entered. Click Save to save the settings.
That’s it! That completes the configuration of the SMS provider.
Important: For more information refer this video:
Configuration of WhatsApp Provider
This section walks you through the steps that are needed to configure a WhatsApp provider that can be used by the user. The Engagement Server supports Twilio WhatsApp aggregator that can be used to send WhatsApp messages.
If not already done, do sign up for a trial or paid account of Twilio.
-
After logging into the Engagement Server, click Configuration in the Settings section.
-
In the screen below, click SMS Configuration to view of SMS providers. You will notice that by default the General option is set to active.
-
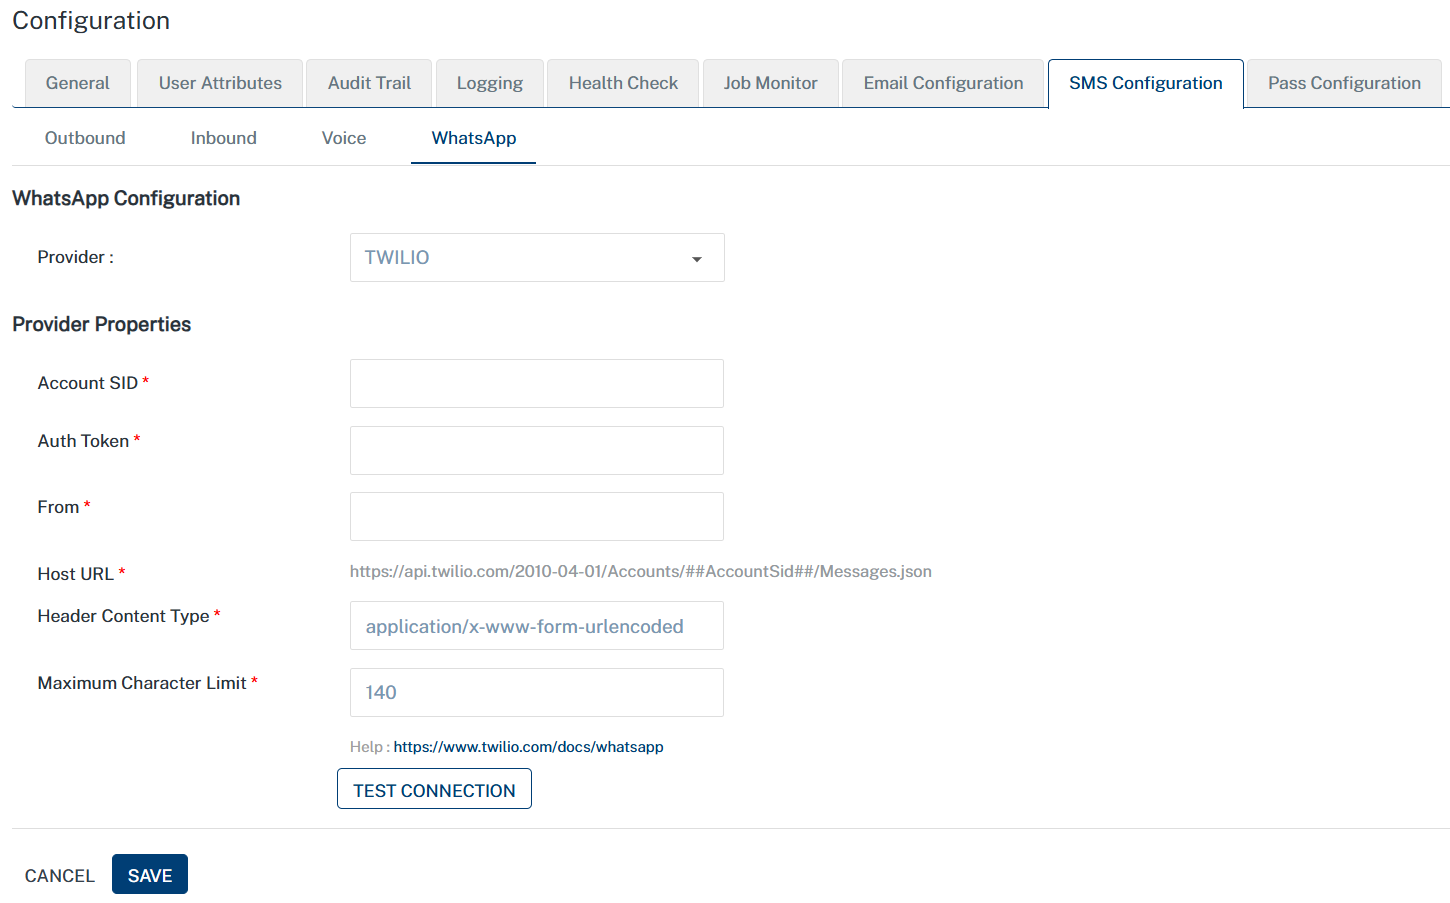
In SMS Configuration, click on WhatsApp to view WhatsApp aggregator settings. You will notice that by default the Outbound option is set to active.
-
Account SID: TWILIO provides you a unique Account SID for your account. Enter the Account SID in the Account SID field.
-
Auth Token: TWILIO provides you a unique Auth Token for your account. Enter the Auth Token in the Auth Token field.
-
From: The registered Twilio WhatsApp number (e.g., +14155238886) to be used as the From parameter. You can set up a Twilio Sandbox for a trial account, which provides you with a WhatsApp Sender number for messaging.
-
Host URL: The field is populated with the Host URL details.
-
Header Content Type: The field is populated with the header content type as
application/x-www-form-urlencoded. -
Maximum Character Limit: The field is populated with the maximum number of characters allowed in a WhatsApp message.
-
Click Test Connection to check if the connectivity is successful. The system displays the notification that connection is successful. Click OK to continue.
That’s it! That completes the configuration of the WhatsApp provider.