Audience
This page describes how users can define audience criteria using raw or aggregated attributes to trigger targeted marketing events.
A number of options are available when selecting audience conditions for an event. For better understanding of these options, we will explore different use-cases.
Raw Audience Condition
A raw audience condition is a customized audience condition. There may be a need to create this if the user cannot find the condition they need in the lists provided.
USE-CASE: Create a raw condition based on customer's nationality
Audience must be customers who are of Singaporean nationality.
To add raw conditions, follow the steps below:
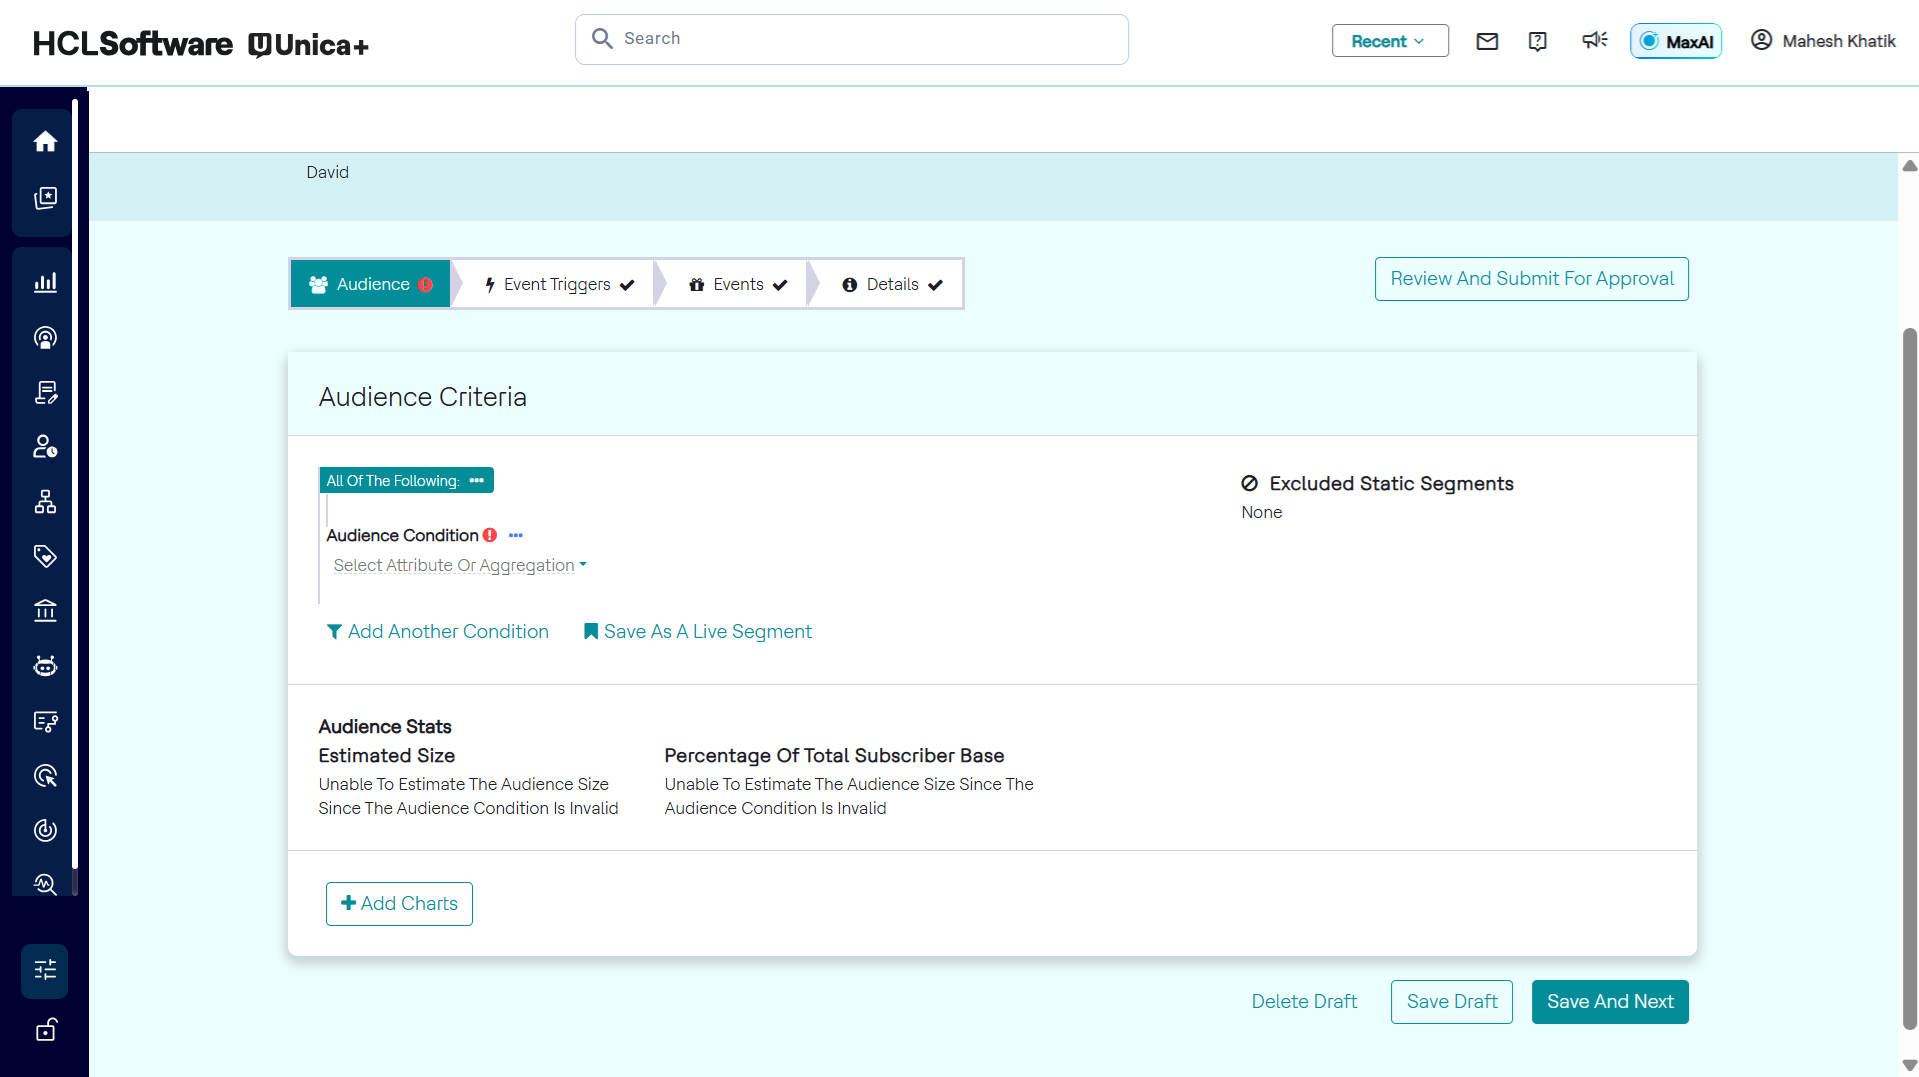
- From the Audience Criteria pop-up, click add raw condition.
- A blank audience condition will appear, as seen in the image below. Click
Select attribute or aggregation to display a list of attributes
or aggregations which the user can select from. Once an attribute or
aggregate is selected, the user can specify its value.
- The Attributes for audience criteria list is displayed as shown in the image
below.
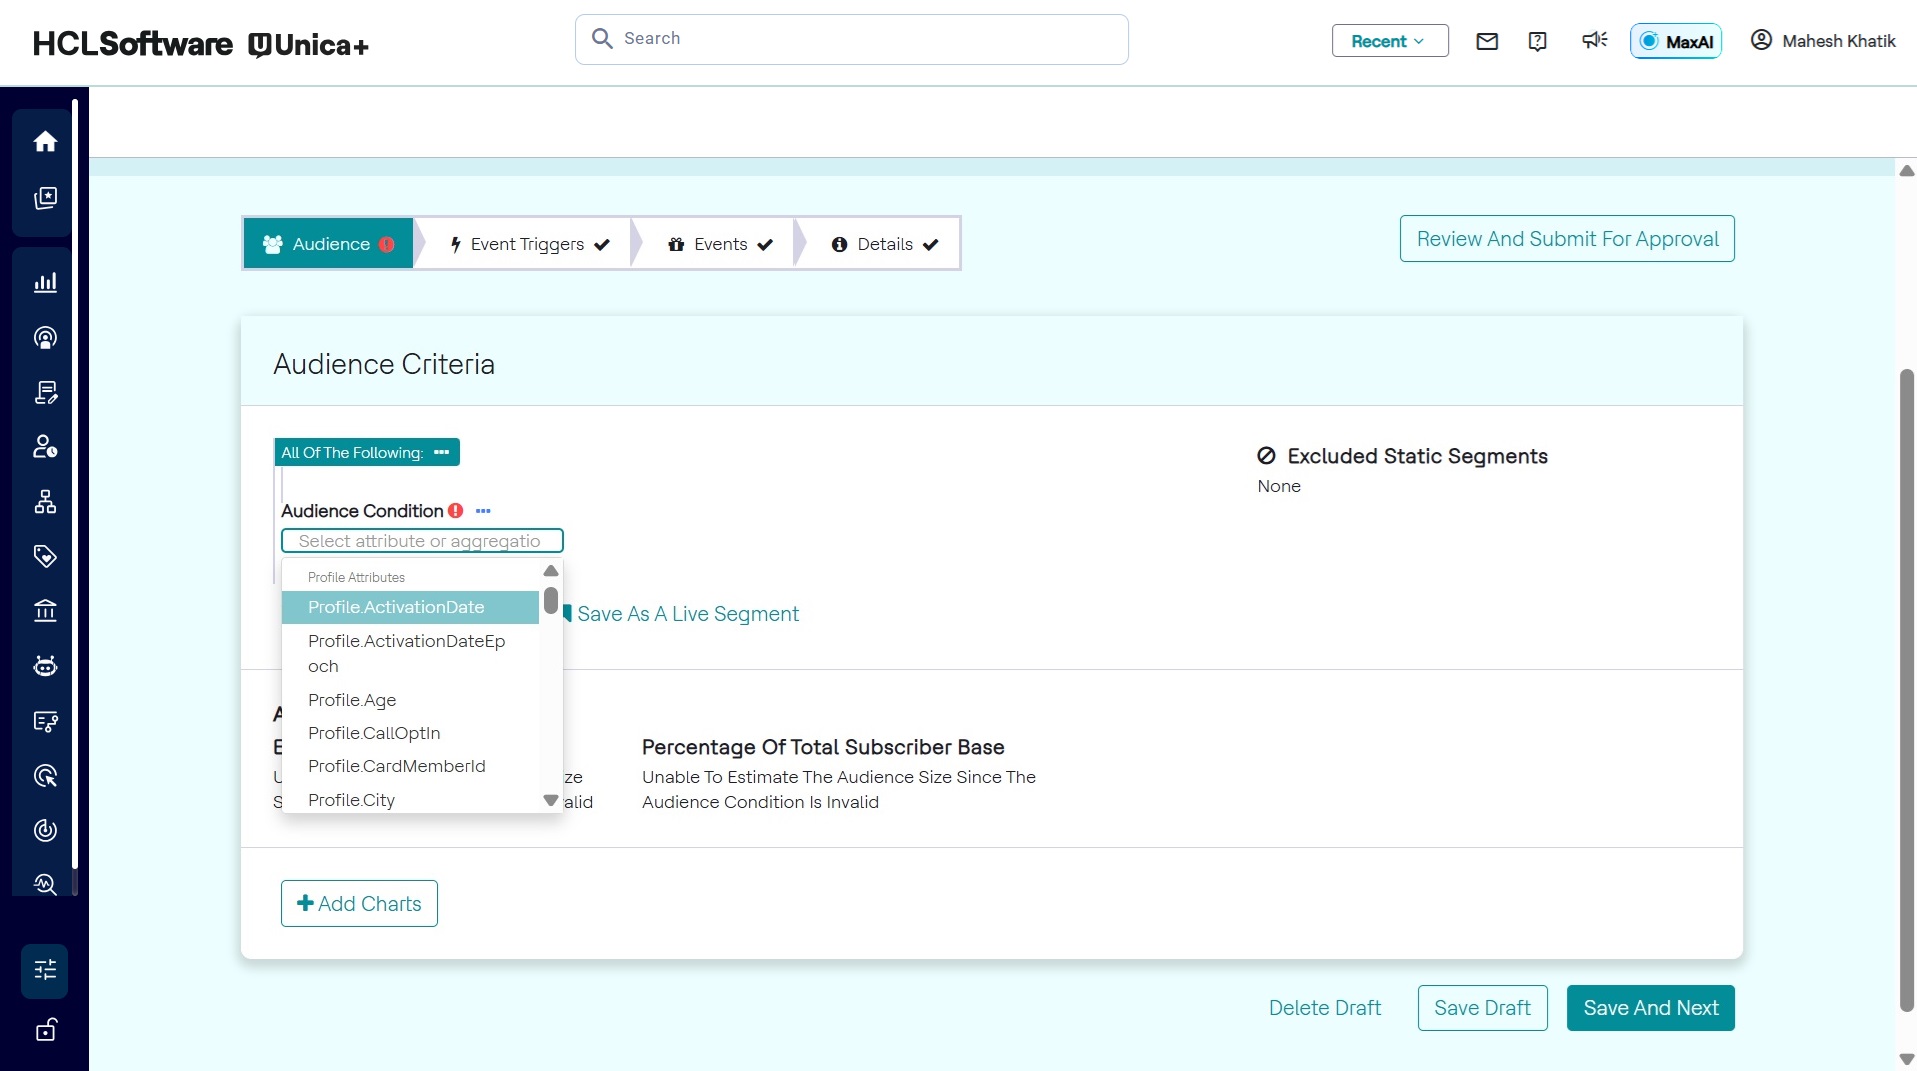
- Set value of attribute/aggregation in condition. The user will then need to
select the operator, which is 'equal to' in this example.
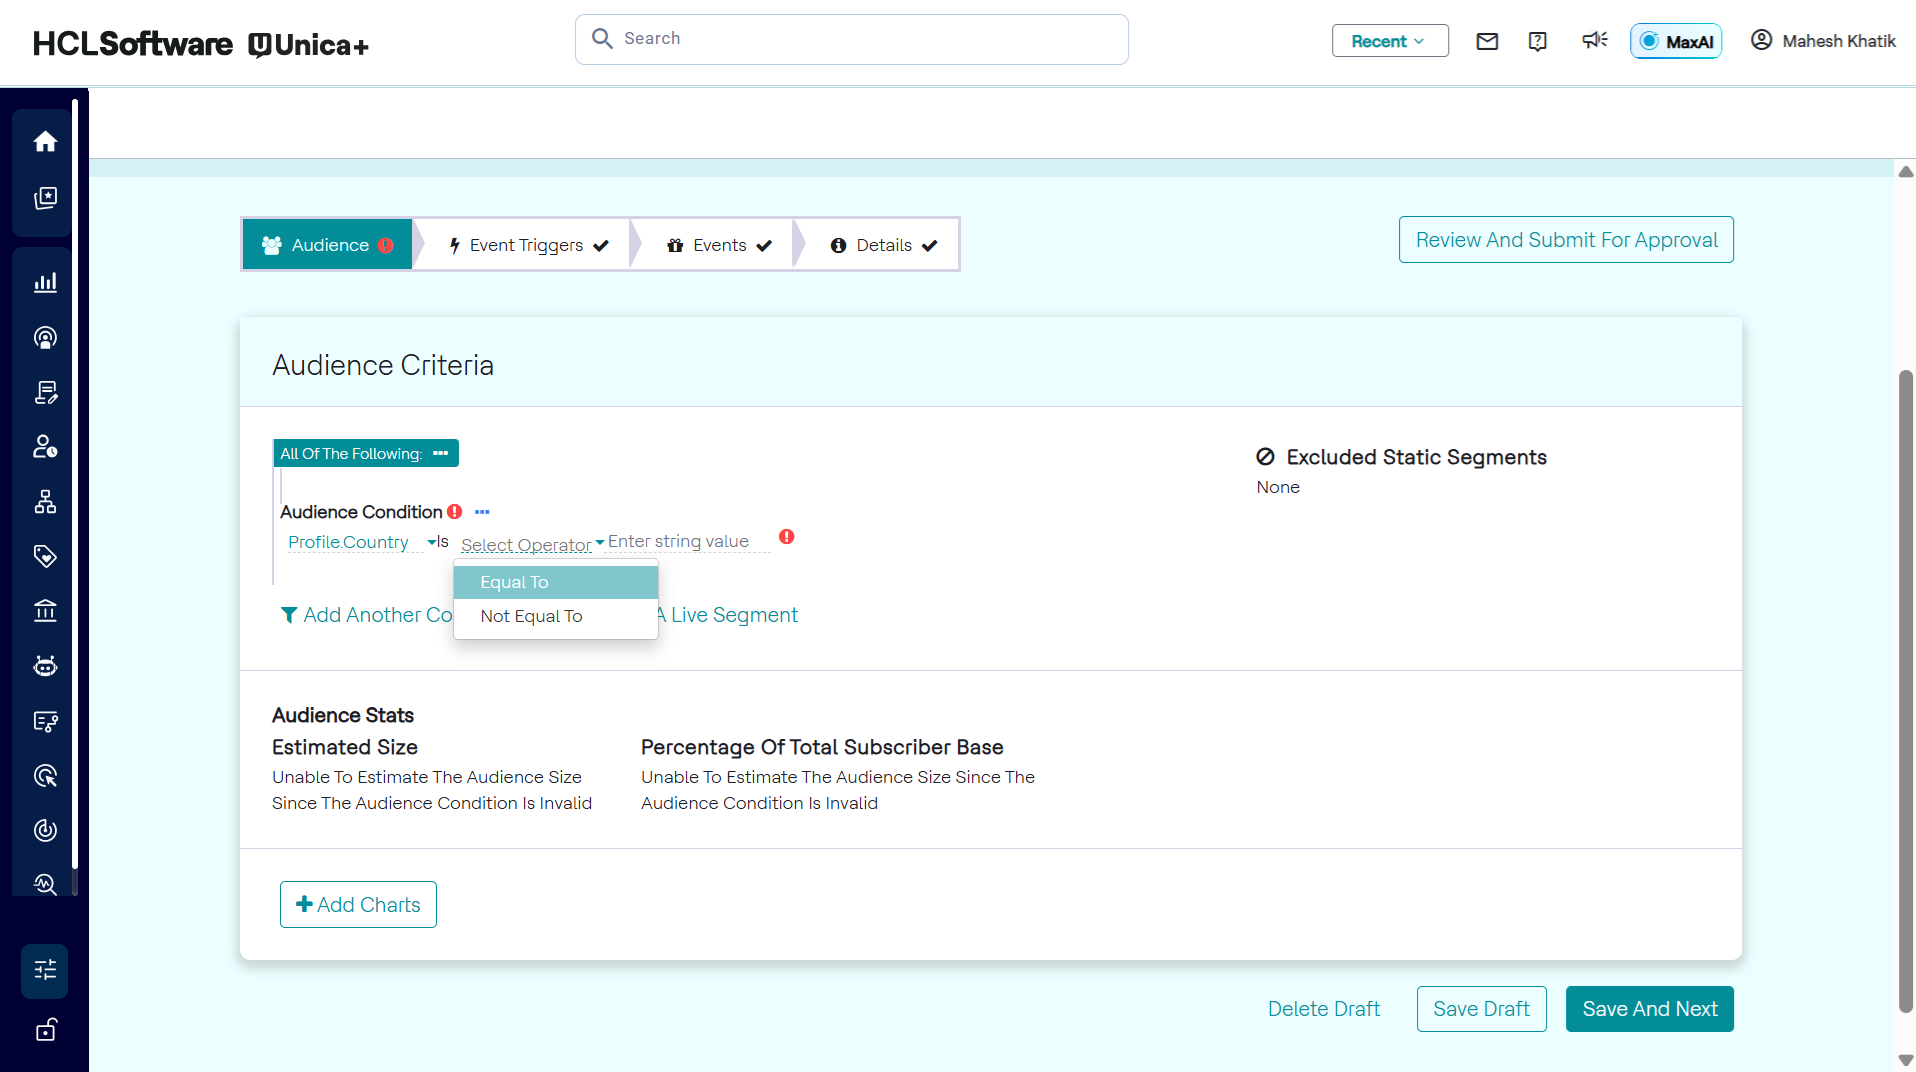
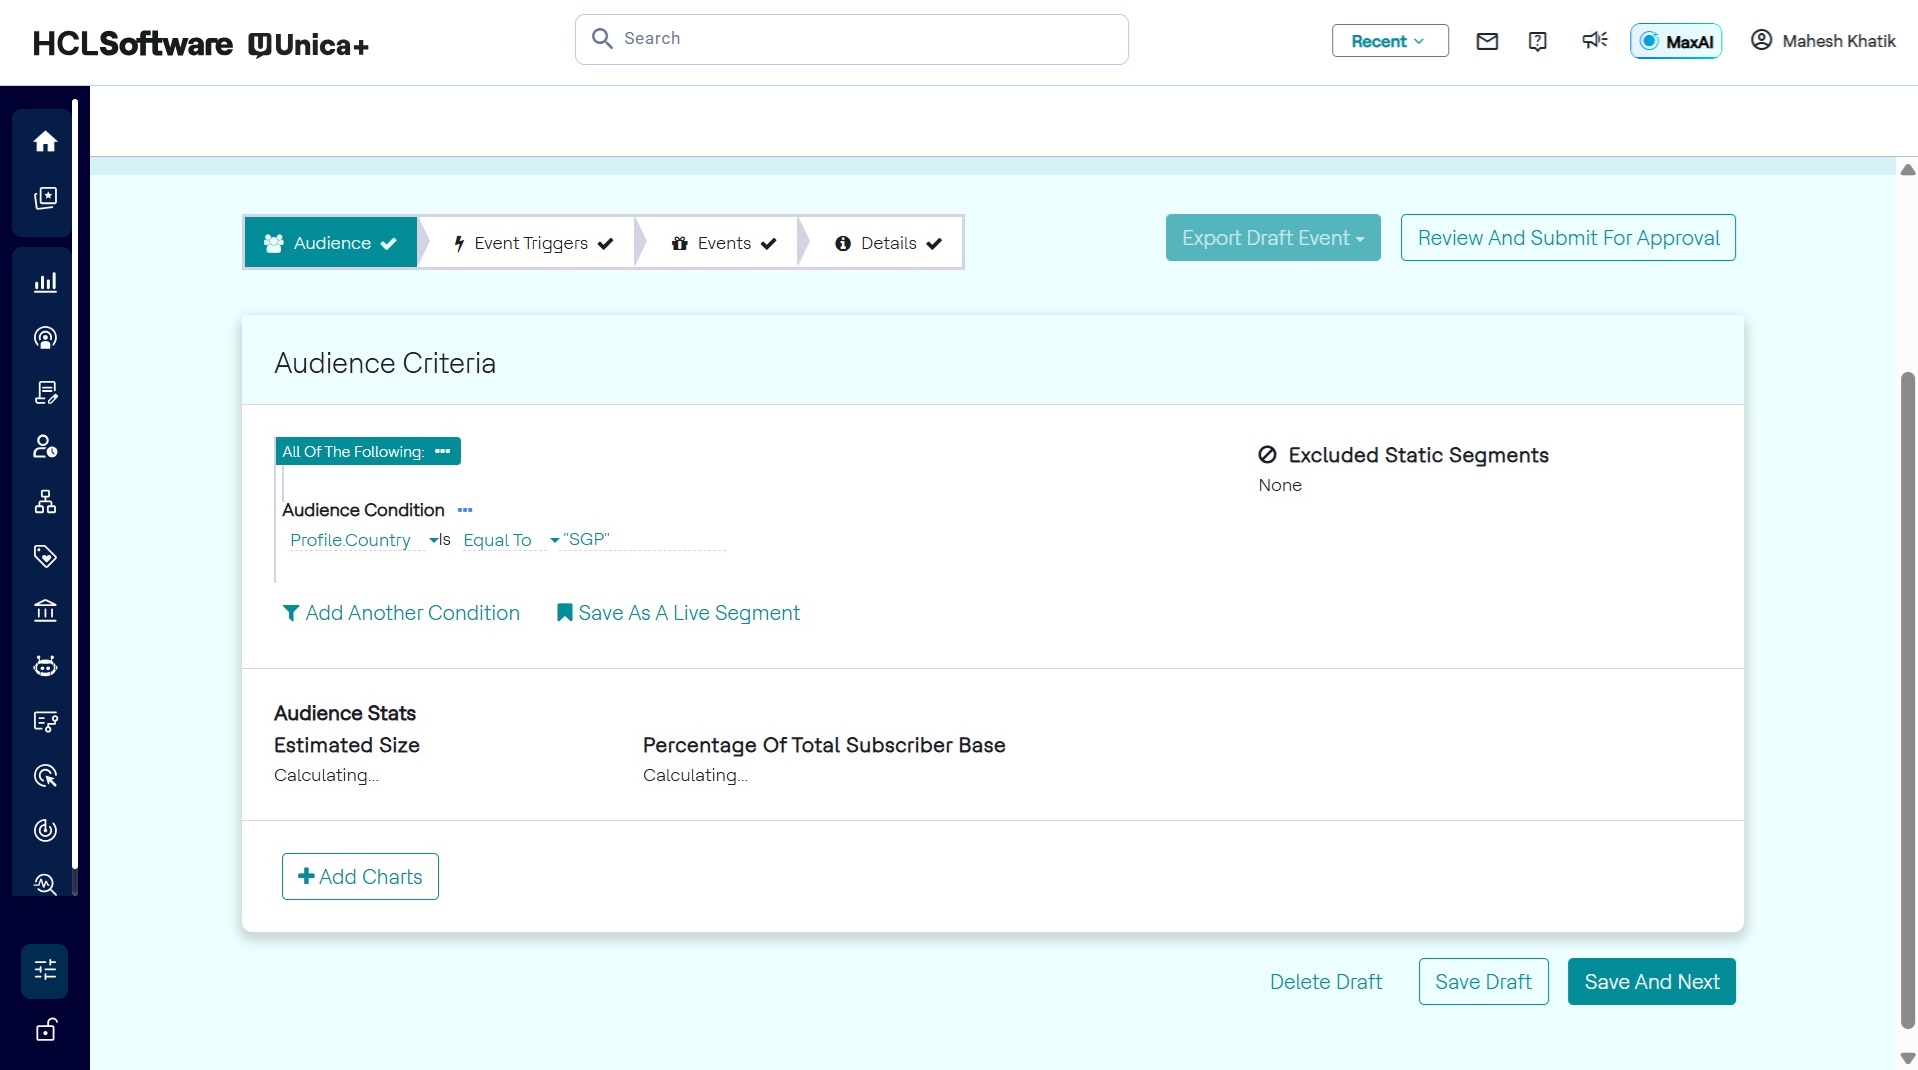
- The operator will be displayed, as seen in the image above. Specify the code
representing Singapore in the space provided after the operator. As a string
is expected, add double quotes to the code "SGP" as shown in the image
below.
Condition Groups
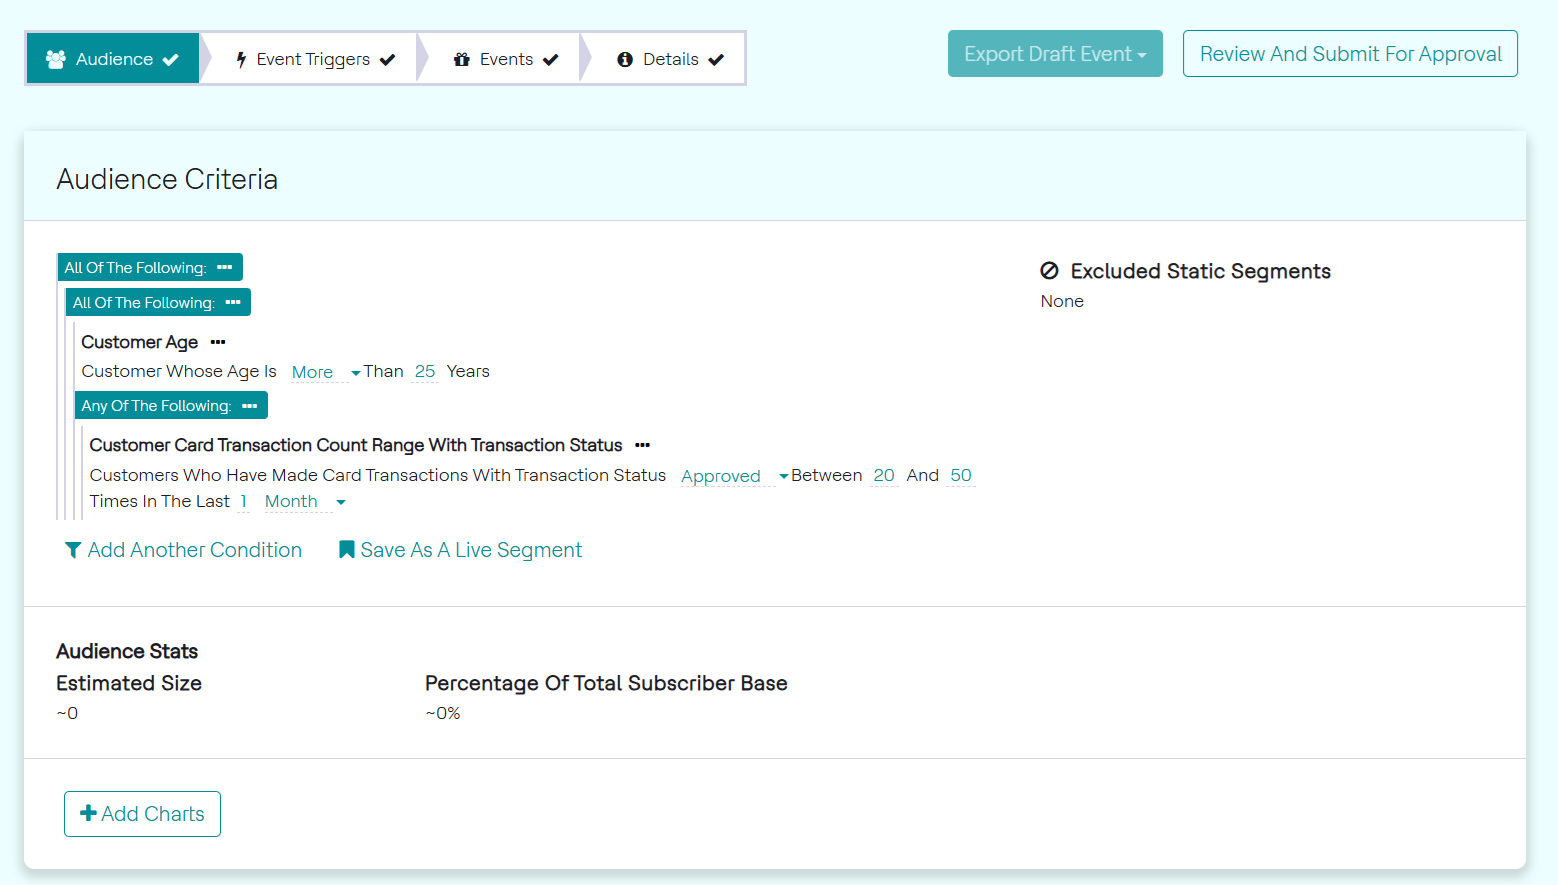
Individual audience conditions can be combined using condition groups. For the condition group All of the following, a customer must satisfy all of the statements under the condition group to be qualified as part of the audience. For the condition group Any of the following, a customer can satisfy at least one of the statements under the condition group to be qualified as part of the audience.
USE-CASE: Using an "All of the following" Condition Group
To add condition group, follow the steps below:
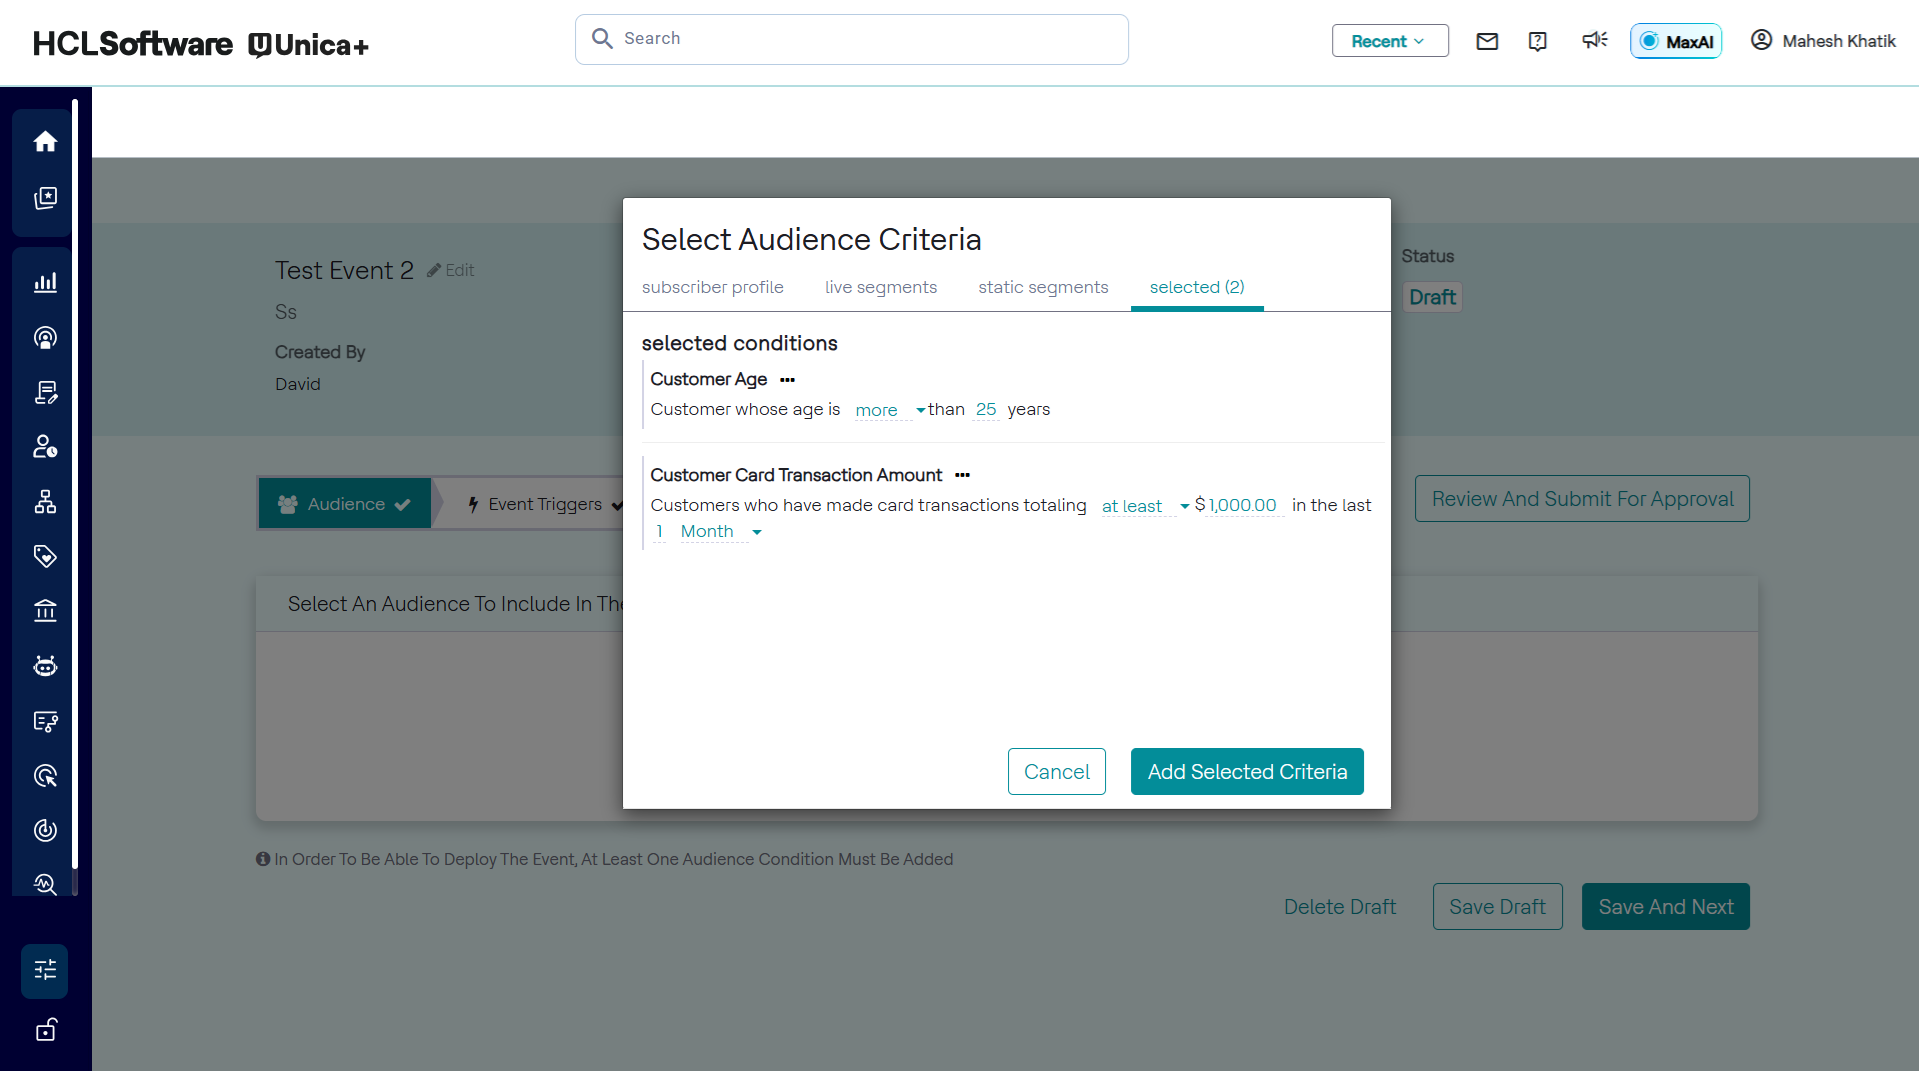
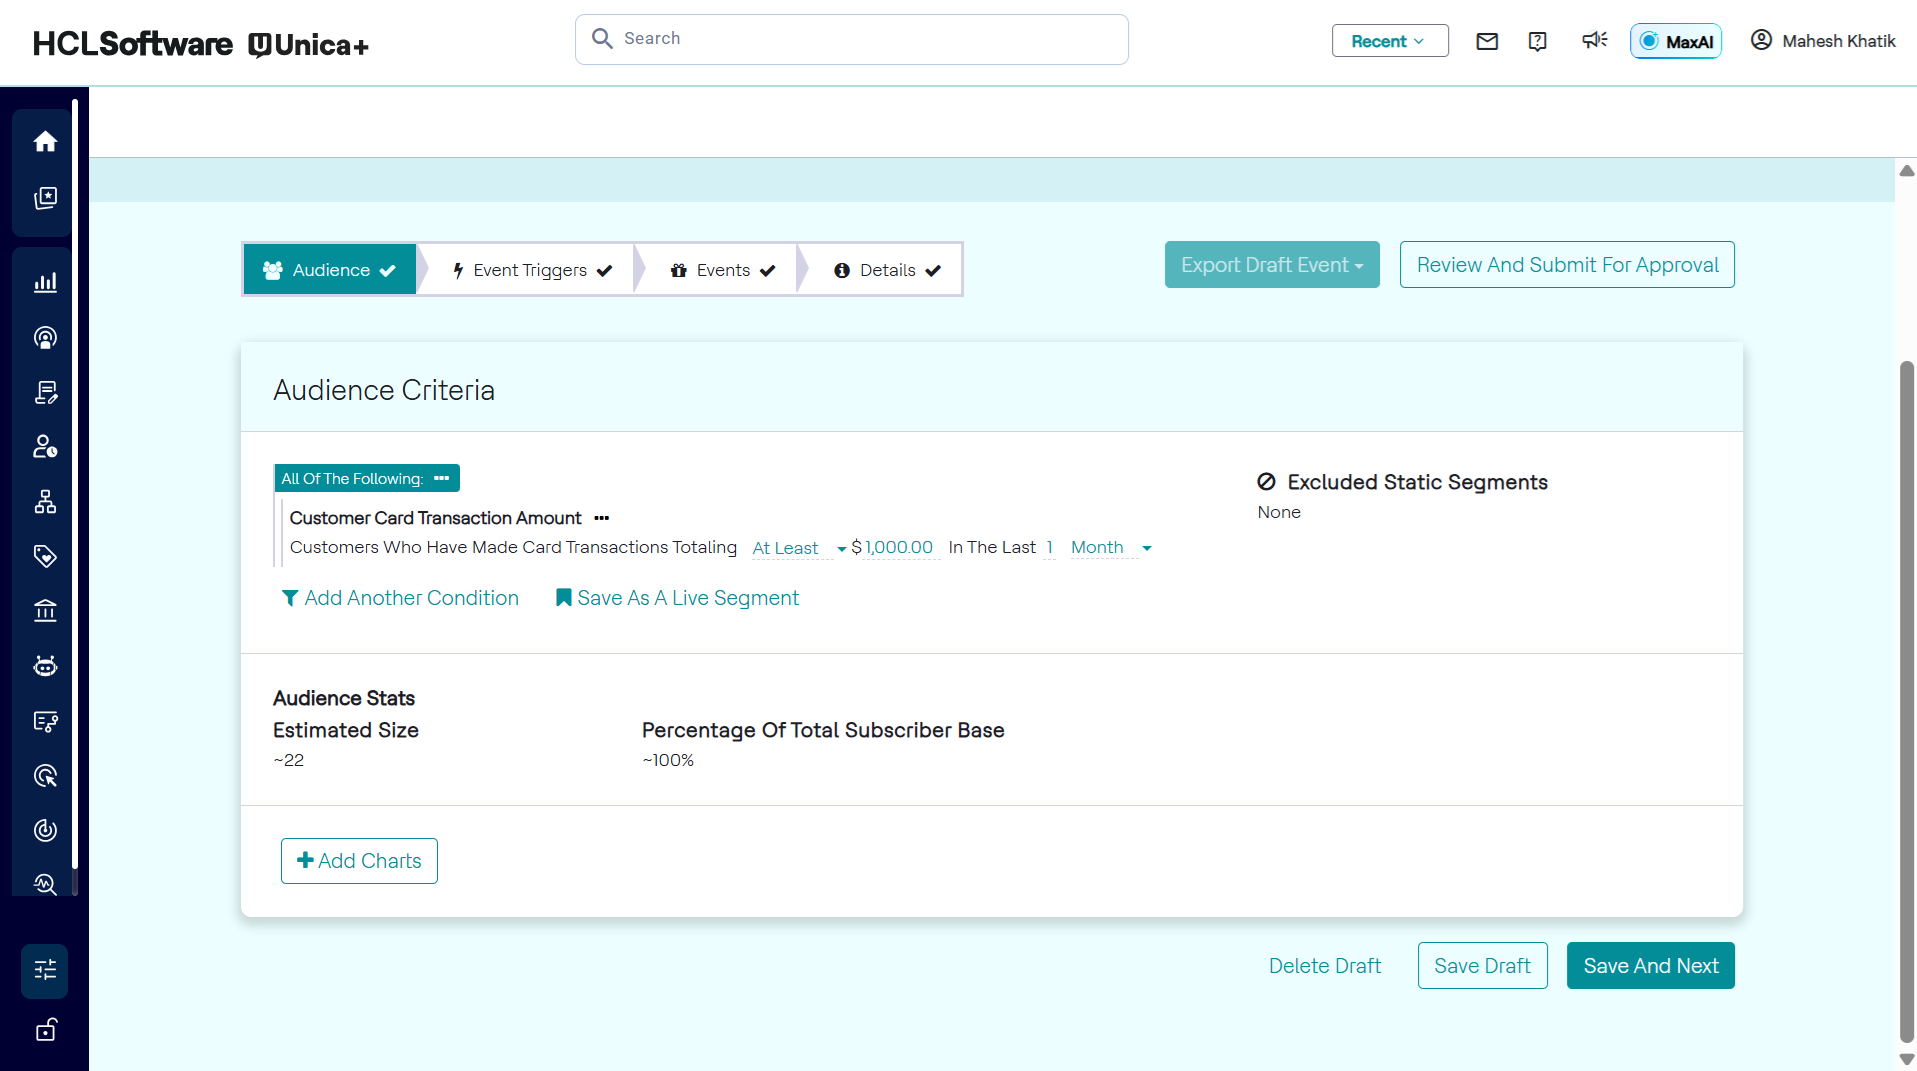
- Add multiple conditions. By default, they fall under the All of the
following condition group as seen in the 2 images below.

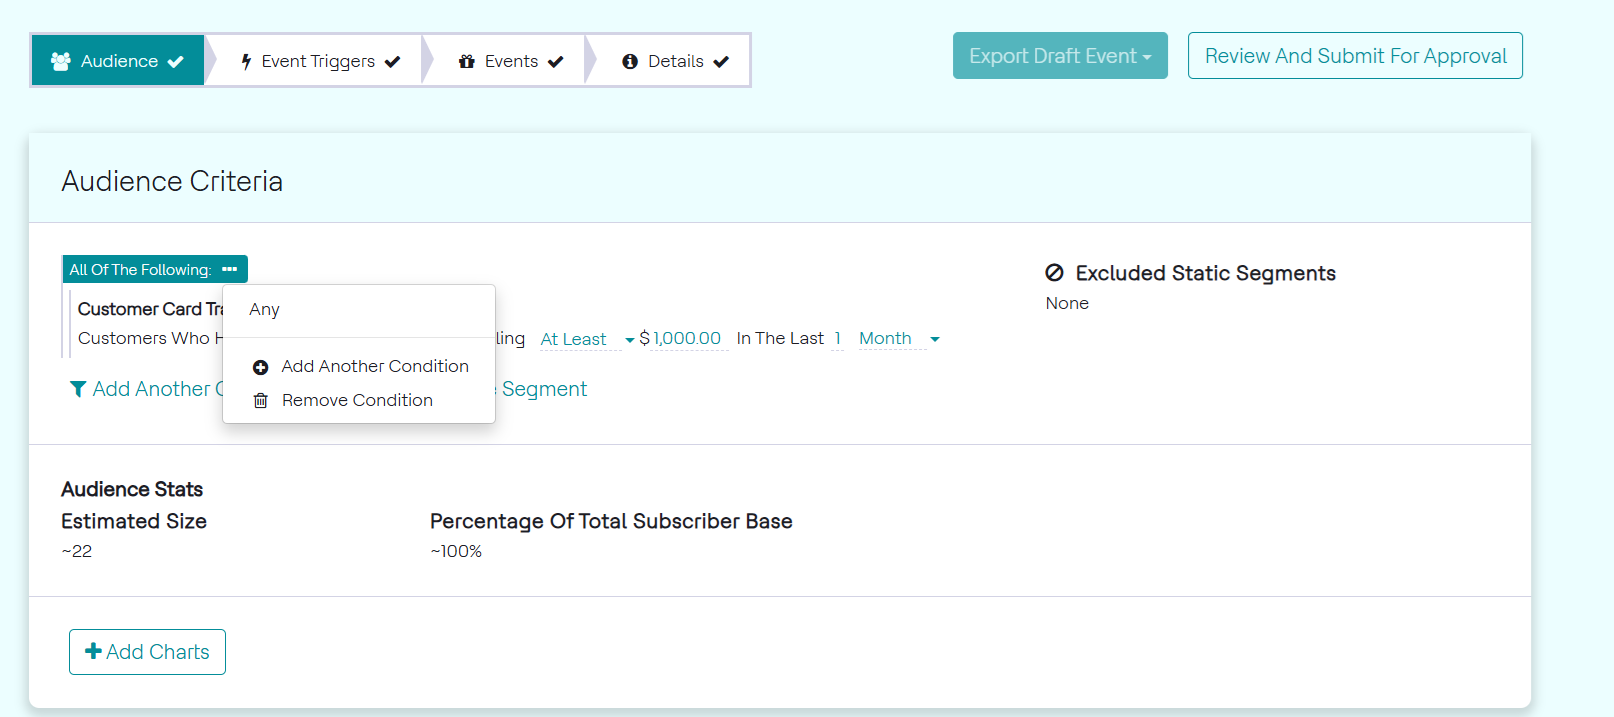
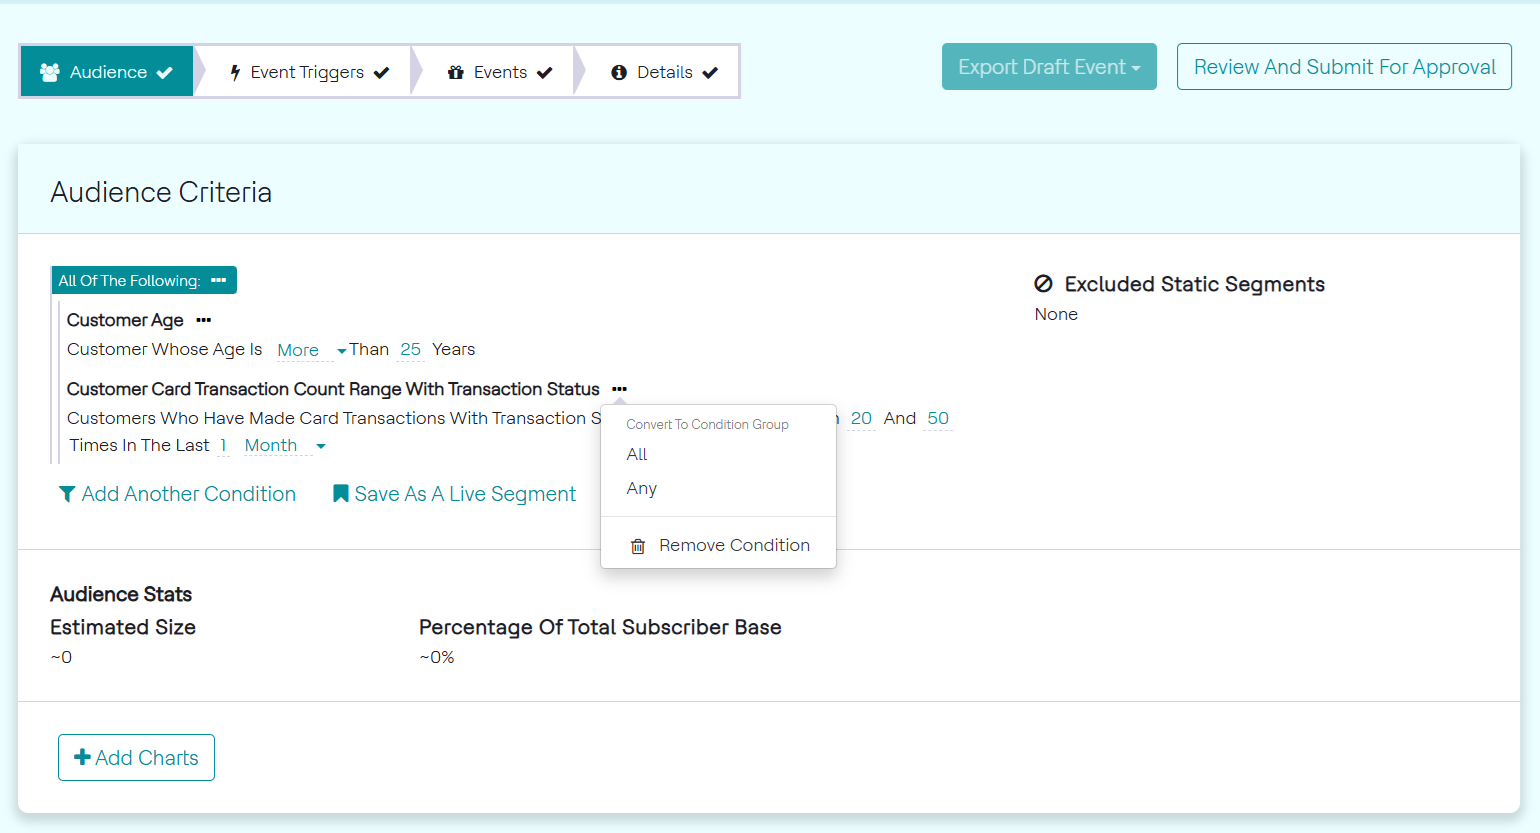
- Alternatively, click the ellipses (…) to add a condition within a condition
group, as seen in the image below. This allows the user to add another
condition within that group, remove the condition group, or convert it to
Any of the following.
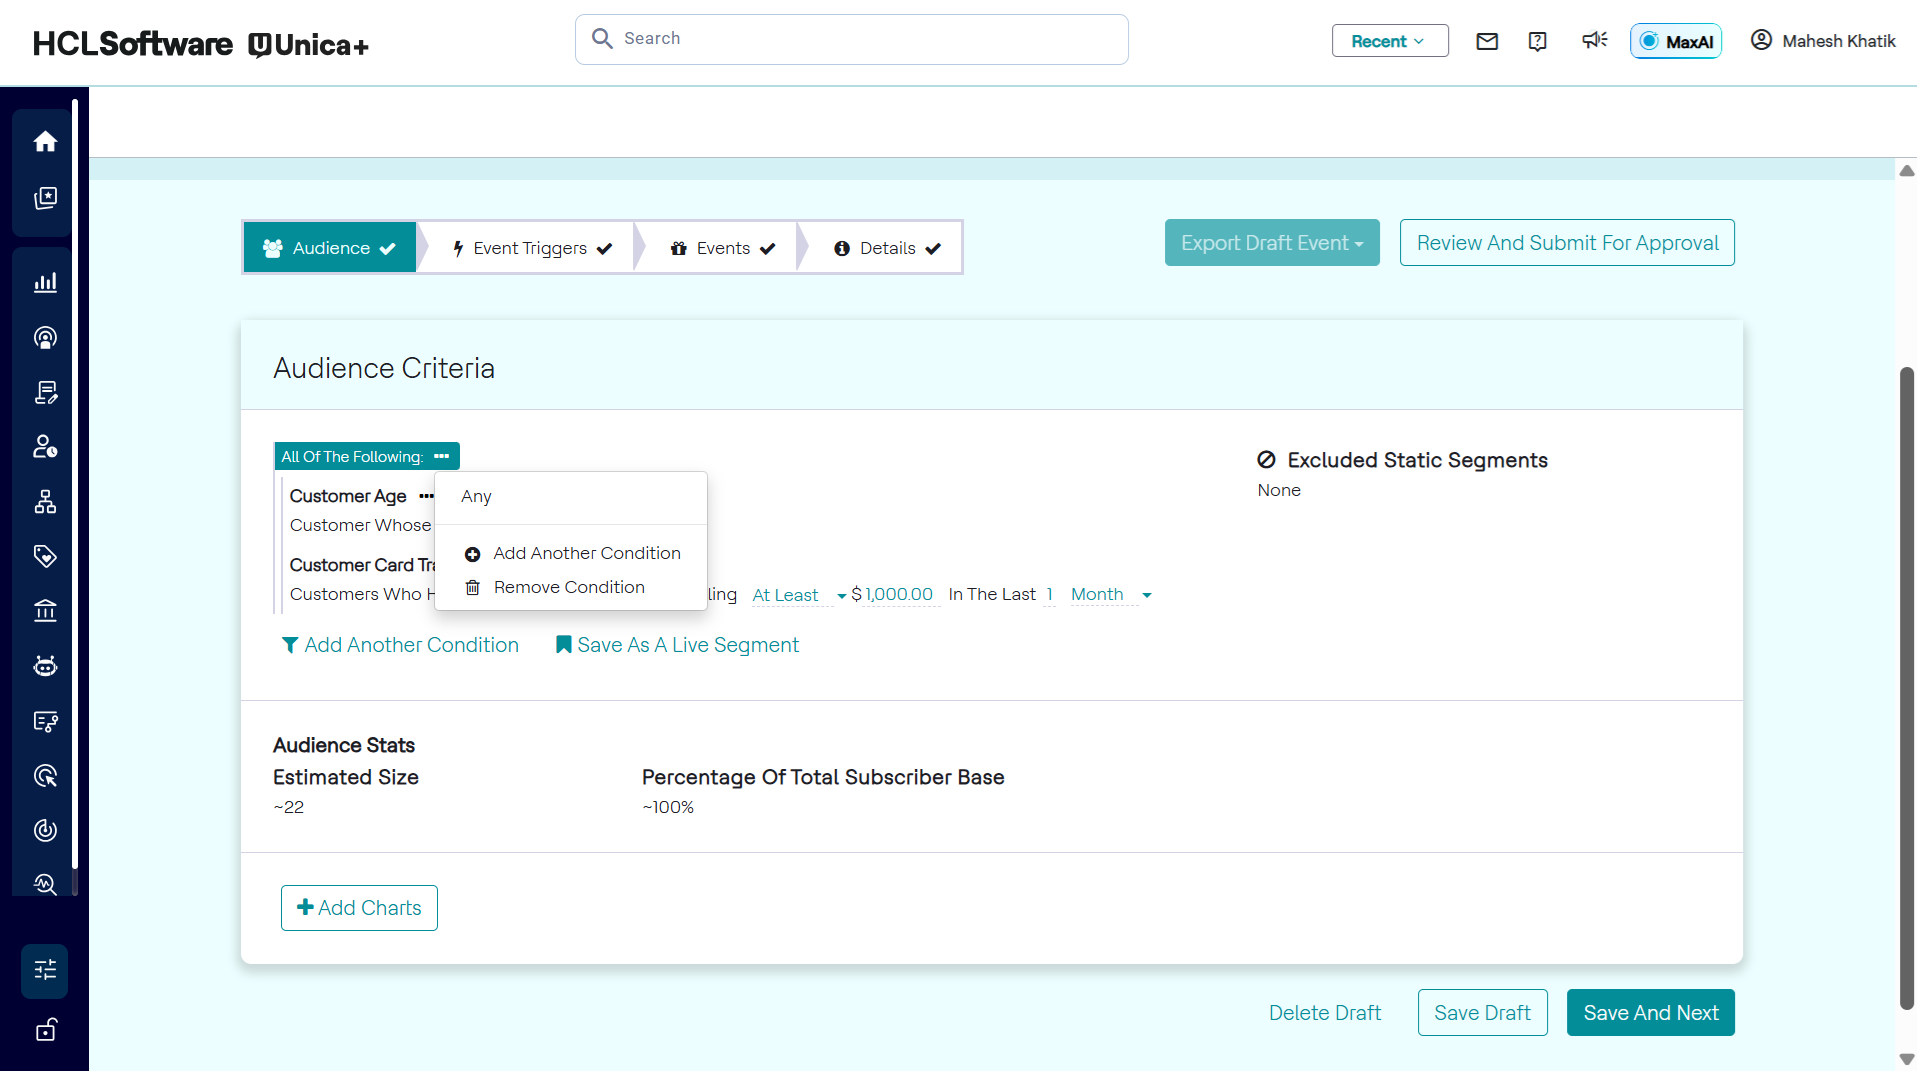
The added condition will automatically fall under the original condition group, which is All of the following.
USE-CASE: Using an "Any of the following" Condition Group
To add any of the following to the conditions, follow the steps below:
- Add a condition as seen in the image below.
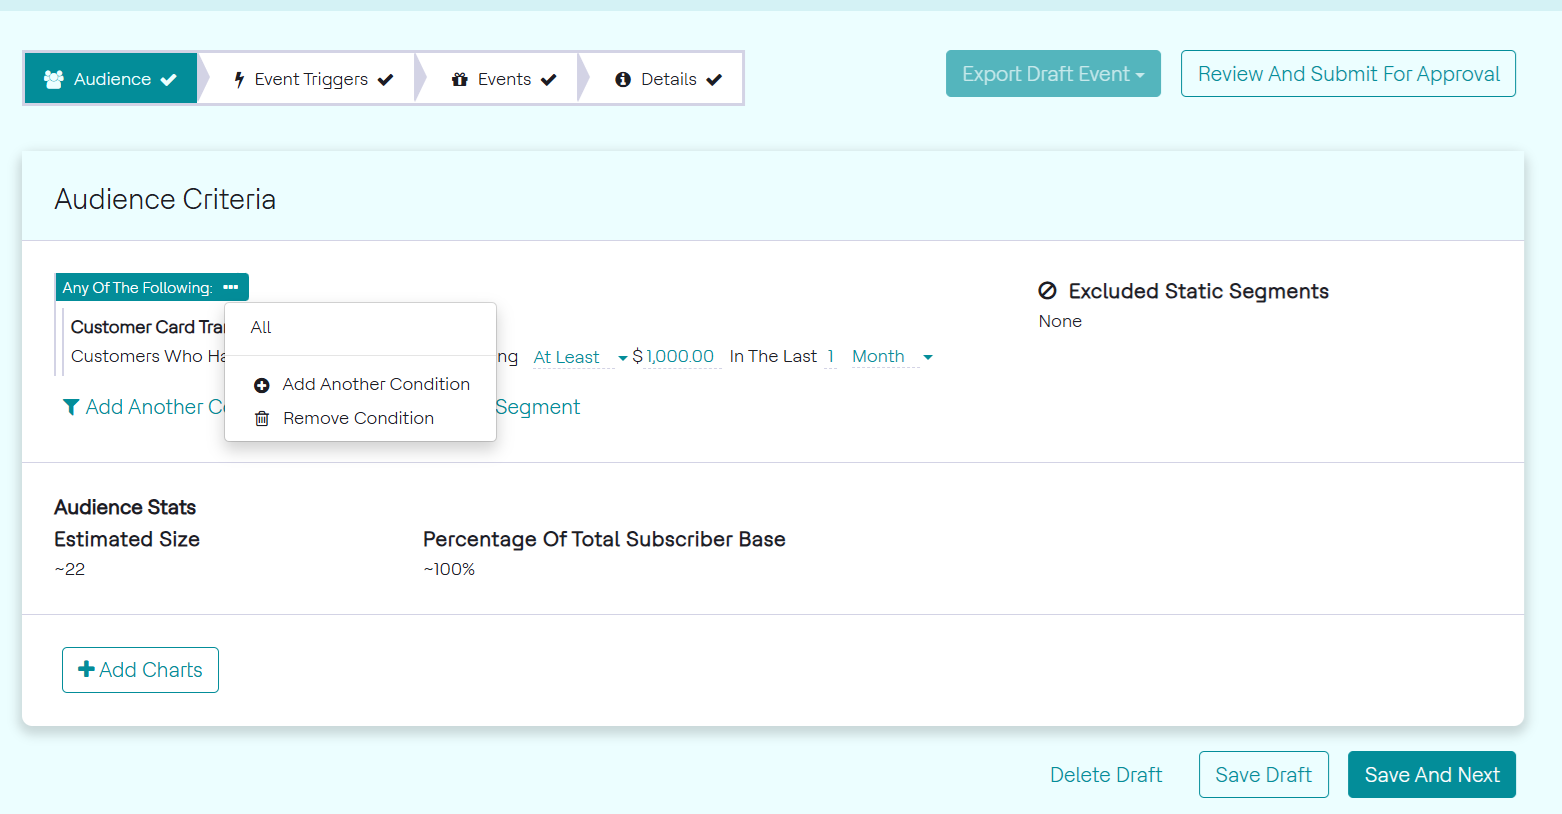
- Click the ellipses (…) button on the condition group, as seen in the image
below. Select ANY to convert it to Any of the
following.
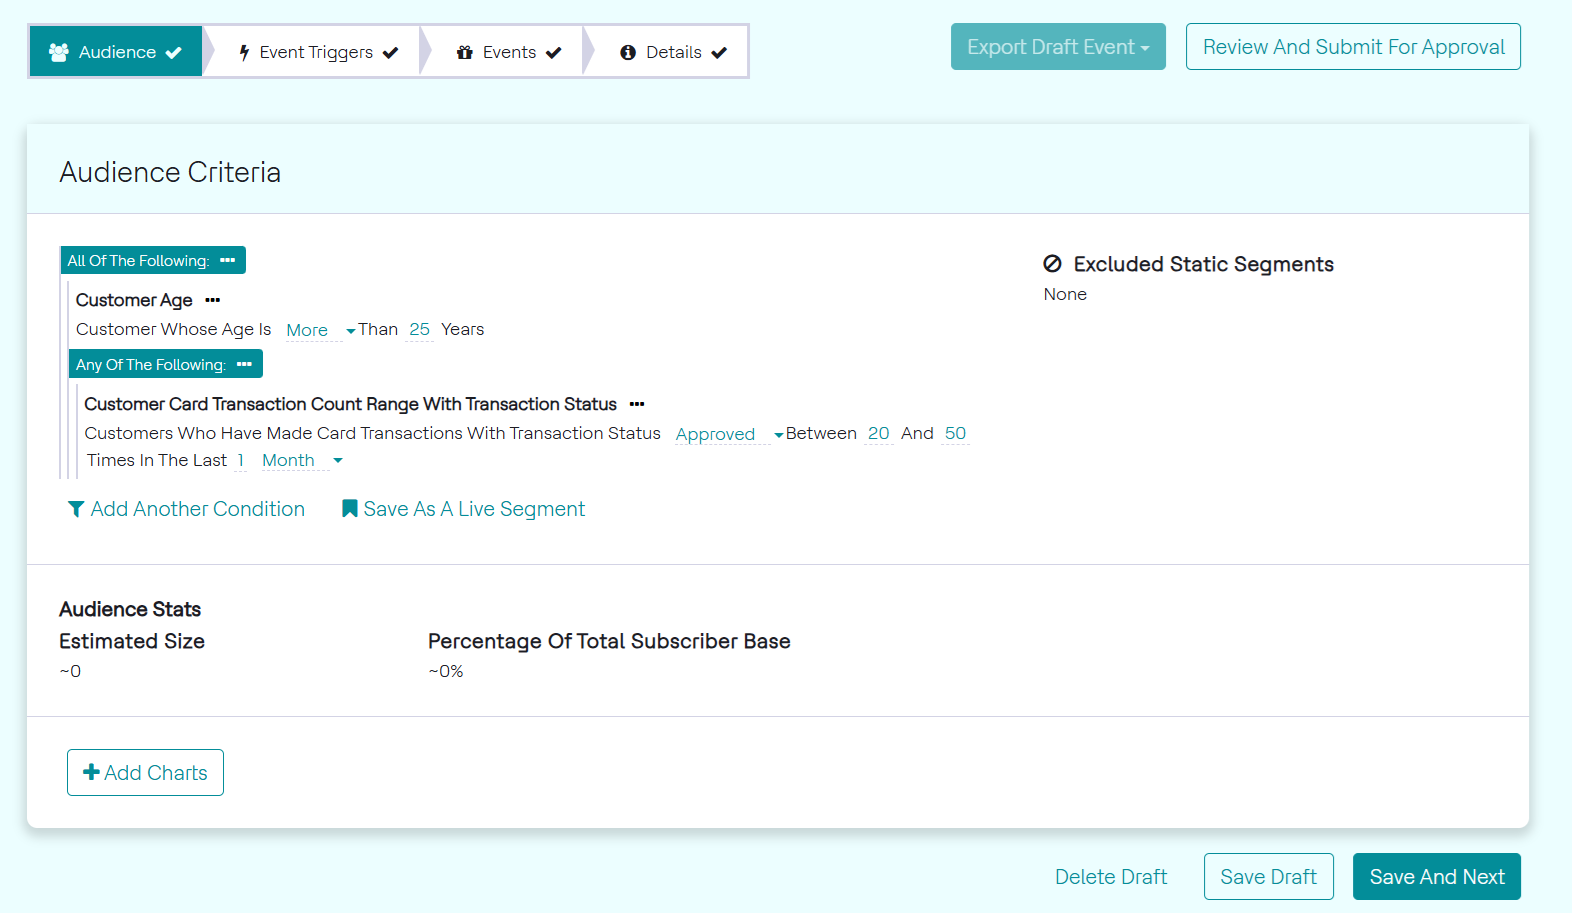
- Once converted, click the ellipses again as seen in the image below. Select
Add another condition to add an individual condition to the
condition group.
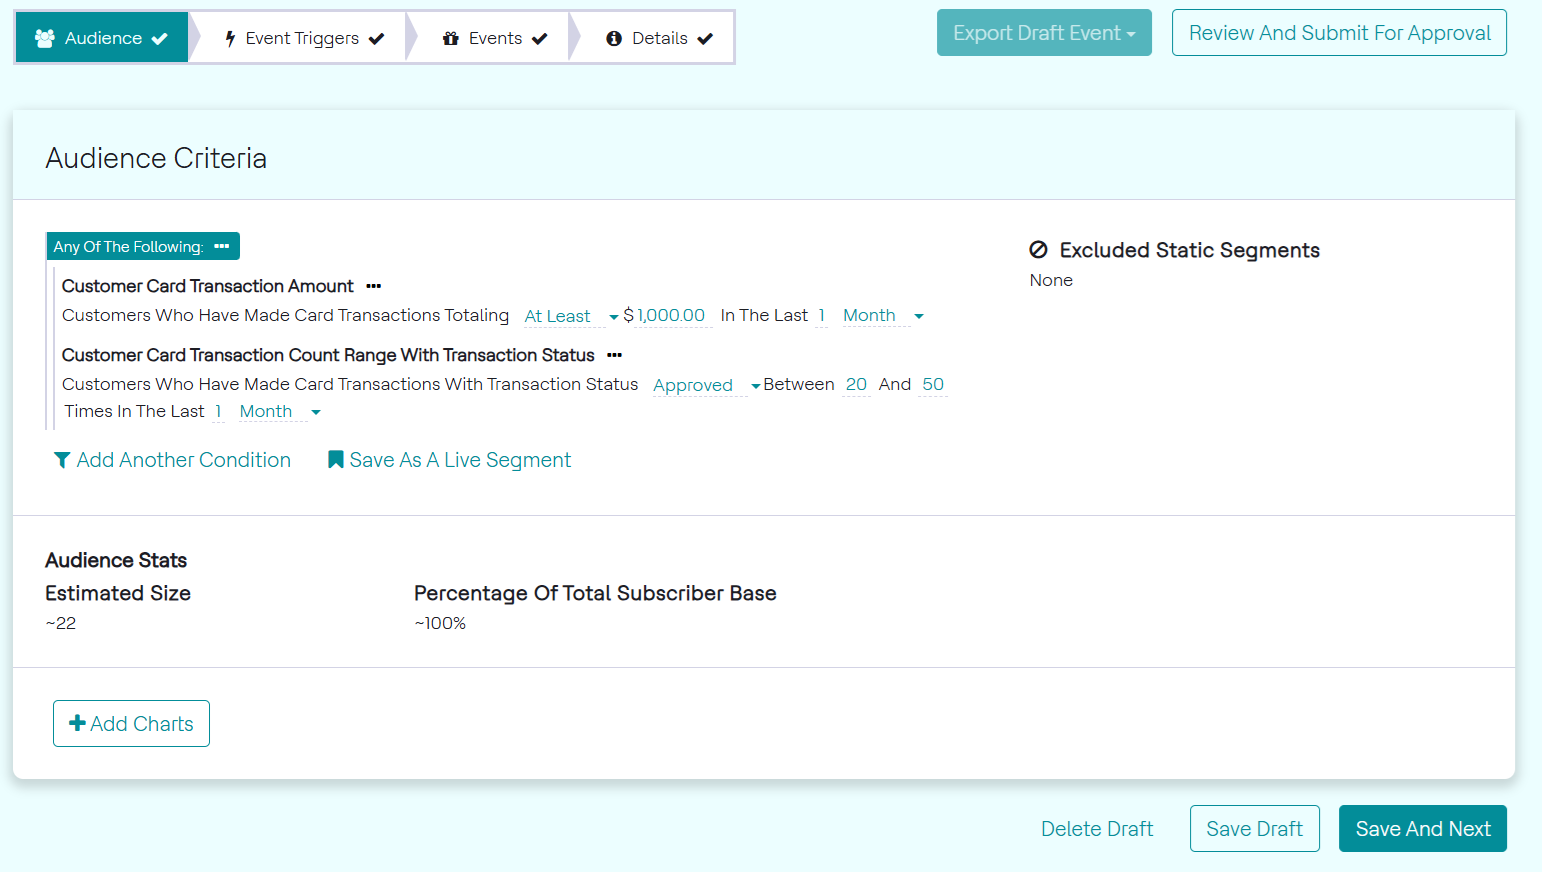
- The added condition can be seen in the image below. It will automatically
fall under the original condition group, which is Any of the
following.
USE-CASE: Using Nested Condition Groups
A combination of condition groups must be used, which is called a nested condition group.
To add nested condition groups, follow the steps below:
- Add multiple conditions. By default, they fall under the All of the following condition group.
- Click the ellipses (…) beside the group condition.
- Click ANY to convert to Any of the following condition
group.
- Click the ellipses (…) on the new condition group to add a condition within
the group as seen in the image below. Flatten Group will undo the
conversion, turning it back into an individual condition. Remove Condition
will remove the whole condition group. Add Another Condition will add a
condition to the condition group, select this option.

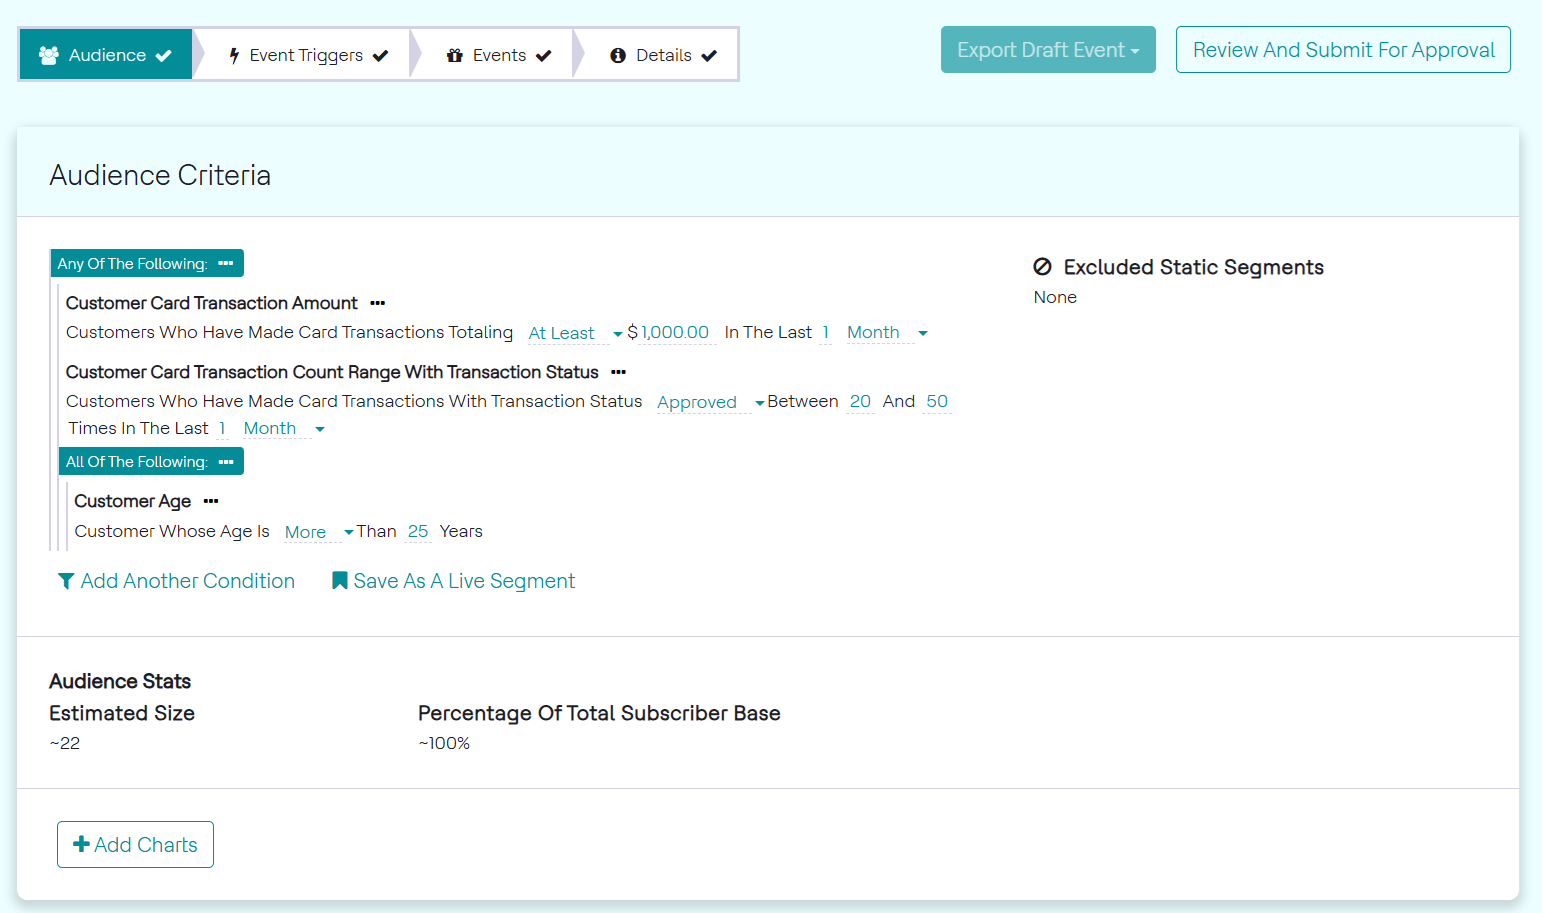
The added condition, as seen in the image above, will automatically fall under the Any of the following group due to the correct ellipsis option being used.
Live Segments
After setting up audience conditions, they can be saved for future use using a live segment. The customers in a live segment will be a changing set, based on the audience conditions.
USE-CASE: Saving Audience Conditions into a Live Segment
To save the segment as Live segment, follow the steps below:
- In the Events page, under the Audience tab, define the audience condition as mentioned in the above steps.
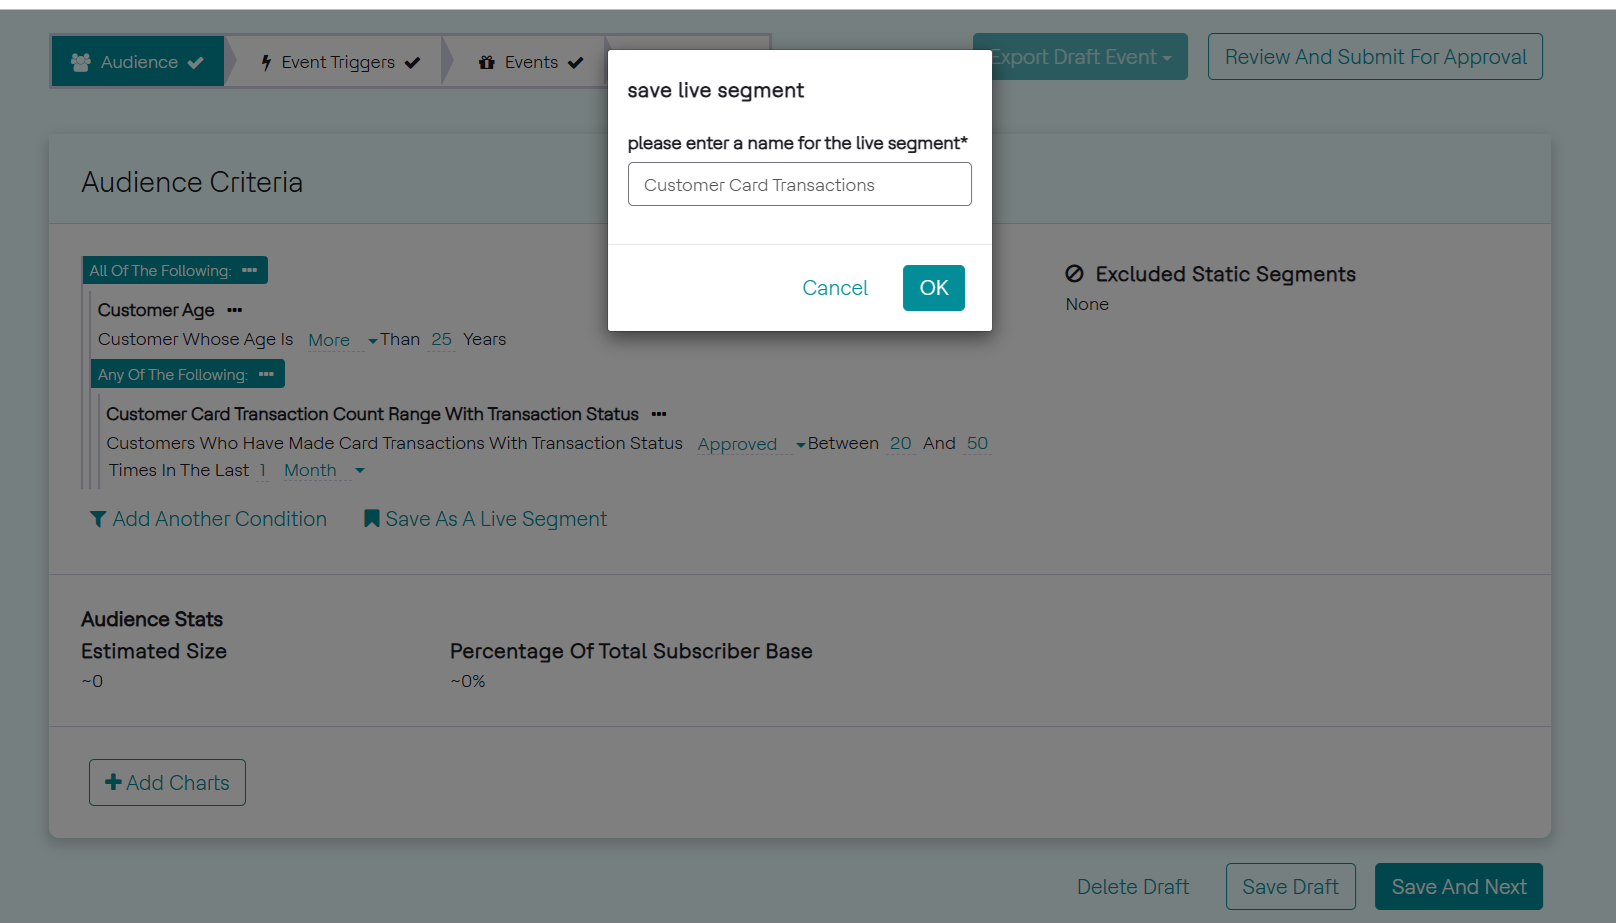
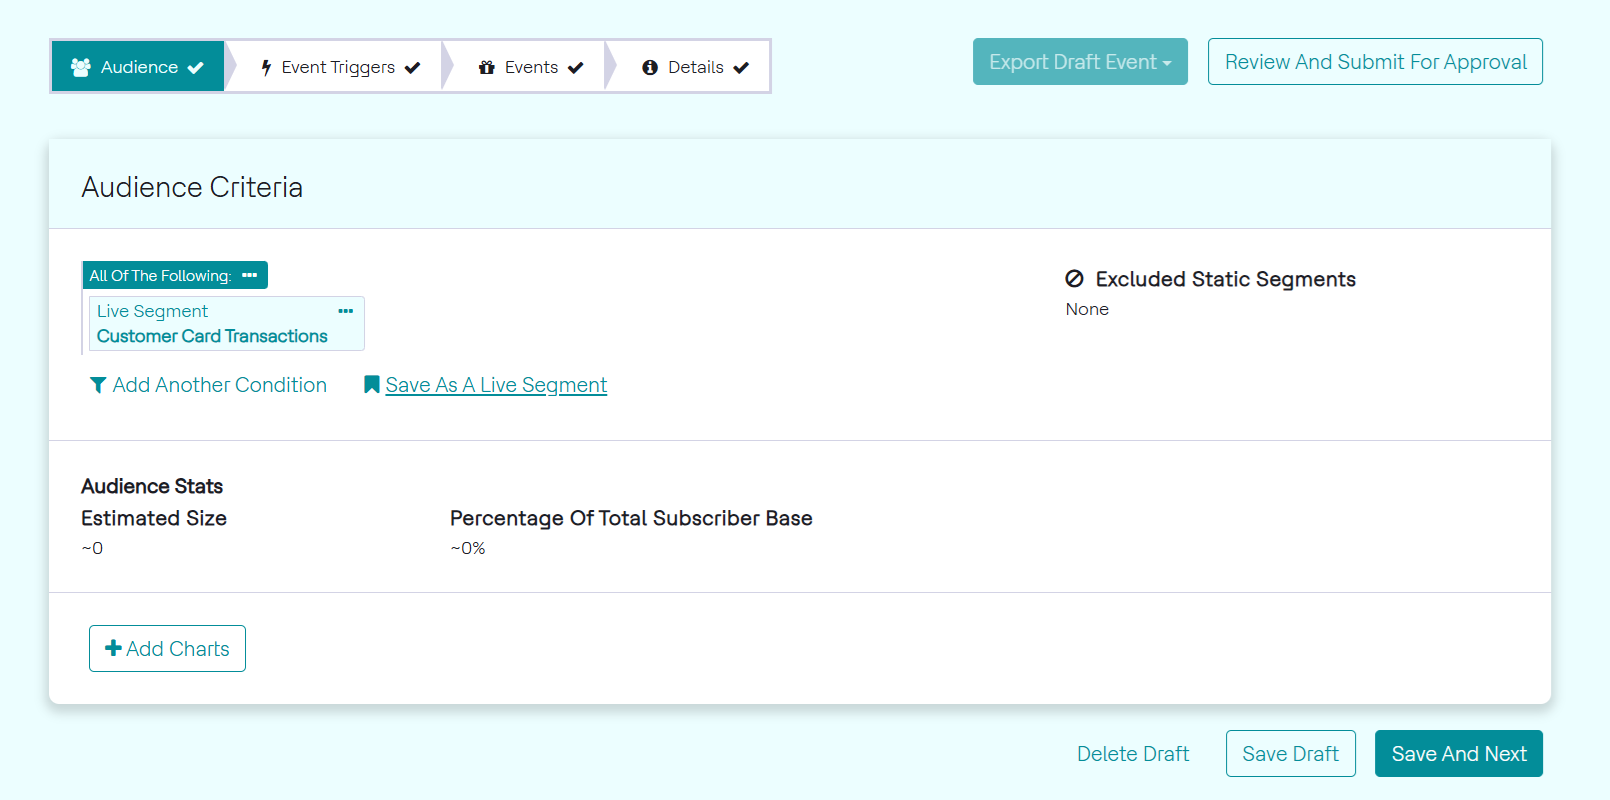
- Below the Audience Criteria section, click Save As A Live Segment to convert the audience condition as live segment.
- In the save live segment popup, enter name for live segment and press
OK. A sample audience conditions is set up and name for the live
segment is provided, as seen in the image below.
- The live segment will now be displayed as seen in the image below. Customers
will be added and removed from this as they transact and if their status
changes.
USE-CASE: Using Live Segment as Audience Conditions
To use the Live Segment as condition, follow the steps below:
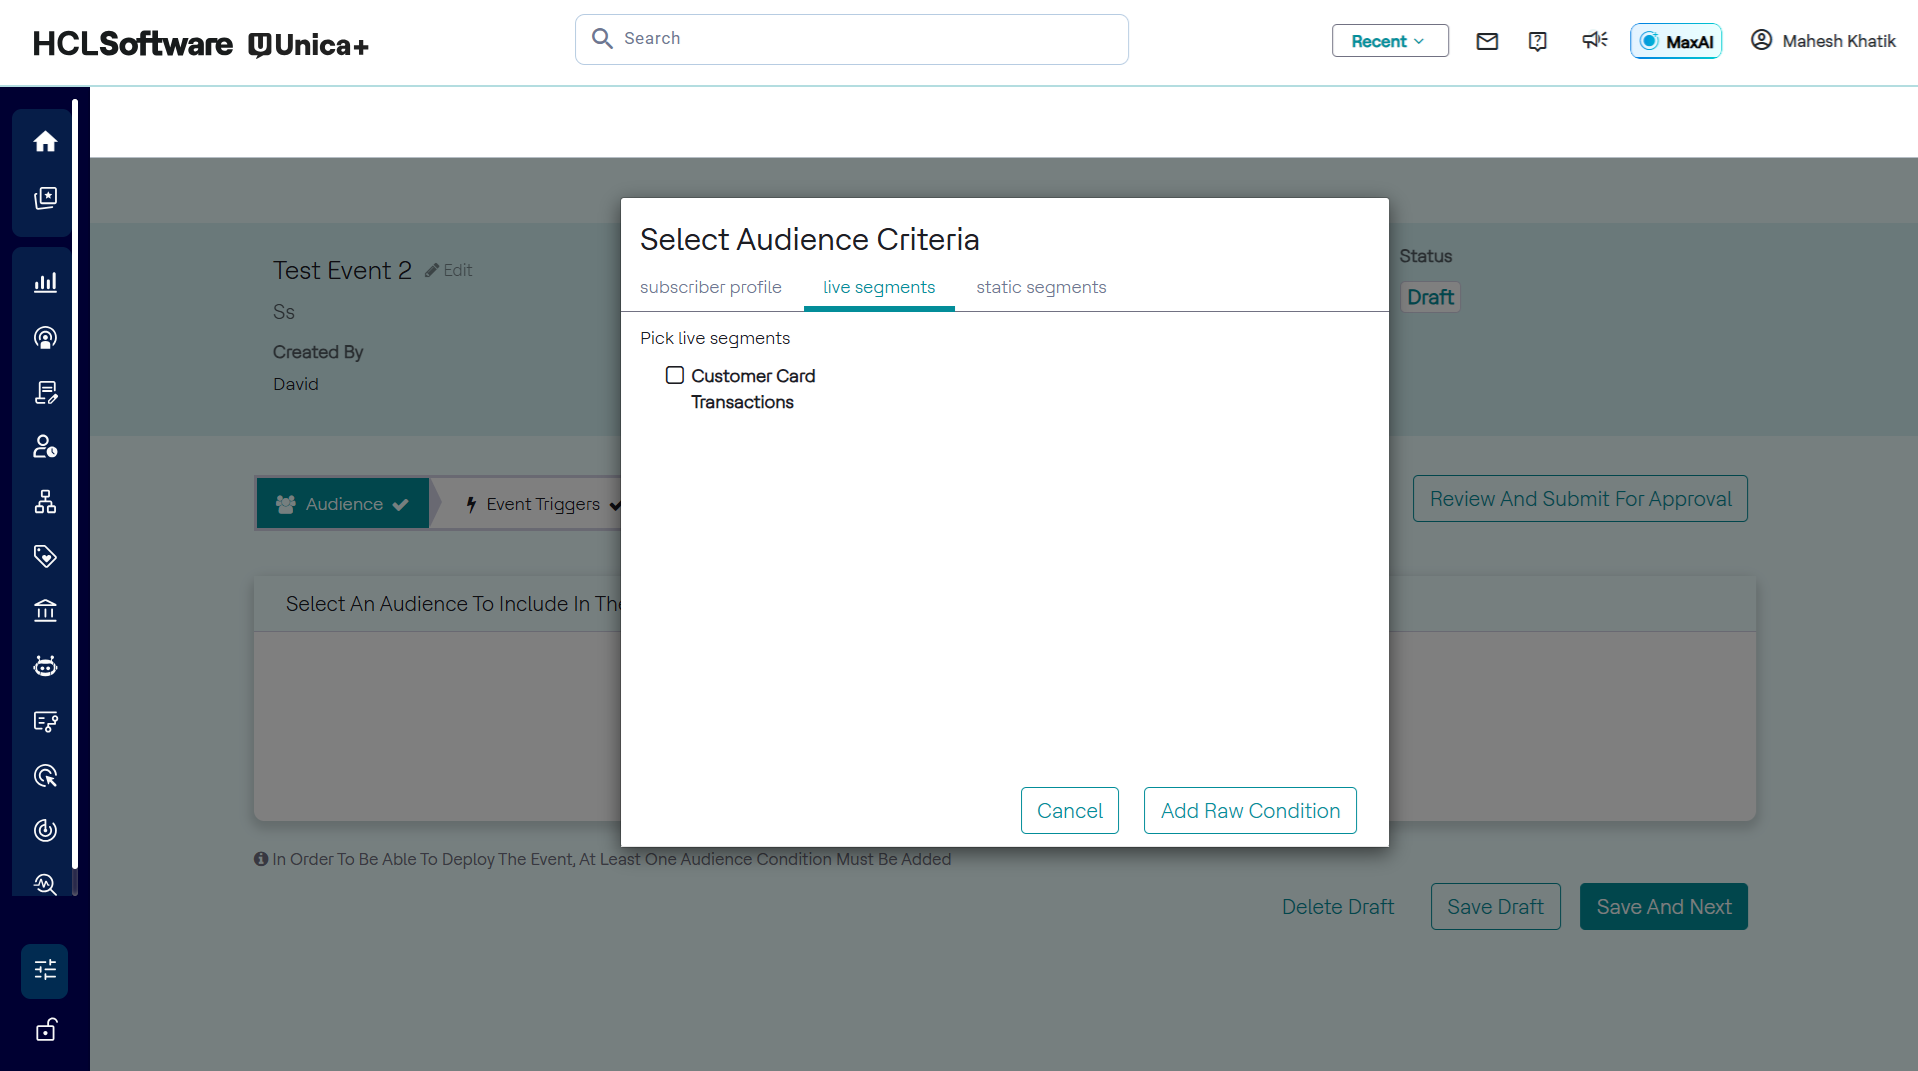
- From the Audience Criteria pop-up, click the Live Segment tab,
as seen in the image below. All the live segments created will be shown
here.
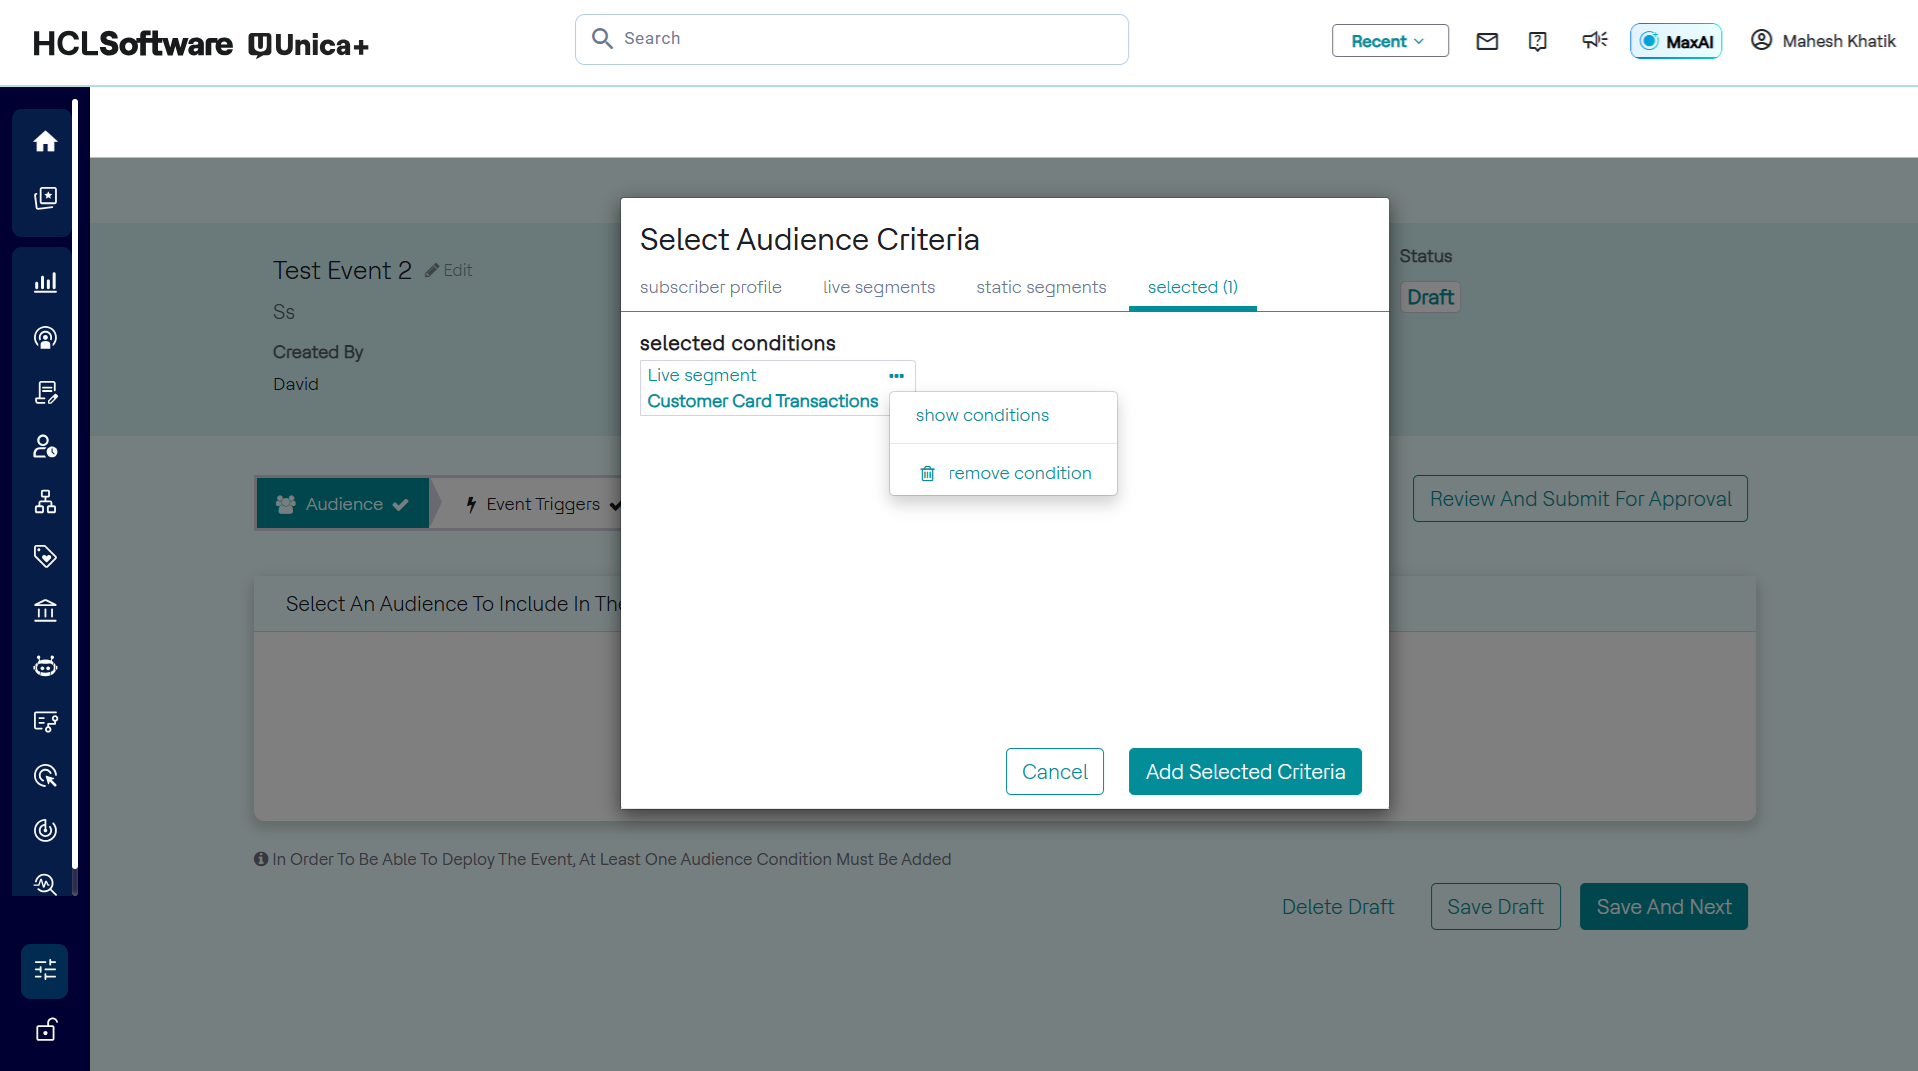
- Select name of live segment and click Add Selected Criteria. On the
Selected tab, the live segment can be seen as in the image below.
Click the ellipses button beside it will allow the user to remove the
condition or show conditions.
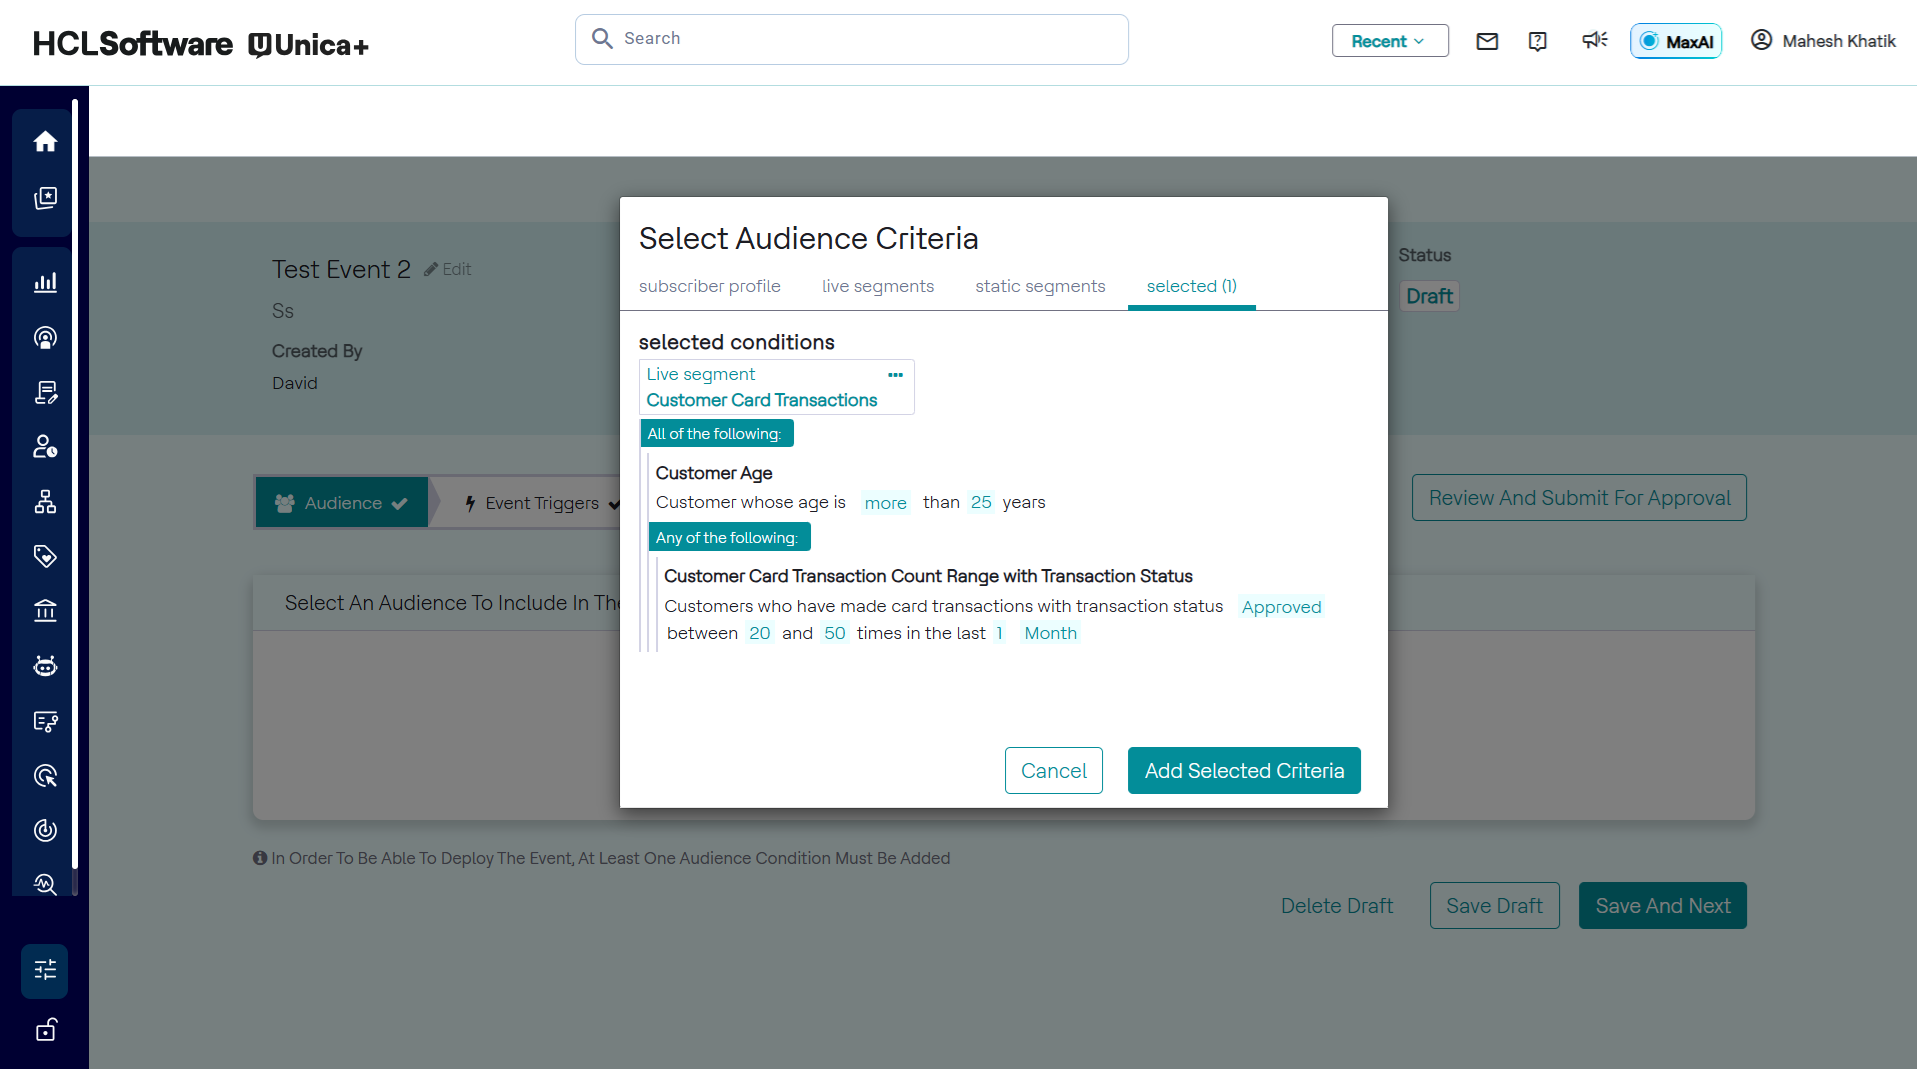
- On the Selected Audience Criteria pop-up, click Show Conditions to
display the original conditions of the live segment, as seen in the image
below.
- When a live segment is selected, clicking the ellipses button on the live
segment will show similar options, as seen in the image below. Show
Conditions will show the original conditions of the live segment.

- Select Replace with Conditions to display the live segment with its
original conditions and allow the user to edit their values, as seen in the
image below.
Static Segments
A static segment is a saved set of customers. It is different from a live segment in the sense that a live segment saves audience conditions, which are the basis of selecting customers as part of that segment. A static segment, on the other hand, saves specific customers. These specific customers can be chosen through the events step of configuration. Once a customer is saved in a static segment, they will always be part of that static segment until explicitly removed by the user, unlike with live segments.
USE-CASE: Saving a Static Segment using a event
Save customers who receive an event into a static segment. The event audience is customers who have transacted at least once with the merchant category A-04-004 (LinePay) in the last 3 months and have a customer status of Active. The trigger is when a single transaction of more than NT $500 in the LinePay category.
To save a static segment, follow the steps below:
- Set up the audience, trigger and event.
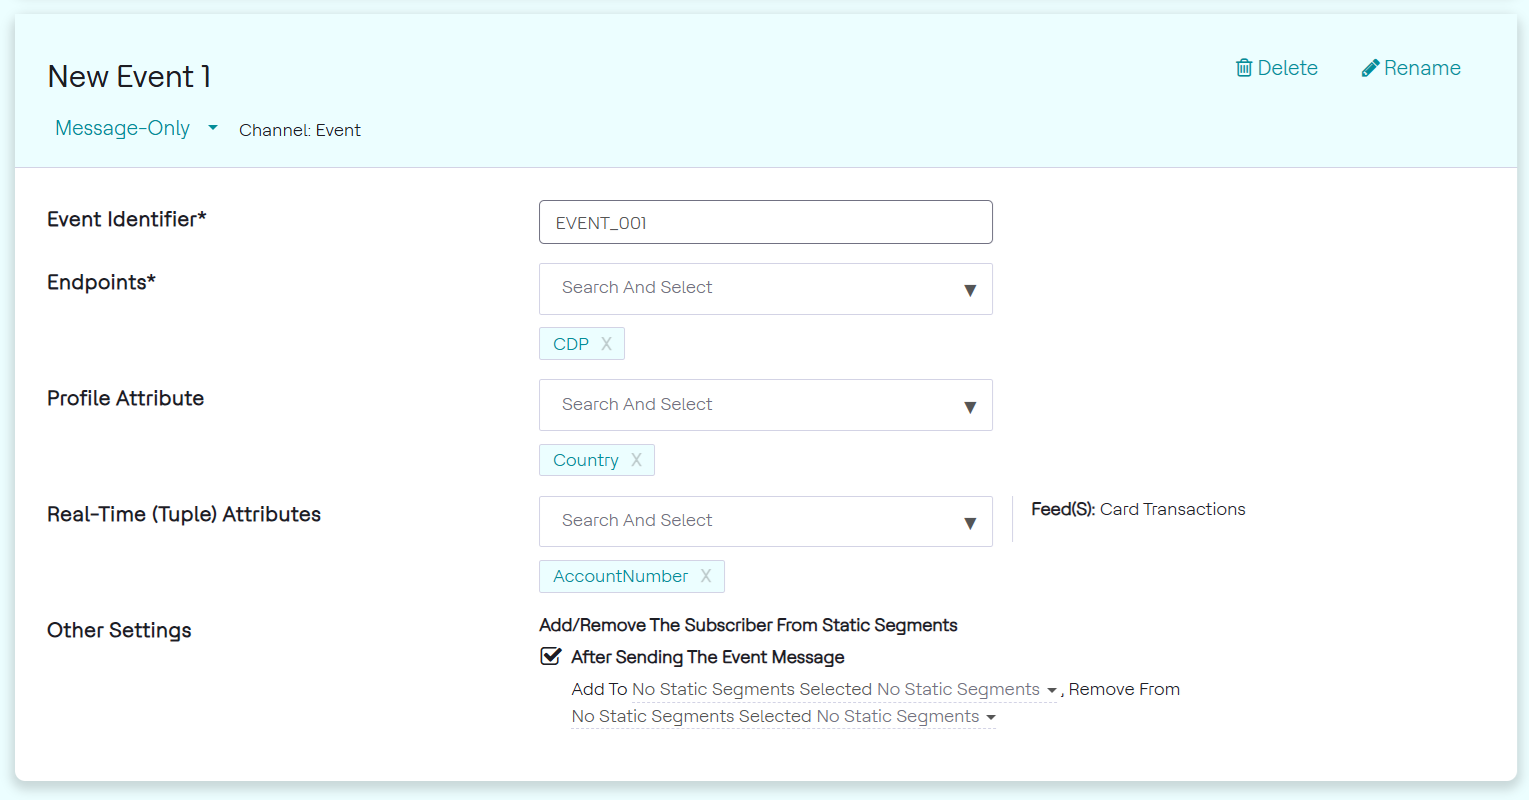
- In Events, check Add/remove the subscriber from static segments after
sending the event.
-
When setting up the event, there is an option to Add/Remove the subscriber from static segments after sending the event. Checking this box will provide the option to add the customer to a segment and/or remove from the segment. Both these are required to be static segments. This feature allows the user to keep track of the customers that triggered an event separately, by adding them to a new segment. It also allows to keep track of all the customers who have not triggered an event yet, by removing them from the current segment. This is seen in the image below. This option is available for all the types of events.
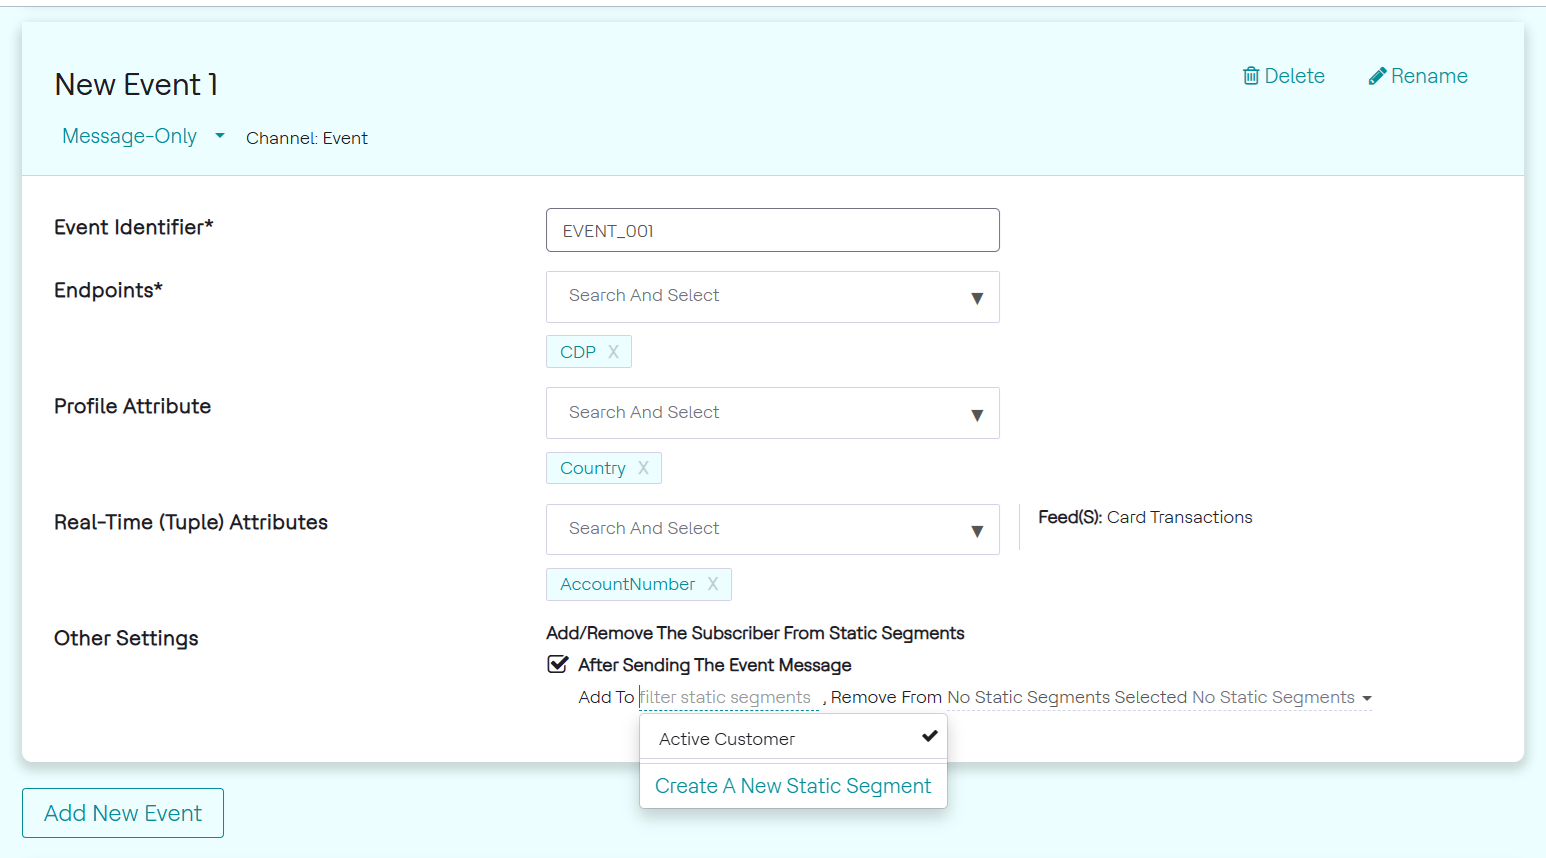
- Select or create a static segment to add these customers into.
One or more static segments can be used to add the subscribers to, as seen in the image below. In this example, we choose to add the subscribers to Active Customers. This is a segment created by selecting the Create a New Static Segment option. A Name and Description needs to be added to create a segment.
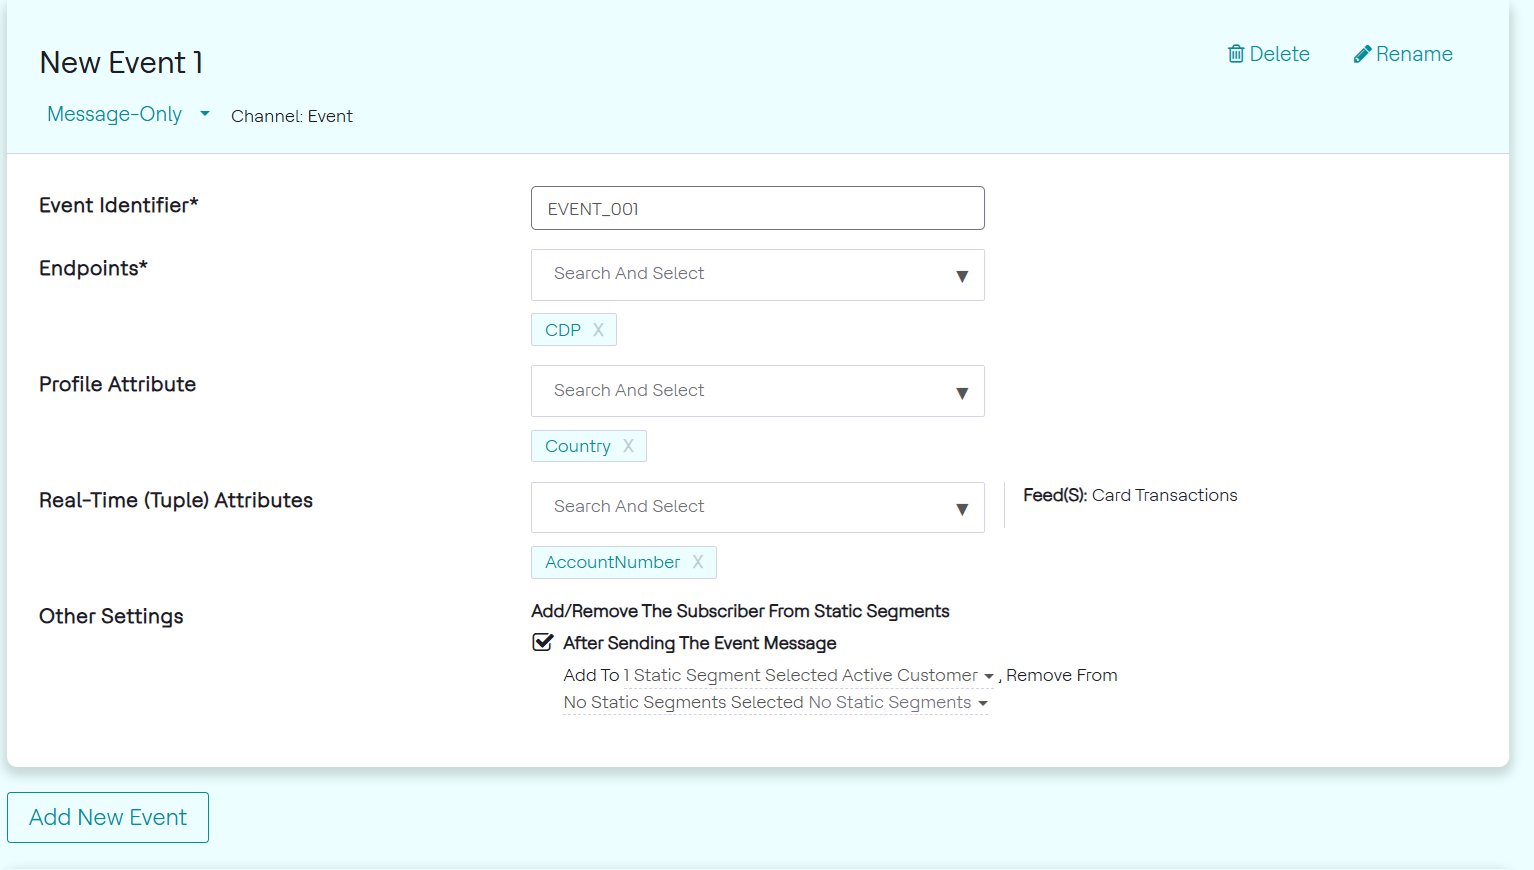
One or more static segments can be chosen to remove the subscribers, in the same way. In this example, we do not remove the subscribers from any static segment, as seen in the image below.
USE-CASE: Static Segment as Audience in an Event
Use saved customers from a previous event "Active Customers" as audience of a new event by using a static segment.
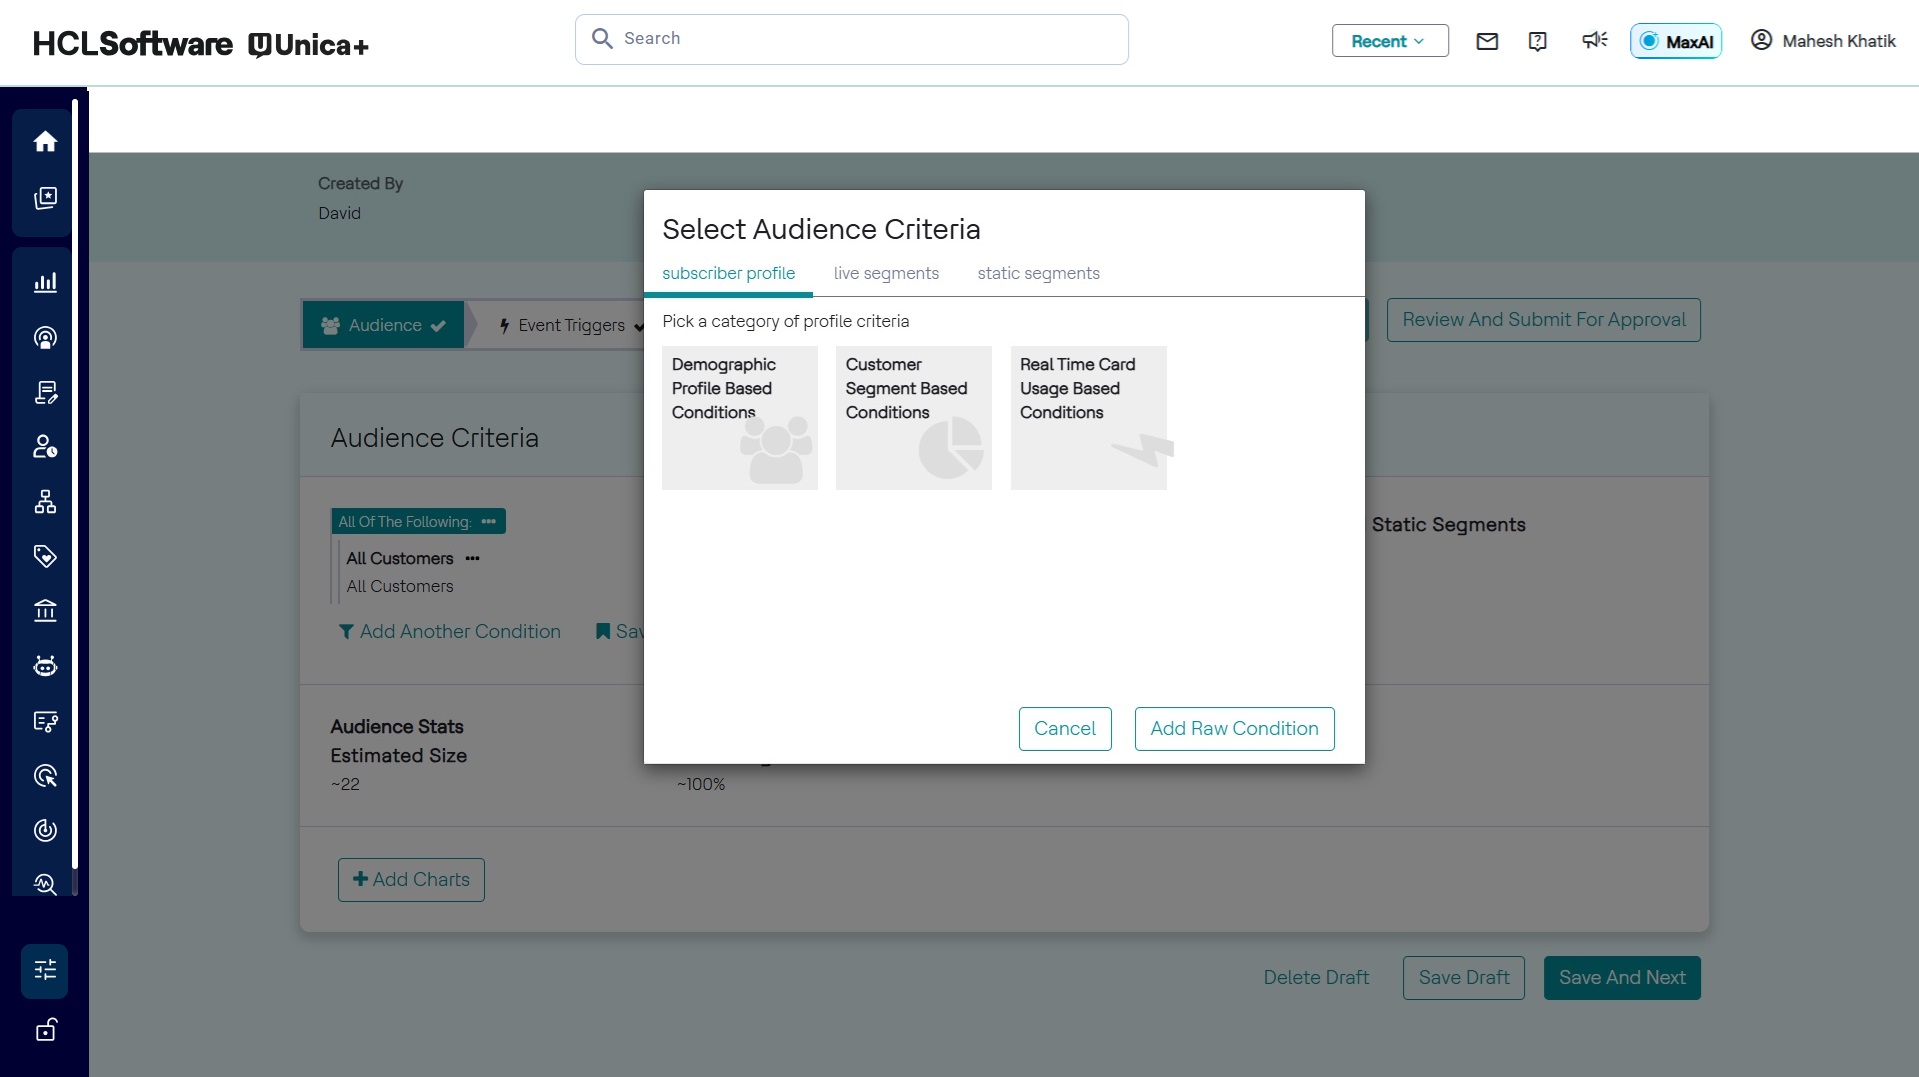
To add static segment for audience criteria, follow the steps below:
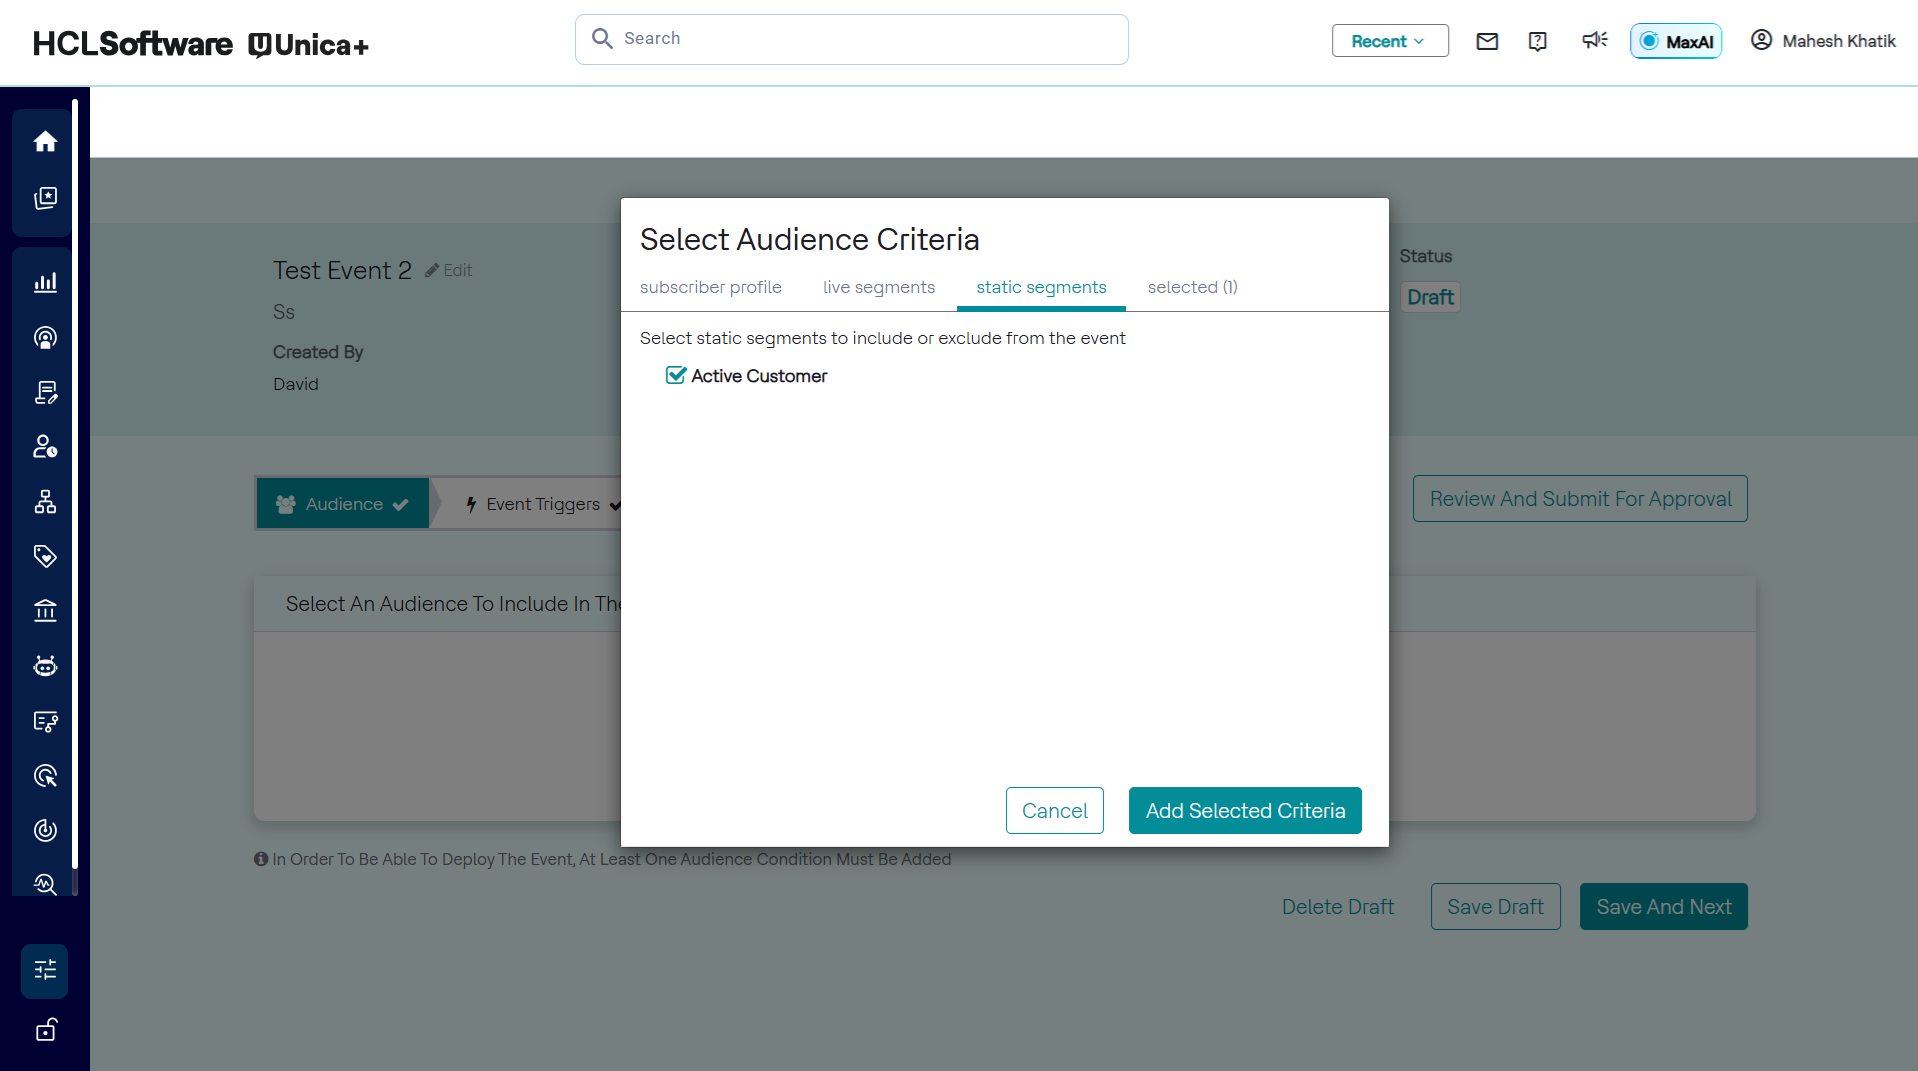
- From the Audience Criteria pop-up, click the Static Segment tab.
- Select name of static segment and click Add Selected Criteria as
shown in the image below.
USE-CASE: View all Static Segment
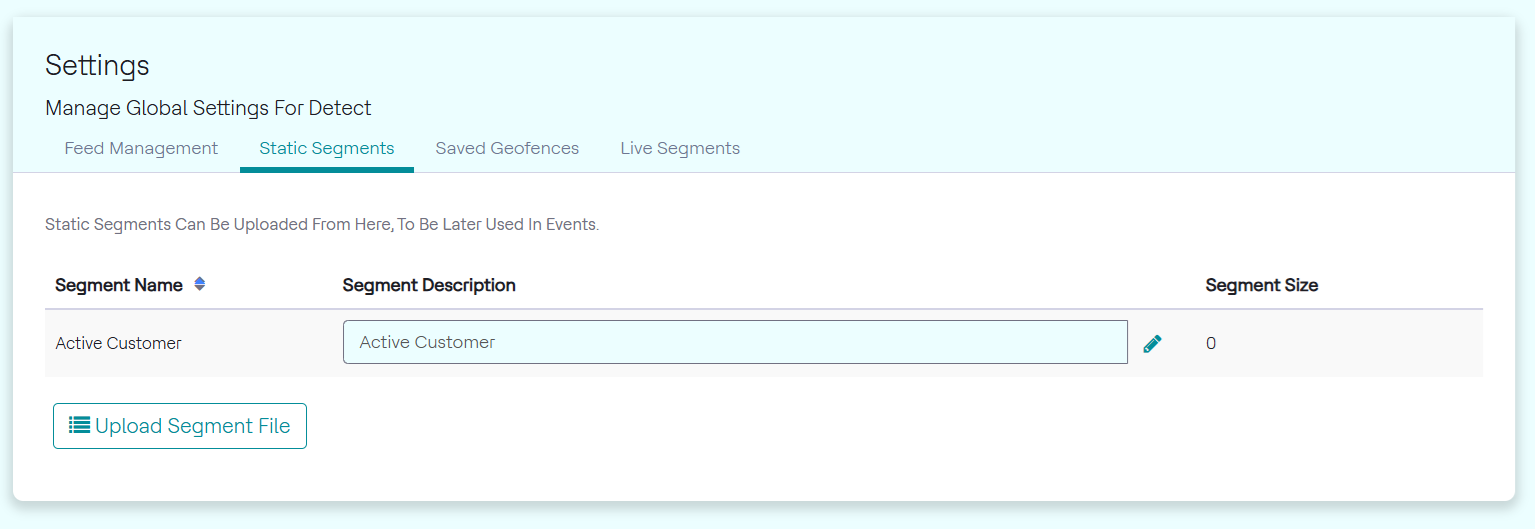
To view all the static segments, follow the steps below:
- In the menu bar, click Unica Detect > Administration.
- Click the Static Segments tab.
- A page will be displayed as seen in the image below. The static segments can
be seen along with a description for each. The segment size is also shown,
which is the number of customers in each static segment. Similarly, all Live
Segments can be viewed in its respective tab. Both of these tabs show all
segments configured by any user as they are usable by any user.
Adding Charts to an Event
To better breakdown and understand the audience of an event, charts based on different metrics can be added.
USE-CASE: Display Metrics of Marital Status and Occupation Type Code
To Add charts to an event, follow the steps below:
- In the Audience Criteria page, click Add Charts.
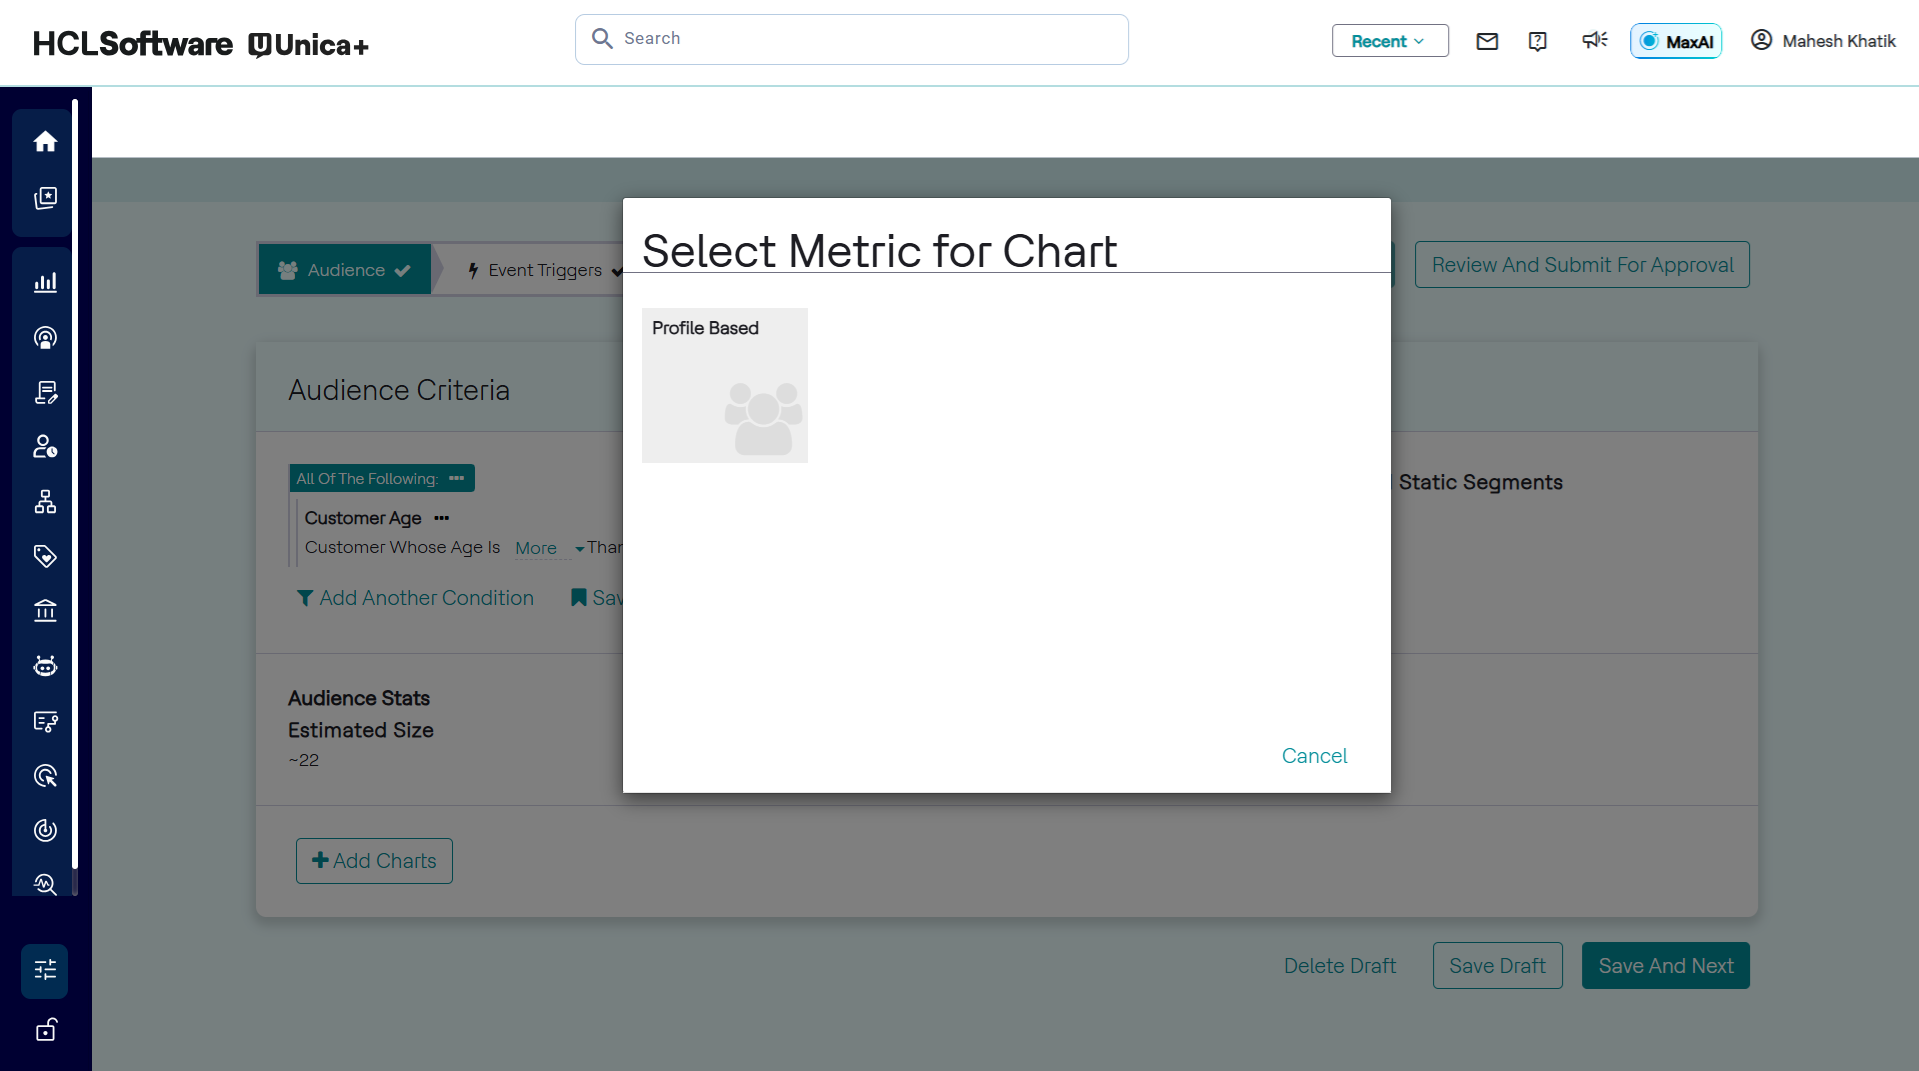
- Click Profile, and choose the category of the metric. In the
Profile Based metrics, select Gender & Segment as seen in the
image below.
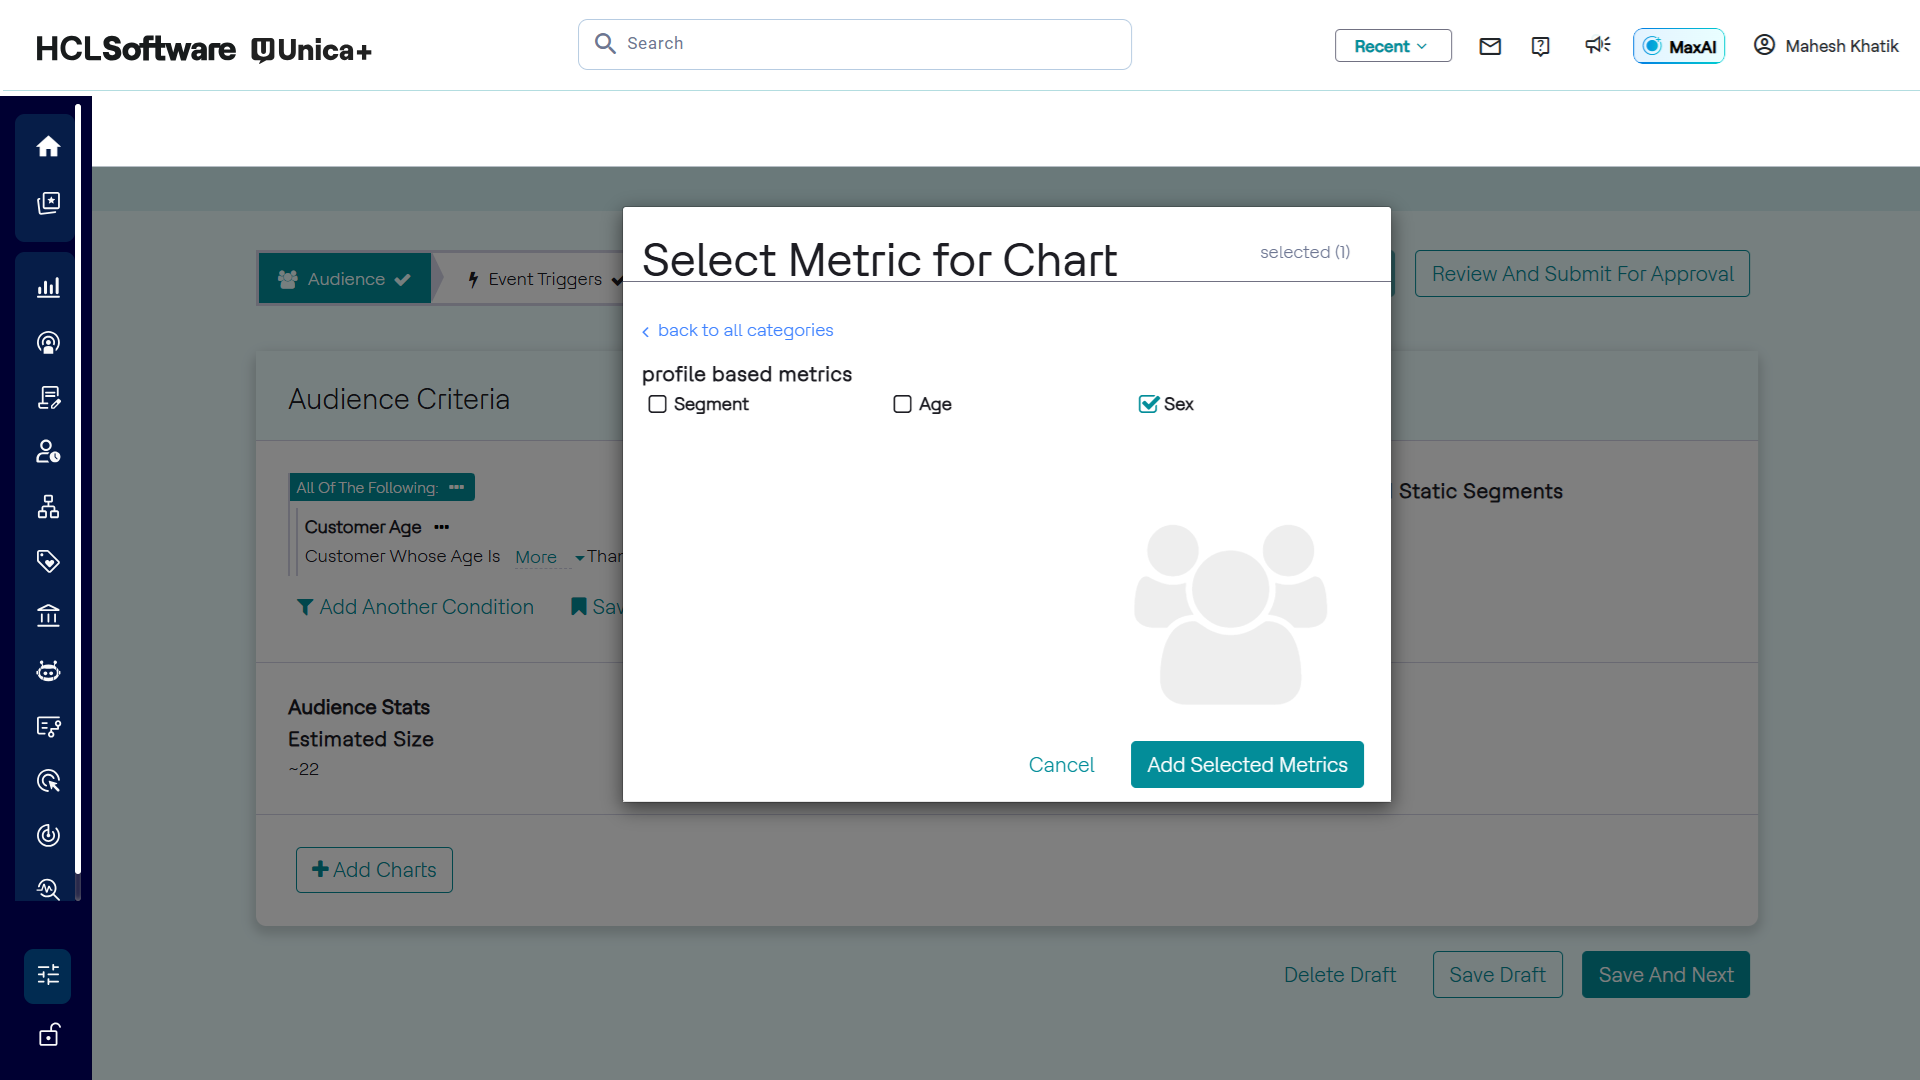
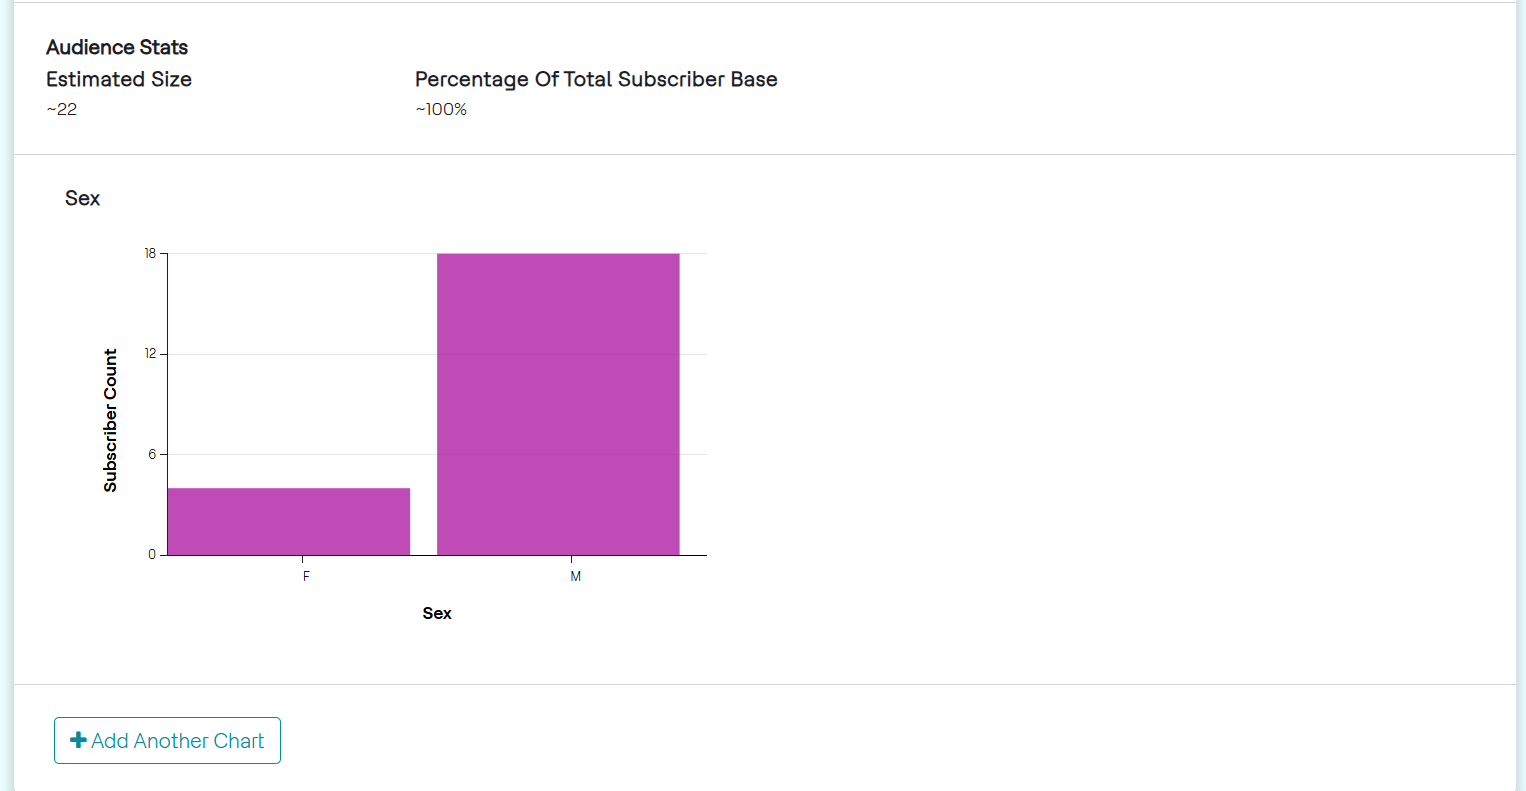
- Check one or more metrics and click Add Selected Metric. The metrics selected produce graphs as shown in the image below.
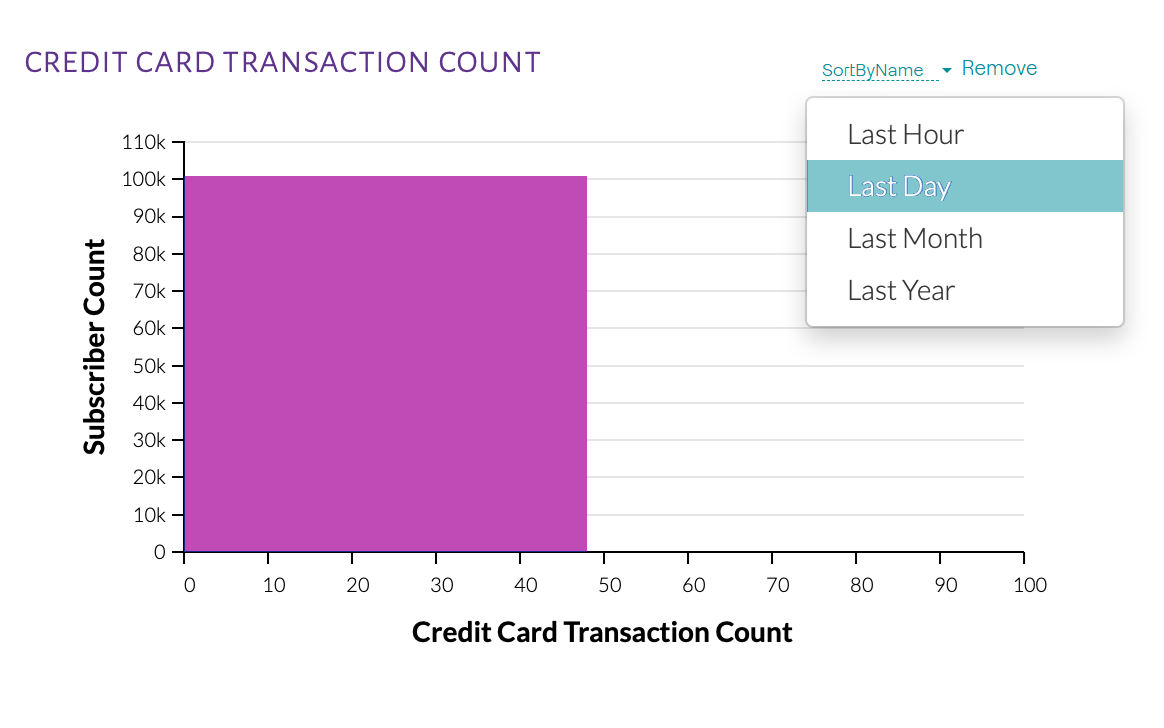
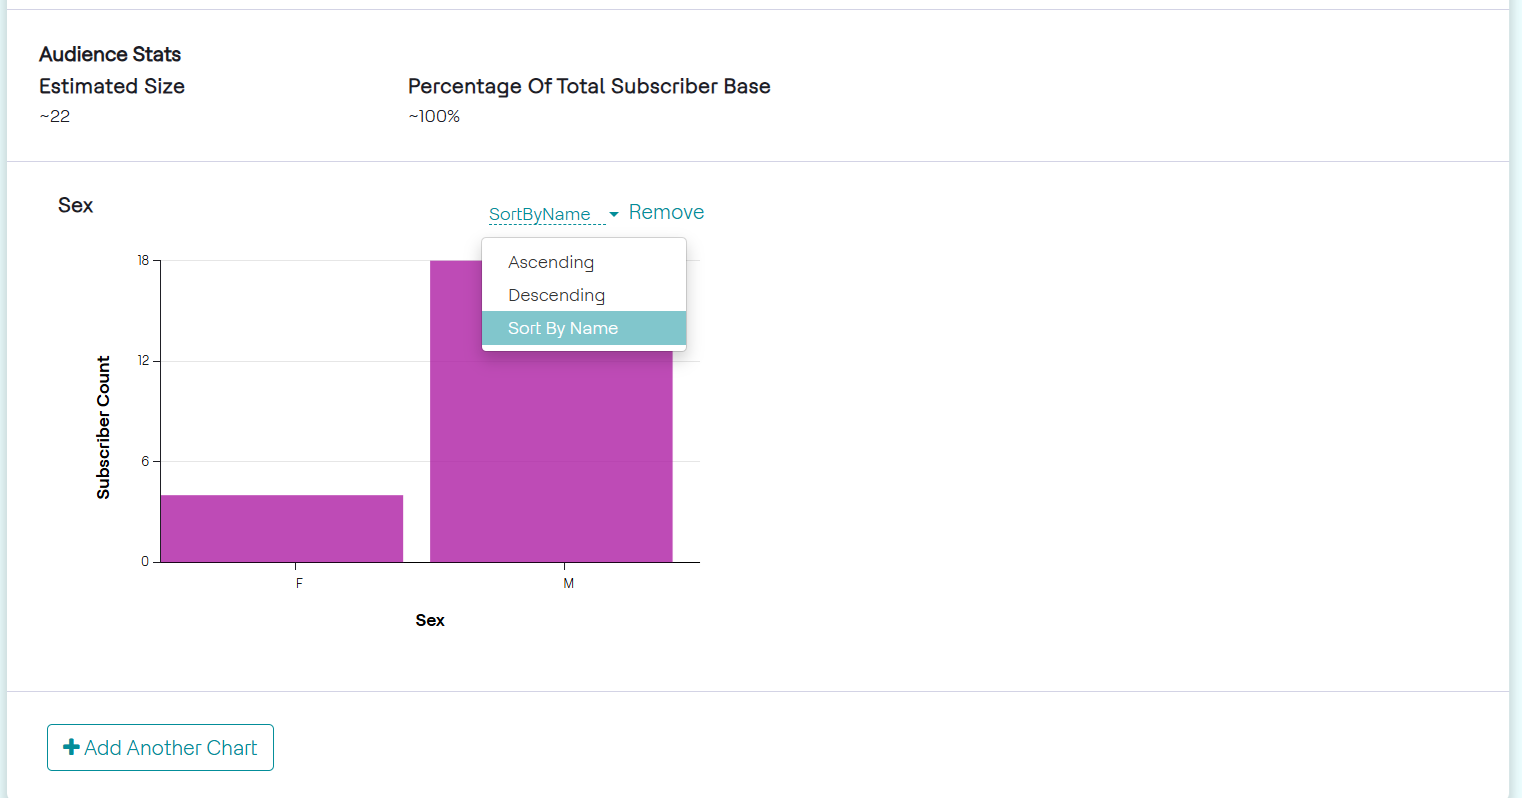
These charts can be reordered by hovering over the top right corner of each, as in the image below.
Non-categorical charts have options to alter the time window and clicking the + and - buttons allows an increase or decrease the number of bars in the chart. This allows for a change in the range of each bin, as seen in the image below.