Event Types
This page explains two event types—Message-Only and Action-Based—enabling marketers to configure real-time or batch-triggered customer interactions by selecting specific attributes and endpoints, with built-in controls for contact policies and data forwarding.
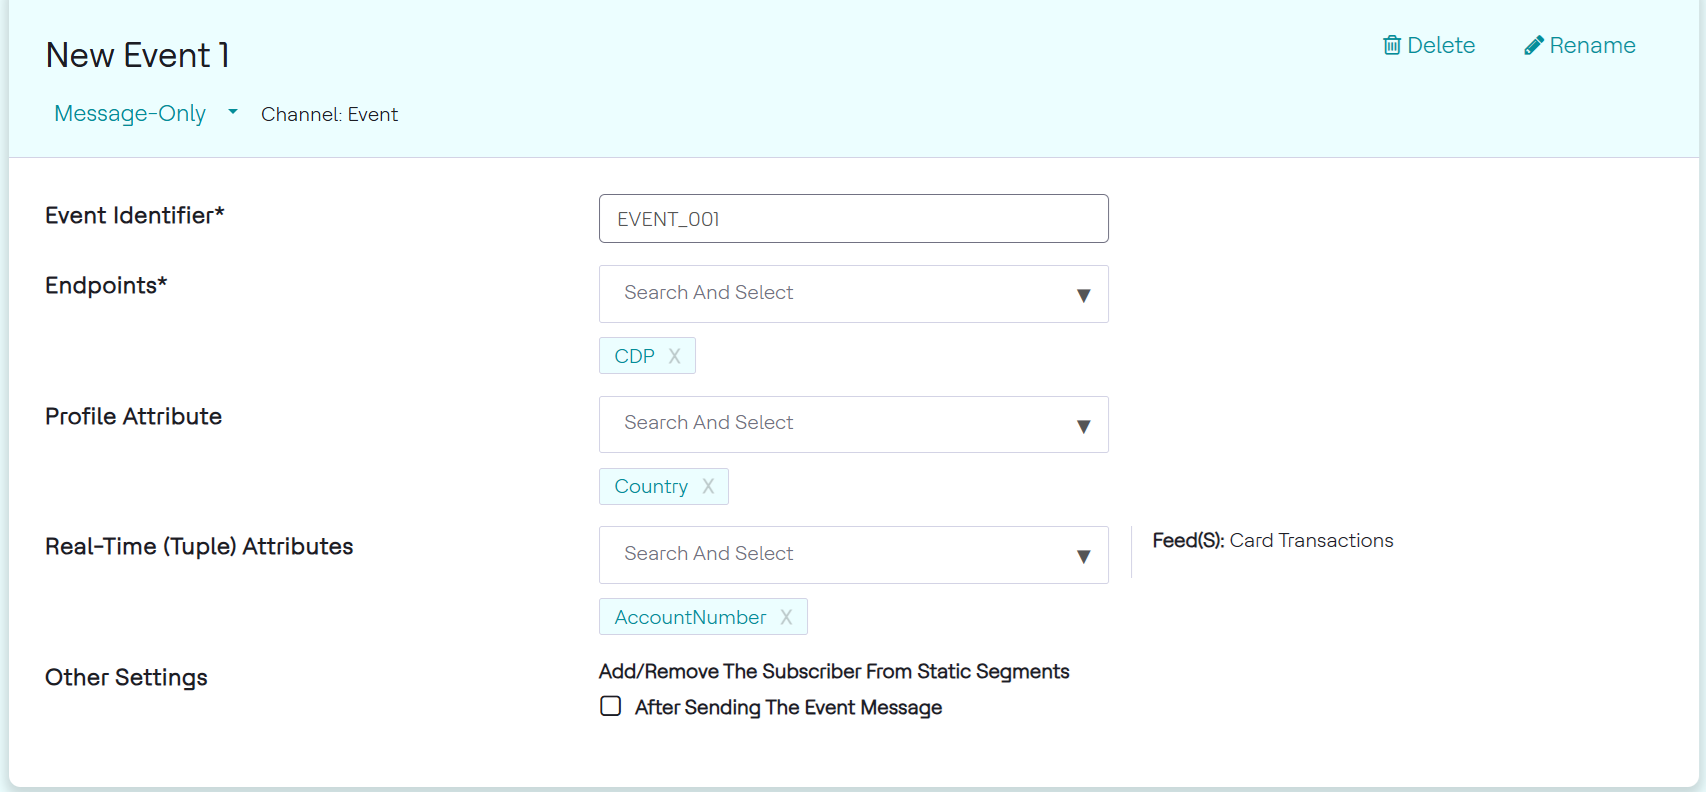
There are two event types to choose from: Message-Only & Action-Based. Both events require an Event ID and Endpoint to be selected. Additionally, the UI allows attributes from each data source to be selected which is forwarded to the chosen endpoint. For all events, we suggest selecting customer first/last name, email ID, phone number, and all relevant channel information (push note, email and text message) with their preference flags from the customer profile with customer ID (custID) and transaction date time (sysDateTime) from real-time attributes.
The check-box "Mark all events as a non-marketing event message" disables our default global contact policy check. This default is currently set to limit the outgoing events to 50 in 7 day, per customer, across all events. There is also an event level contact policy that can be configured in the Details tab.

In order to better understand each event option, we will explore different use-cases as we have done above.
Message-Only Events
Message-Only events are used when an event needs to be sent out each time audience and trigger conditions are met. This is the default selection in the Events tab.
Event Identifier and Endpoints selection is mandatory. The image below contains a sample event ID. It is important that this ID matches with the one expected by the endpoint systems like DB so that stitching together events with offers is seamless. Endpoints should be selected based on if the event is real-time or batch. Both can be selected as shown in the image below.
In HCL Detect, there are two categories of attributes:
- Profile Attributes: Customer-level data stored in the customer profile
(e.g.,
firstName,city,gender,emailID). These are relatively static and represent who the customer is. - Real-time Tuple Attributes: Event-level data fields that come from
incoming real-time data feeds (transactions/events). A "tuple" is essentially a
single record in a real-time feed, and its attributes are the individual fields
within that record — for example,
transactionAmount,eventTime,MSISDN,transactionId,duration, etc.
These tuple attributes are defined in the Feed Data Model configuration
(data_model.json) where each feed model specifies its attribute
names, types, and whether they're required. For example, an "Identity" feed model
might have tuple attributes like MSISDN,
calledNumber, callingNumber, and
ts.
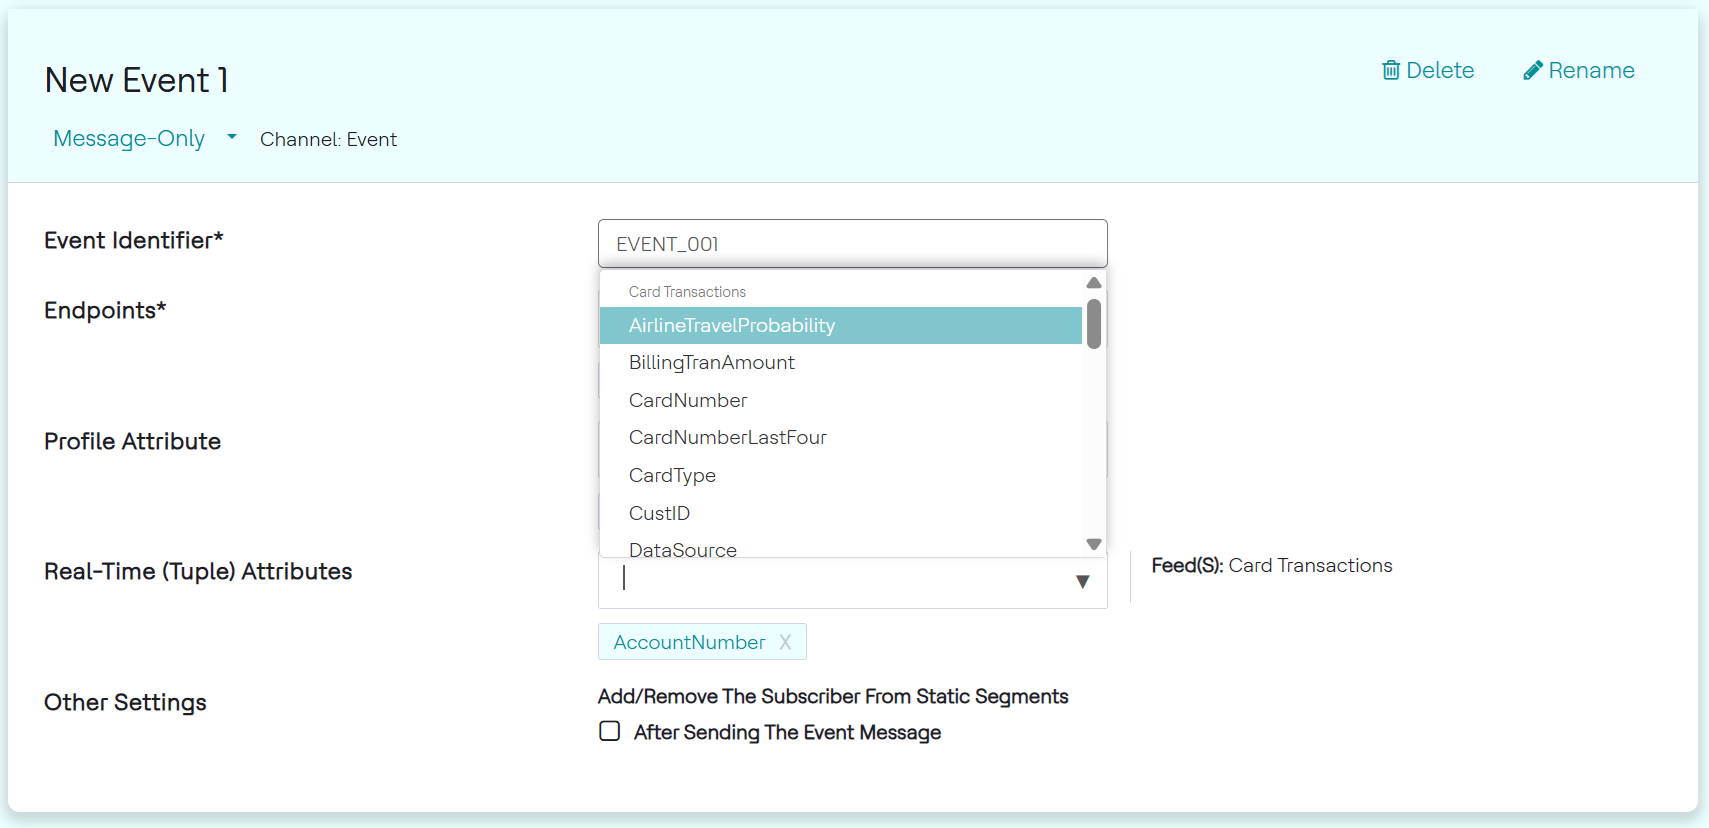
Multiple attributes can be selected based on what is expected by the downstream systems. For the real-time source, the Feed(s) with attributes present for selection are displayed on the right.
The image below shows how attributes can be searched for and selected.
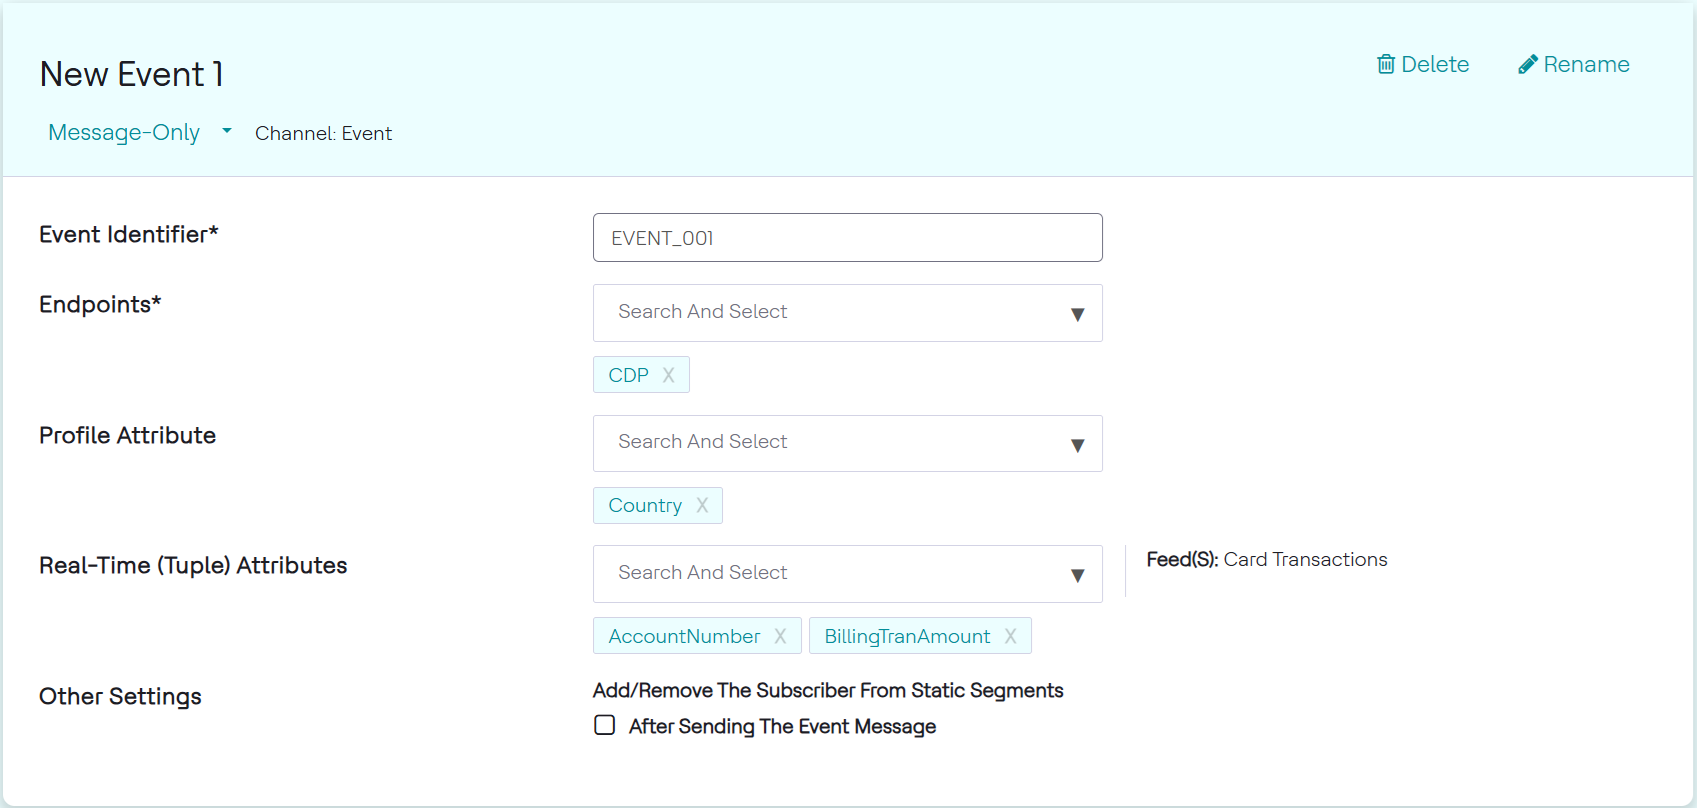
Similarly, we can choose to forward profile attributes as well, for offer personalization. Final attributes selected are shown in the image below.
Action-Based Events
For Action-Based Events, the customer must complete an action to receive the product of an event. Time-based & Milestone-based reminders can be added as well.
To create action-based events, follow the steps below:
- From the Events page, select Action-based and fill up general
event information.
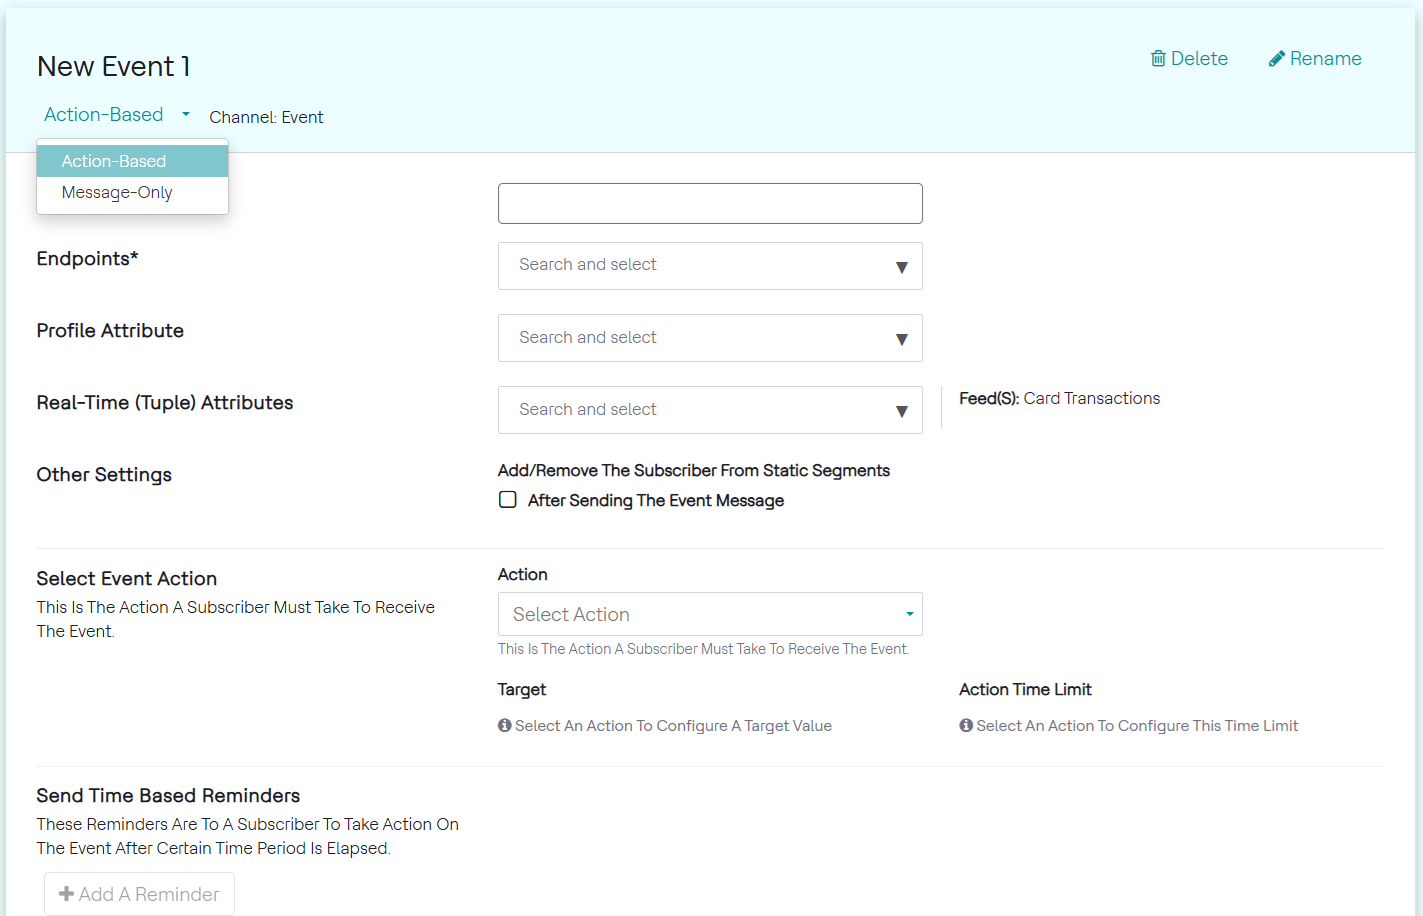
- Select Event Action, as seen in the image below. Among the customers
qualified for the event, this filter will monitor which customers performed
a specified action.
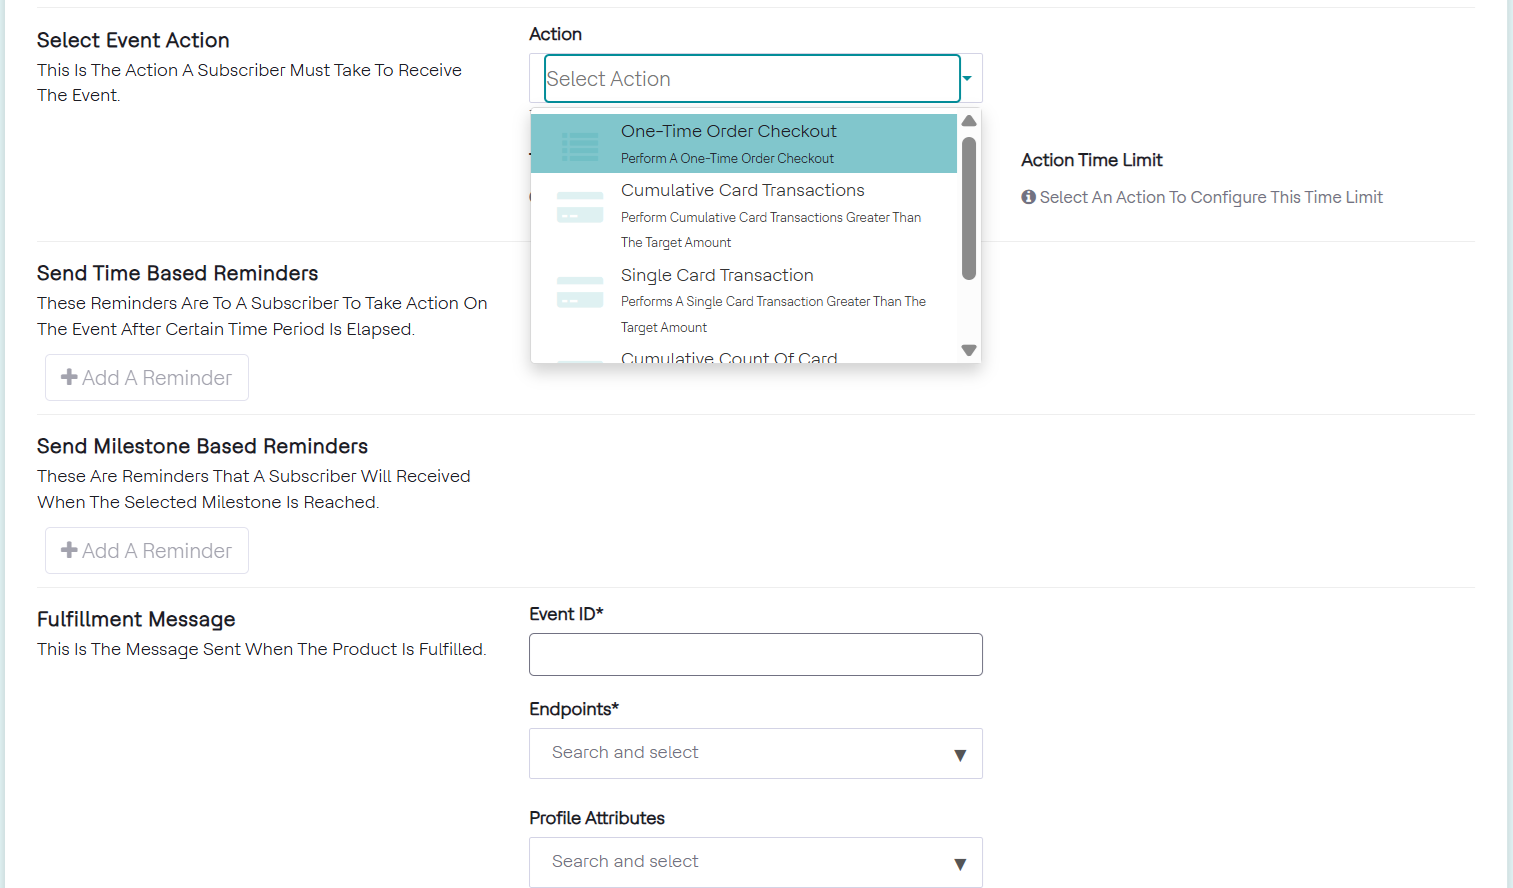
- Fill in the Action details. The Single Transaction option will
monitor the transaction amount but for a single transaction only, in a given
period of time. Cumulative Count of Transactions monitor the number of
transactions in a given time period. Do note that for the Cumulative Count
option, the threshold does not take into consideration the message that has
been sent out the first time a customer fulfills the trigger and audience
conditions.
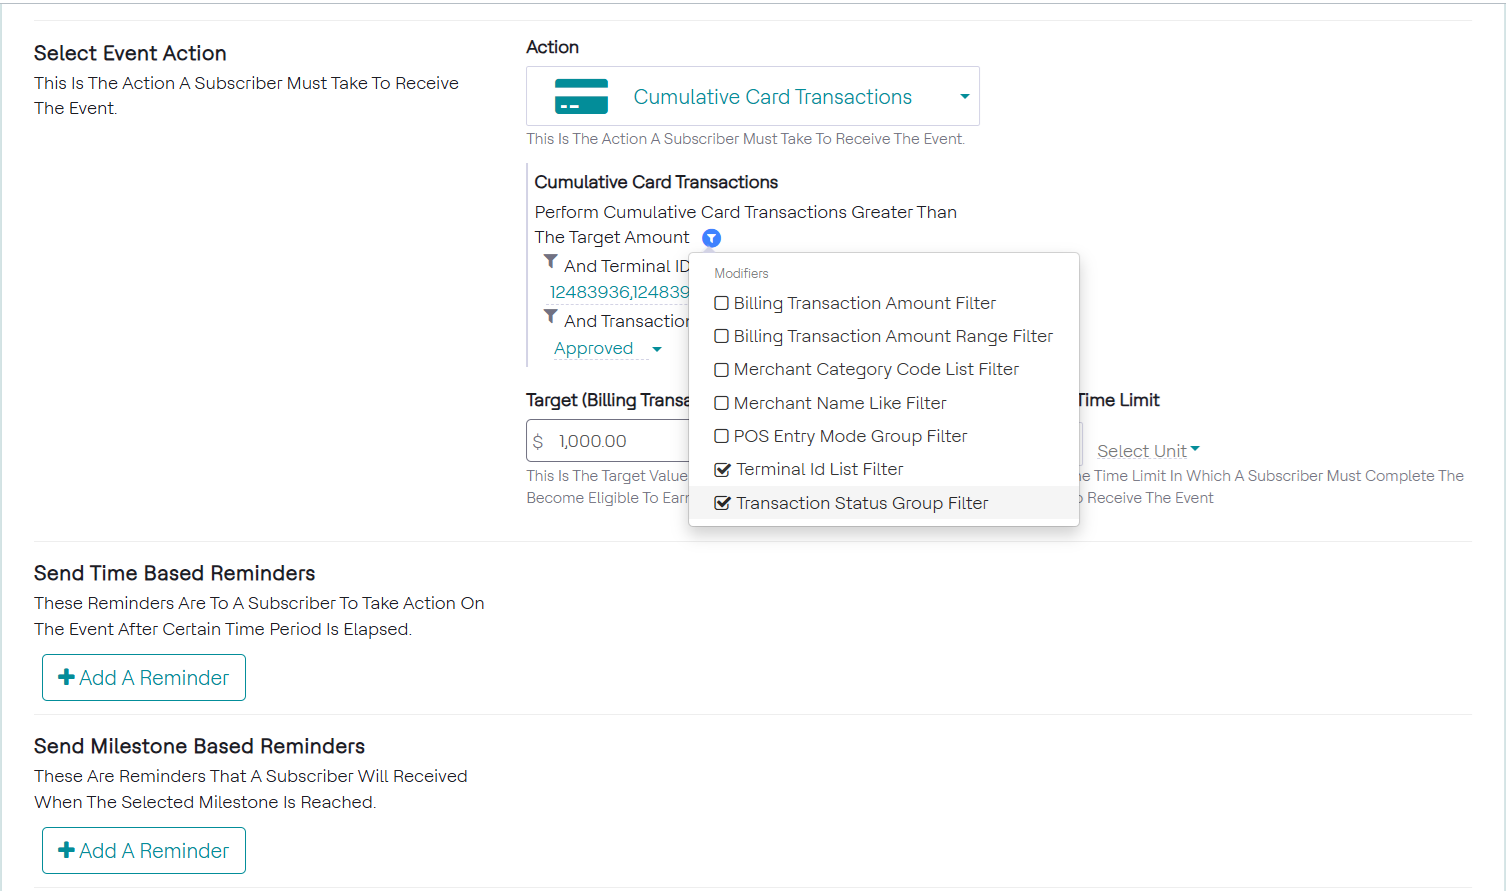
For all selected actions, filters can be added to all of these options as well. This is shown in the image below.

- Filters can be implemented as shown in the image below. These are in
addition to the audience and trigger configurations and can be modified
similarly.
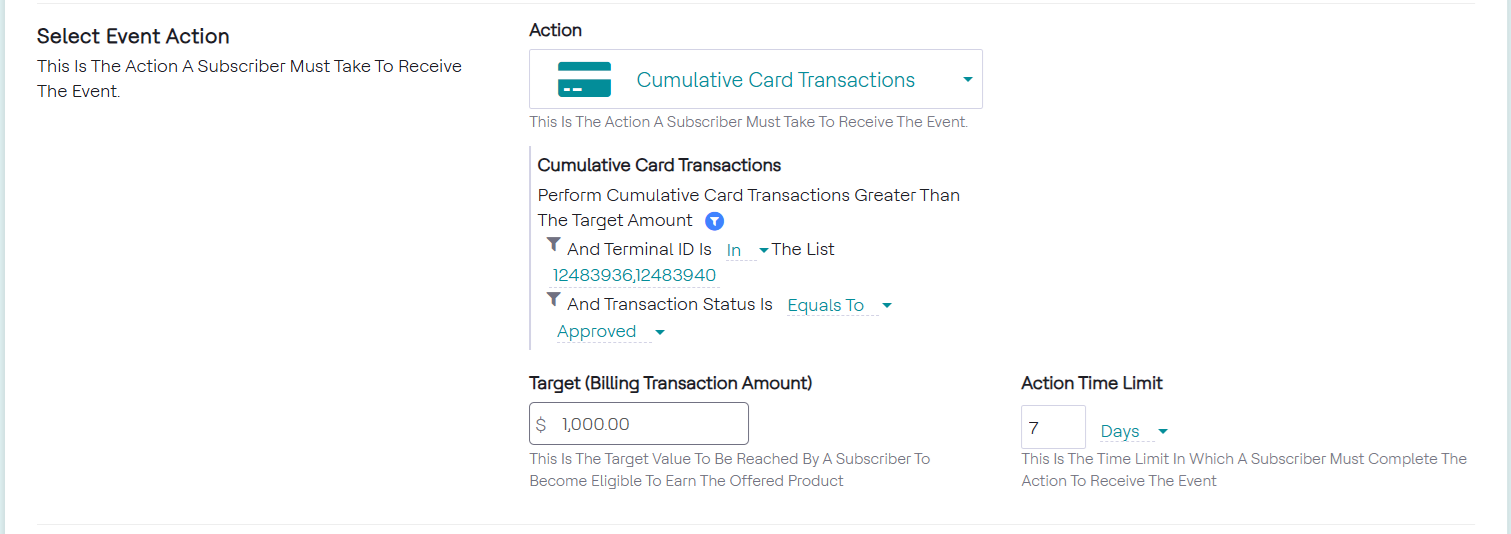
- Final filter selection shown in the image below. As a result of this setup,
the downstream systems will receive a message once the amount and time
period conditions are met. The message received is defined in Fulfillment
Message, mentioned below after reminders.
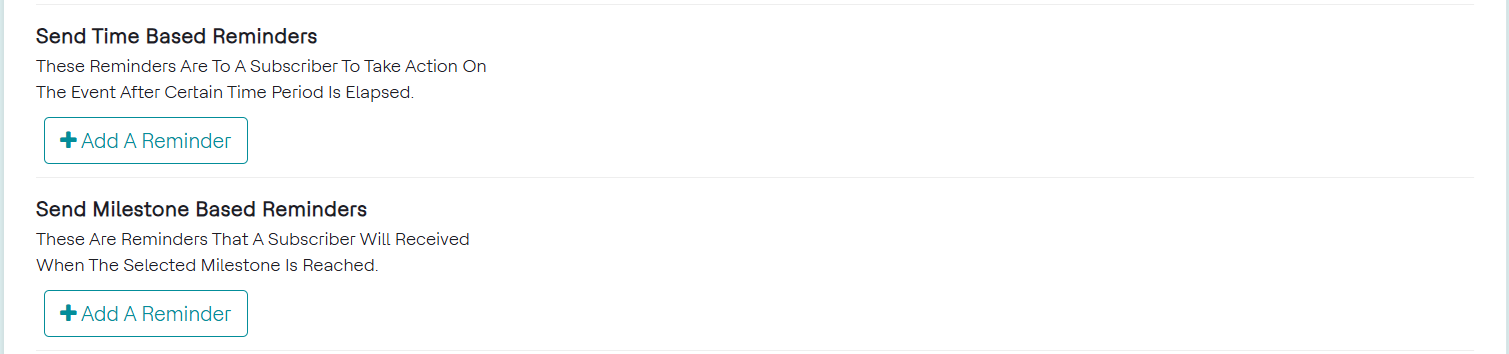
- Set Time-Based Reminders and/or Milestone Reminders. Time-Based Reminders
send a message to the customer based on the amount of time that has passed,
which can be specified. Milestone-based Reminders send a message to the
customer based on the purchase amount the customer has reached, which can be
specified. These can be seen in the image below. For Cumulative
Transactions, both reminders are possible and so are available for
selection.
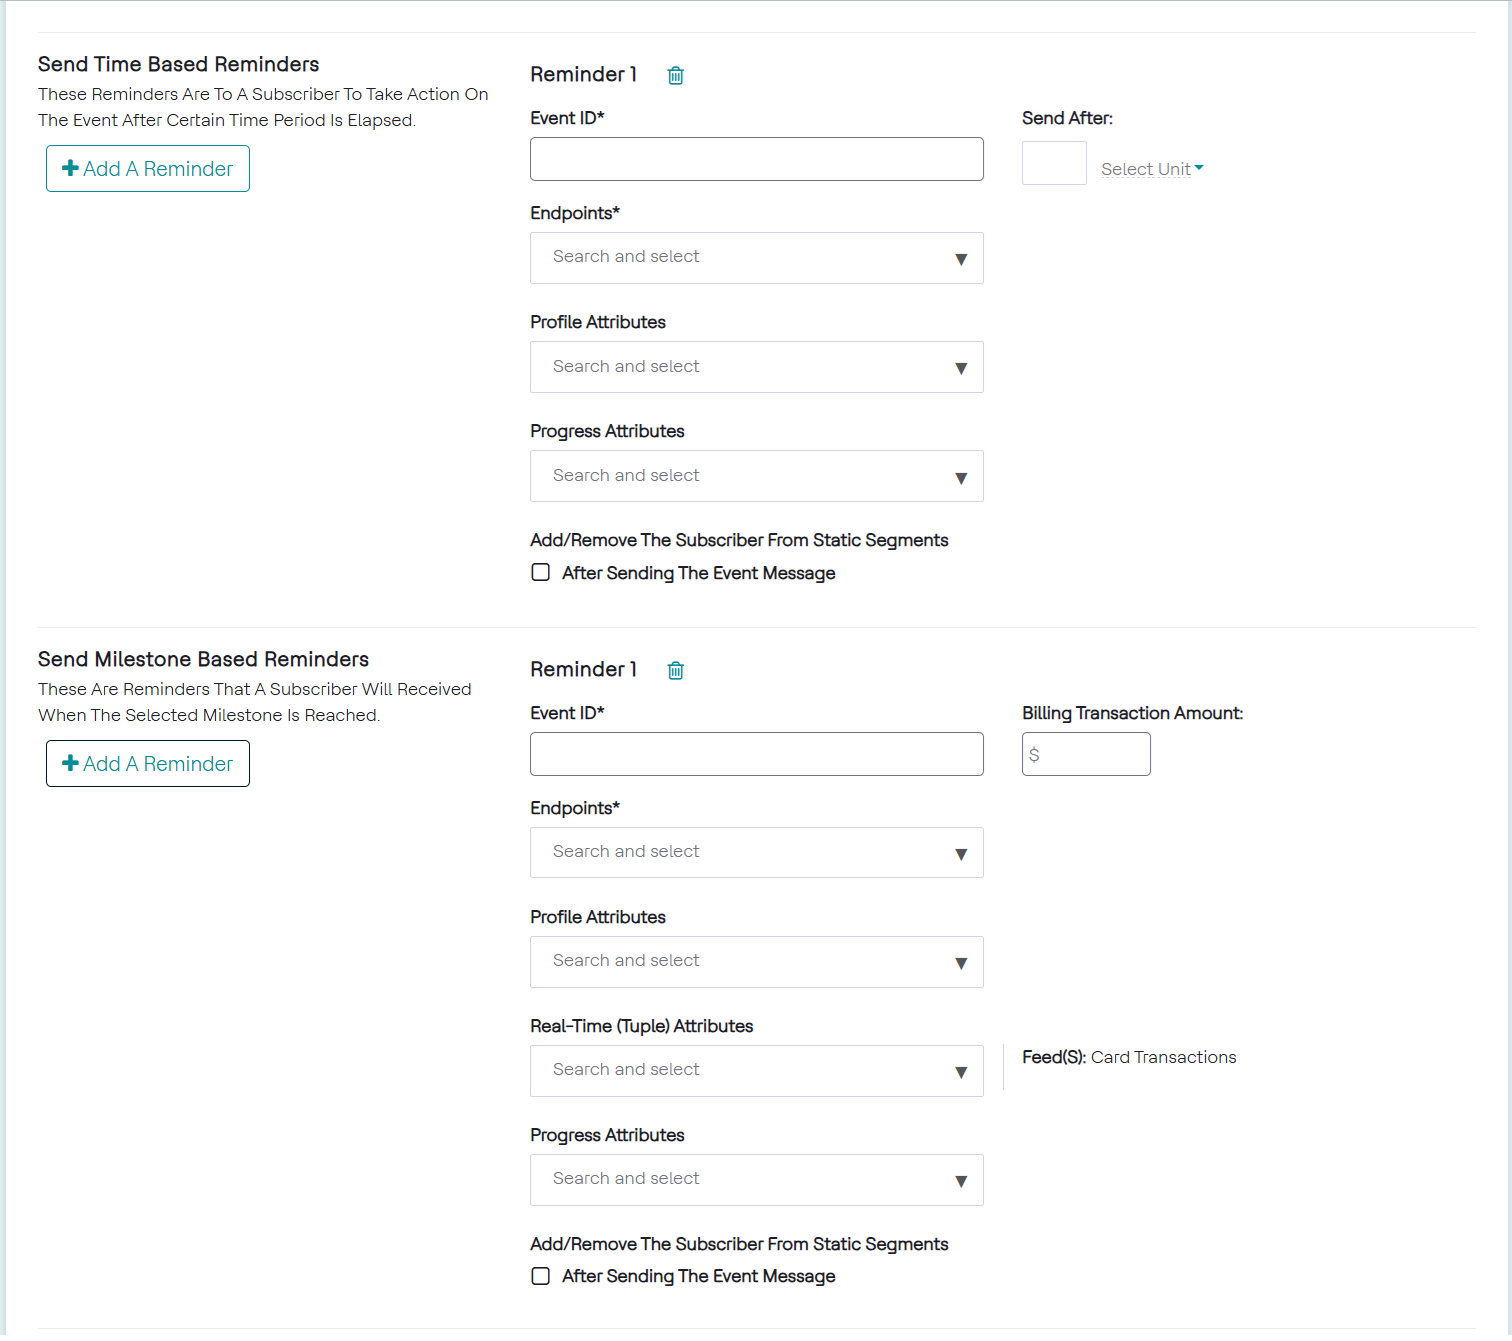
- Clicking Add a Reminder to both options, the same options as a message-only
event appear with a time and amount threshold for time and milestone based
reminders respectively. The image below shows these fields. Once those
thresholds are reached, another event is triggered by the system and
forwarded to the selected downstream systems. Multiple time and milestone
based reminders can be set as required.
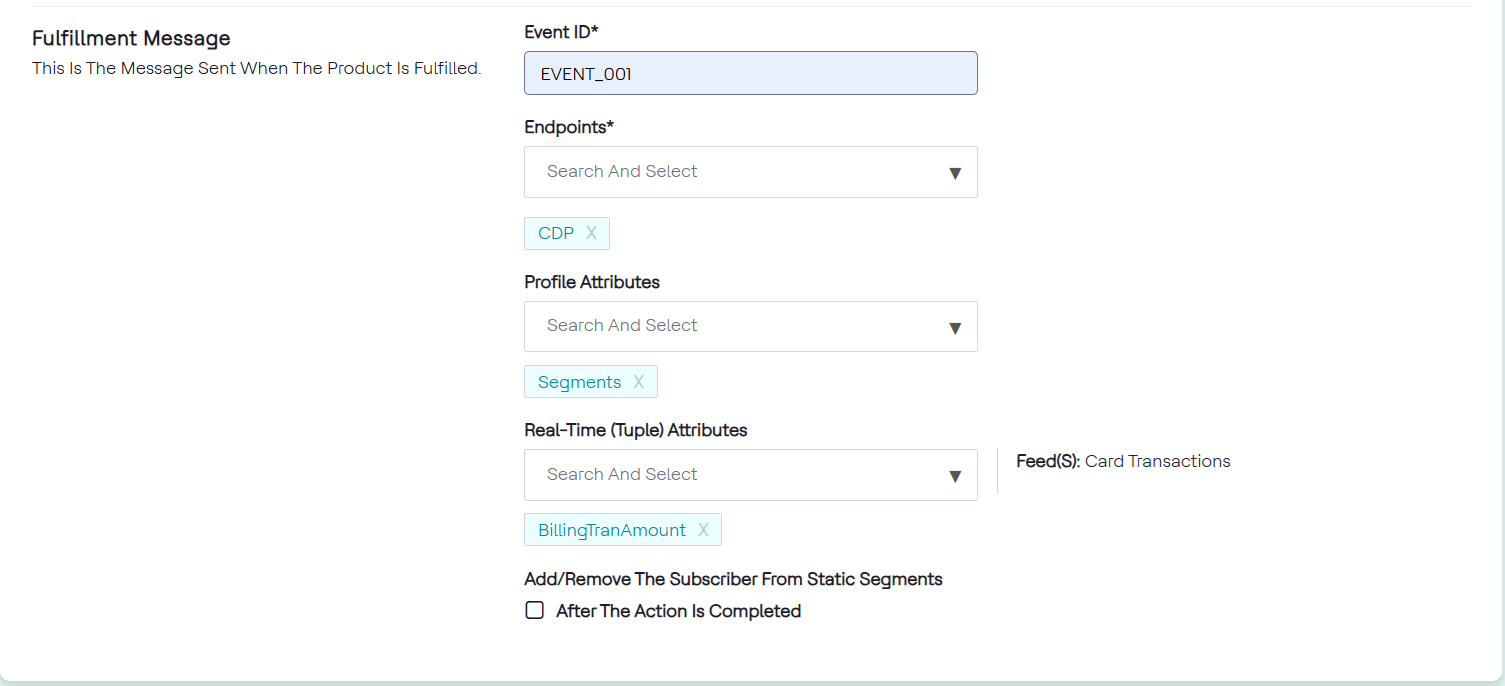
- Fill in the Fulfillment Event information. The Fulfillment Message defines
what will be sent to the downstream system once the Event Action criteria is
fulfilled. Selections here can be same or different than the initial event
message and following reminders as shown in the image below.
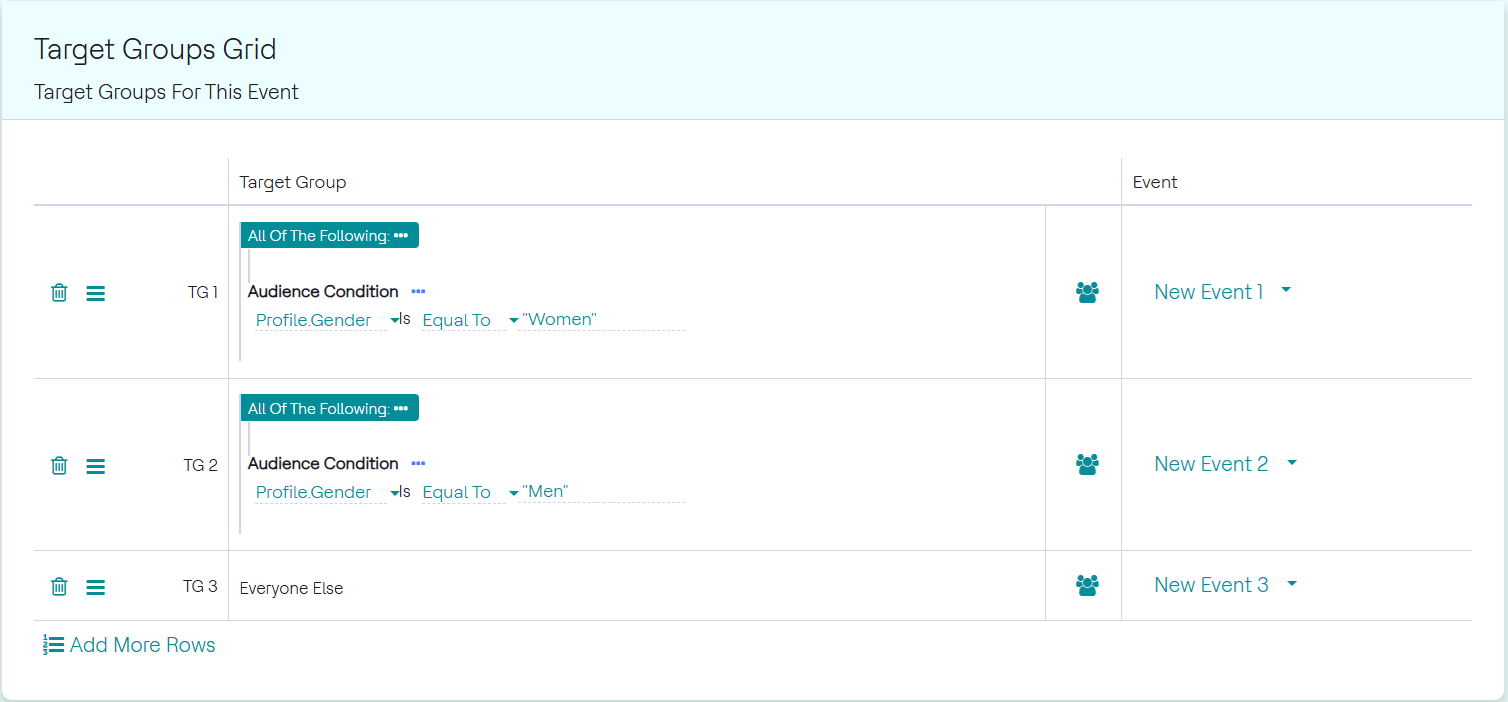
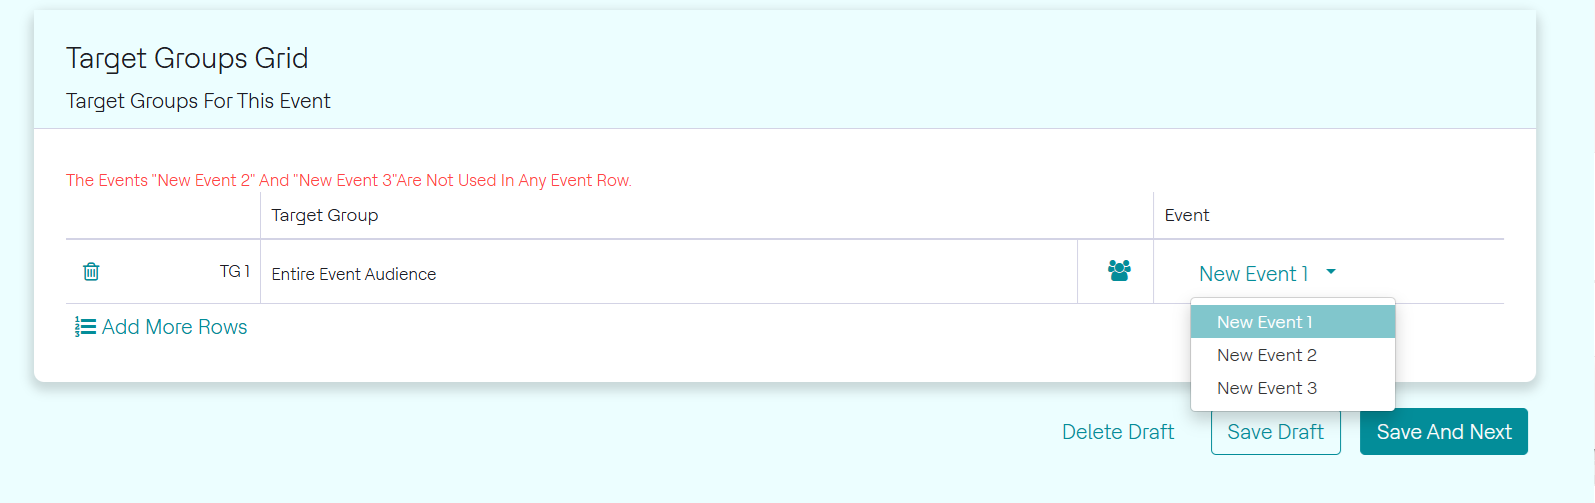
Target Groups
Target groups can be used to assign events to different groups among the customers who have qualified for the event.\
To add target groups, follow the steps below:
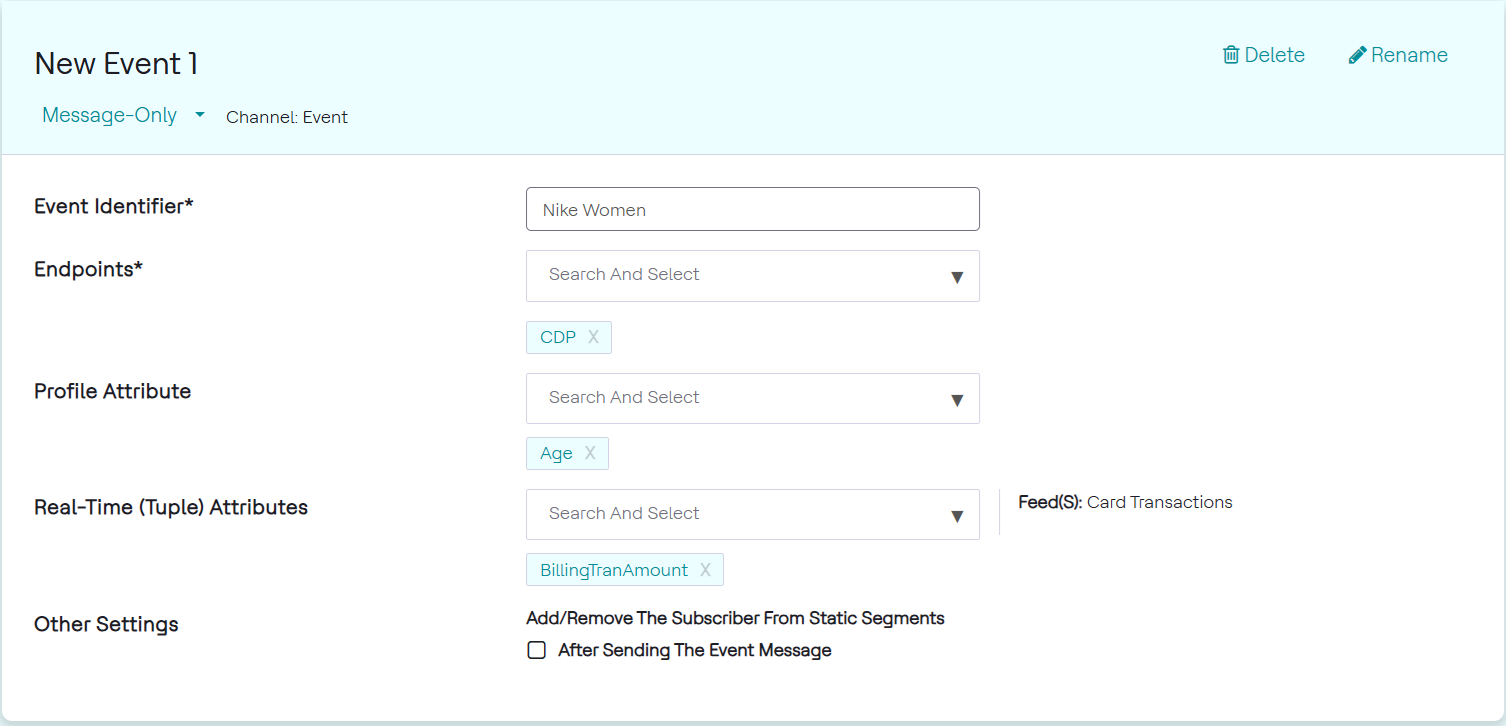
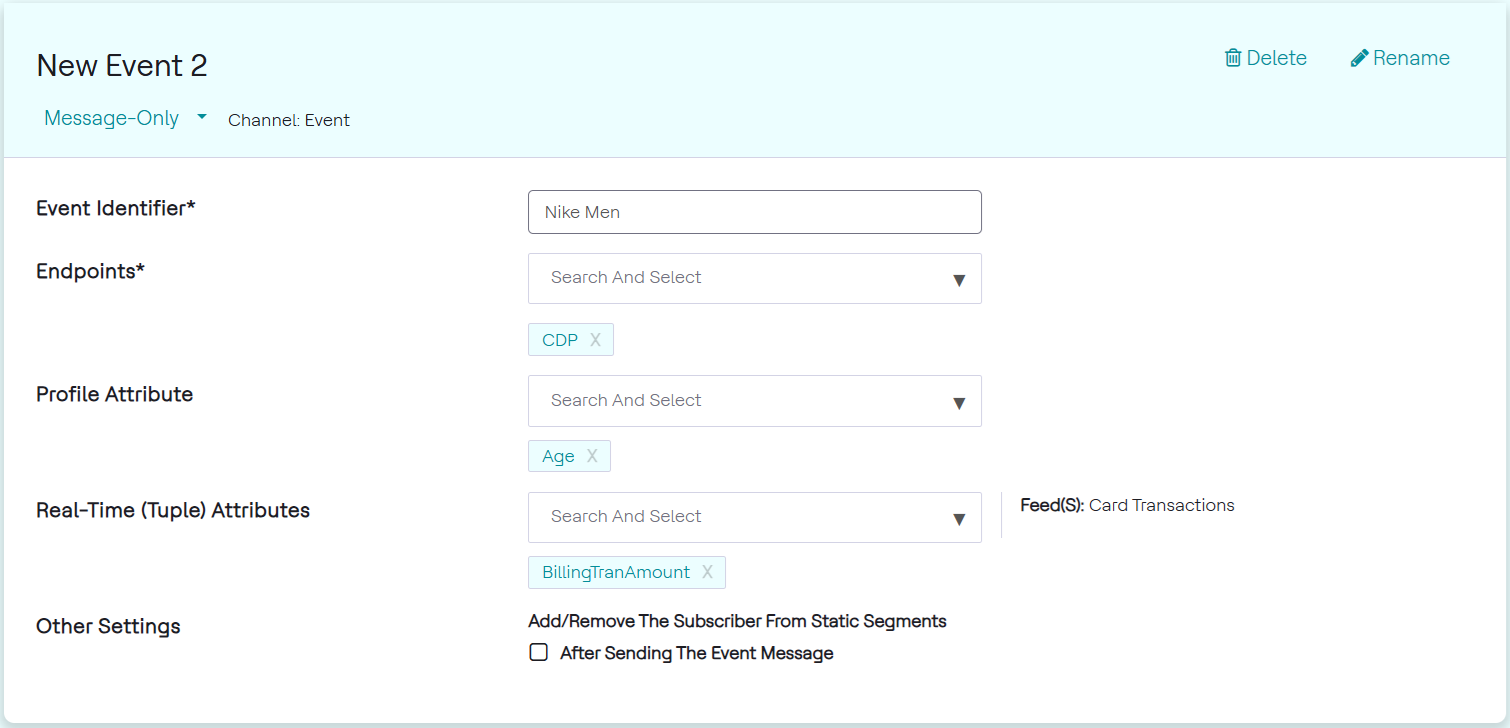
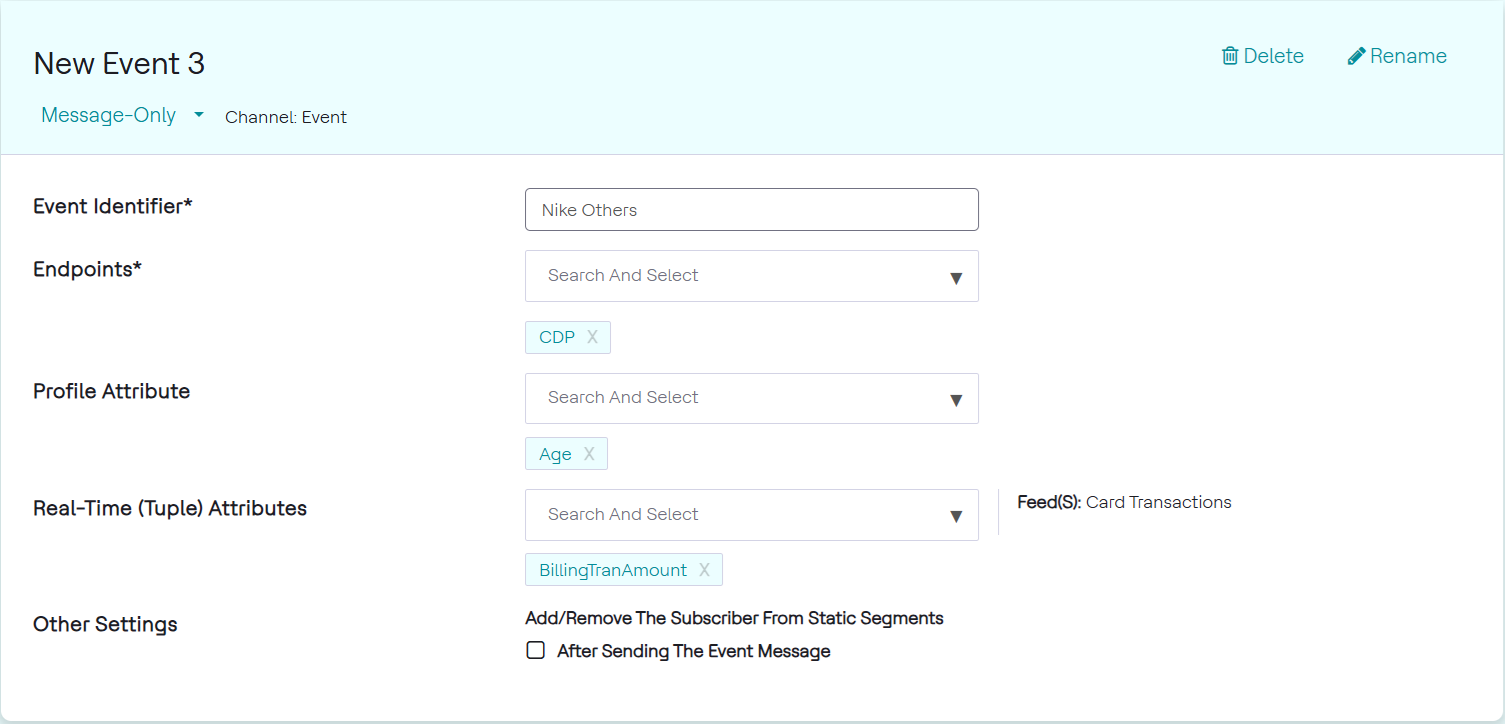
- Click Add New Event to create multiple events. The events can be set-up as shown
in the 3 images below.
New Event 1
New Event 2
New Event 3
- Choose conditions for each target group, making sure a customer cannot be part of multiple groups.
- Assign an event to each target group as seen in the image below. Click the icon
near the event drop-down, to choose the conditions for each target
group.
- In the Select Audience Criteria pop up, select audience conditions. Select the
desired conditions for the target group. For this example, we will select the
condition Customer's Gender.
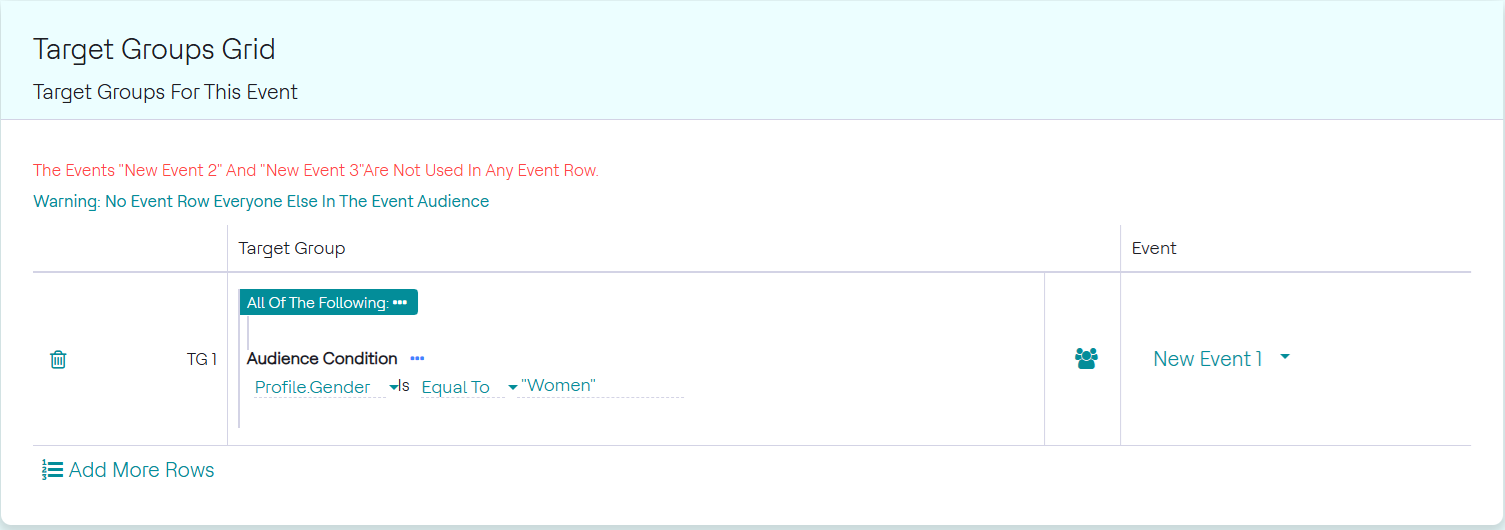
- Set an Everyone Else target group. The final set of target groups can be seen in
the image below. It is important to note that an Everyone else target group must
be set. Target groups must also never intersect, that is, a customer should not
be part of 2 target groups. If this happens, only the event of the first target
group will be received.