Creating multiple Contract tests
You can create multiple Contract tests from a Message Exchange Pattern (MEP) in HCL OneTest™ API from the Test Factory view. The MEP defines the pattern, schema, and binding for messages that are exchanged by the operation. You can create a Contract test that adheres to the rules defined in the contract.
Before you begin
- Created a project. See Creating a project.
- Created a logical resource and bound it to its corresponding type of physical resource.
- Created a service component under the logical resource. See Creating a service component.
- Created an operation under the service component. See Creating an operation.
- Added a schema that is used to validate the incoming messages. See Adding a schema.
- Configured the MEP for the operation. See Configuring the MEP settings to create consumer-driven Contract tests.
- Opened the project in the Test Factory view.
About this task
You can create multiple tests in an operation that use the message exchange pattern (MEP) either at the time of synchronizing resources or after you have created and bound the physical resource with the logical one in an operation.
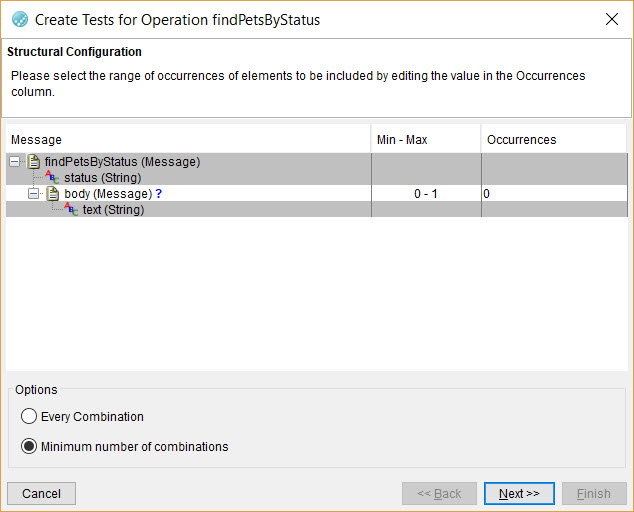
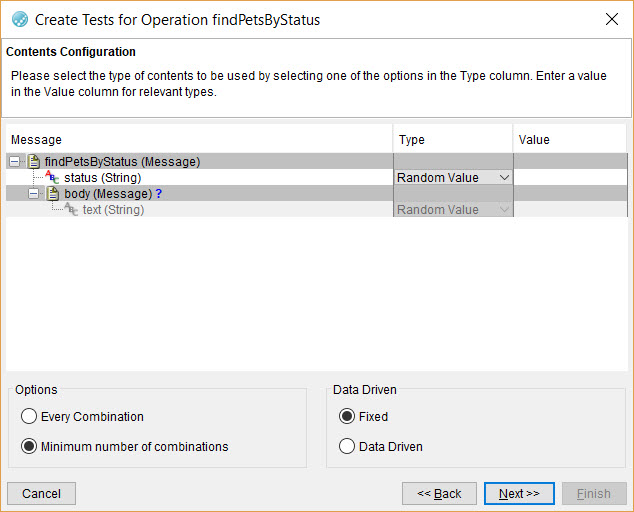
When you create Contract tests you can opt to alter the occurrences of some of the message elements in the Structural Configuration dialog or opt to change the value of the element type in the Contents Configuration dialog.
You can create different Contract tests for each of the content configuration or the variable test data that you set by selecting the Fixed option.
- A single data-driven Contract test with multiple content iterations is created along with the test data in an Excel worksheet that specifies the values for the iterations which is used at test run time.
- Multiple data-driven Contract tests with different test structures and content iterations along with the test data in different files that are used by each of the tests during test run time.
- The data-driven Contract tests are created under the Tests folder in the selected operation.
- A dataset that contains the test data for all the test iterations for each of the data-driven Contract test is created under the Test Data folder in the selected operation.
- Both the Contract test and the test data are created with the same name and subsequent data-driven tests that are generated in the same operation are suffixed with a number that increases for each successive generation.
- The physical files of the Contract test and the test data reside in the operation folder of the service component folder of the logical folder in your project directory.
For example, the location can be as: D:\Projects\MyProject\Logical\PetstoreSwagger.swag\v2.scm\pet.scm\findByStatus.scm\findPetsByStatus.opr, where pet.scm is the name of the service component and findPetsByStatus.opr is the name of the operation.
- When you delete the generated Contract test or the generated dataset in the UI, the corresponding physical file is not deleted from their physical location.
Procedure
- Select the operation or folder in which you want to create the tests.
-
Right-click the operation or folder, and then select from the menu.
Note: If you created a test already, you can right-click the Tests folder or one of the existing tests, and then select .
The Structural Configuration dialog is displayed.
 Note: The Binding Configuration dialog is displayed, if the operation that contains the tests has a WSDL as its parent. You must select the binding properties for the message patterns.
 -
Perform the following actions in the Structural Configuration dialog:
-
Perform the following actions in the Contents Configuration dialog:
-
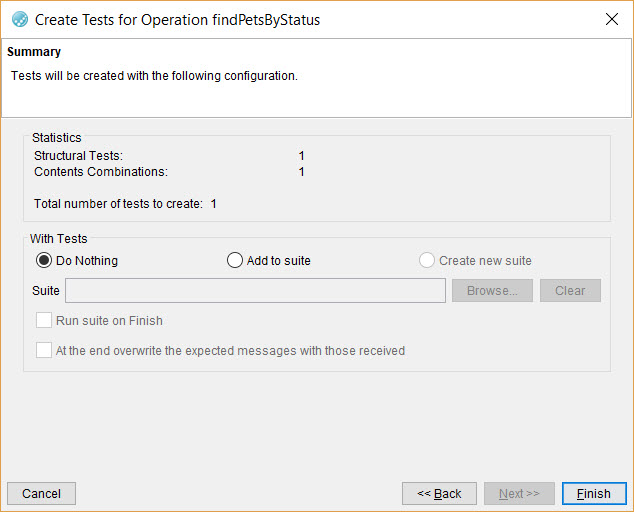
Select your action based on the options available in the With Tests panel as described in the following table:
Option Description Do Nothing Creates the Contract tests as displayed in the Statistics panel. Note: This is the default option.Add to suite Adds the generated Contract tests to an existing test suite that you select by clicking Browse, and then selecting the existing test suite. Create new suite Adds the generated Contract tests to a new test suite, which you must name in the Suite field. Note: This option is enabled only if there are more than one Contract tests to be generated. If a single Contract test is to be generated, you can only add it to an existing test suite and cannot create a new test suite.Run suite on Finish Runs the new or existing test suite when the MEP wizard closes. Note: This option is enabled if you select either the Add to suite or Create new suite option.At the end overwrite the expected messages... Overwrites the expected messages with the messages that are received when the Contract tests are run. Restriction: This option is disabled when you generate Contract tests. - Click Finish to create the Contract tests and return to the Test Factory main view.
Results
What to do next
- Edit the test actions or other contents of the test, if required. See Changing the contents of a test.
- Run the Contract test in any of the following methods:
- Right-click the Contract test, and then click the Run icon
 .
. - Select the Contract test, and then click the Run icon
 in the toolbar.
- Right-click the Contract test, and then click the Run icon
- View in the console log, after the test runs that the incoming messages are validated against the contract.

