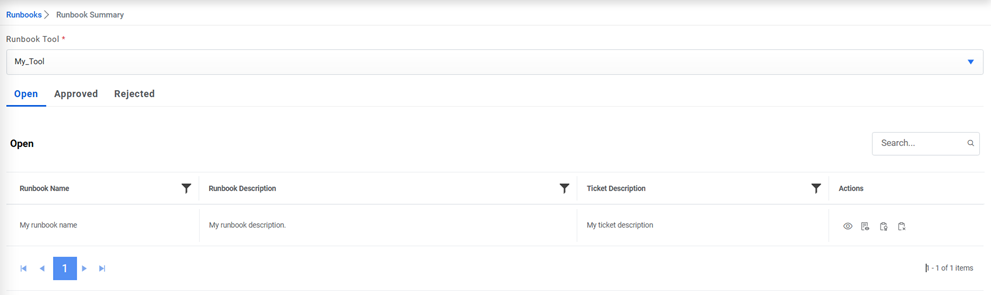
Runbook Summary
Approve or Reject Runbook
A runbook generated from GenAI studio on the chat option corresponding to a ticket can be either approved/rejected before getting enrolled in product/getting discarded completely. The user with role ‘Runbook Approver’ can either approve or reject the runbook.
In Open tab, all the runbooks generated from GenAI which are pending for approval/rejection are available.
In the Approved tab, all the runbooks approved by the approver are available.
In Rejected tab, all the runbooks rejected by the approver are available.
Approve Runbook
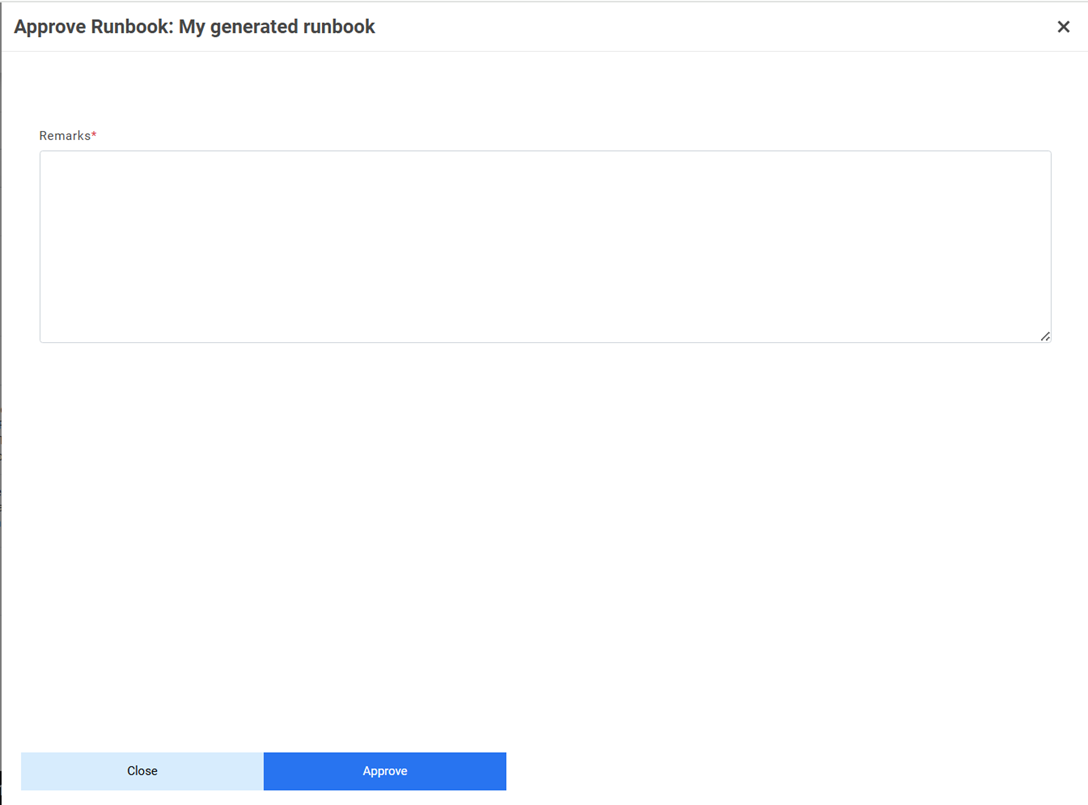
To approve a runbook, click on icon  and once a runbook is approved successfully then the
runbook automatically gets mapped with the organization and available modules and
the model gets built successfully for the same. Before approving, the user can also
schedule the runbook to verify if everything works fine and then approve it.
and once a runbook is approved successfully then the
runbook automatically gets mapped with the organization and available modules and
the model gets built successfully for the same. Before approving, the user can also
schedule the runbook to verify if everything works fine and then approve it.

Reject Runbook
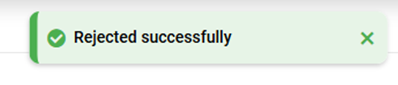
To reject a runbook, click on the icon ![]() and provide the remarks. Once the runbook is
rejected successfully, then it gets removed from the grid and is no longer available
for use.
and provide the remarks. Once the runbook is
rejected successfully, then it gets removed from the grid and is no longer available
for use.

Test Runbook
An option to test the runbook generated from GenAI studio is available to verify if the runbook is relevant for the system or not, before its approval/rejection. With this option, when user proceeds to test the runbook a schedule ticket is created for adhoc execution and based on its execution status, user can proceed for approve/reject the same.
 .
.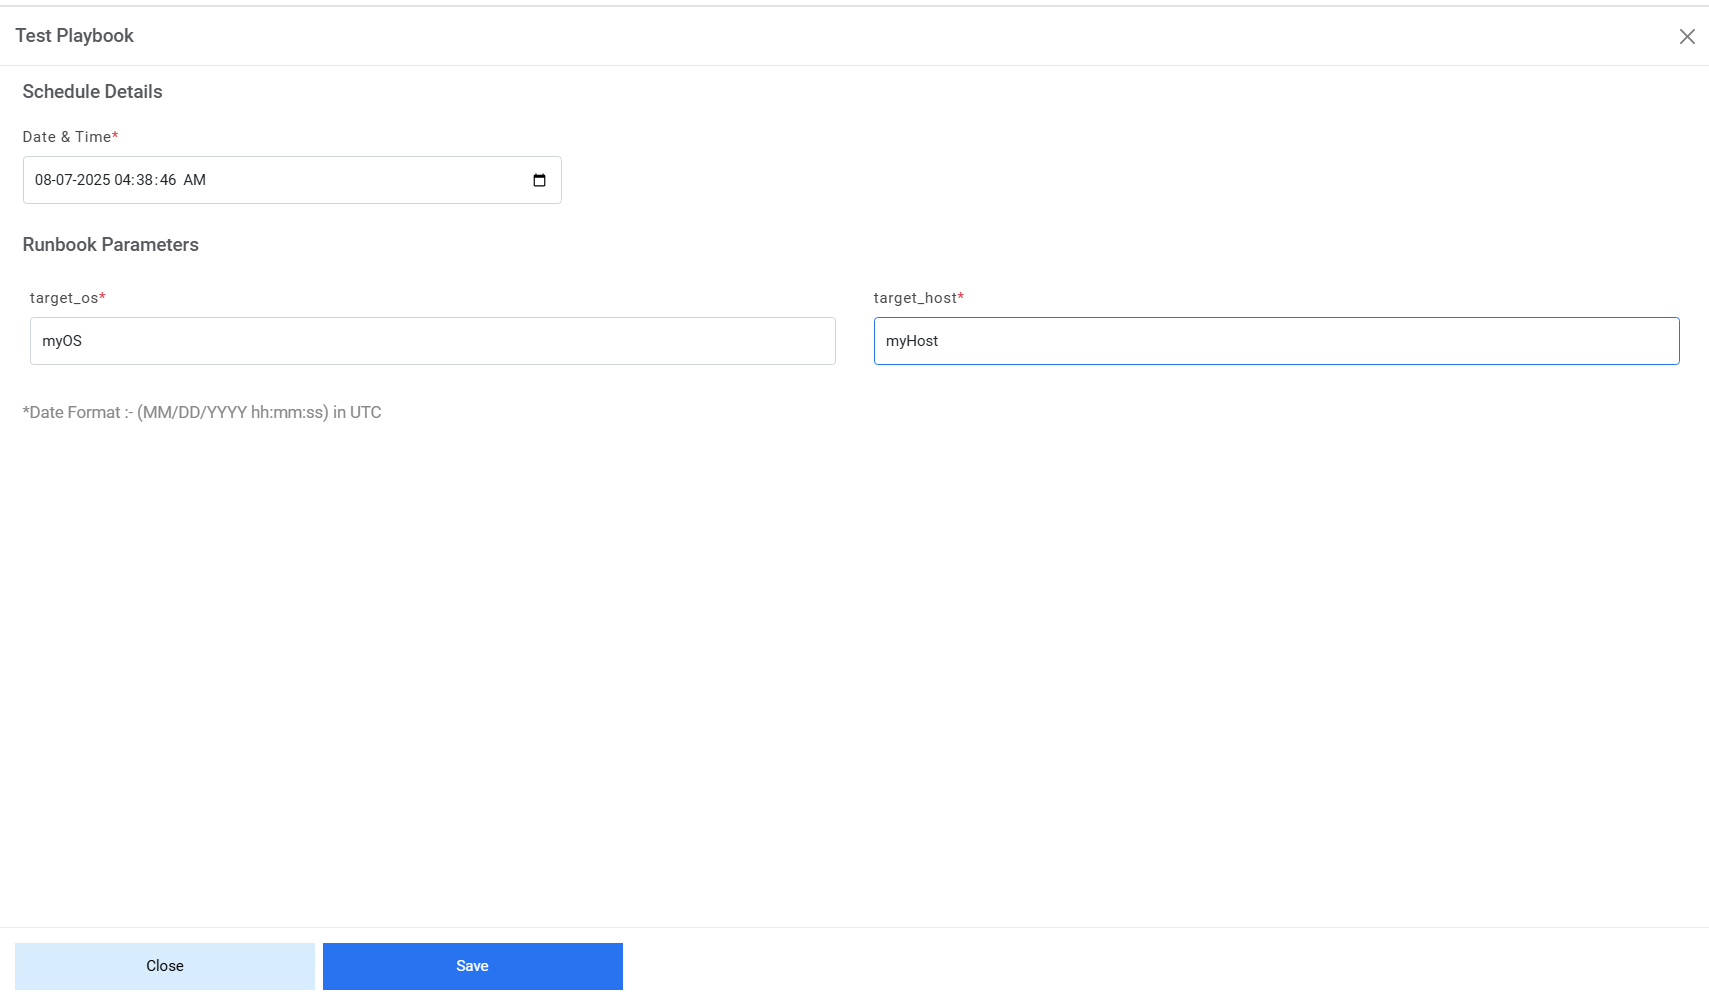
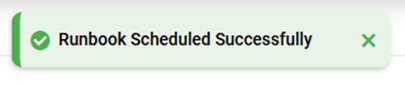
Select the date & time when the user wants to schedule the execution. Enter the values of the parameters and click Save. Below alert appears.
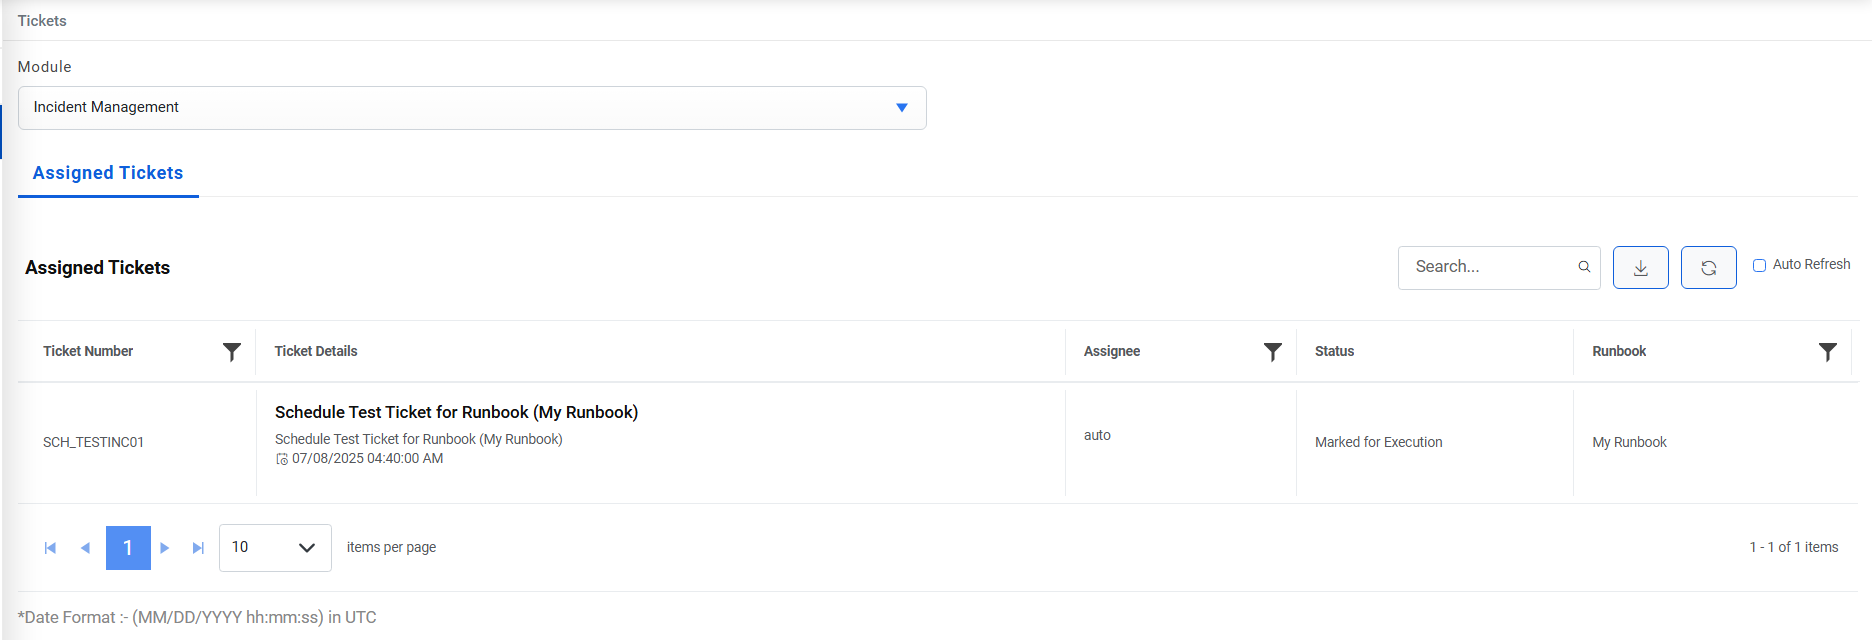
Go to the Tickets menu and see that a ticket is created with prefix ‘SCH_TEST’. Based on the execution of this test ticket, the user can proceed for approval/rejection of the runbook.
Update Playbook Code
To update a Playbook, click on the ![]() icon. A popup window will appear, allowing
the user to modify the playbook code, add execution environments, configure custom
credentials, and provide remarks.
icon. A popup window will appear, allowing
the user to modify the playbook code, add execution environments, configure custom
credentials, and provide remarks.
Upon clicking the 'Update Playbook' button, the playbook code will be updated on the Ansible server or the Git/Ado repository.
The provided remarks will be saved for the update, and the execution environment and custom credentials will be updated for the template in Ansible Tower only. For Ansible CLI, users do not have the option to select execution environments or custom credentials.
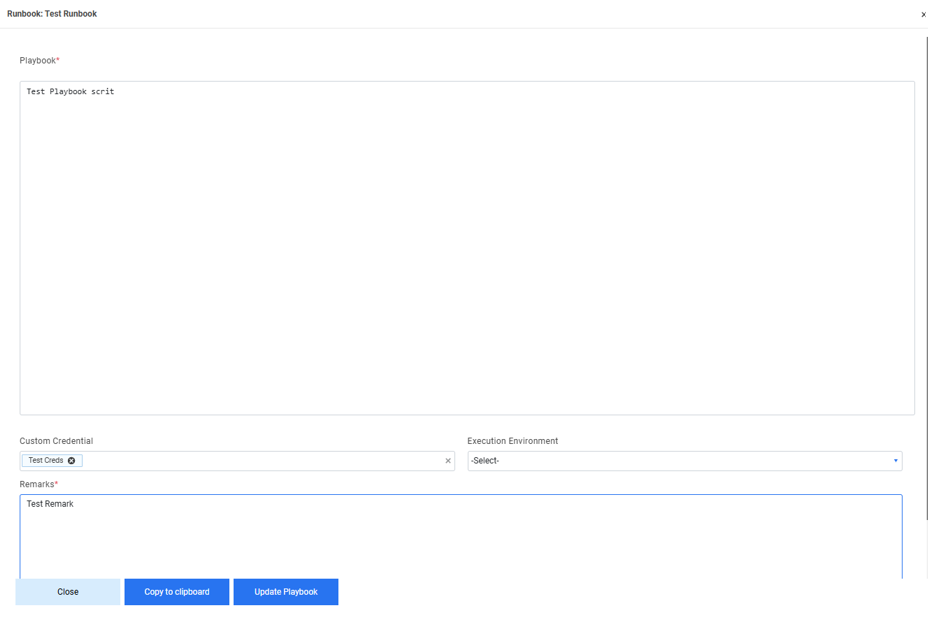

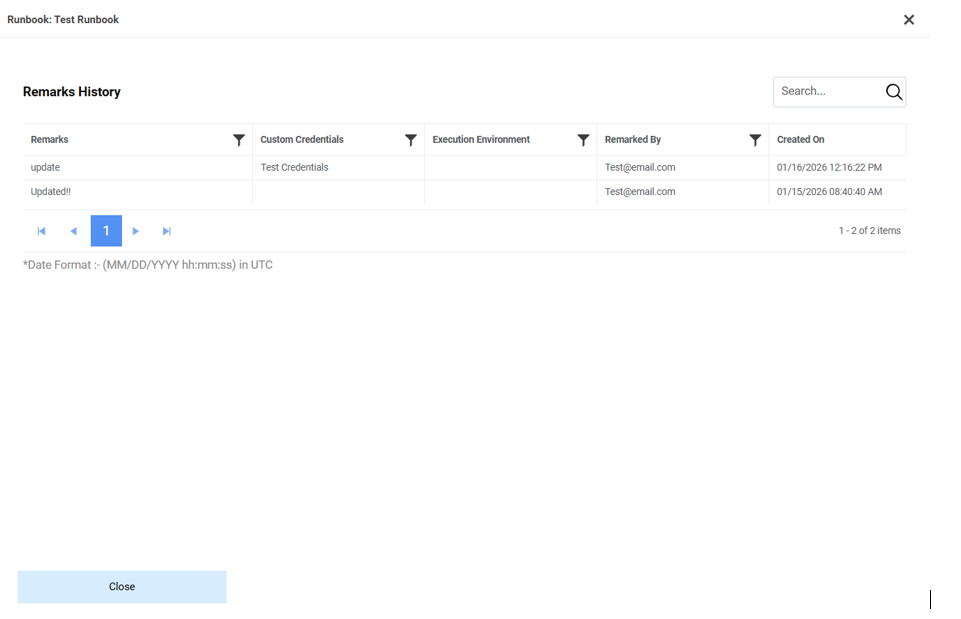
For view the playbook remarks click on the ![]() button.
button.