View Blueprint
The View Blueprint tab lists all the existing blueprints and displays various options associated with each blueprint. The user can search for specific blueprints by using the filter option.
.png)
Refer the below table to understand the columns in the above figure:
| Fields | Description |
|---|---|
| Blueprint ID | Displays the ID of the listed blueprint. This is used in process template for the execution of the Blueprint. |
| Blueprint Name | Displays the Name of the listed blueprint. |
| Blueprint Description | Displays the Description of the listed blueprint. |
| Platform | Displays the Platform of the listed blueprint. |
| Tags | Displays the tags associated with the listed blueprint. |
| Status | Displays the Active/Inactive status of the listed blueprint. |
| Action | Displays the actions that can be performed on the listed blueprints. |
The search can be filtered by selecting the Platform and by providing Tags associated with the blueprints. By default, the page displays data for all the platforms.
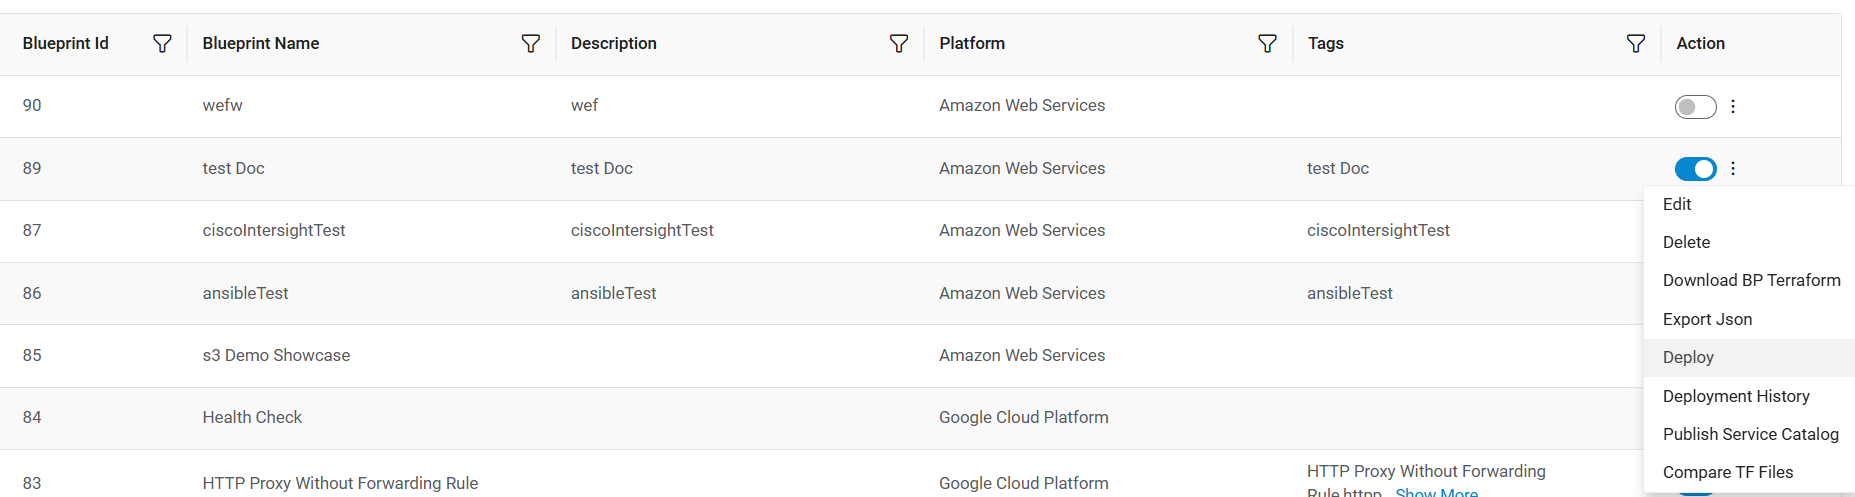
The Menu icon (:) under the Action column displays the actions that can be performed on each blueprint.
.png)
Below actions can be performed to manage an existing blueprint:
- Edit
- Change Status
- Download Blueprint Terraform
- Export JSON
- Deploy
- Deployment History
- Compare Blueprint Files
- Publish Service Catalog
- Compare TF Files
Edit
To edit a blueprint, follow the below steps:
- From the list of the existing blueprints under the View Blueprint tab, click on the gear icon corresponding to the blueprint to be edited and the click the Edit icon.
- It opens the Design Blueprint page in edit mode loaded with the selected
blueprint in the diagram pane along with all the attributes and variables.
Figure 3. Edit Blueprint 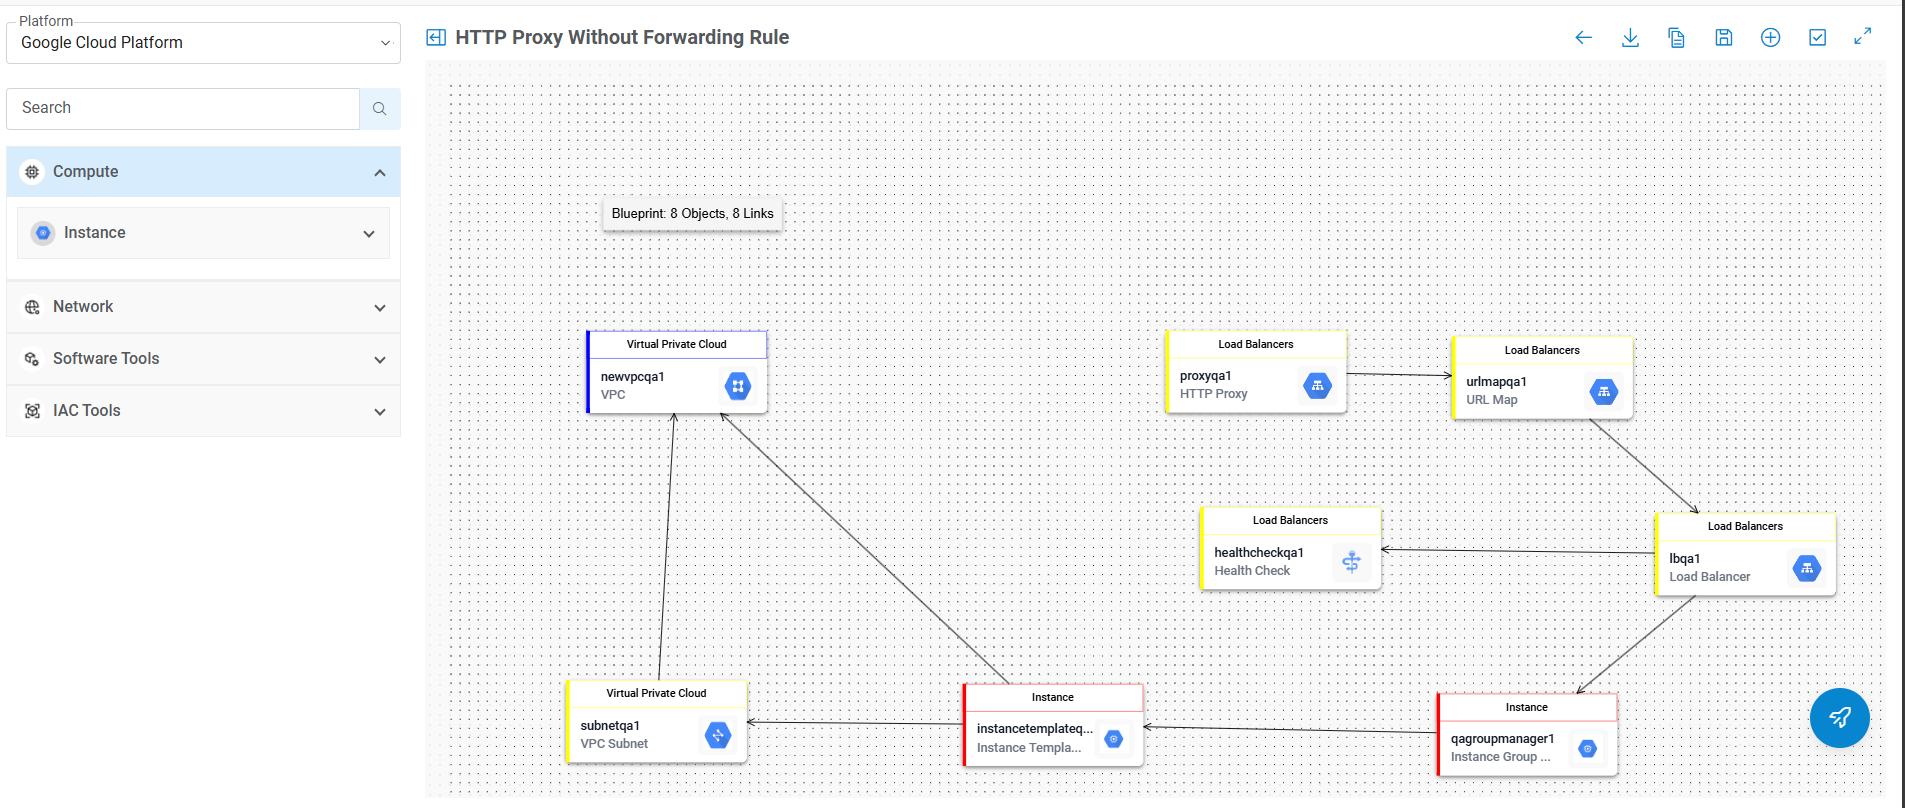
- Make the required changes and click on the Save (
 ) action button.
 - The Update Blueprint dialog box appears.
Figure 4. Update Blueprint 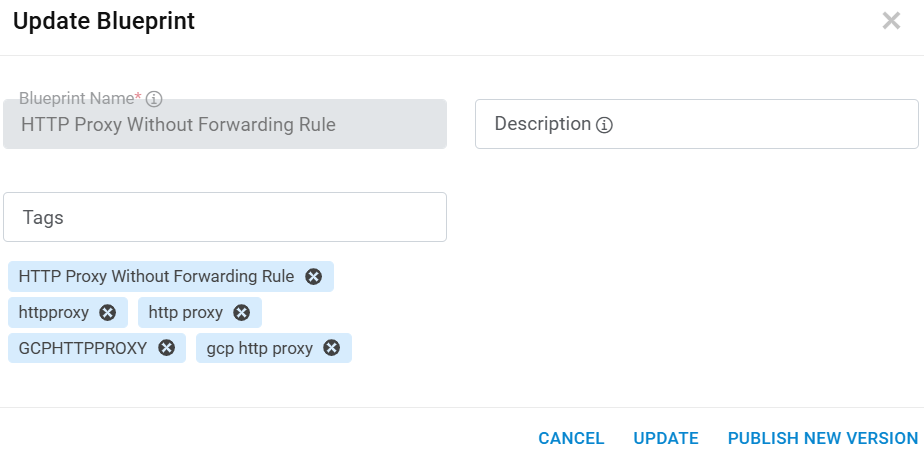
- On the Update Blueprint screen, users can add or remove tags while updating the blueprint. This can be used to search for the created blueprint with the help of tags attached to it under the View Blueprint tab.
-
Note:
Only Blueprint Description and Tags fields are editable here.
- This dialog has two options for updating the blueprint.
-
Update: Clicking on Update button updates the selected blueprint and displays the
following success message:
Figure 5. Success Message for Update 
-
Publish New Version: Selecting this option creates a new version of the blueprint
along with all the changes and saves it in the table with the new version number with
column ‘ispublished’ as ‘Y’. The old copy of the blueprint is marked ‘ispublished’ as ‘N’
in the table.
Figure 6. Success Message for a New Version Update 
Change Status
The option is to mark the listed blueprint status as Active/Inactive.
- Click on the gear icon corresponding to the
desired blueprint and then click Change Status
icon (
 ).
). - A confirmation dialog appears to confirm the action.
Figure 7. Change Status Confirmation 
- On clicking OK, the status of the blueprint is changed to Active or
Inactive and a success message appears as follows:
Figure 8. Success Message for Status Change 
- If the status is changed to “Active,” it is marked with a green color as shown in the following screen:
Figure 9. Status Changed to ‘Active’ 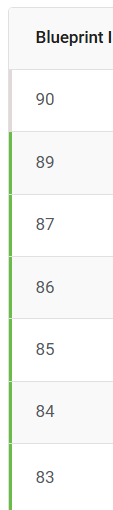
- Similarly, if the status is changed to “Inactive,” it is marked with a red color.
Figure 10. Status Changed to ‘Inactive’ 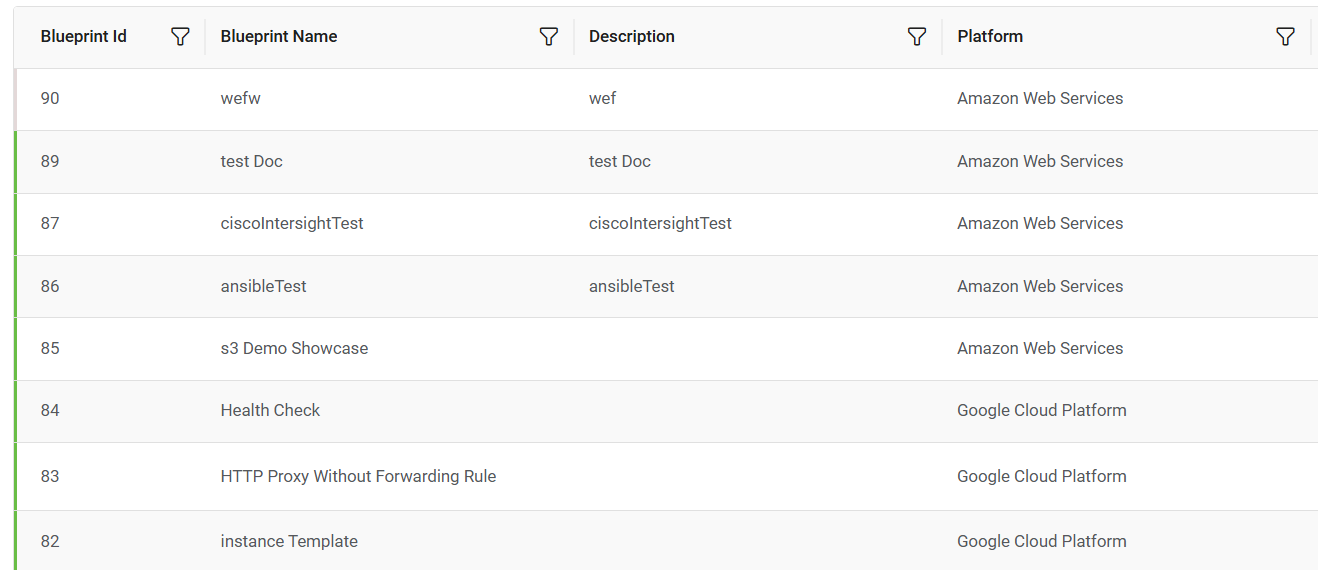
For an Inactive Blueprint, the Edit, Deploy and Deployment History options are not available under the Action tab.
Download Blueprint Terraform
This option is used to download the blueprint TF file.
- Click on the Download Blueprint Terraform icon
(
 ) corresponding to the desired
blueprint.
) corresponding to the desired
blueprint. - This downloads a zip file with the blueprint name.
- For further steps to download Blueprint Terraform, please refer to Download TF File.
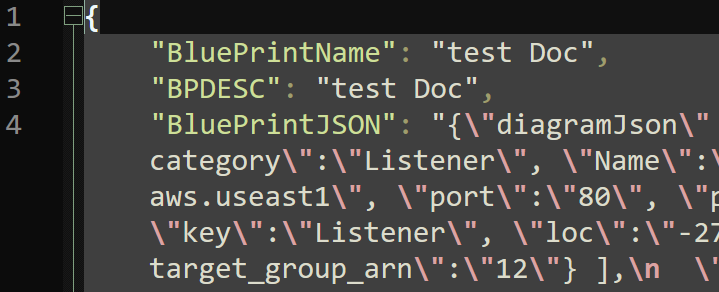
Export JSON
This option is used to export the blueprint JSON that can be imported later to any other environment.
- To export the blueprint JSON, click on the gear
icon corresponding to the blueprint and then click (
 ) icon.
 - A single JSON file with the blueprint name is downloaded. It has blueprint data in JSON format.
Deploy
Another way of deploying a blueprint is by clicking the Deploy icon under the Action column on the View Blueprint page.
For detailed information about the deployment process of blueprints, refer to Deployment from the View Blueprint Tab.
Deployment History
This option is used to view the deployment history of the listed blueprints. This option enables the user to view the Deployment History tab of the Manage Blueprint Page. The Deployment History tab cannot be directly accessed. It can be accessed through this action item of listed blueprints.
- Click on the Gear Icon -> Deployment History icon
 .
. - This takes the user to the Deployment History tab where he/she can view the
deployment history of the blueprint.
Figure 13. Deployment History 
- The Deployment History can be filtered by specifying the Start Date, End Date, and Status, then clicking the Filter button.
- Refer the below table to understand the columns in the above figure.
Table 2. Deployment History Table Columns Fields Description Request ID Displays the Request ID of the blueprint deployment. On deployment of the blueprint, a request ID is generated. Action Displays the actions that can be taken against the listed deployment request ID. E.g.: Rerun. - On expanding the listed request ID by clicking on the plus icon (
 ), a drill down table opens. This
table displays the deployment request data. All the tasks created for Blueprint Deployment
are listed under the given Request ID created for deployment. Tasks are grouped and listed
under the Request ID created for deployment.
), a drill down table opens. This
table displays the deployment request data. All the tasks created for Blueprint Deployment
are listed under the given Request ID created for deployment. Tasks are grouped and listed
under the Request ID created for deployment.Figure 14. Deployment History Drill Down 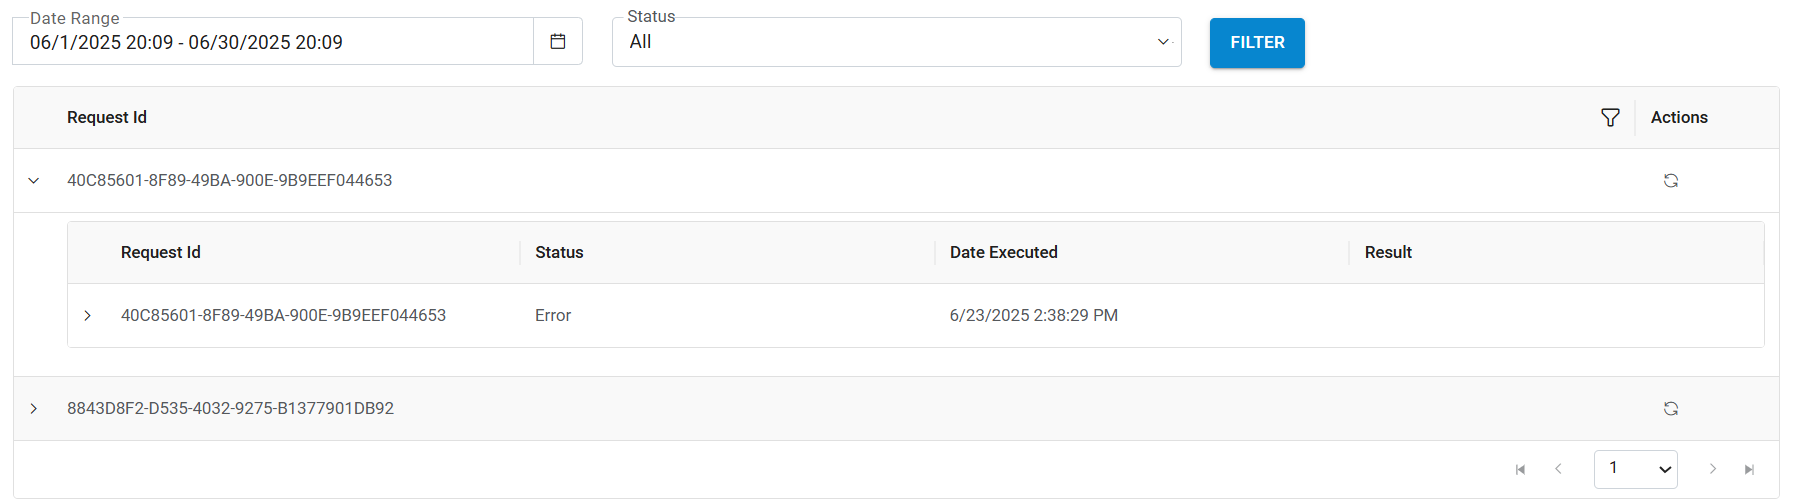
-
Refer the below table to understand the columns in the above figure:
Table 3. Deployment History Drill Down Table Field Fields Description Request ID Displays the Request ID of the blueprint deployment. On deployment of the blueprint, a request ID is generated. Status Displays the status (Completed/inprogress/Error) of the blueprint deployment request. Date Executed Displays the Execution Date of the blueprint deployment request. Result Displays the Result of the blueprint deployment request. Action Displays the actions that can be taken against the listed deployment request ID. E.g.: Rerun. - Further expanding the listed Request Id by clicking again on the icon (>)
opens the complete execution log of the blueprint deployment task.
Figure 15. Deployment Execution Log 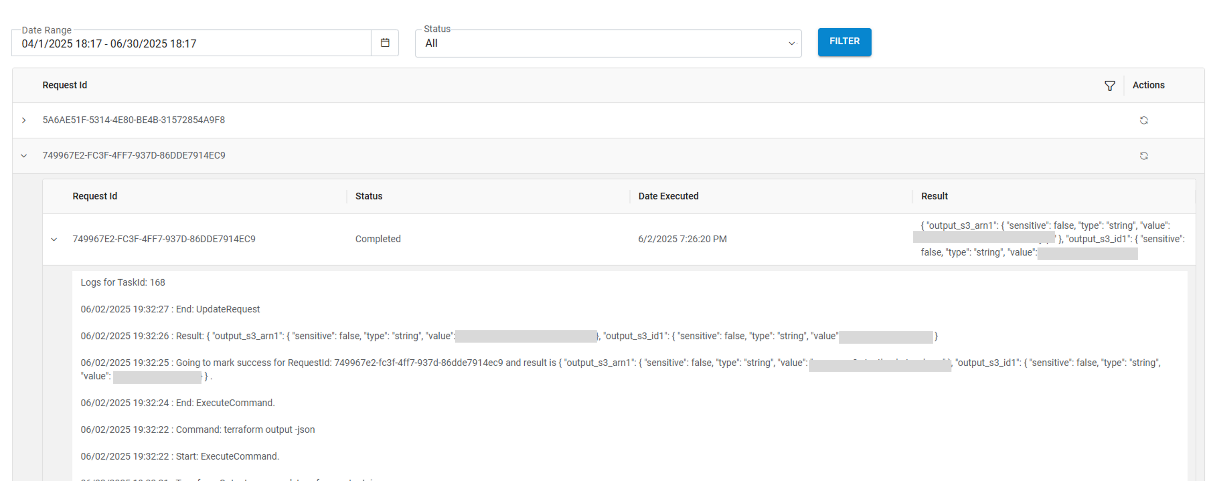
- One request can have multiple tasks that are listed in the drill down logs page as shown
below:
Figure 16. Multiple Tasks Listed under Deployment History Drill Down 
- The Re-Run functionality allows users to re-run a deployment request multiple
time. To re-run the deployment request, click on the Re-Run icon (
 ) located under the Action
column in the Deployment History table.
) located under the Action
column in the Deployment History table.
To learn more about the Re-Run Blueprint functionality, please refer to the section Re-Run Blueprint.
Delete Blueprint
The Delete icon under the Action column in the View Blueprint tab allows users to delete the listed blueprint.
- Click on the Delete corresponding to the blueprint to be deleted.
- A confirmation message appears as follows:
Figure 17. Confirmation Message 
- Click OK to confirm. A success message appears as follows:
Figure 18. Success Message 