Enabling REST services
Enable REST services on the Domino server that runs Traveler.
Before you begin
Note: If you use mail quotas, Notes® assumes a certain quota
enforcement method, that you can verify by opening the server document in the Domino® Administrator client, then choosing
the Transactional Logging tab and selecting Check
space used in file when adding a note for the Quota
enforcement field:

About this task
Procedure
- Use the Domino® Administrator client to open the server.
- Select the Configuration tab, then select .
- If there is an Internet Site document for your server,
open it.
- Click the Edit Web Site action.
- Select the Configuration tab.
- In the Domino Access Services section of the form, select the Enabled services drop-down menu.
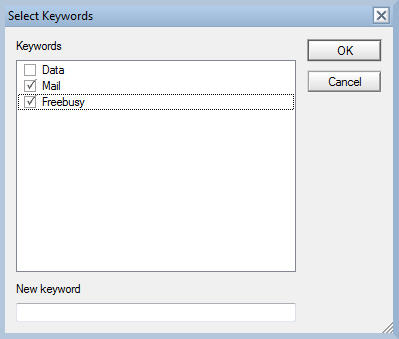
- In the Select Keywords dialog,
add Mail and Freebusy using
the New keyword field, and make sure they are selected.


- Internet Site documents for REST URLs use forms authentication.
To ensure proper access for users, add a session authentication override
rule for the URL
*/api/*.
- If you do not have an Internet Site document for your server,
then in the Domino® Directory
navigator, select the Configuration tab, then
select .
- Open the server document for your server.
- Click the Edit Server action.
- Select the Internet Protocols tab, then select Domino Web Engine.
- In the Domino Access Services section of the form, select the Enabled services drop-down menu.
- In the Select Keywords dialog, add Mail and Freebusy using the New keyword field, and make sure they are selected.
- Save your changes, and restart the server's HTTP task.
What to do next
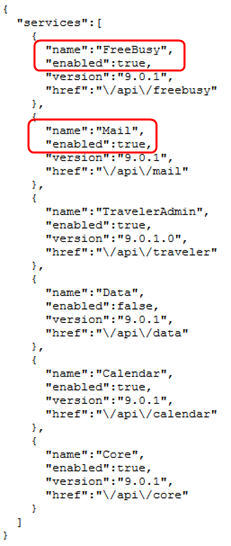
http://[yourhostserver]/api.
This should return a list of services in JSON format; verify that
the Mail and Freebusy services are in the list, and that the enabled
property for each is true.
