Kafka
This page provides detailed instructions for configuring Kafka as a data source in HCL CDP. Kafka allows you to send large volumes of real-time data to HCL CDP with security and reliability.
Kafka serves as a source in HCL CDP, enabling data transfer from your Kafka producers to HCL CDP. It is ideal for handling high volumes of streaming data in real-time.
Configure Kafka as Source
To configure Kafka as source, follow the steps below:
- On the left pane, navigate to Data Pipeline > Sources .
- Click +Create New Source.
- From the source type, select Kafka, and click Proceed.
- In the Source Name, add a unique name to the source, and click Create.
- Set up source details in the following parameters:
- Host Name
- Port
- Topic Name
- Authentication Details
You can configure these details in your Kafka setup to produce messages to our Kafka.Tip:A maximum of three Kafka sources can be added per account. - Click Test to test your configuration. If we're able to connect and produce event to the given Kafka config, a success event will be shown otherwise error message will be shown.
- On successful testing, click Update to update the Kafka configuration.
Test the integration
To test the integration, configure the Kafka details shown and click TEST. Produce a Kafka event to the consumer and if we receive the event successfully, a success message will be shown indicating successful source configuration.
Payload: The correct format for the payload to send events will be displayed here. You can copy the payload and use it while sending Kafka events.

Setup Kafka as Source in HCL CDP
- After creating the source, navigate to the CONFIGURATION tab.
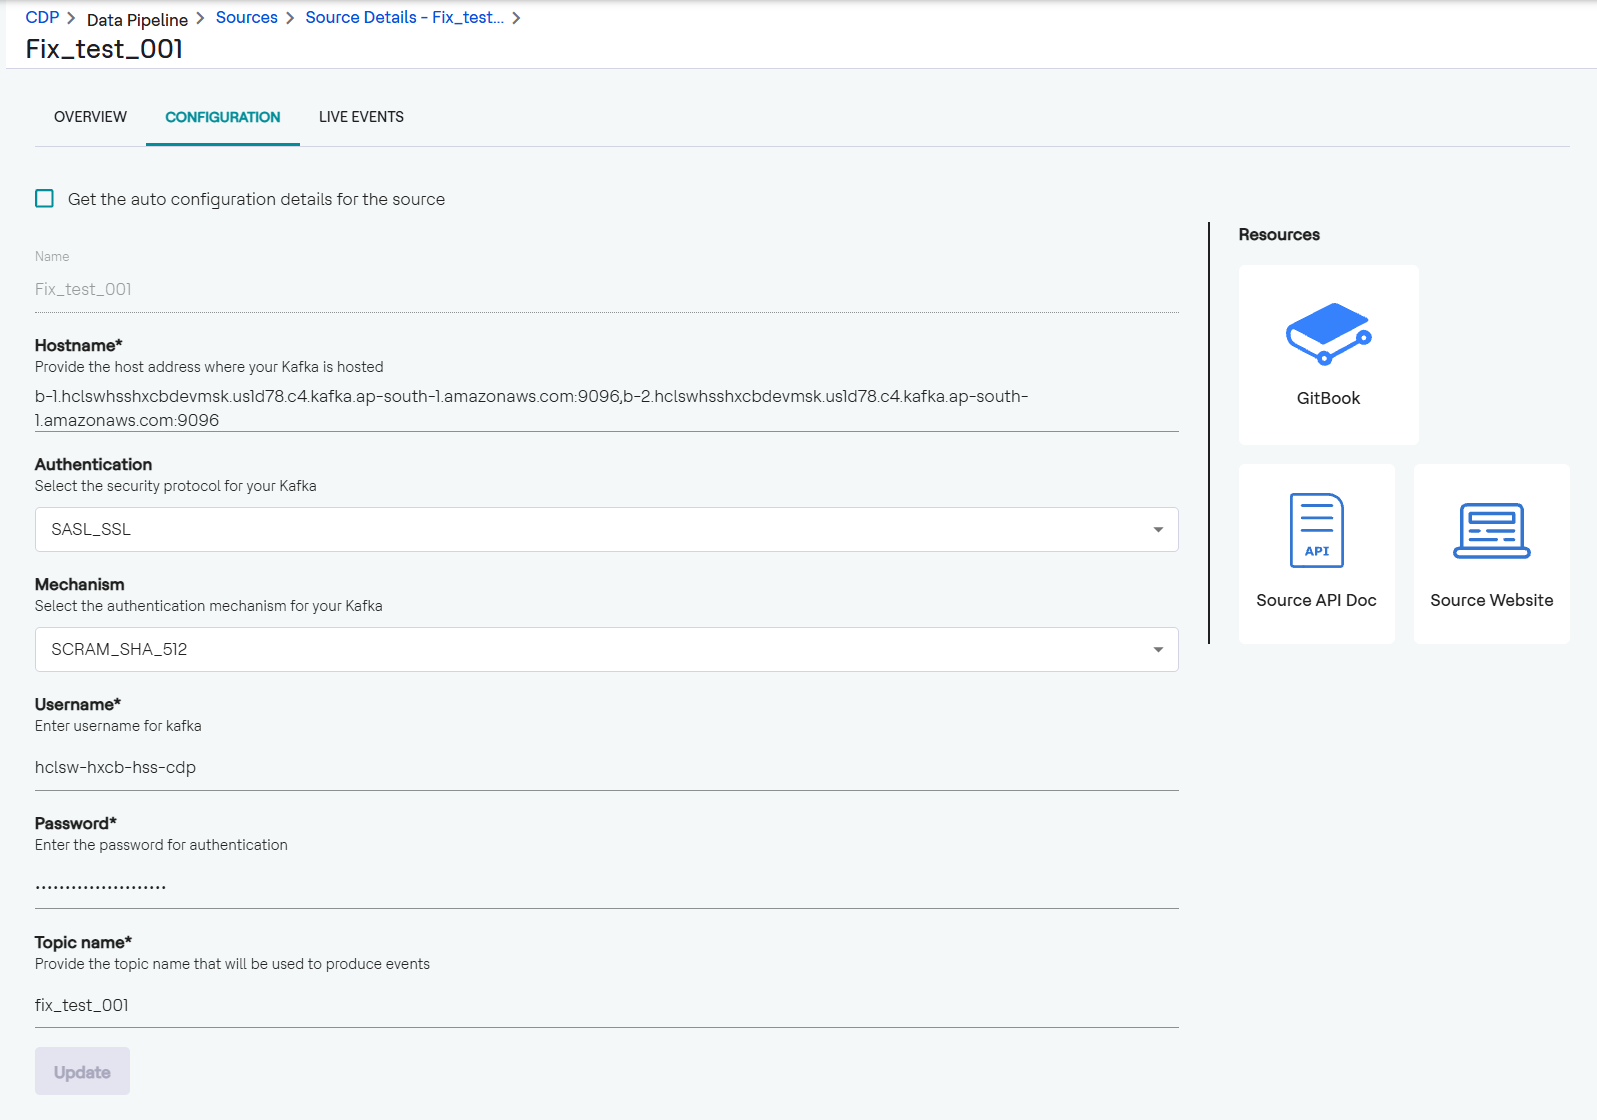
- Enter the following details to configure your source.
- Name: Enter a descriptive name for your Kafka source.
- Hostname: Provide the Kafka host address where your Kafka
instance is hosted.

- Authentication: choose between
PLAINTEXTandSASL_PLAINTEX. If usingSASL_PLAINTEXT, select one of the three available authentication mechanisms.
- Topic name: Enter the Kafka topic name where HCL CDP will produce the Kafka events.
- Click Test to verify the connection and ensure events can be produced to the specified Kafka configuration. If successful, a success message will appear. If not, an error message will indicate the issue.
- After a successful test, click Update to save your Kafka destination configuration.
- Toggle the activation status to enable the destination.Tip:It may take up to 30 minutes for the destination to become fully functional after activation.