Create App Push Notification - Android
This page explains how to create an App Push Notification for Android using HCL CDP Marketing Automation Platform.
Create an App Push Notification
Create an App Push Notification Engagement from Segments
To create an App push notification engagements from segments, follow the steps below:
- Navigate to .
- Select the Segment Name, and on the left panel, click the App Push Notification option.
- Click Add Engagement.

Create an App Push Notification engagement from Channels
To create an App push notification engagements from channels, follow the steps below:
- Navigate to .
- On the left panel, click the App Push Notification option.
- Click Add Engagement, and select the Segment Name from the list.
- Click Confirm And Proceed To Next Step.
Configure App Push Notification
In the create app push notification page, configure the following details:
Add General details
- Engagement Name (mandatory): Add a unique name to the Engagement. It must range between 6-25 characters.
- Language (mandatory): Select a language in which you prefer to write the Engagement.
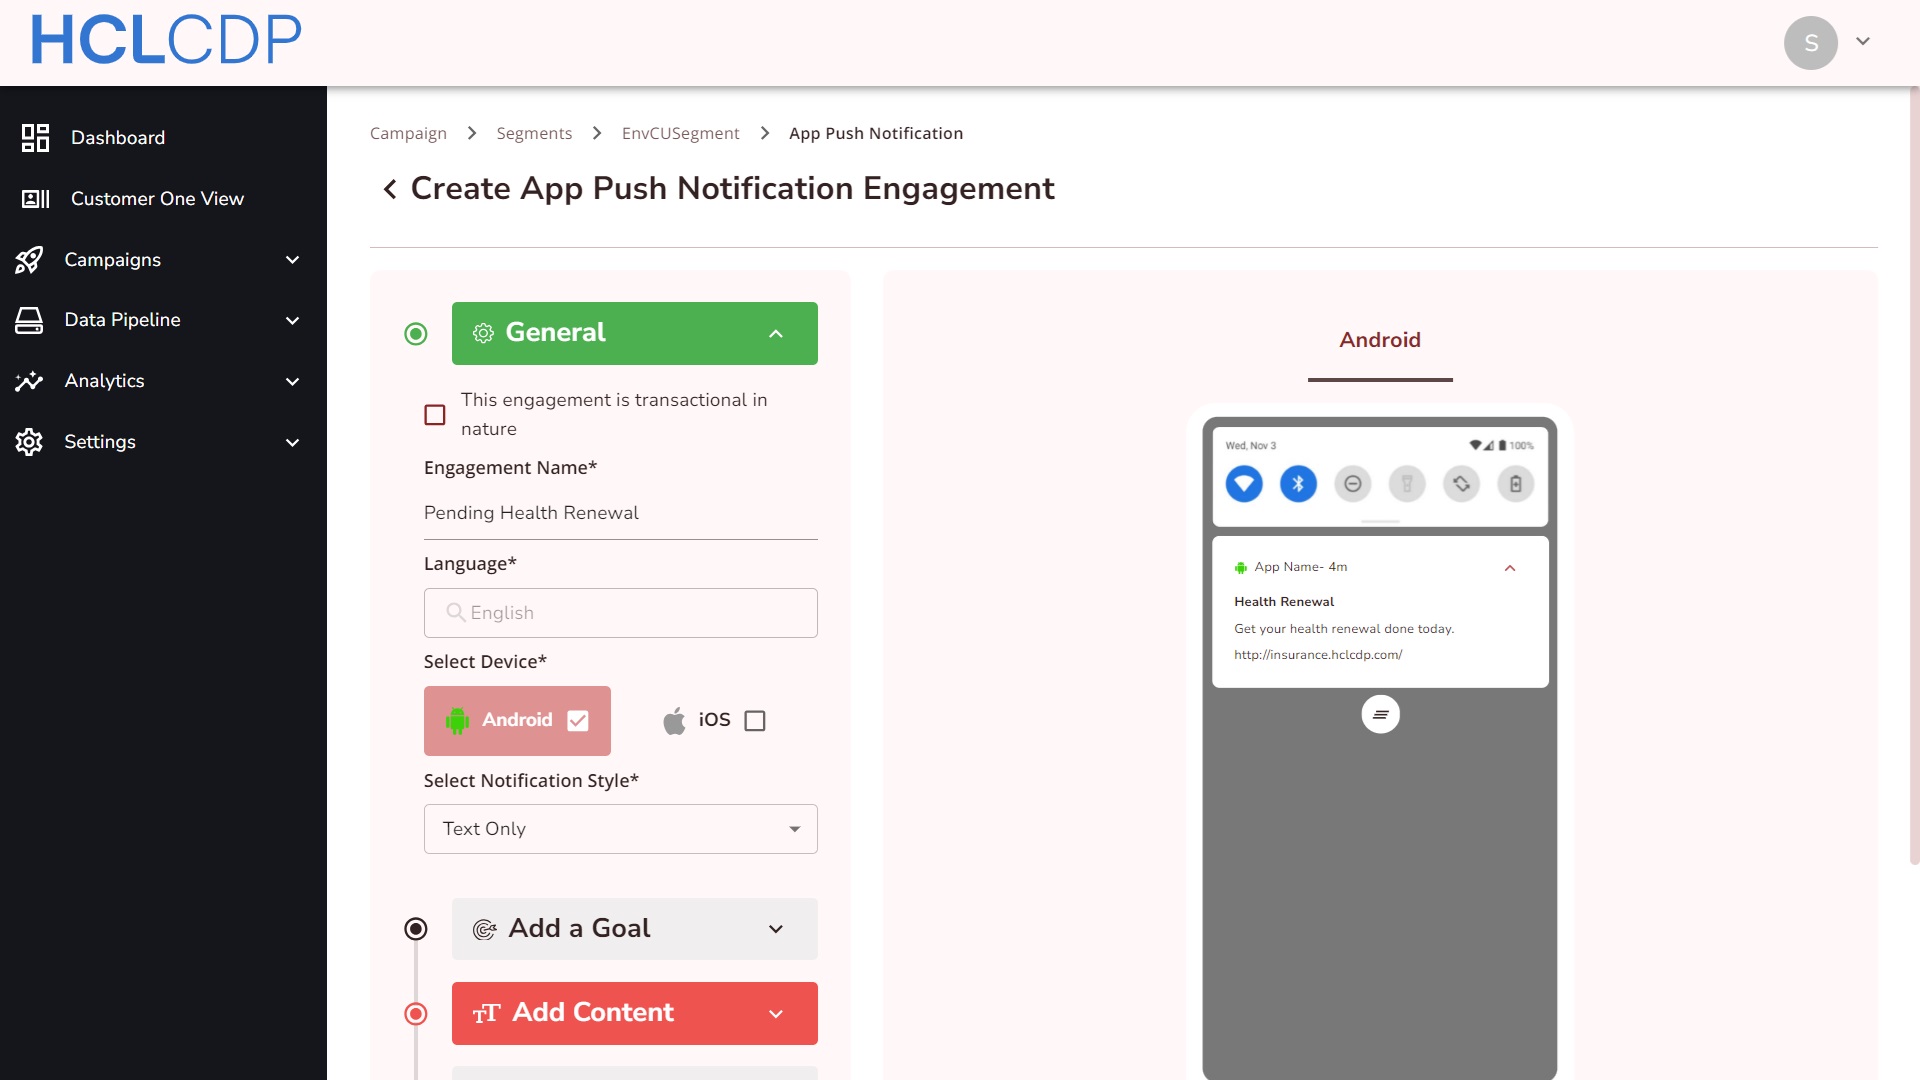
- Select Device (mandatory): Select Android from the device list. The preview on the right should show the preview of the Android device.
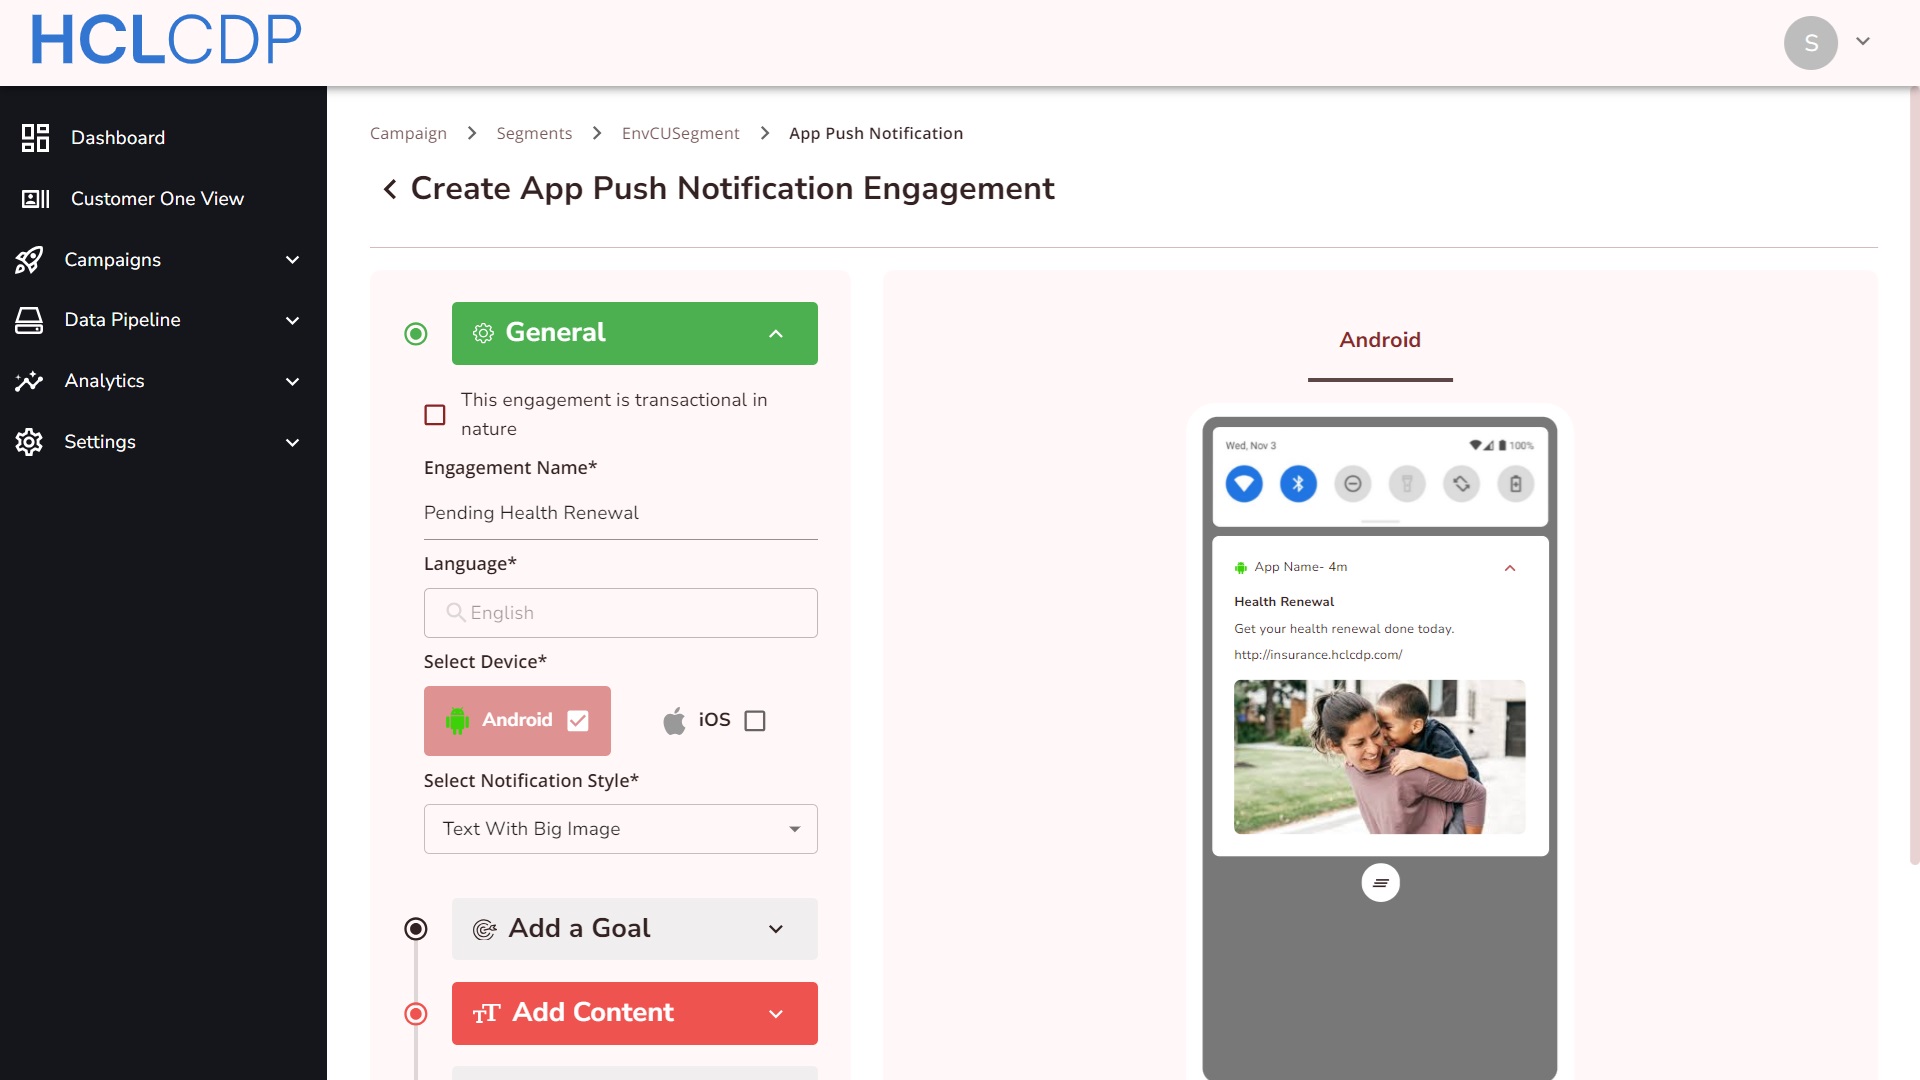
- Select Notification Style (mandatory): Choose a notification style of engagement based on device configuration.
For Android, we have three Notification Styles.
- Text Only: You can use this notification style, in case you want to
add only text to your App Push engagement.
- Text with Big Image Use this notification style to add an image with
the specified text. You can also add a caption to the engagement
image.
- Text with Image Carousel Use this notification style to create
carousel-style infographic engagements. Add captions to your image carousel,
and see real-time updates in the preview. Click the preview to check if the
redirect URL works.
Add a Goal
Goal Type: Select a goal type from the drop-down list. For more information about Conversion Goals, refer here.
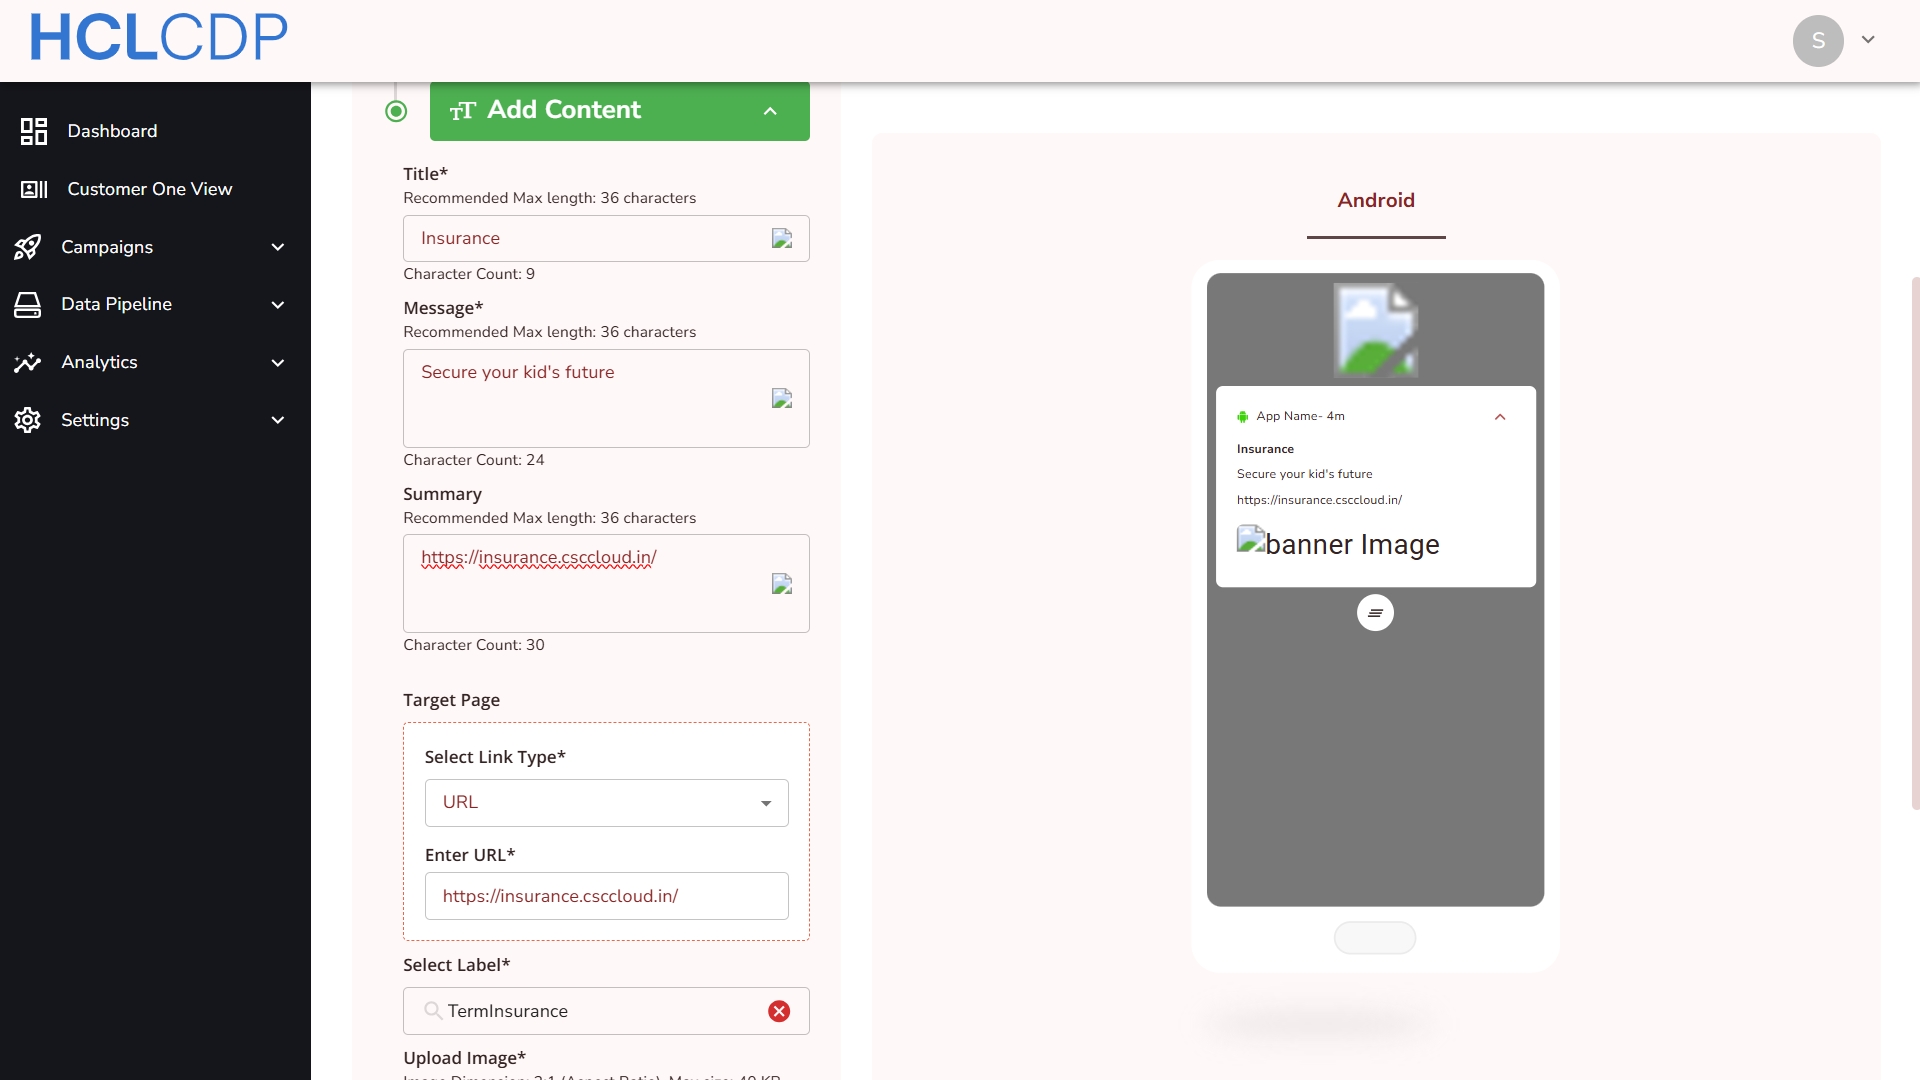
Add Content
- Title (mandatory): Enter the title of the Engagement message. It should range between 1-42 characters. The recommended max length is 36 characters.
- Message (mandatory): Enter a brief message explaining the purpose of the Engagement. It should contain at least 6 characters. The recommended max length is 36 characters.
- Summary: Enter a summary of the Engagement. The recommended max length is 36 characters.
- Target Page: Enter the target URL to which the user will be redirected when the app push notification is clicked. You can add an URL or a deep link.
- Select Label (mandatory): Select a product label from the drop-down list. For more information about labels, refer here.
In case, if your engagement type is Big Image or Image Carousel, follow the steps below:
Upload Image (mandatory): Upload an image with the following dimensions:
- Aspect Ratio: 2:1
- Max Size: 40 kb
- Supported File Formats: JPG, JPEG, PNG,WEBP.
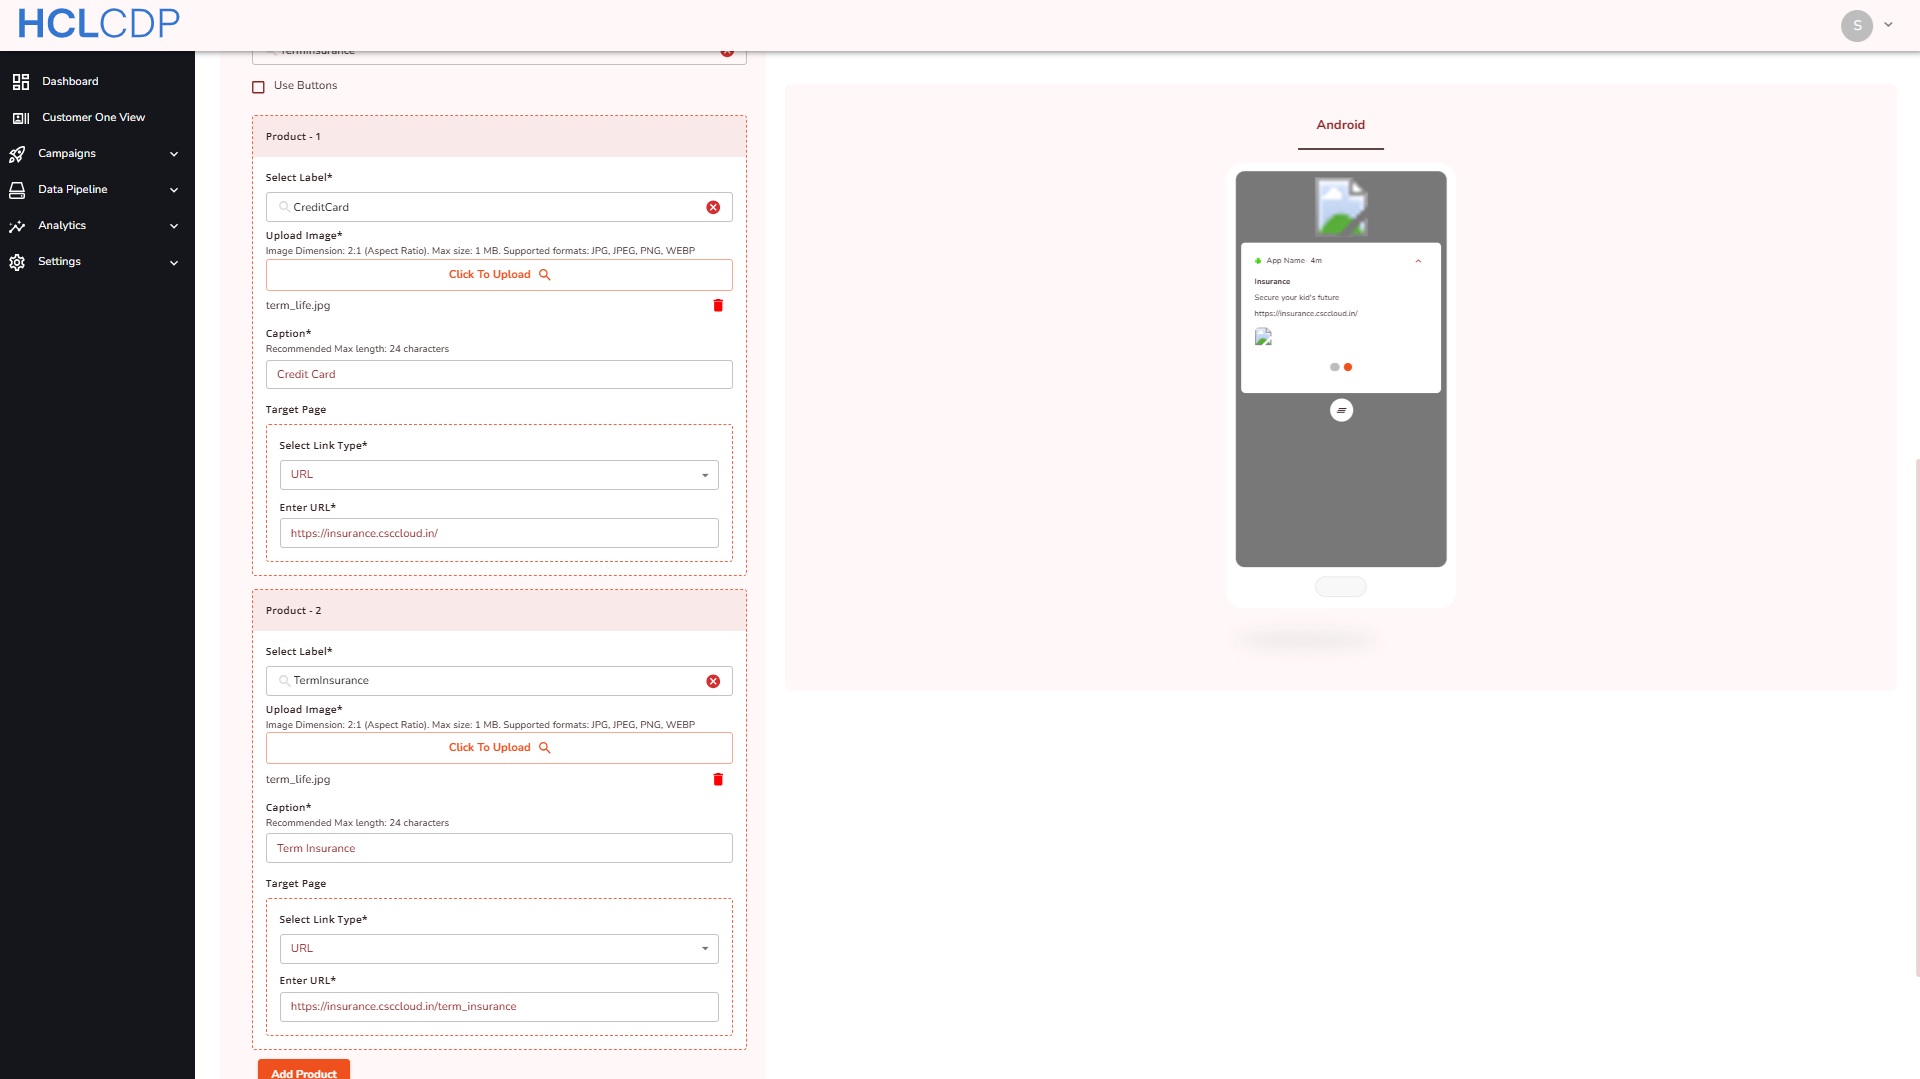
It is mandatory to have 2 products in the Carousel.
- Select Label (mandatory): Choose a product label from the drop-down list. For more information about Label, refer here.
- Upload Image (mandatory): Upload an image with the following dimensions: - Aspect Ratio: 2:1 - Max Size: 1 MB - Supported File Formats: JPG, JPEG, PNG,WEBP.
- Caption (mandatory): Enter a caption to the image. The recommended max length should not exceed 24 characters.
- Target Page: Enter the target URL where the user will be redirected when they click the app push notification.
- Select Link Type (mandatory): Add a URL or a deep link. For more information about Link Type, refer here.
- Enter URL (mandatory): Enter the URL of the target page.
Click Add Product to add the image carousel.
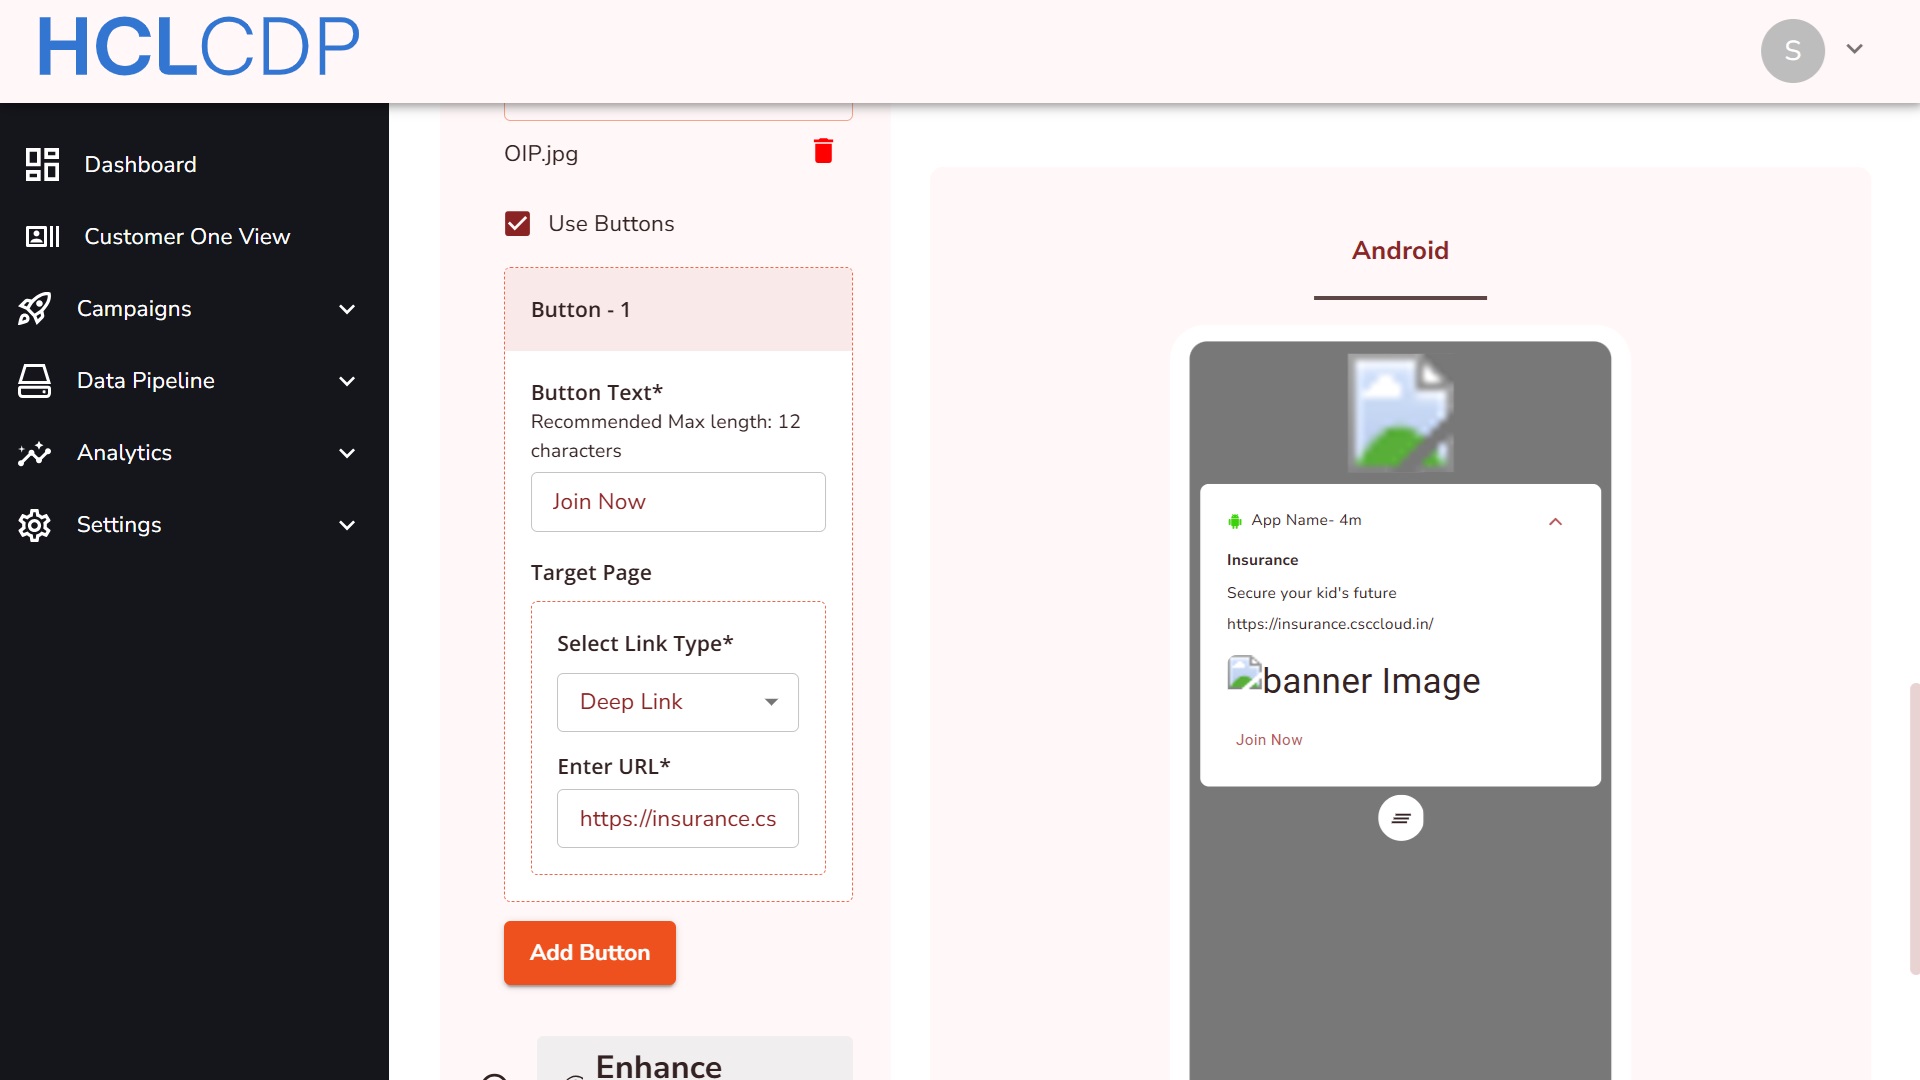
- Use Button: Select this checkbox to include buttons in the app push notification. Adding this button is optional, and you can add up to 3 buttons.
- Button Text (mandatory): Enter a name for the button.
- Target Page:
- Select Link Type (mandatory): Select a link type either URL or deep link to perform the required function.
- Enter URL (mandatory): Enter the URL of the target page to
redirect the user to a URL in the browser.

- Deep Link - Enter URL (mandatory): Enter the URL for a
specific activity within the application to redirect users to a
particular screen on the application.
An acknowledgment will trigger a new app notification for the user, once s/he clicks the button. You need to include the following content as well.
Title (mandatory): Enter the title of the inline Engagement.
Message (mandatory): Enter a brief message explaining the purpose of the Engagement.
Summary: Enter a summary of the Engagement.
Enhance Delivery
Enabling Enhanced Delivery helps you reach your customers within your desired time frame, ensures the notification expires upon reaching its expiry time, and increases the likelihood of message delivery even in poor network conditions.
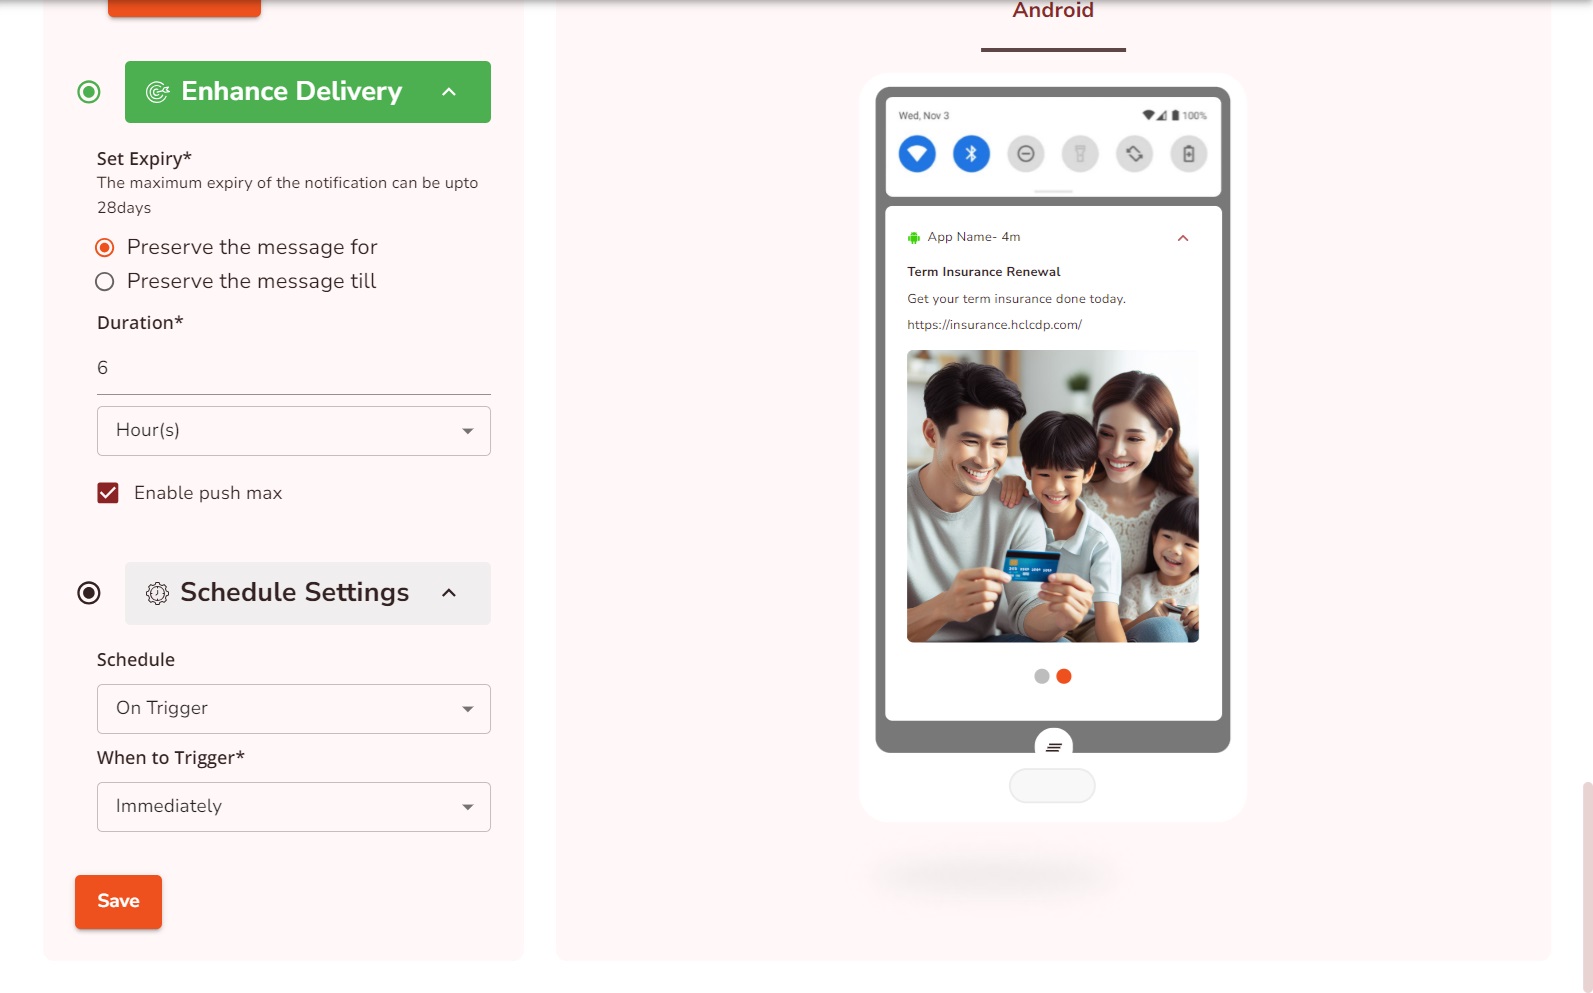
- Set Expiry: Define an expiry time for your communication to ensure it does not reach users after its purpose has passed. For example, if you want to inform users about a launch event with exclusive offers, setting an expiry ensures users won’t receive the message after the event ends due to network issues or other delays. You can set Maximum expiry of up to 28 days.
- Preserve message for: Specify the duration of your communication's validity in minutes, hours, or days. By default, you can set 6 hours, and the minimum can be 1 hour.
- Preserve Message till: Set your communication validity until a specific date and time using the calendar. You can set a minimum validity of 1 hour.
- Enable Push Max:
Enhance communication delivery by optimizing it based on the user's network strength. In good network conditions, users receive the message with media. In poor network conditions, users receive text-only messages, increasing the chances of successful delivery.
Schedule Settings
Schedule an engagement to send at a later time or trigger it immediately once the engagement goal is achieved. For more information about Engagement Scheduling, refer Campaign Channels
Save
Click Save to save the Engagement.