Accessing Presentation Designer
This section provides steps on how to access the Presentation Designer and navigate its user interface workspace.
Prerequisites
Presentation Designer is installed and deployed by default as part of the CF update process. You can access Presentation Designer from the Practitioner Studio interface.
Note
Presentation Designer is automatically included when you create a virtual portal with Practitioner Studio enabled and web content configured.
To use Presentation Designer, you must have the following minimum set of roles. Note that the roles listed are the minimum; if you have a Manager or Administrator role, you can still access Presentation Designer.
The Presentation Designer page requires at least a User role to access. Follow the steps below to set this role:
- Click the Administration menu icon.
- Go to Security > Resource Permissions > Pages > Content Root > Practitioner Studio > Web Content.
- In the Presentation Designer row, click the Assign Access icon to set the User role.
The Presentation Designer portlet requires at least a User role to access. Follow the steps below to set this role:
- Click the Administration menu icon.
- Go to Security > Resource Permissions > Portlets.
- In the Presentation Designer portlet row, click the Assign Access icon to set the User role.
The WCM page requires at least a User role to access. Follow the steps below to set this role:
- Click the Administration menu icon.
- Go to Security > Resource Permissions > Pages > Content Root > Practitioner Studio.
- In the Web Content row, click the Assign Access icon to set the User role.
The WCM Authoring portlet requires at least a User role to access. Follow the steps below to set this role:
- Click the Administration menu icon.
- Go to Security > Resource Permissions > Portlets.
- In the Web Content Authoring row, click the Assign Access icon to set the User role.
WCM_REST_SERVICES requires at least an Editor role to access. Follow the steps below to set this role:
- Click the Administration menu icon.
- Go to Security > Resource Permissions > Virtual Resources.
- In the WCM REST SERVICE row, click the Assign Access icon to set the Editor role.
WCM libraries and items require at least an Editor role to access. Follow the steps below to set this role:
- Click the Web Content menu.
- Go to Web Content Libraries.
- Click the Set permissions icon to set the Editor role for any library as needed.
(Optional) To select a library where you are an Editor and display it on the Library Explorer, set the Privileged User role on the WCM Authoring page. While Privileged User access is not needed to use Presentation Designer, this access is still recommended so users can view and edit presentation templates in specific libraries where they hold Editor permissions.
To set the Privileged User role:
- Navigate to the Administration menu.
- Go to Security > Resource Permissions > Pages > Content Root > Practitioner Studio > Web Content > Authoring.
- Click the Assign Access icon to set the Privileged User role.
Refer to Working with resource permissions for more information.
Accessing Presentation Designer
To access the Presentation Designer, follow these steps:
-
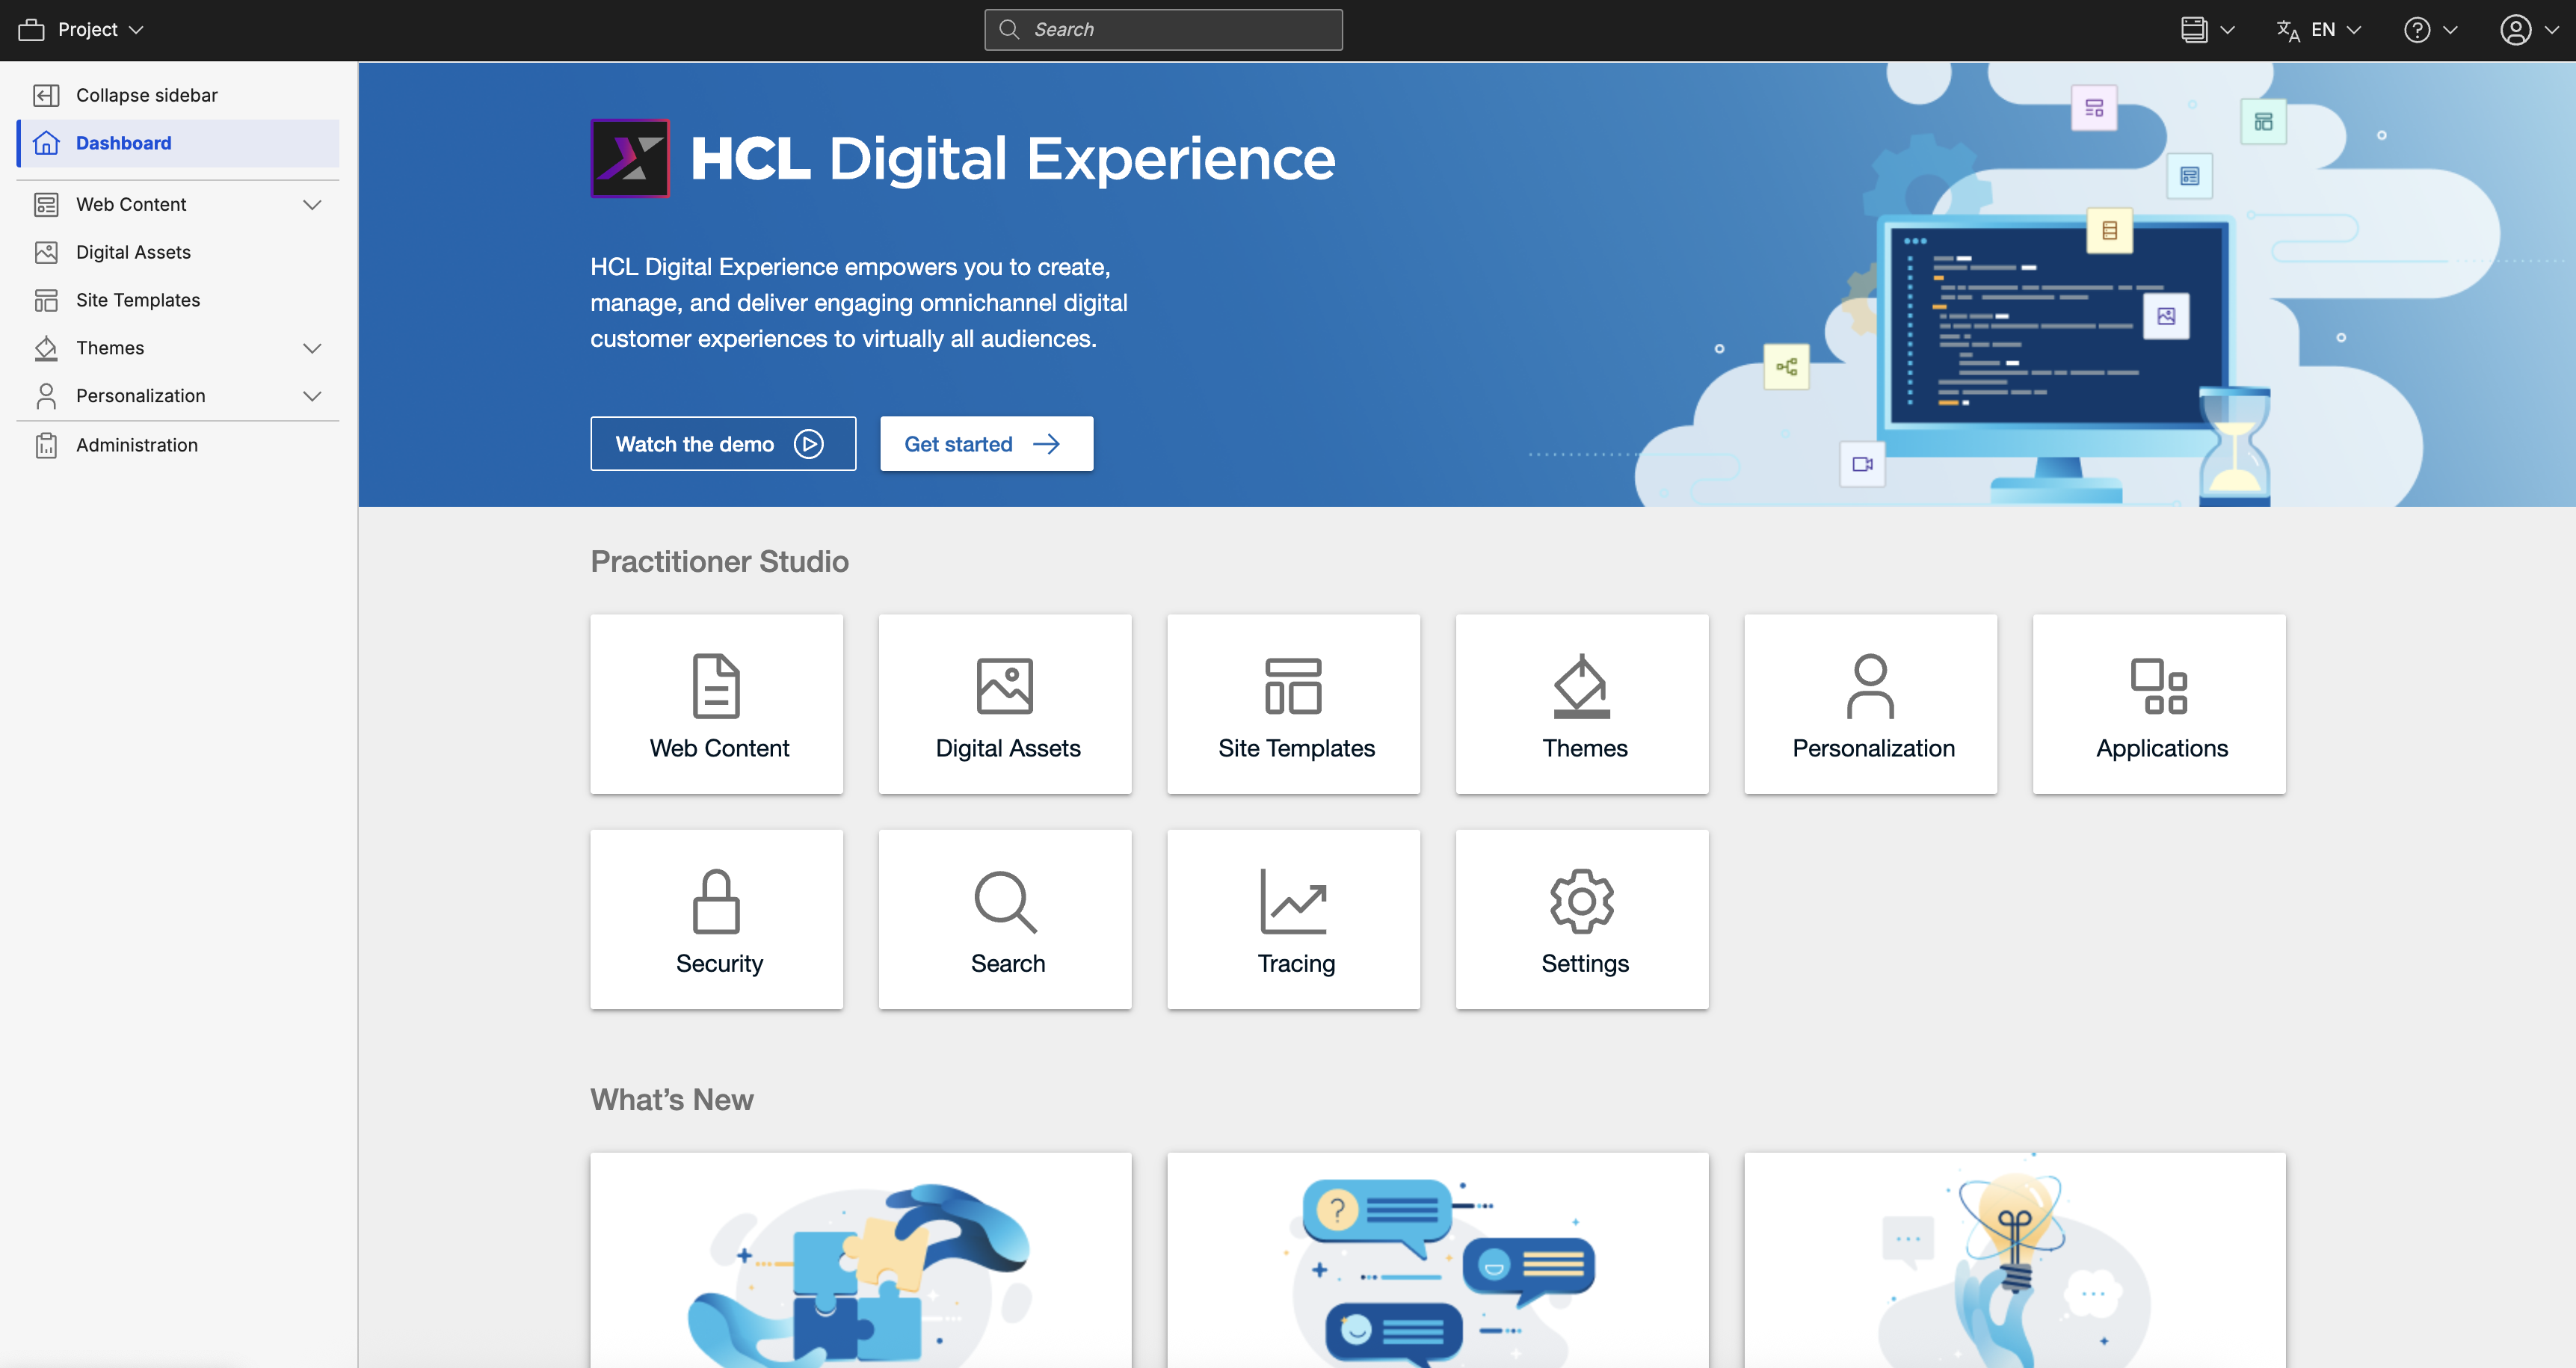
Log in to your HCL Digital Experience 9.5 platform, and select Web Content from the Practitioner Studio navigator.
-
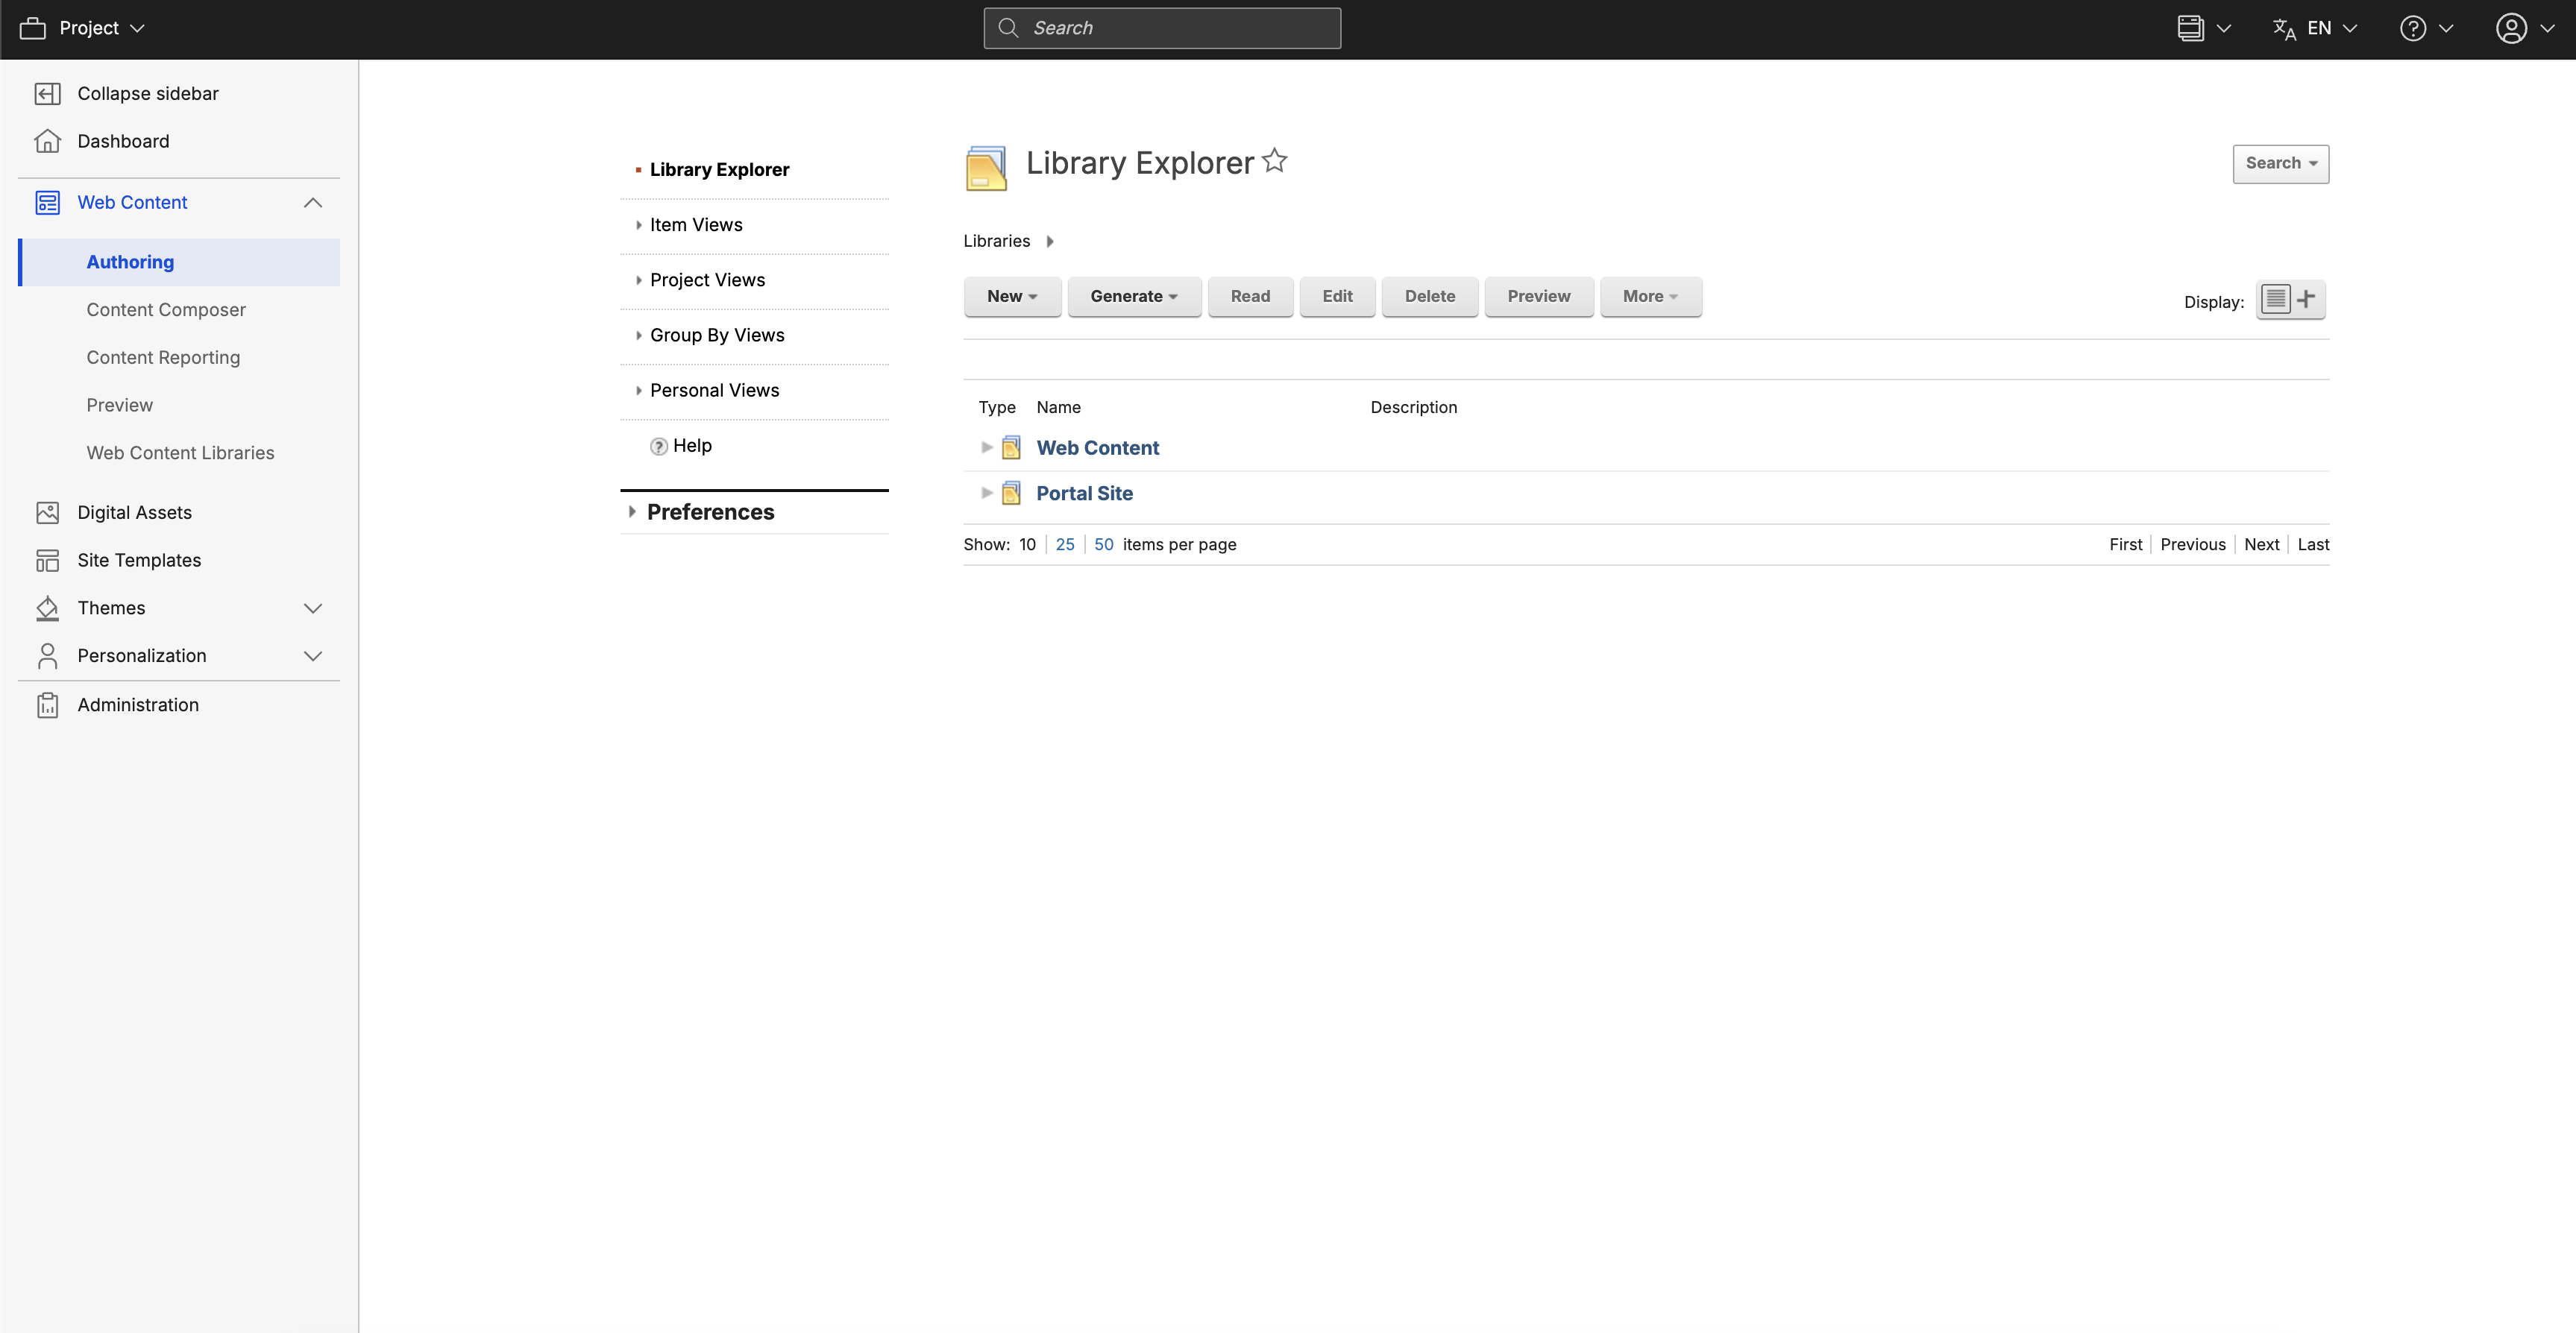
In the Web Content menu, select Authoring.
-
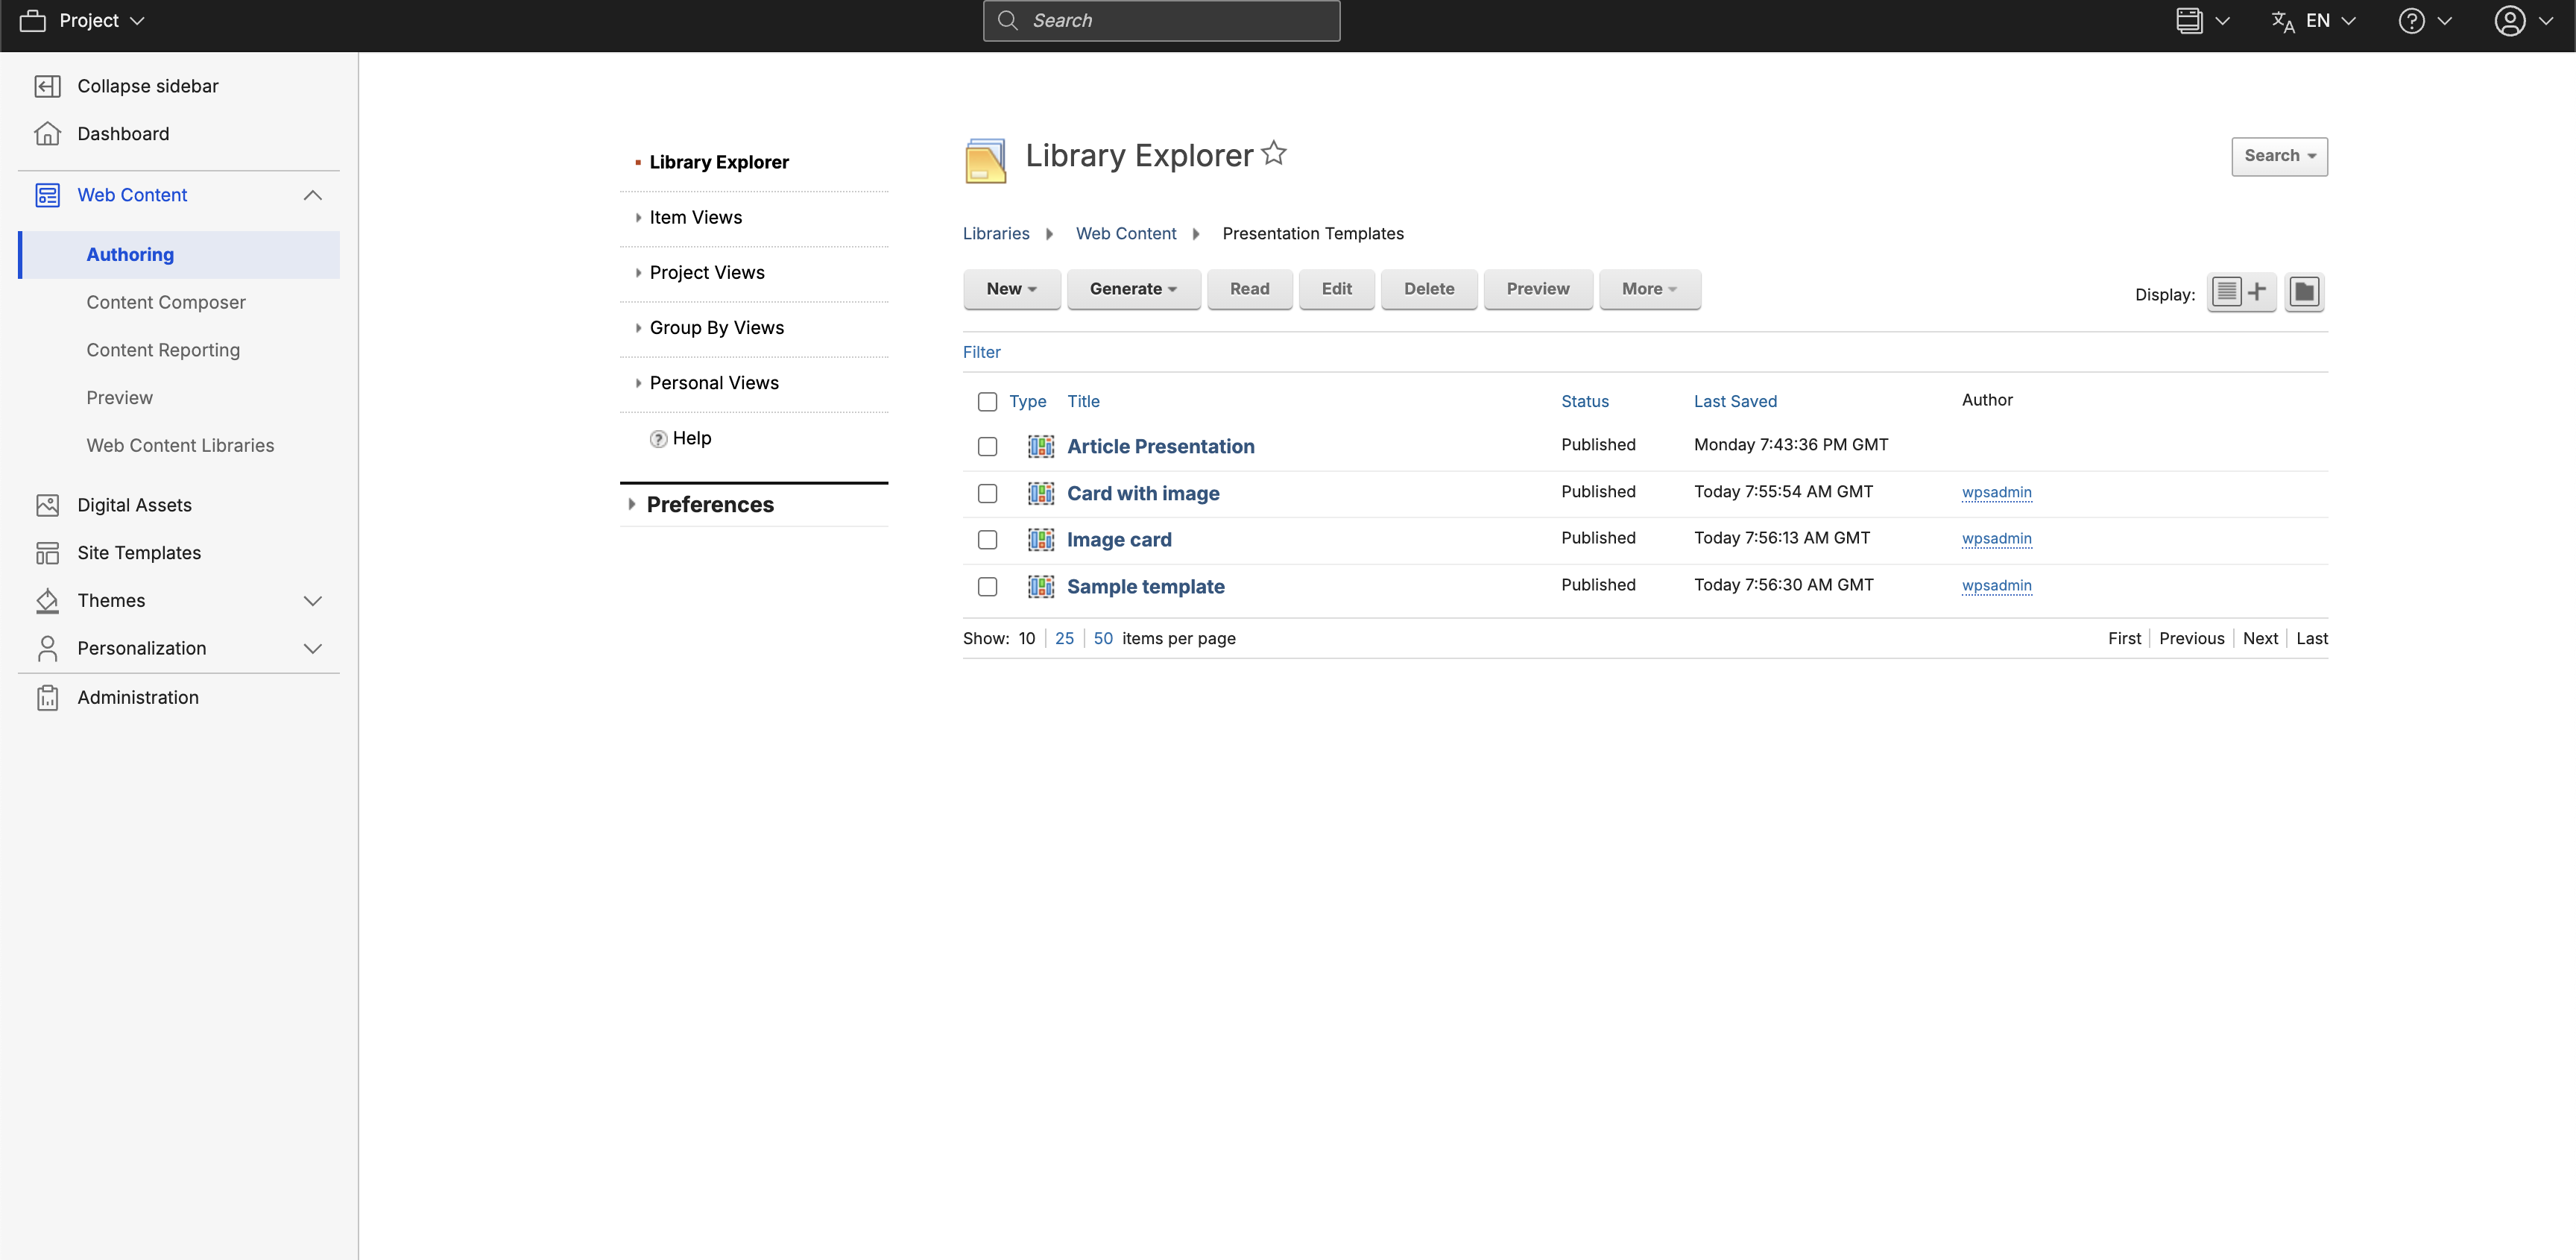
In the Authoring portlet, select your library and navigate to the Presentation Templates.
-
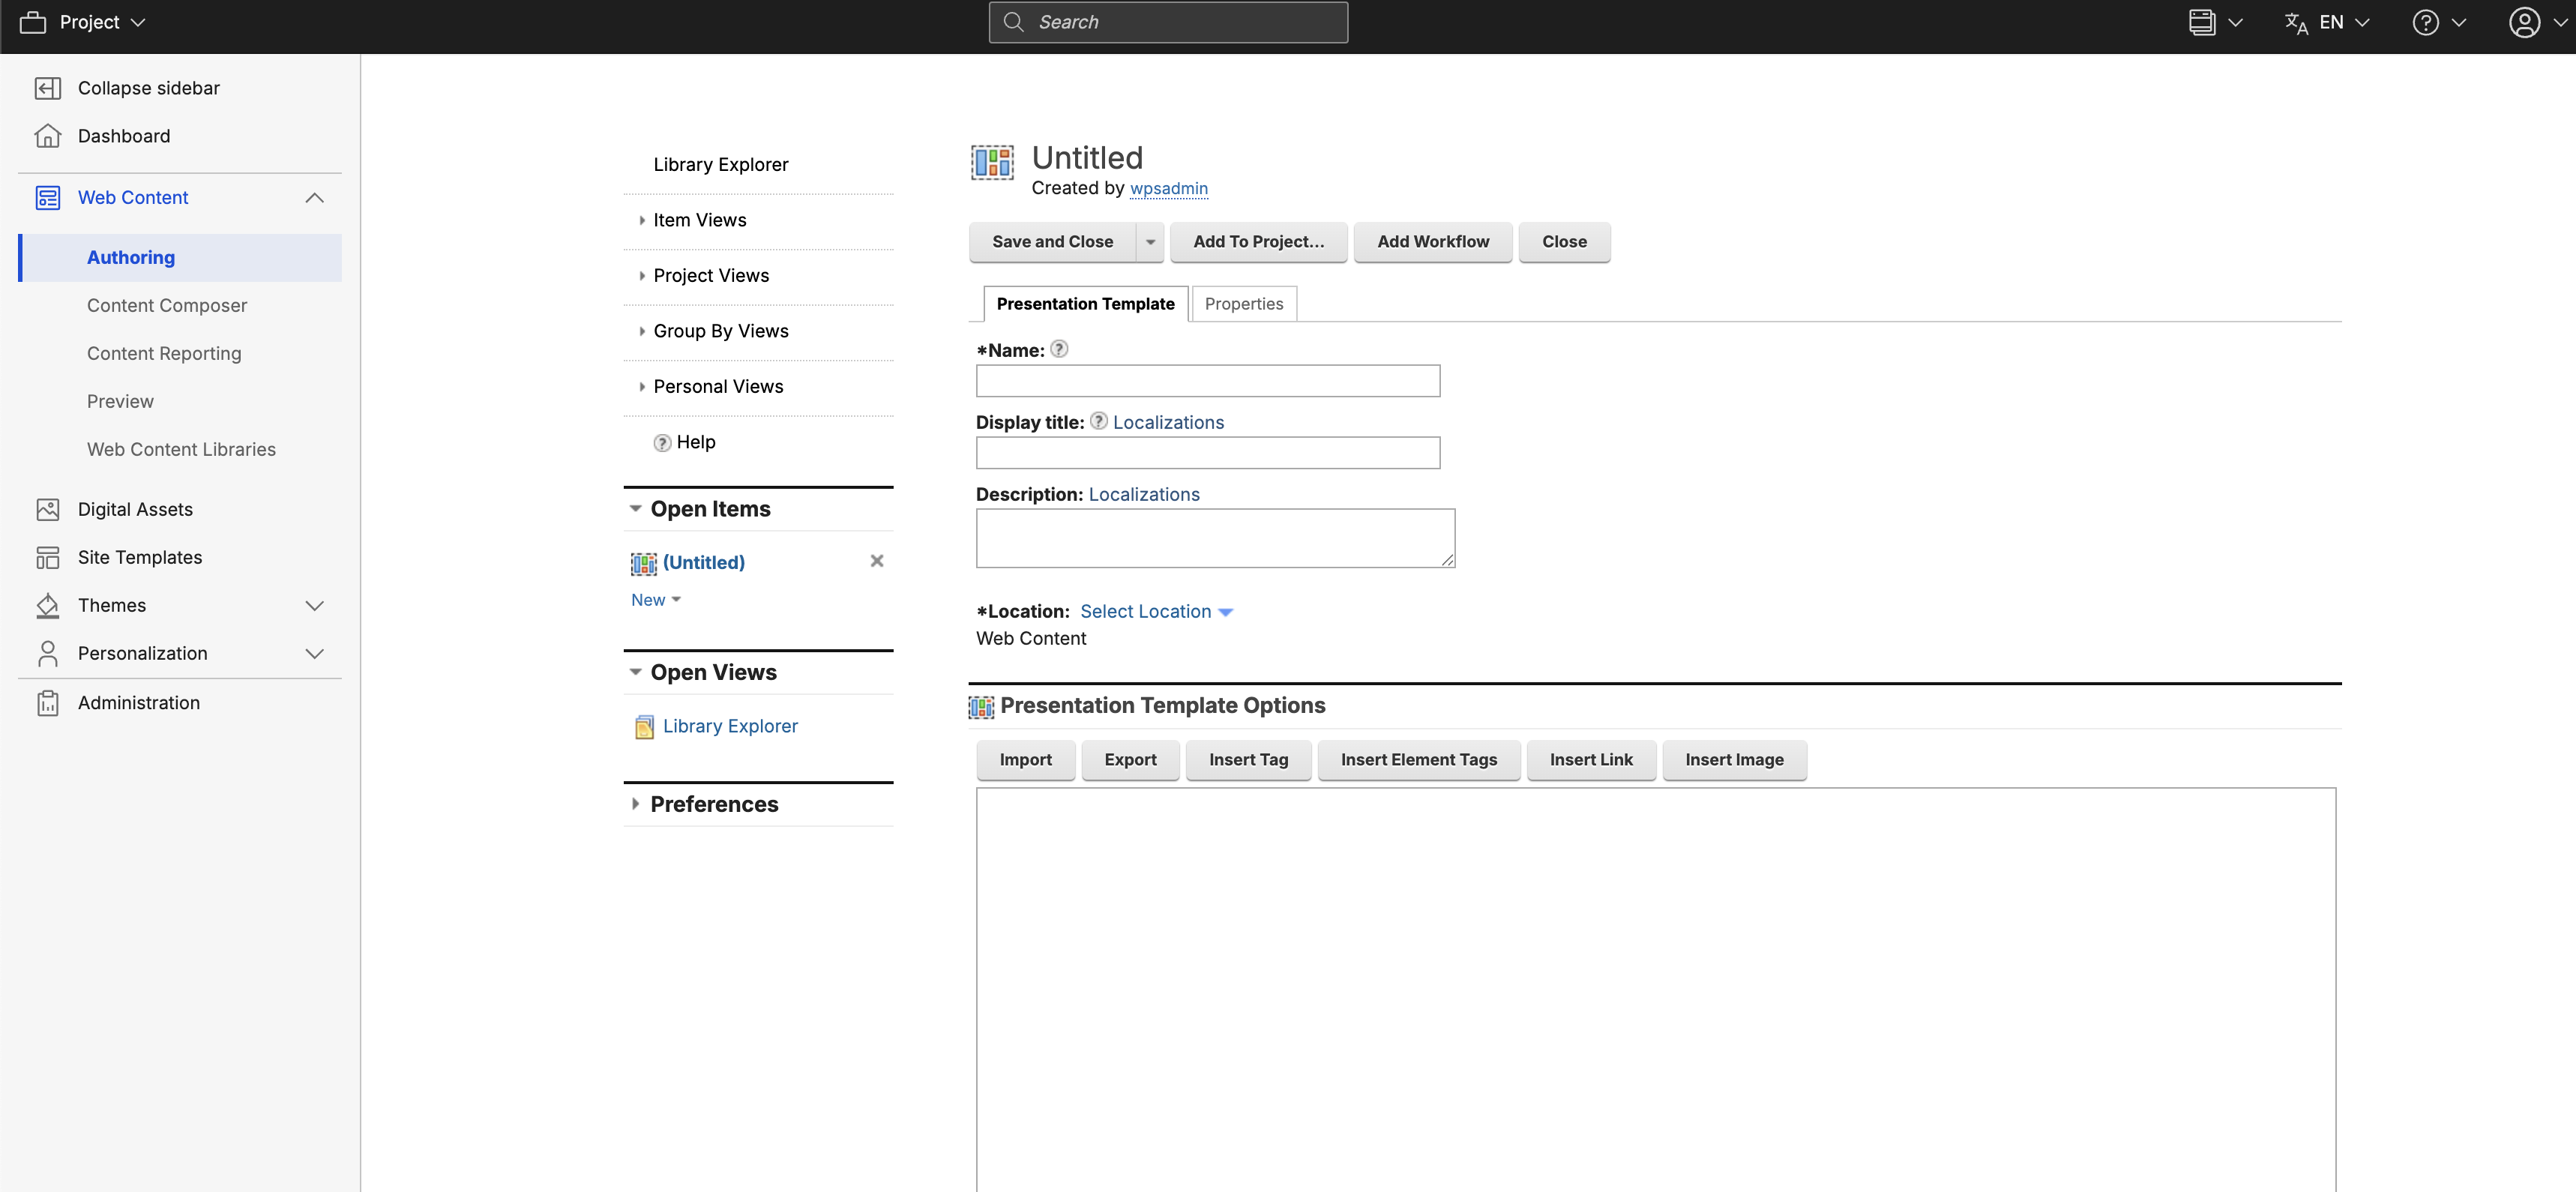
Create a new presentation template by clicking New > Presentation Template.

-
In the Presentation Template, leave the markup blank. This way, you can start with a blank canvas in Presentation Designer. Click Save and Close.
-
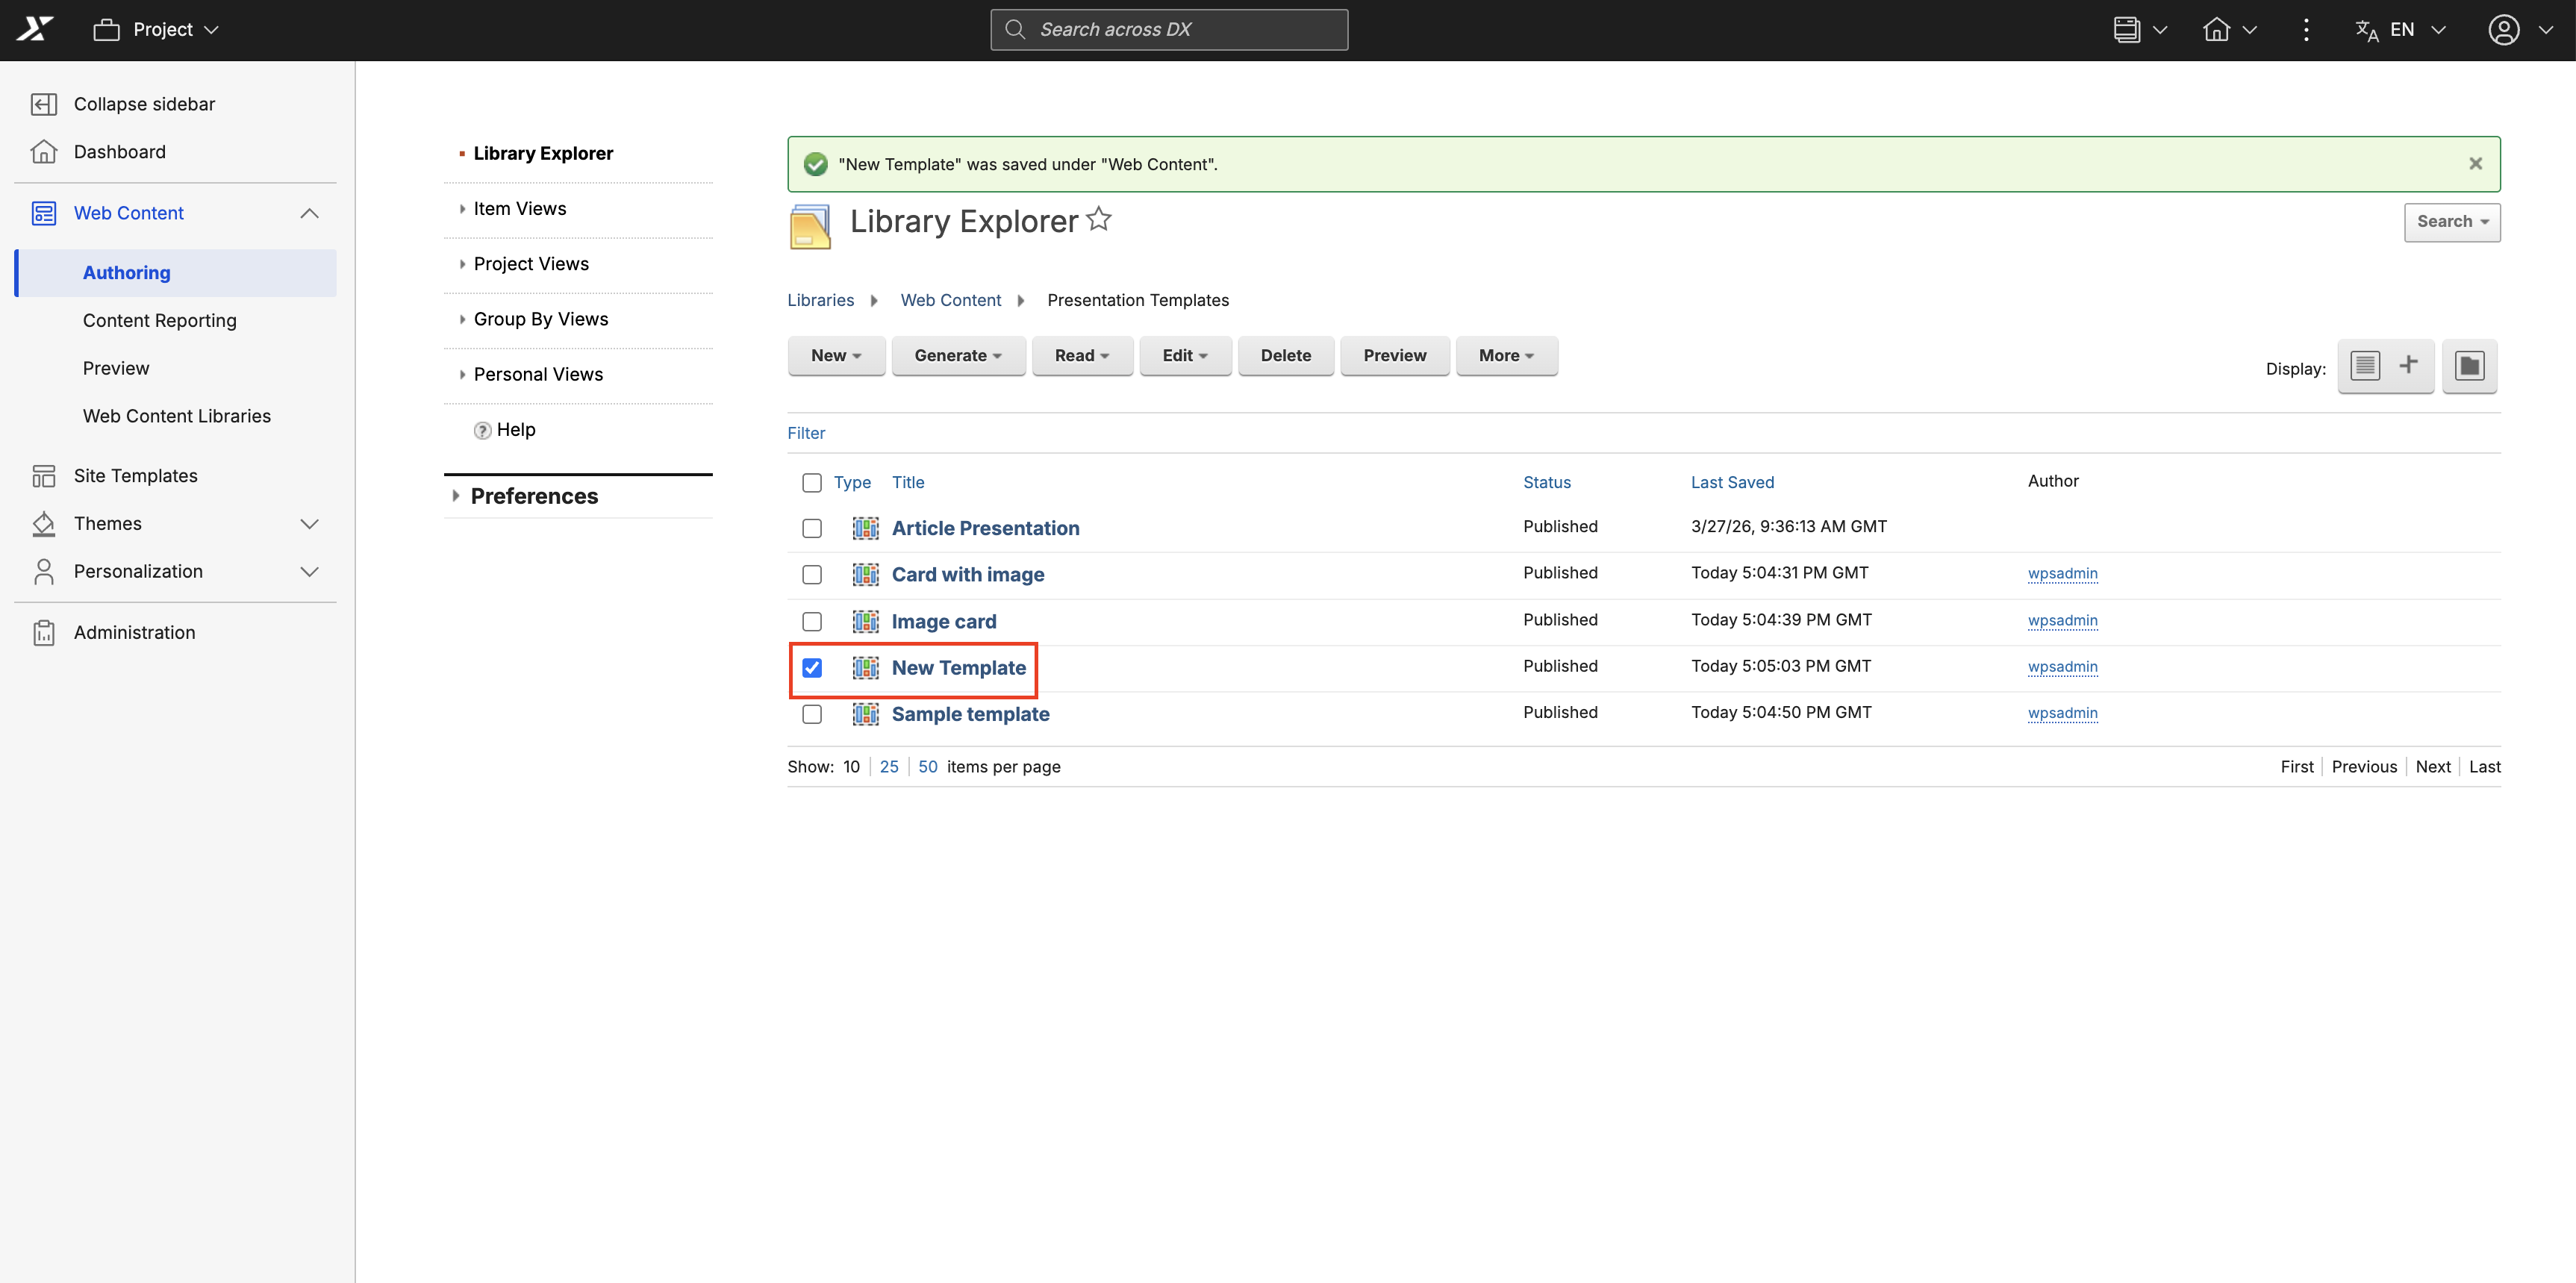
Select the presentation template you want to access by checking the box next to its title.
-
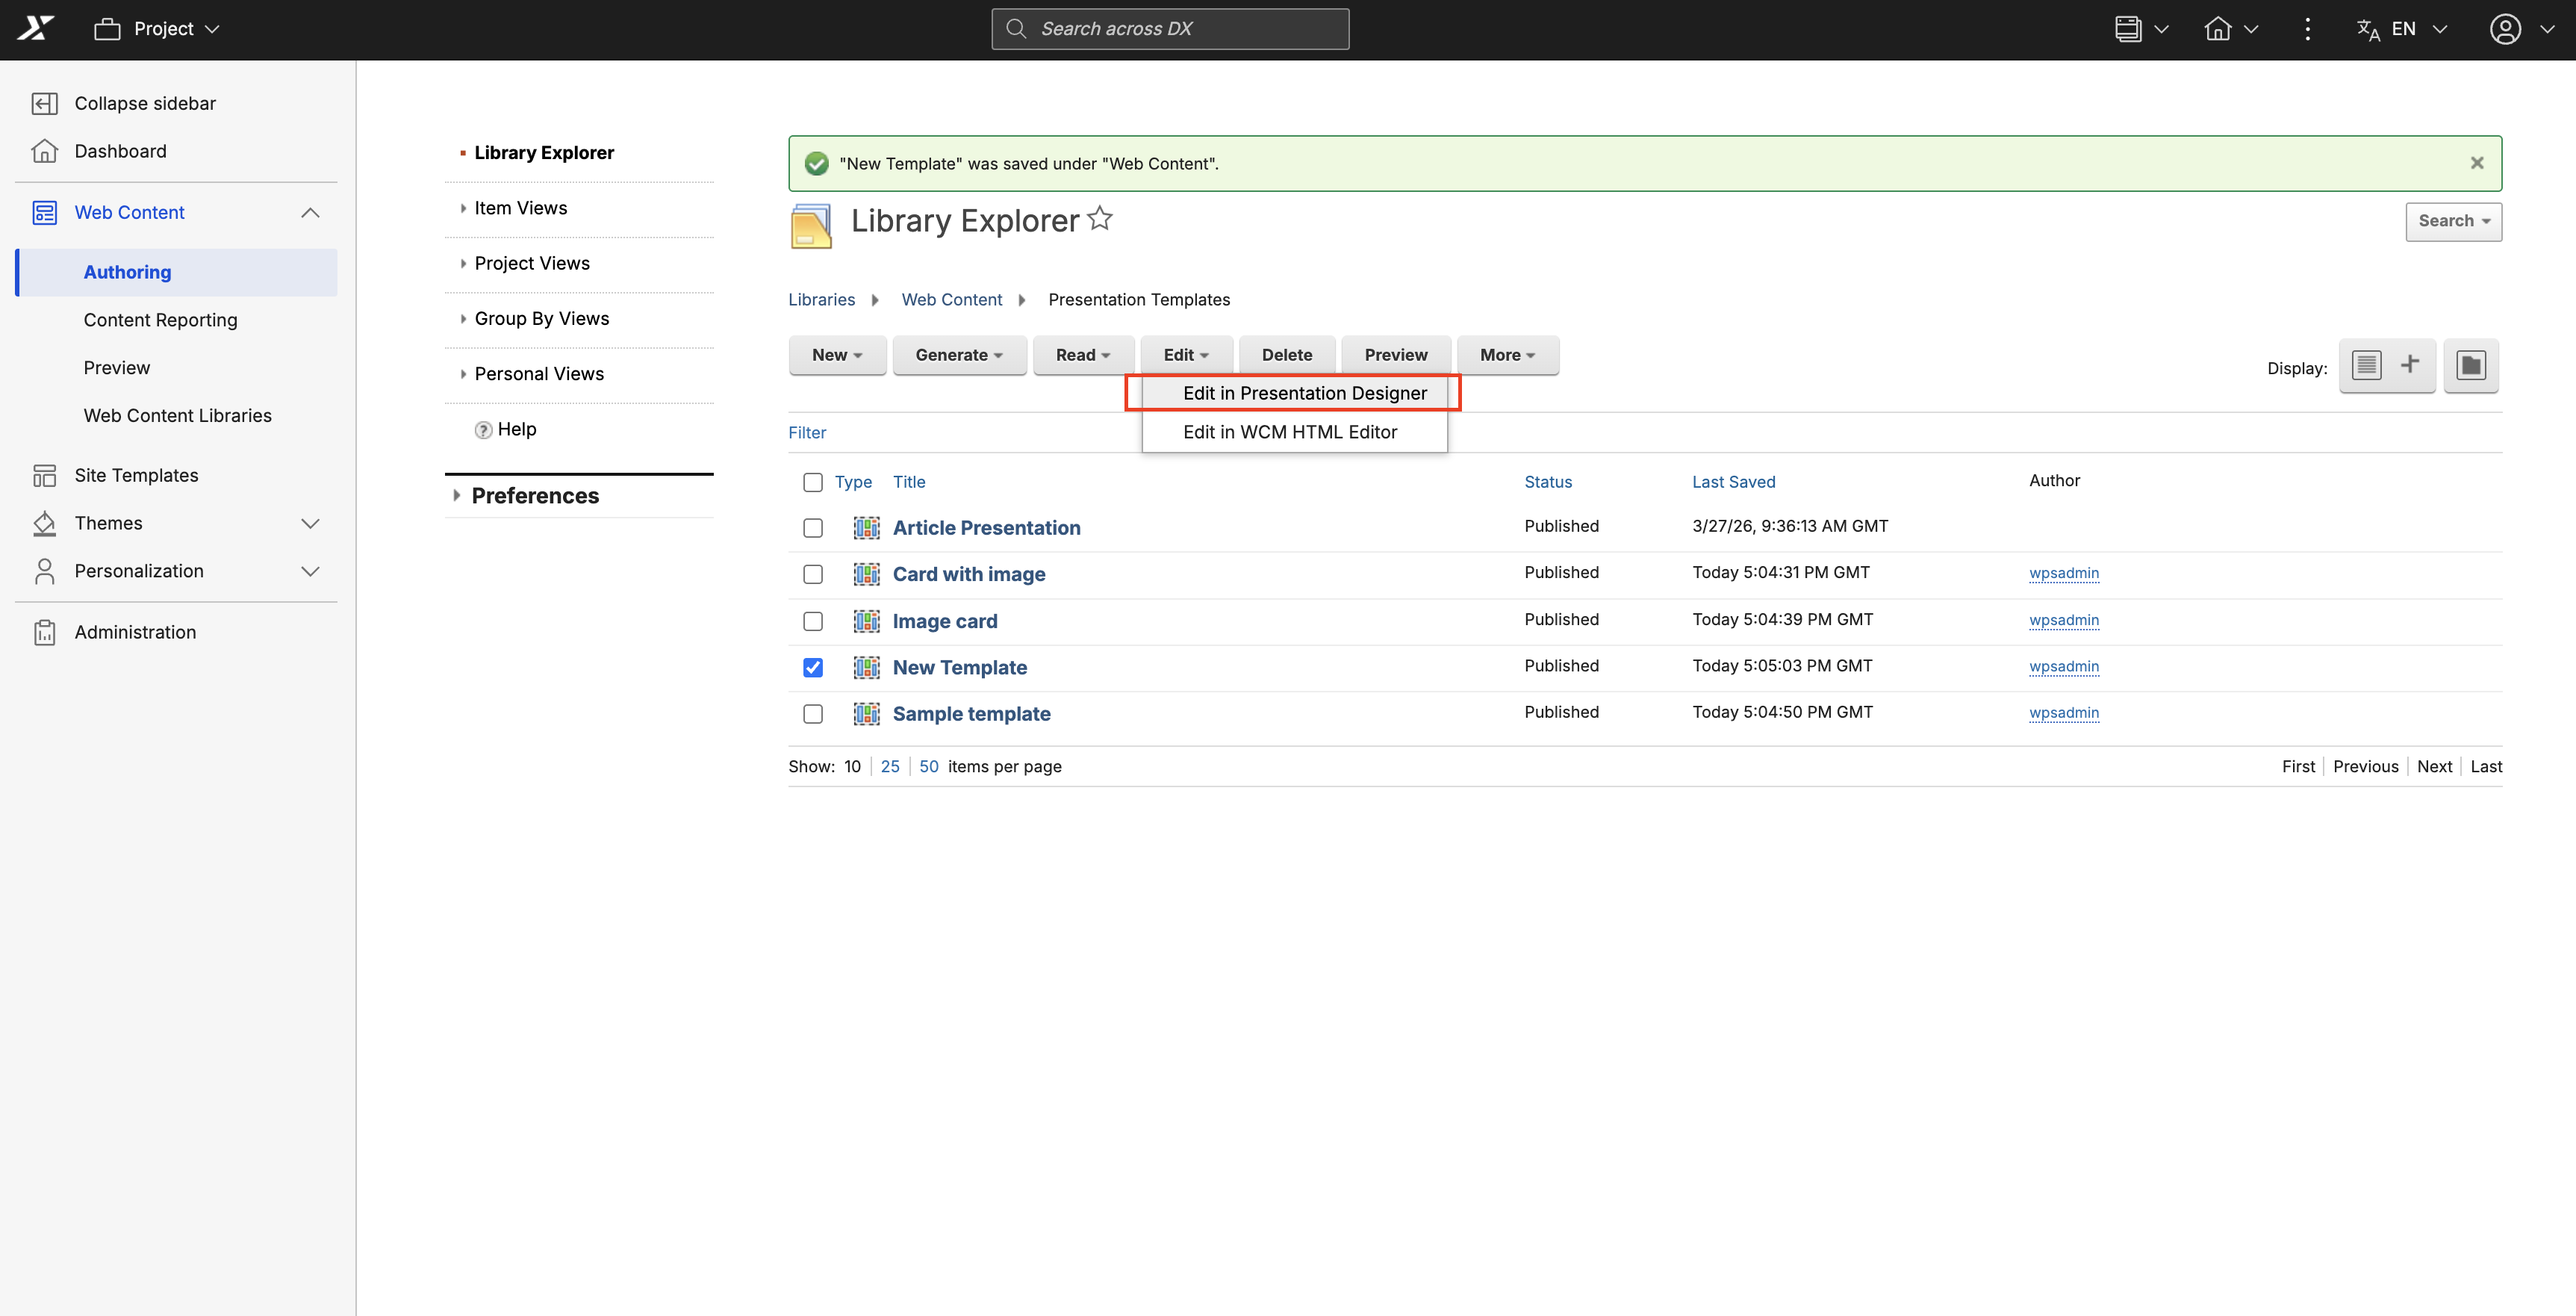
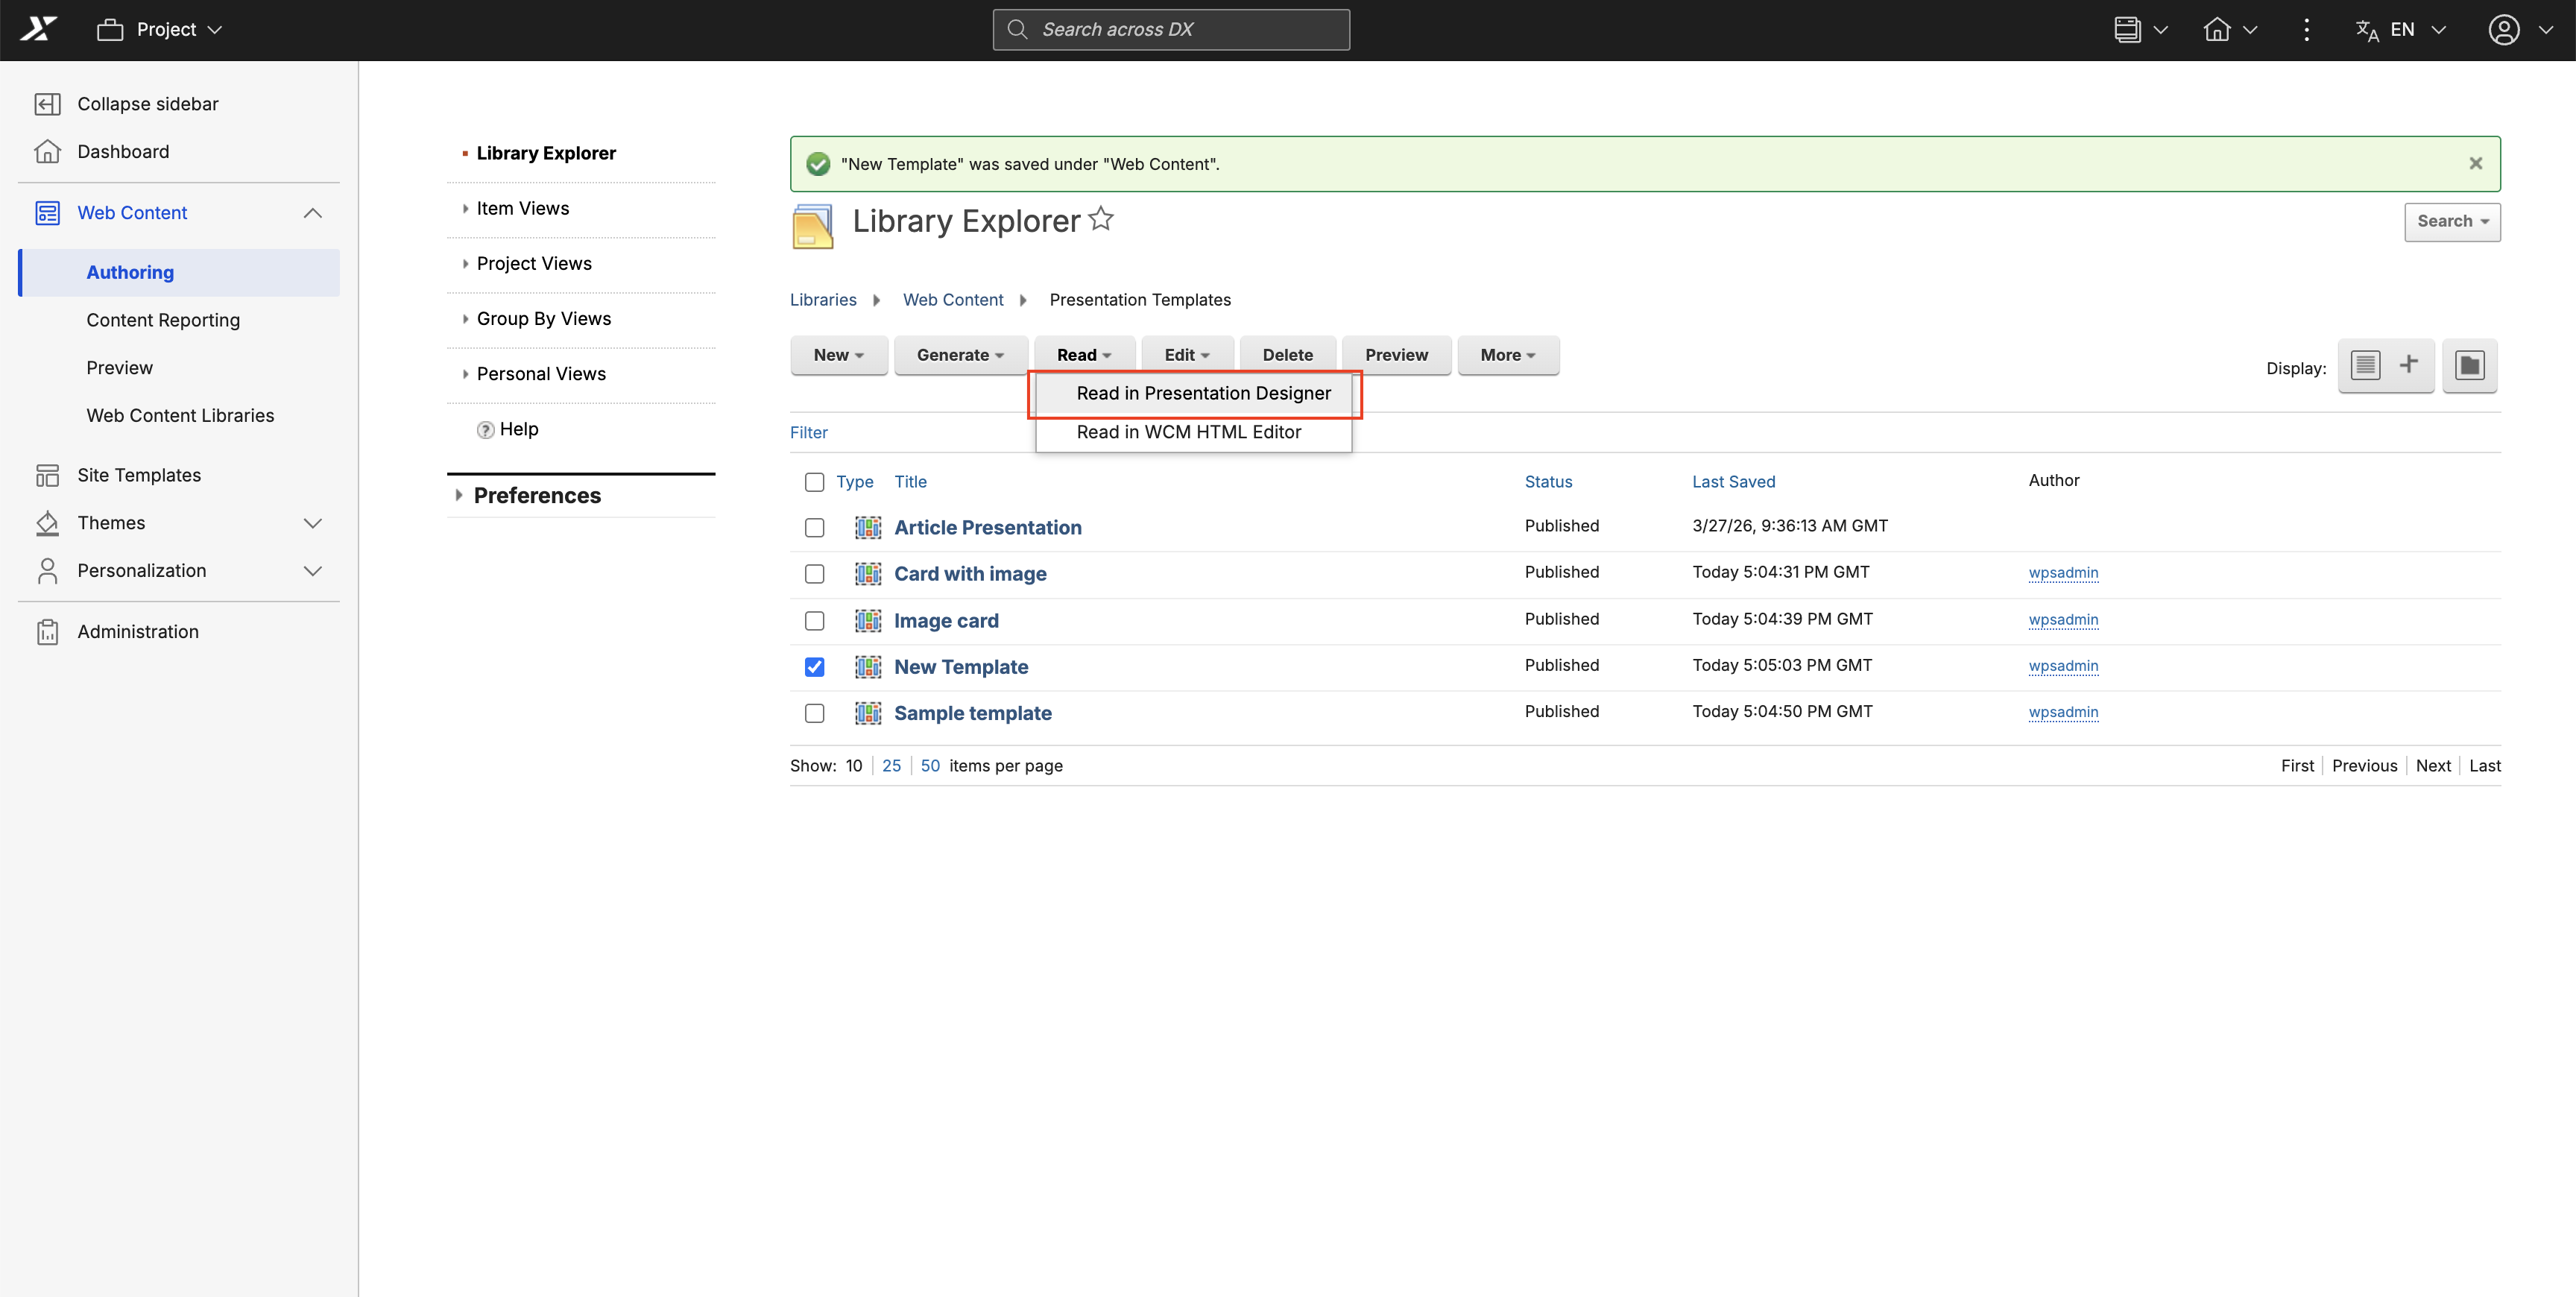
Choose how you want to open the presentation template using the action buttons located in the toolbar:
-
To edit the template in Presentation Designer: Click the Edit dropdown menu and select Edit in Presentation Designer. This opens the template in the Presentation Designer with the toggle button set to Edit mode.
-
To view the template in Presentation Designer: Click the Read dropdown menu and select Read in Presentation Designer. This opens the template in the Presentation Designer with the toggle button set to Read only.
Note
You can also choose to open the template in the standard WCM HTML Editor by selecting Edit in WCM HTML Editor or Read in WCM HTML Editor from these same dropdown menus.
-
-
You can also switch to the Presentation Designer while working within the standard WCM HTML Editor:
-
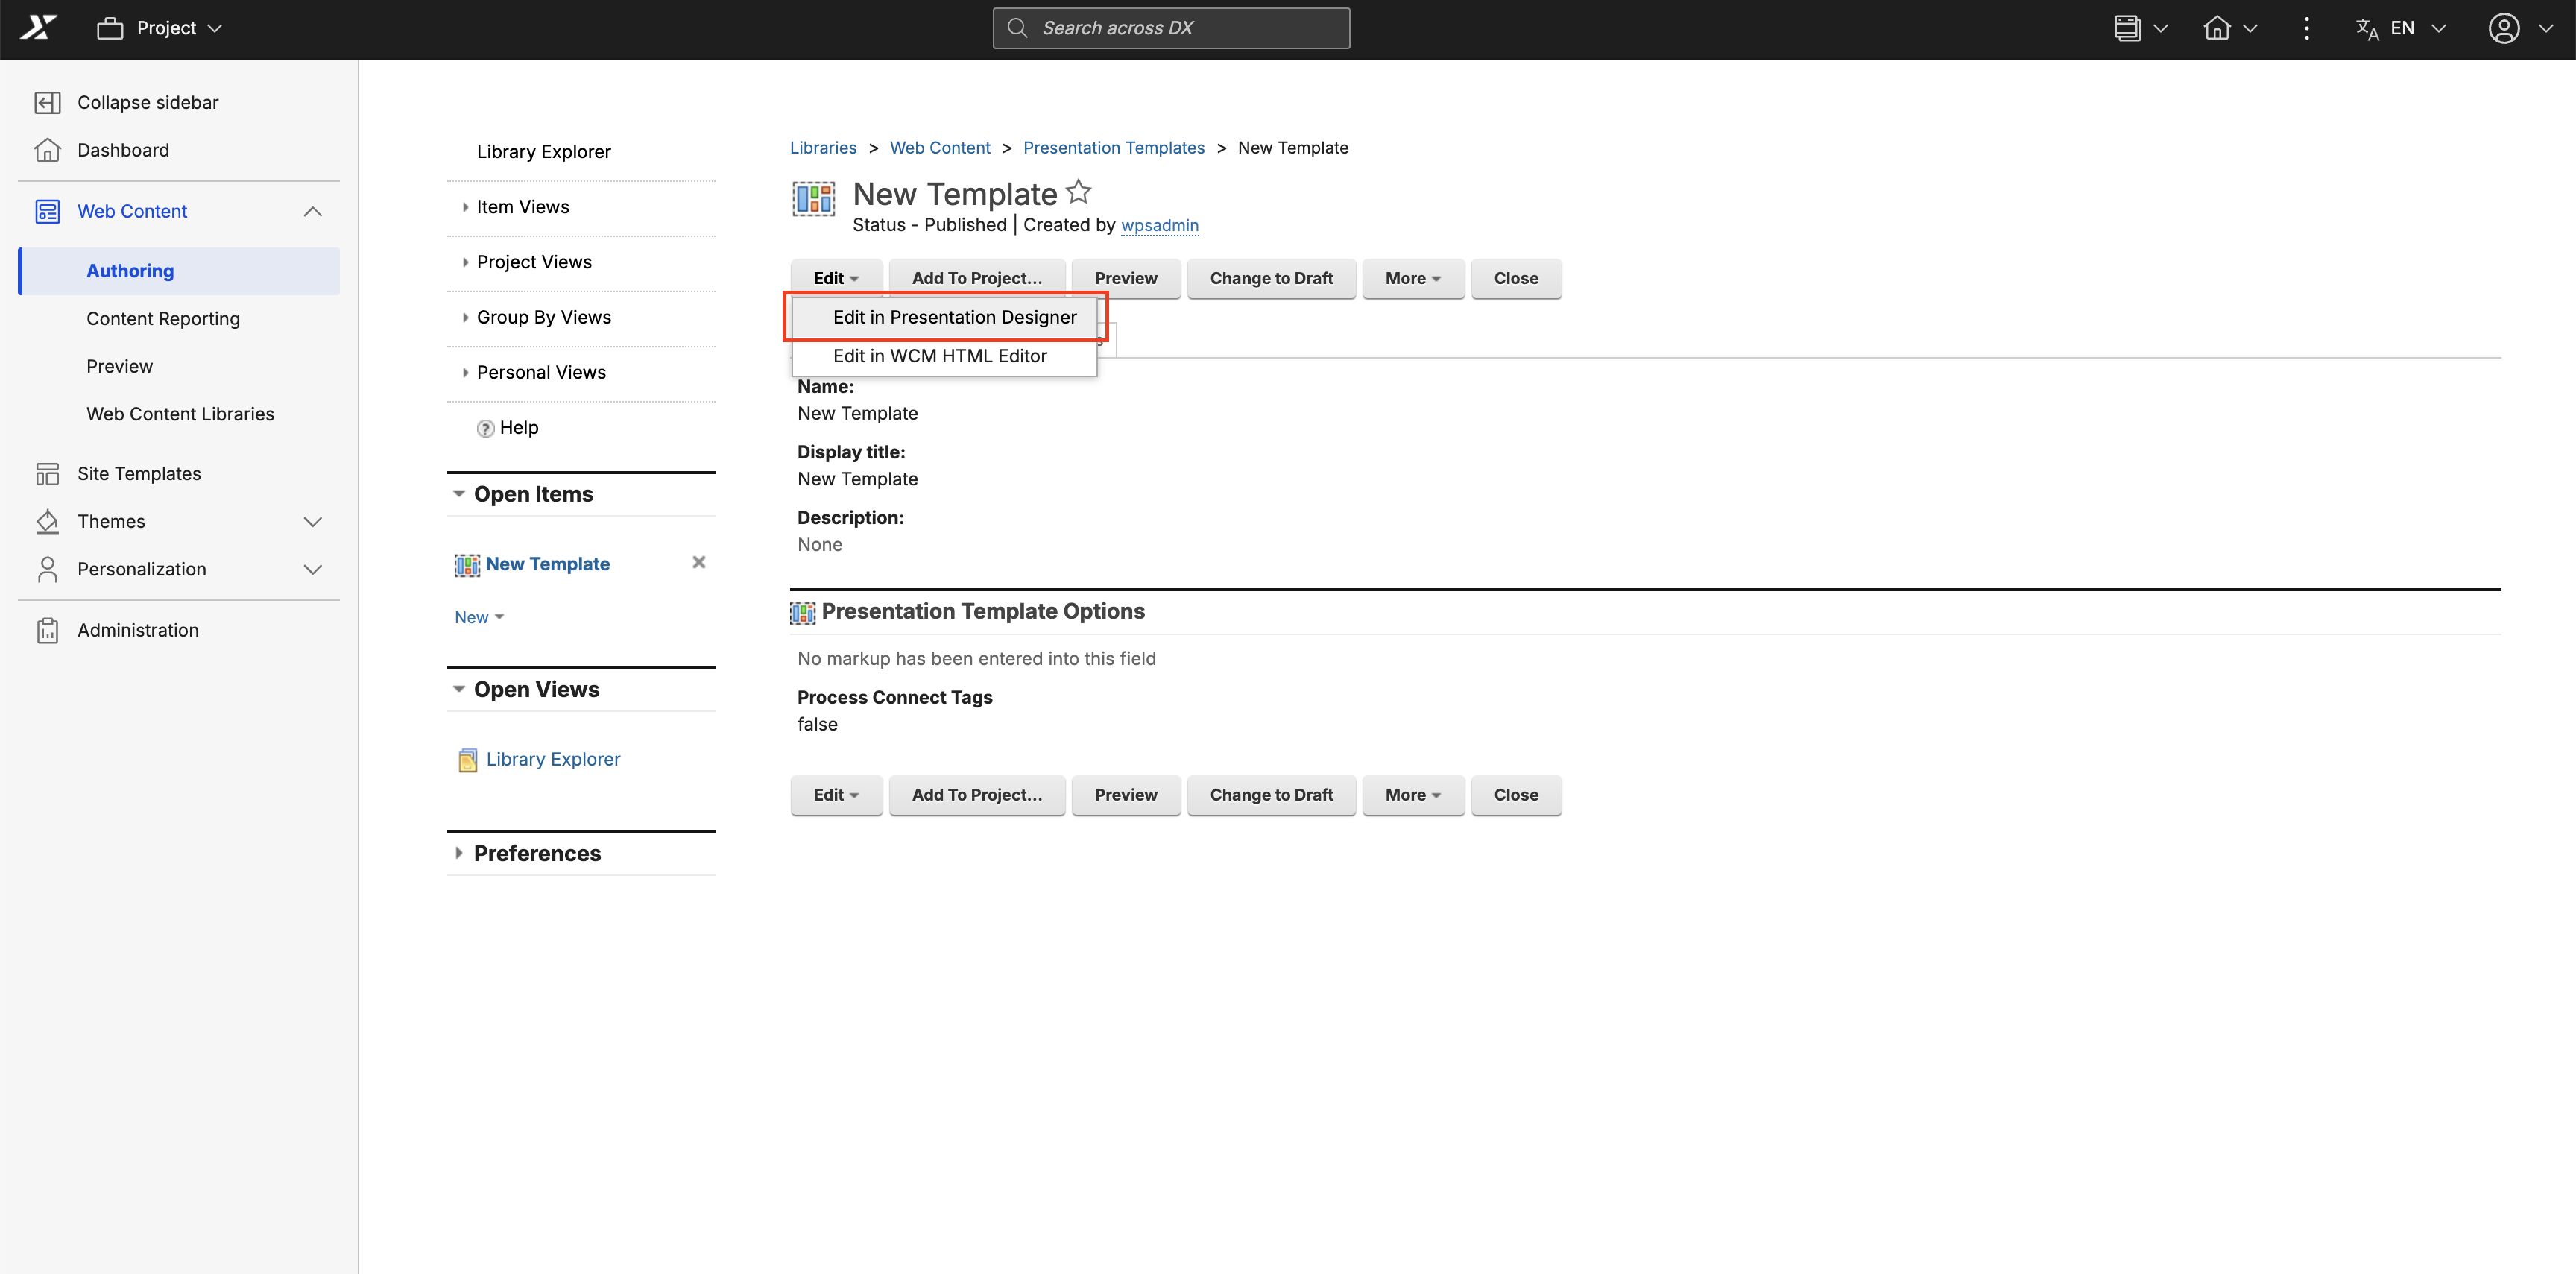
If you are already viewing a template in the WCM HTML Editor (Read mode), click Edit > Edit in Presentation Designer in the action bar to switch to Presentation Designer in edit mode.
-
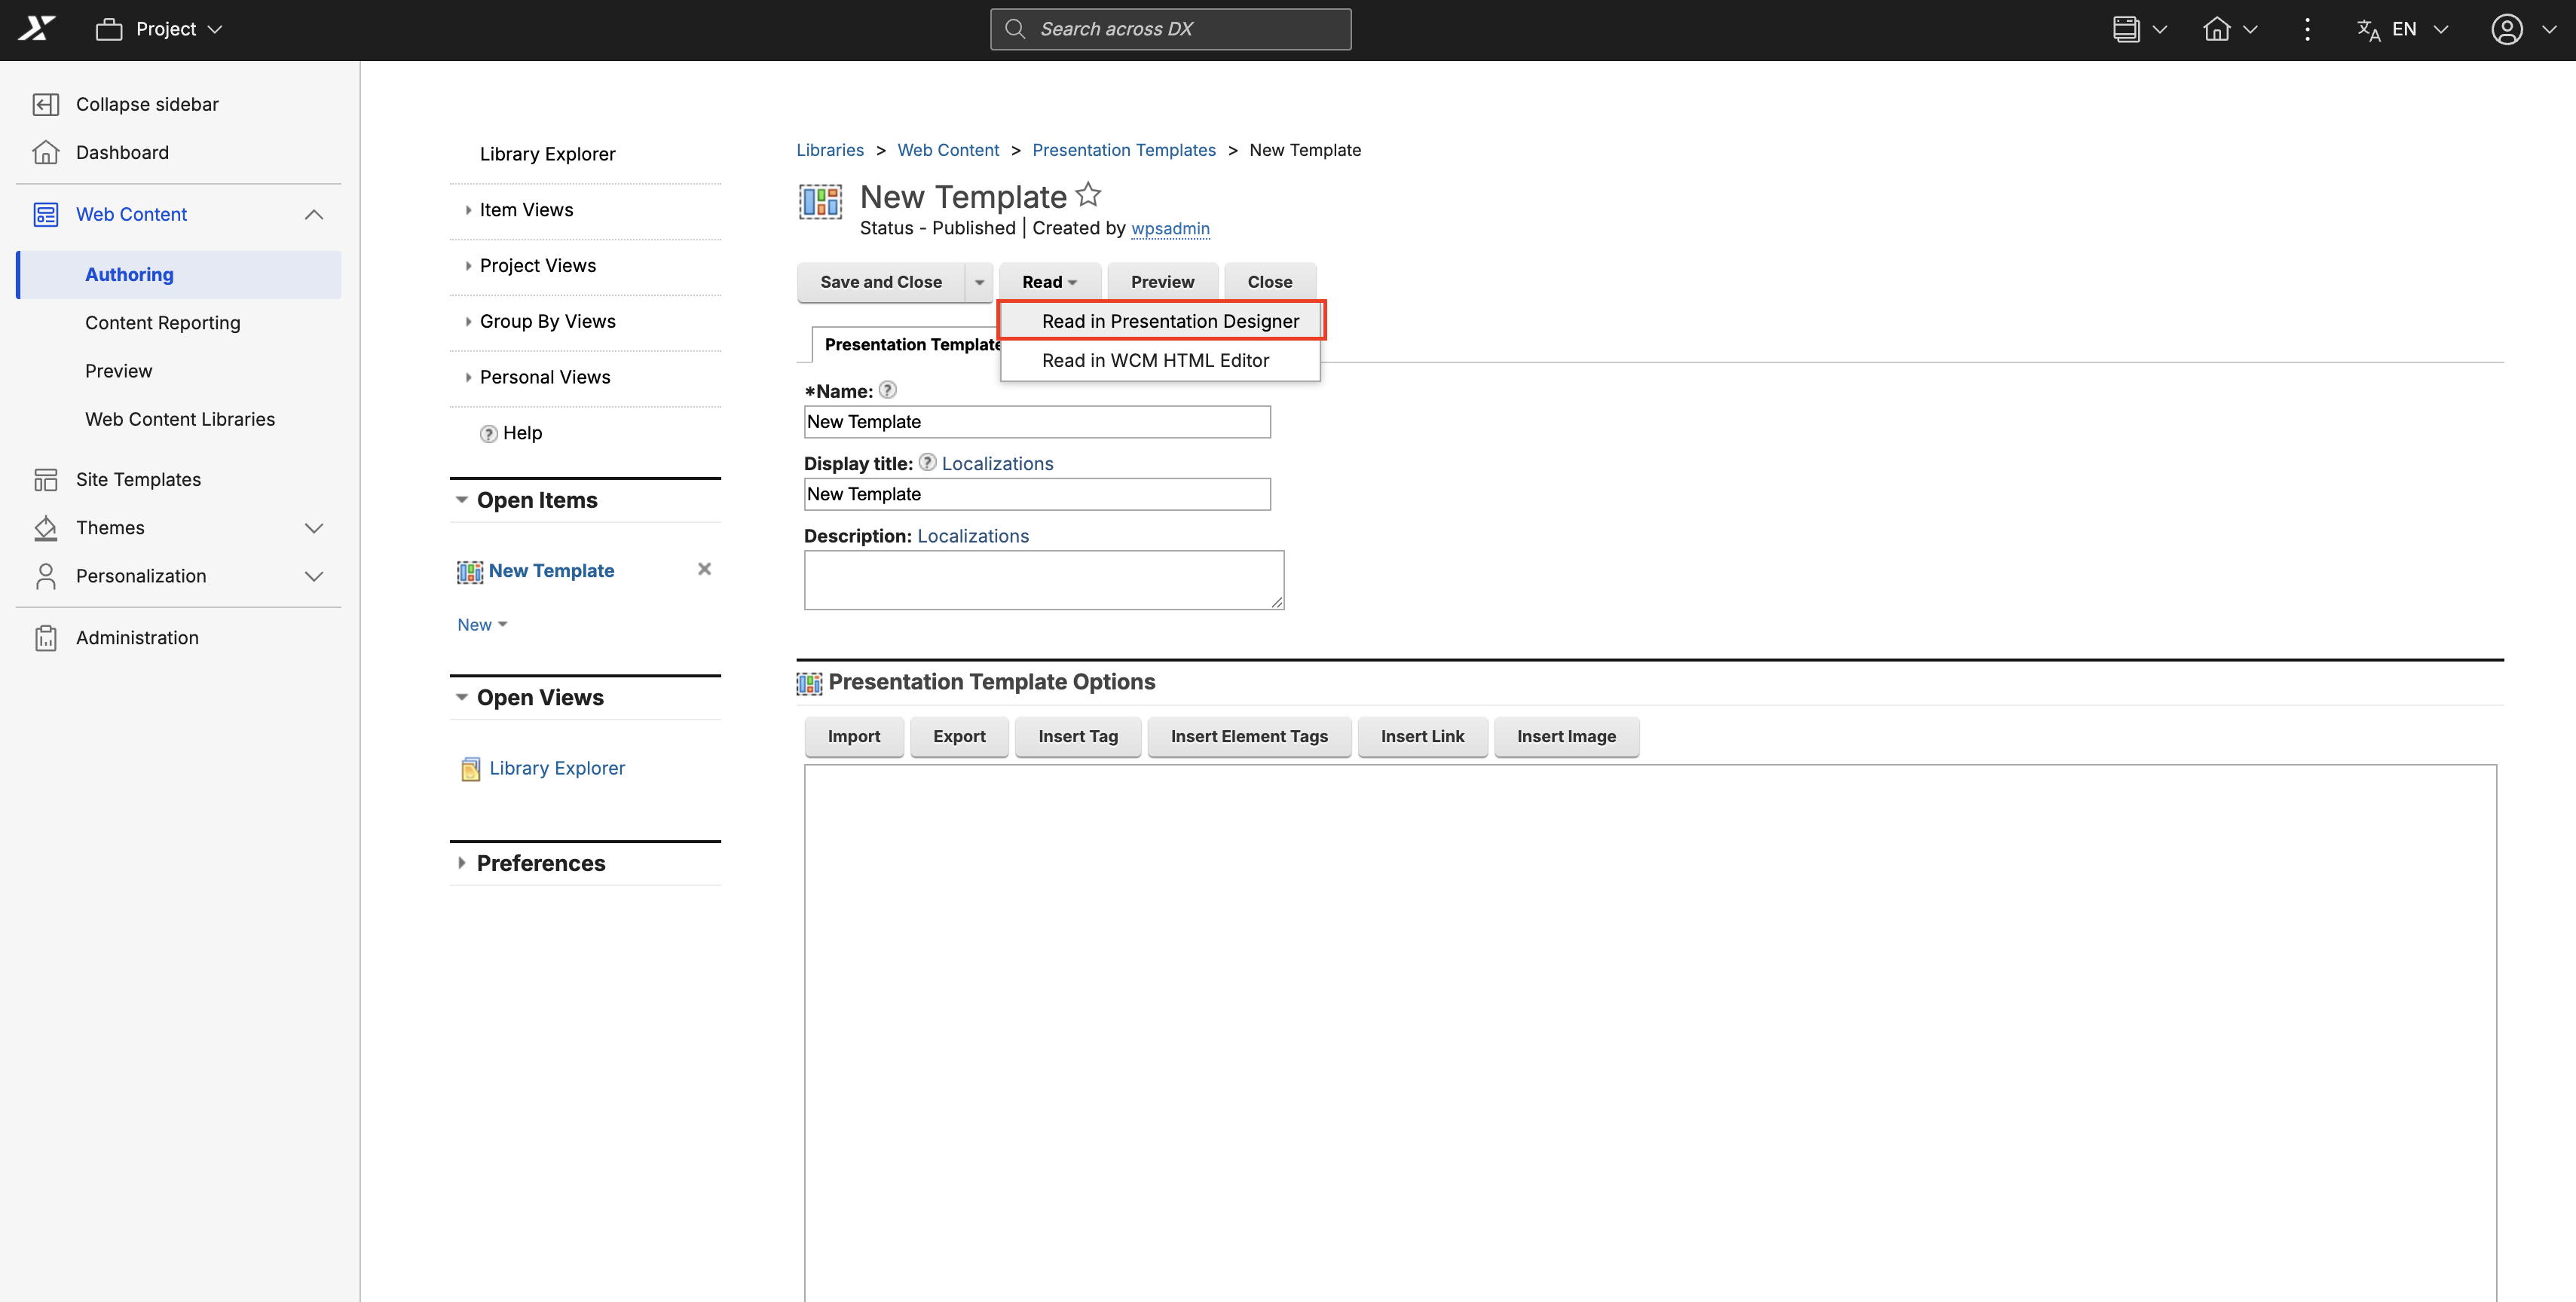
If you are already editing a template in the WCM HTML Editor (Edit mode), click Read > Read in Presentation Designer in the action bar to switch to Presentation Designer in read-only mode.
-
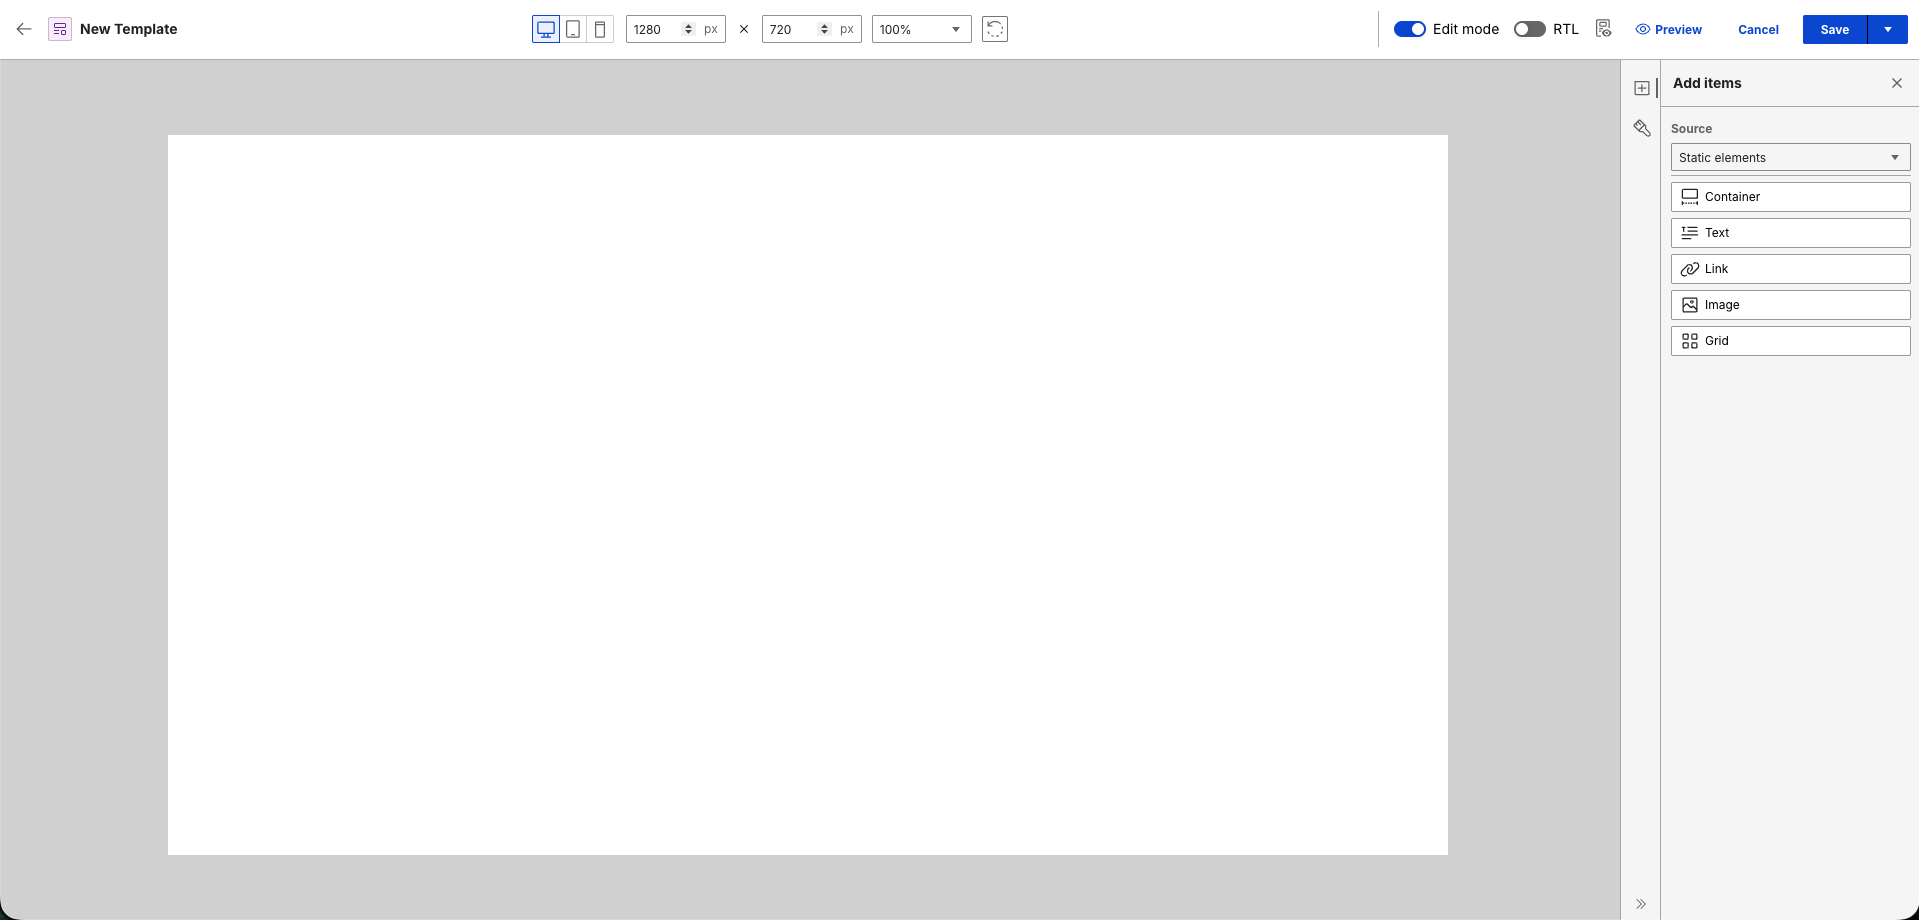
The Presentation Designer user interface appears. You can also use steps 6 to 8 to access any existing presentation template.
The Presentation Designer UI
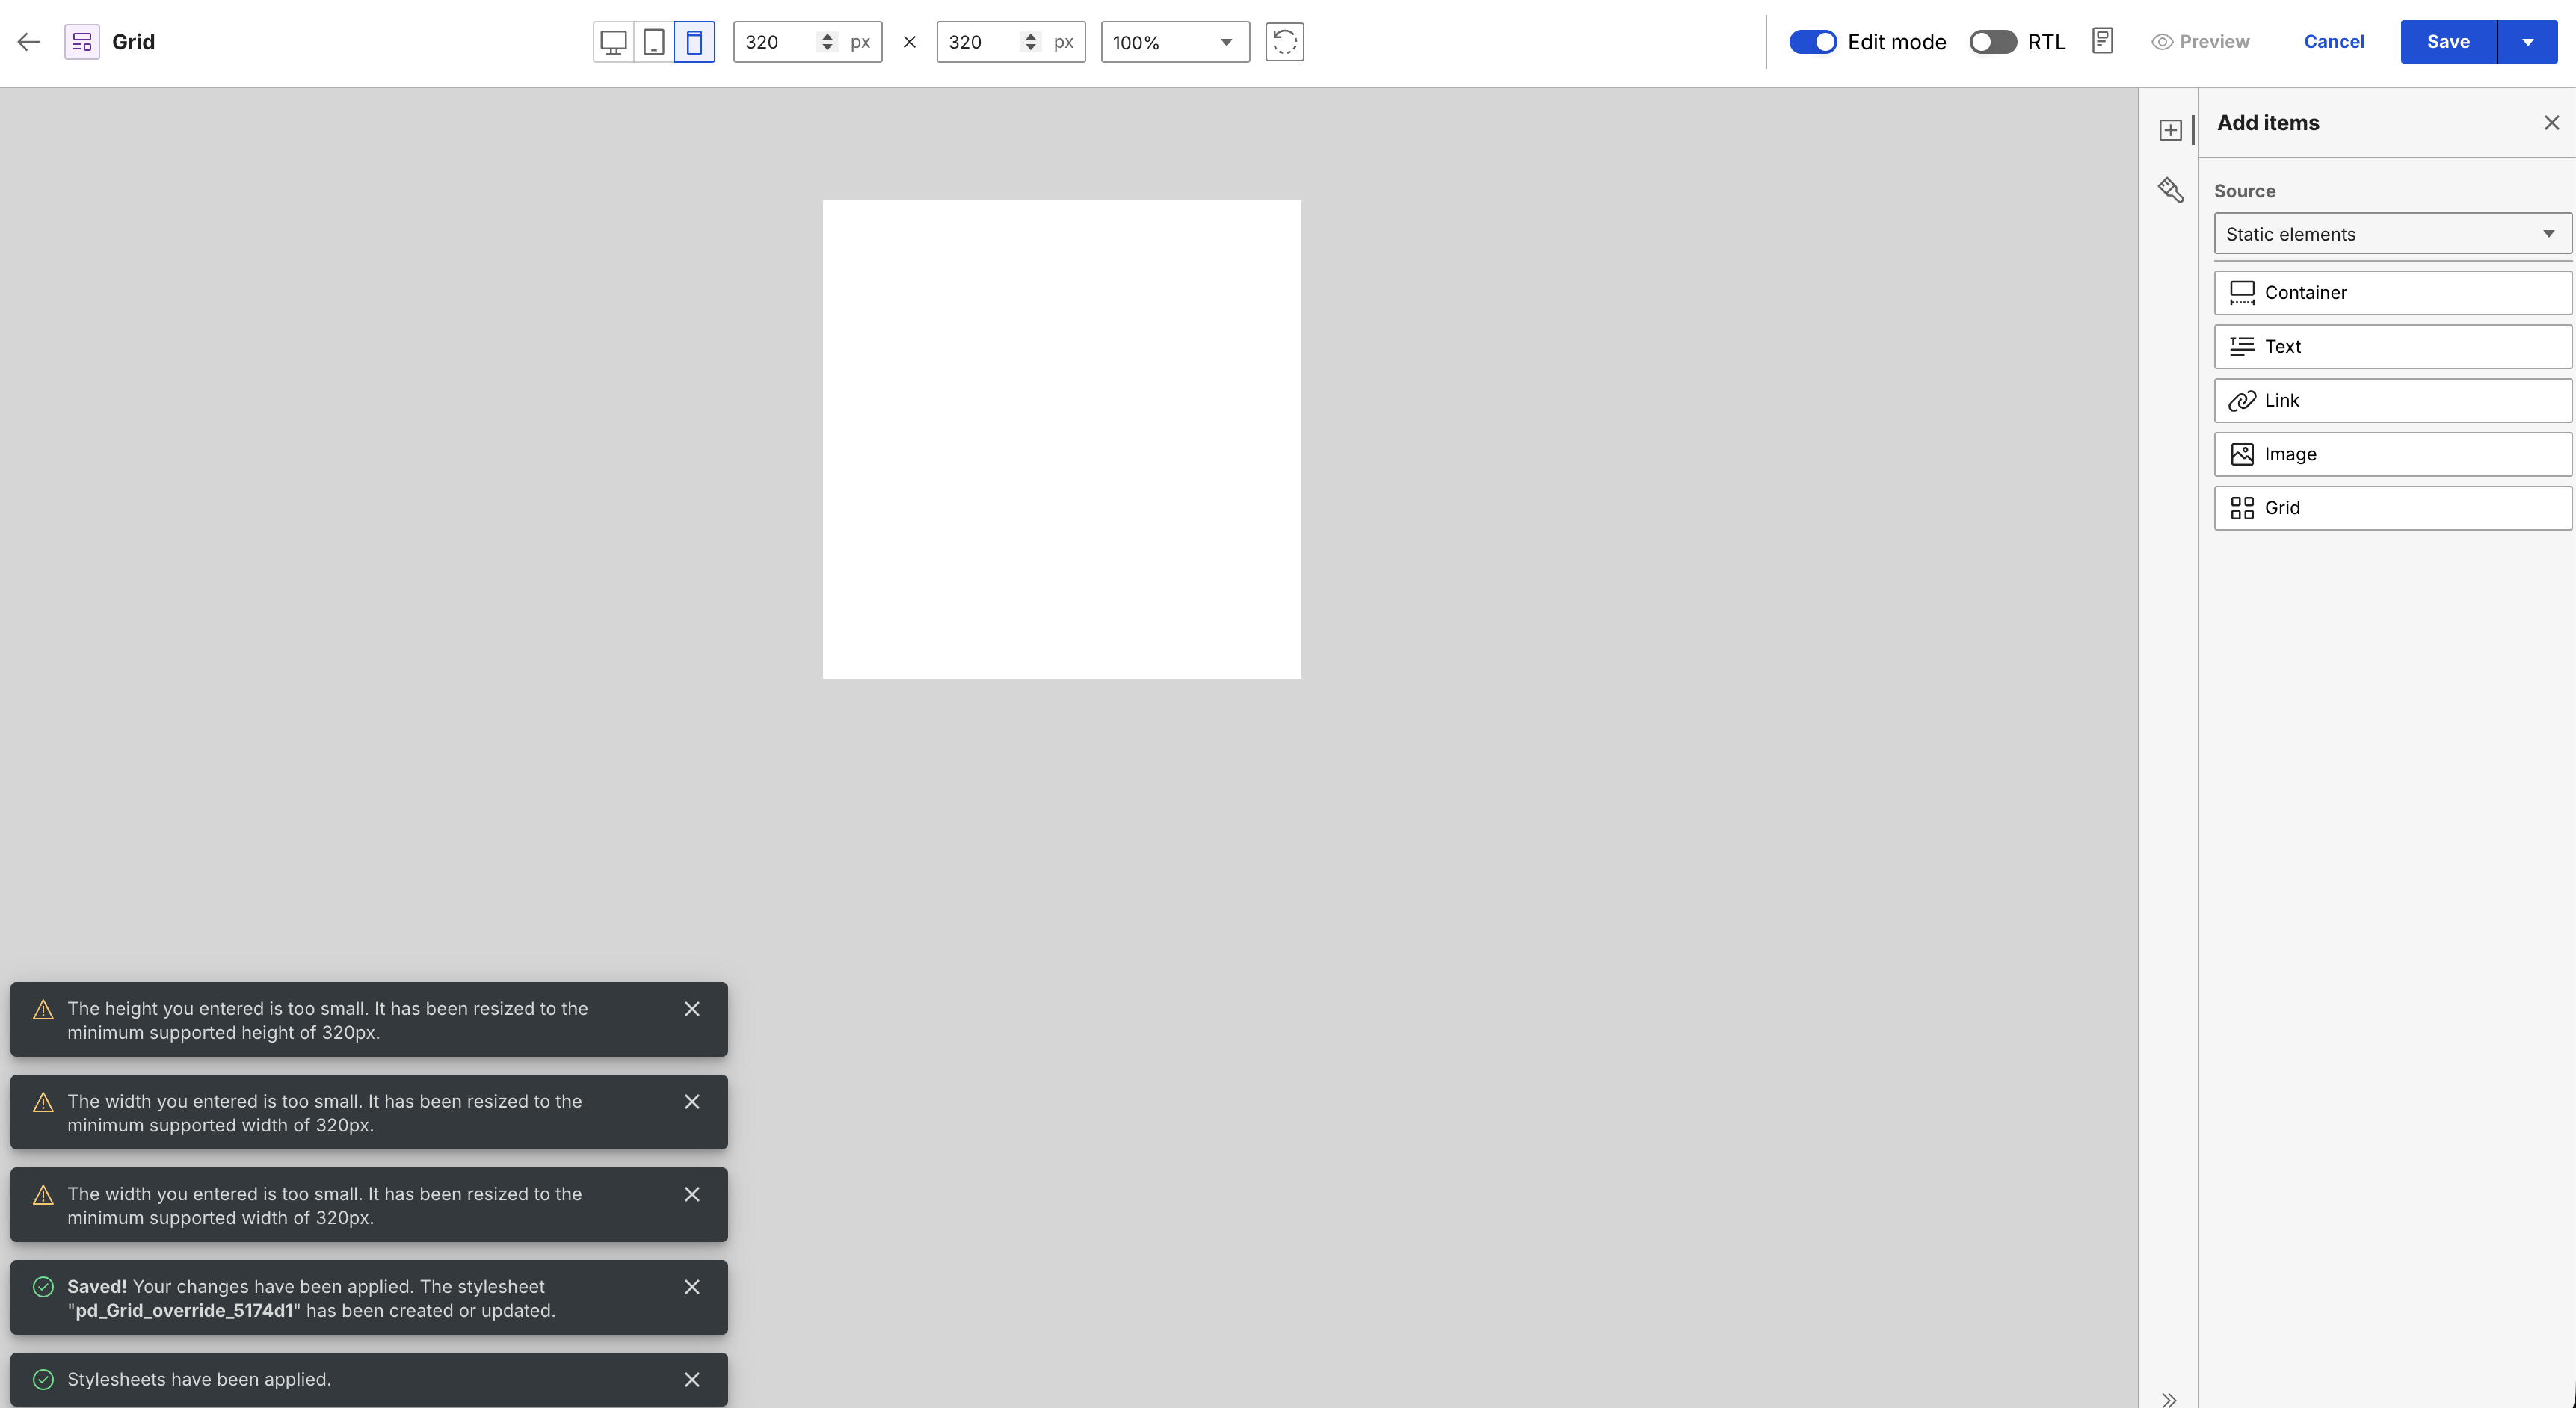
The Presentation Designer user interface is composed of three main sections:
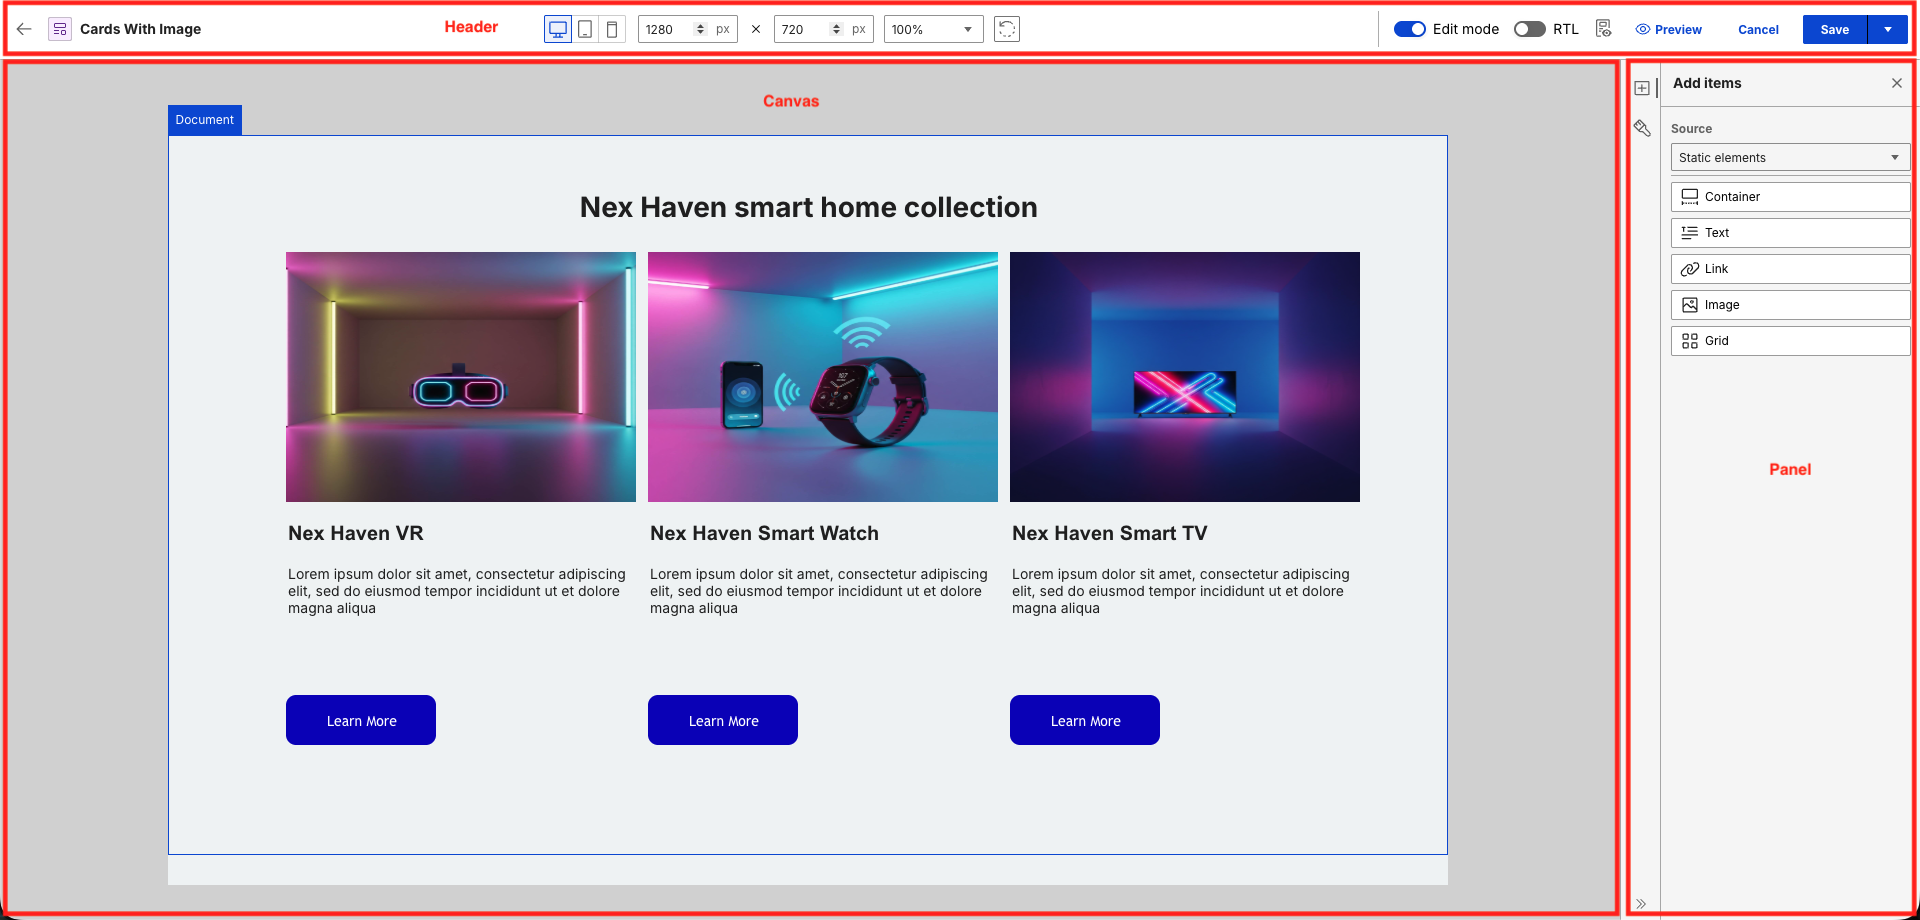
Toolbar
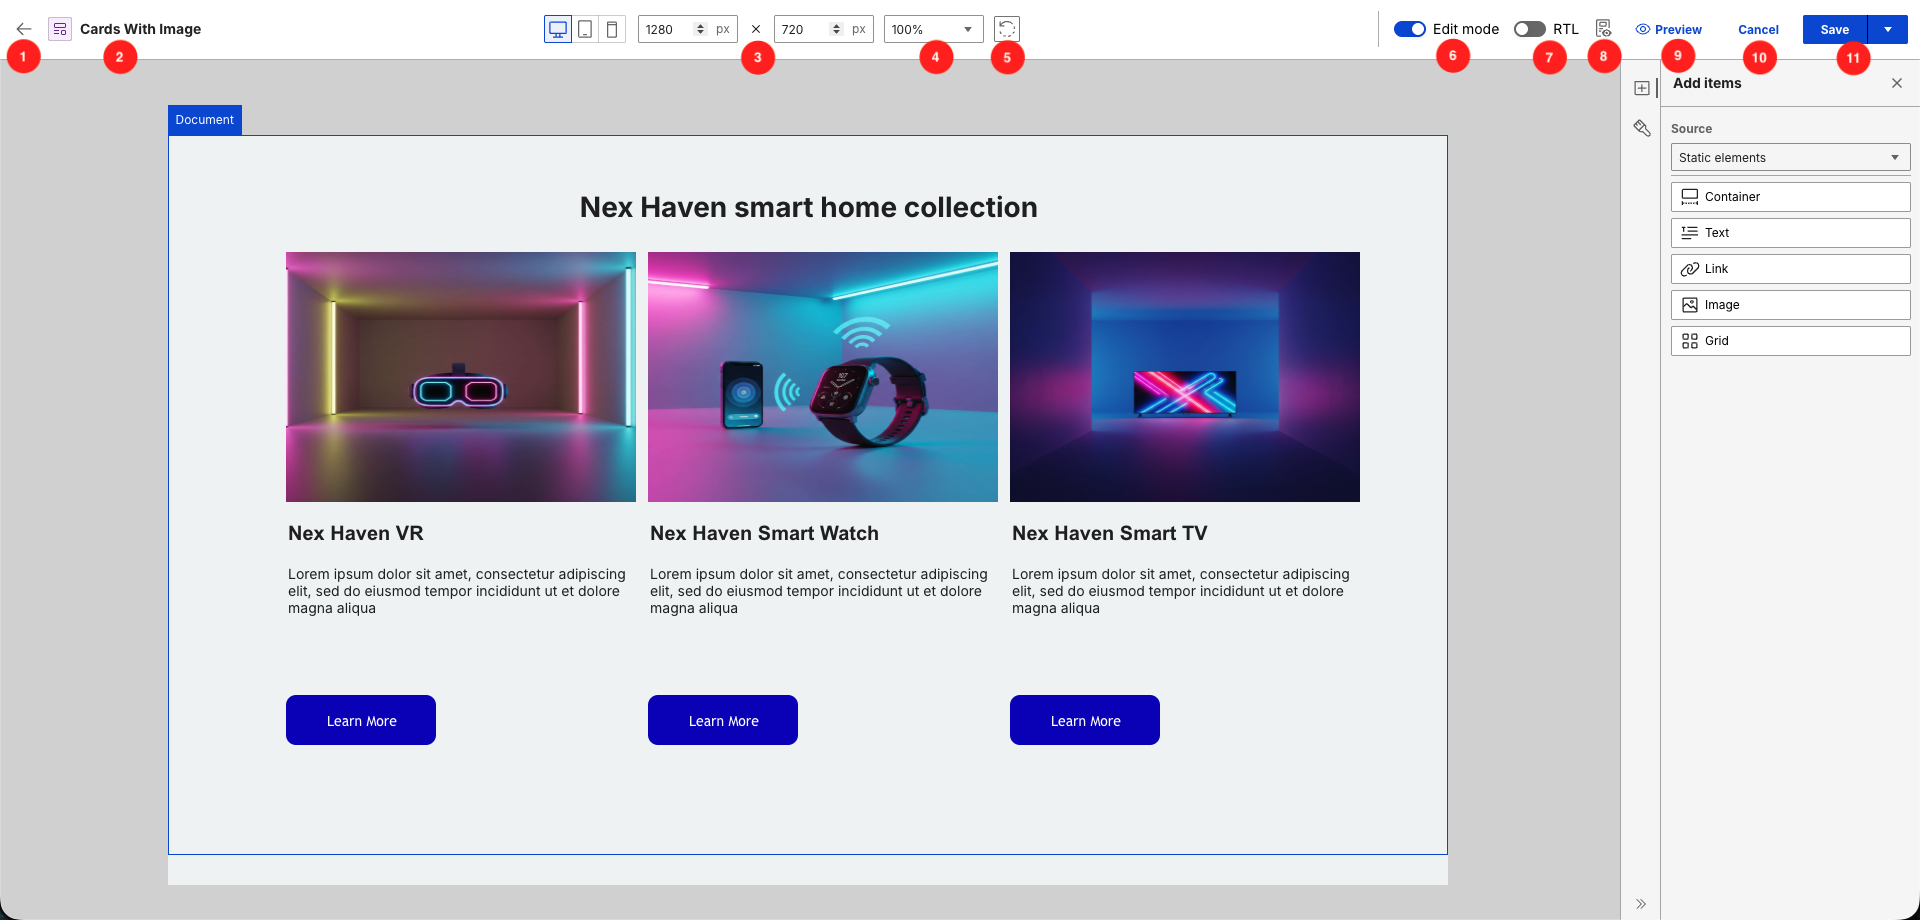
- Back button: Returns you to the source page within the Authoring portlet. The Presentation Designer automatically synchronizes the return URL and preserves your active editing context, language settings, and selected page highlights.
- Template Title: Displays the name of the current presentation template.
- Canvas dimensions settings: Adjusts the width and height properties of the canvas workspace.
- Zoom selection: Scales the magnification level of the active workspace view.
- Rotate button: Switches the orientation of the layout canvas between portrait and landscape.
- Edit or Read mode toggle: Switches the workspace environment between Edit and Read modes.
- RTL toggle: Switches the canvas orientation between left-to-right (LTR) and right-to-left (RTL) layouts.
- Canvas Context Preview button: Renders a real-time preview of the template using actual Web Content Manager (WCM) content items to verify data mapping, custom styling, and layouts across different device views before publishing.
- Preview button: Saves the template and opens a full preview in a separate window with the selected content applied. It automatically detects unsaved changes and prompts you to save the template before generating the file.
- Cancel button: Discards unsaved changes and exits the Presentation Designer to return to the Authoring portlet.
- Save button: Saves the presentation template or opens a dropdown menu to choose Save and Close.
Panel
There are two panels you can use in Presentation Designer: Add Items and Style Items.
Add items
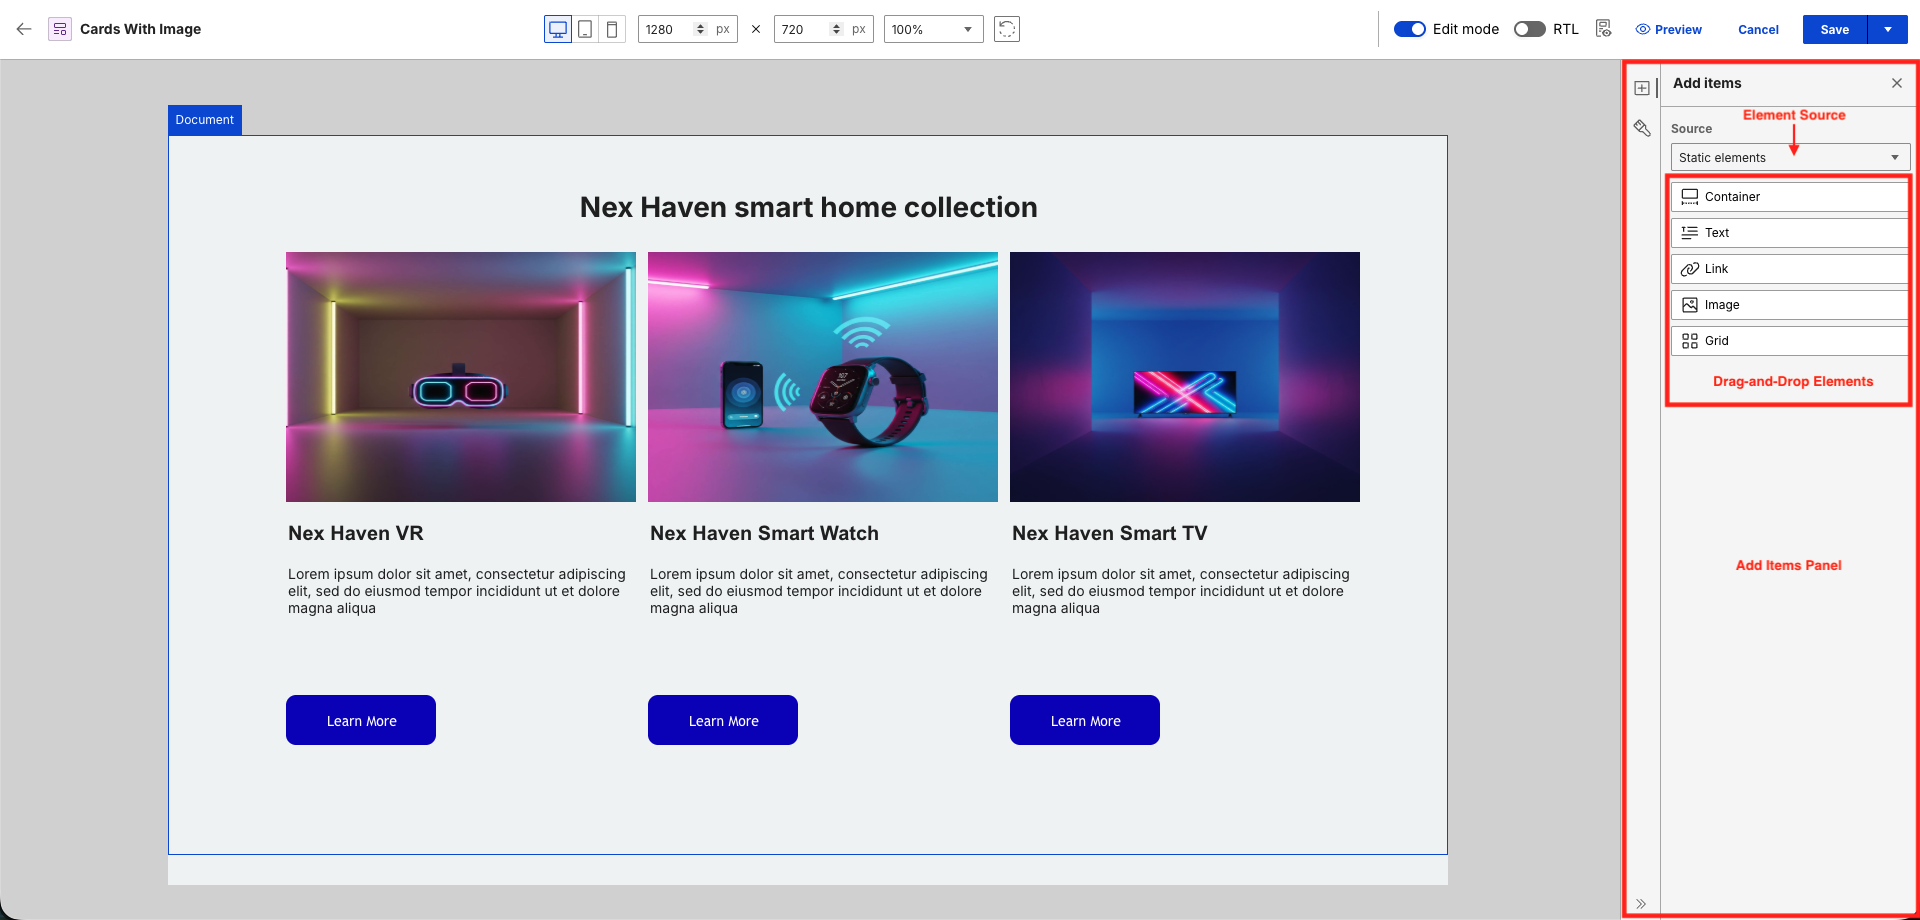
The Add items panel contains the user elements that you can drag and drop to the canvas. The Source field contains a dropdown menu where you can select an element source. The list of elements you can drag in the Add items panel depends on the element source you selected in this field.
Style items
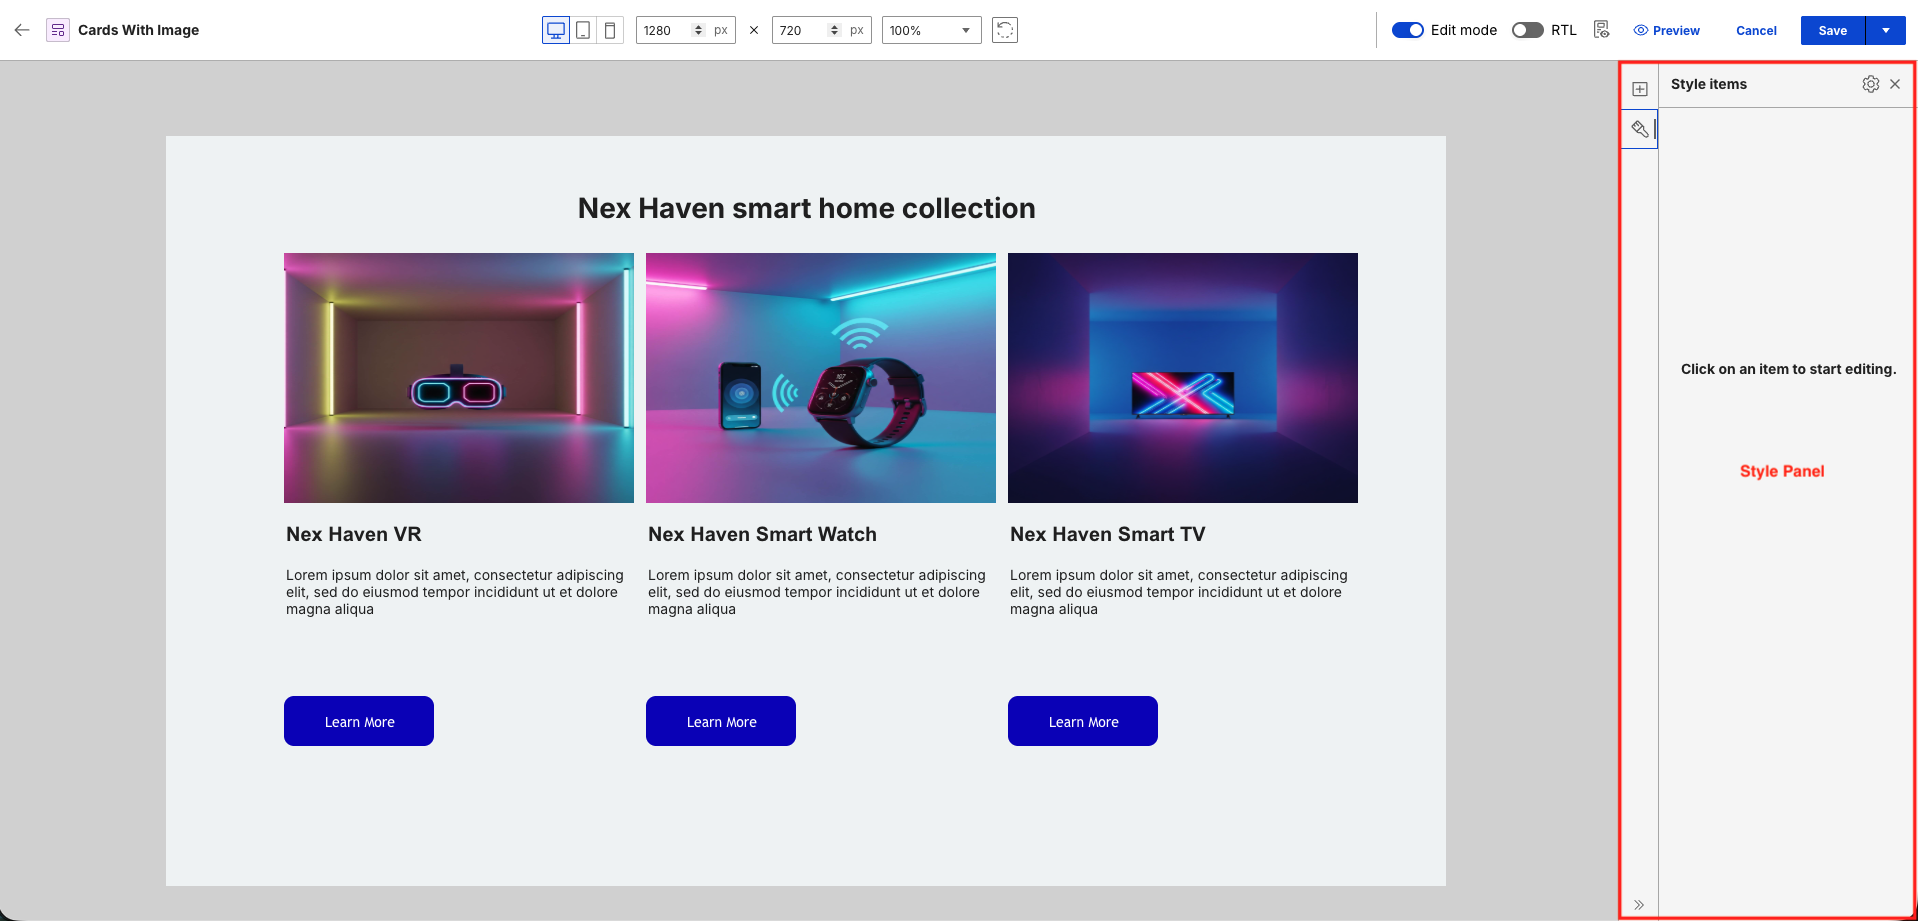
The Style items panel contains the different styling options available for the selected element on the canvas. The styling options are updated accordingly based on the selected element on the canvas.
For more information on the user elements and style options, refer to Usage of Presentation Designer.
Canvas
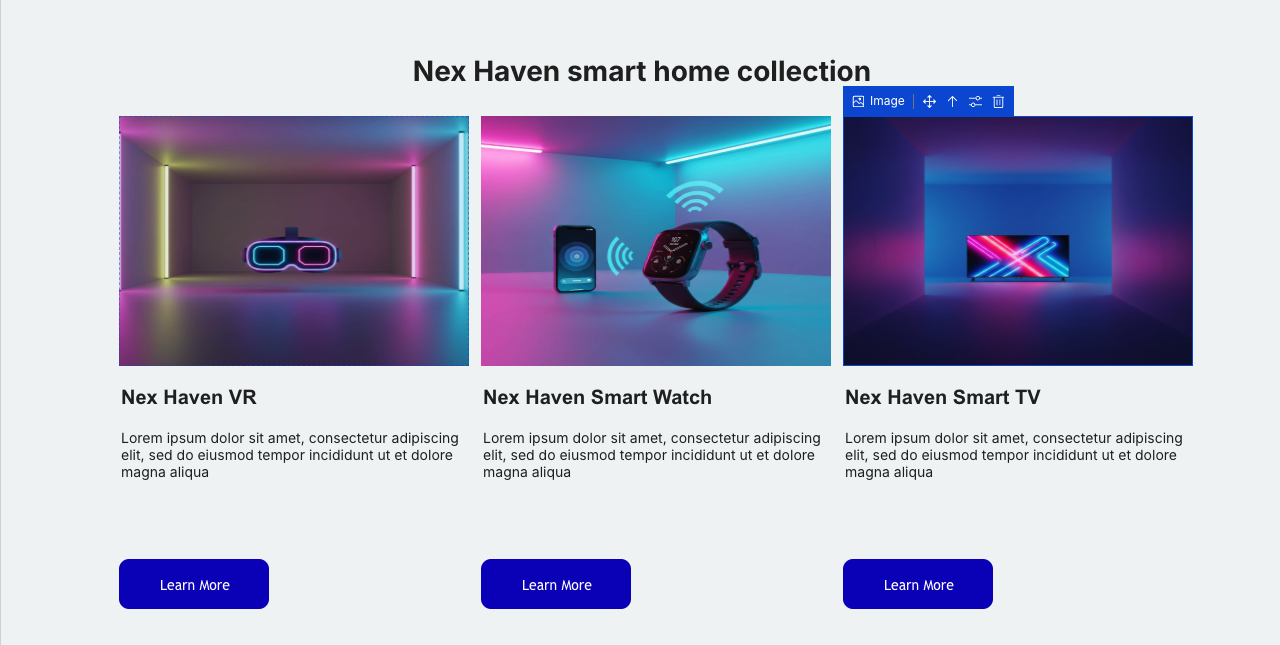
The Canvas serves as the central workspace in Presentation Designer. This is where you can build your presentation templates. You can drag and drop elements right onto the canvas, making it simpler to create your layout. Any adjustments you make to the styling appear right away, giving you instant visual feedback as you work. This workspace allows content managers to experiment with different layouts and designs.
Hovering or selecting an element on the canvas displays the element name and the different action buttons available for the element.
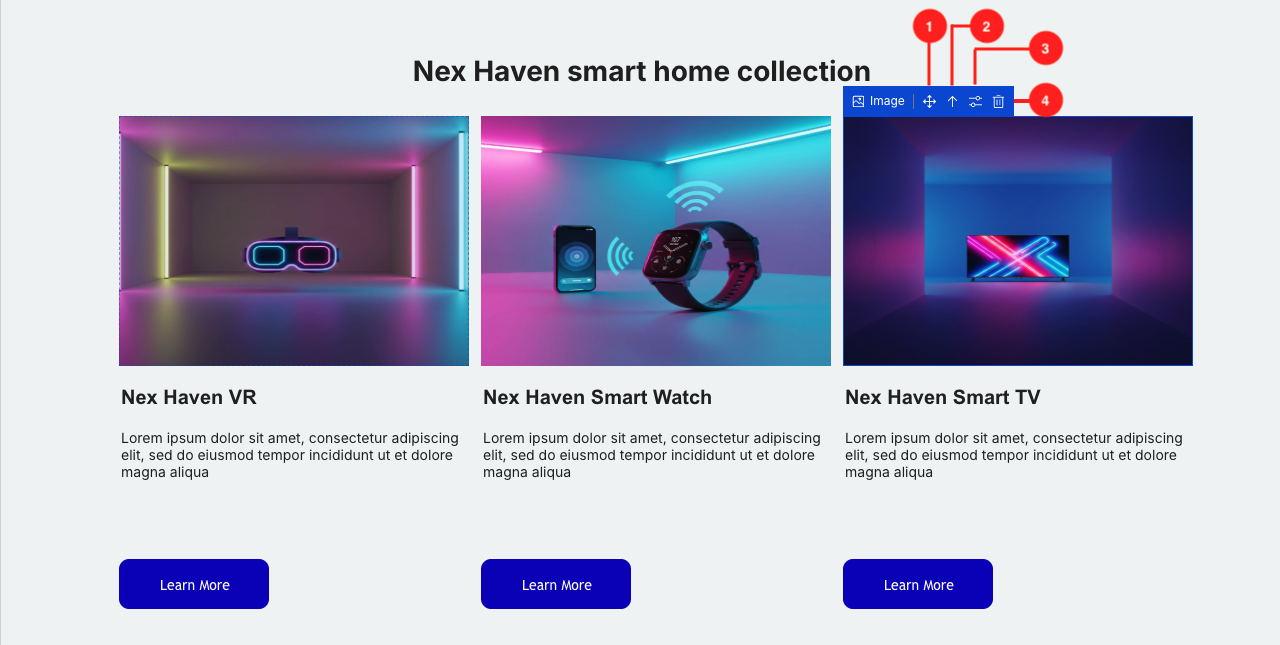
- Move icon: Rearranges elements on the canvas using drag and drop.
- Arrow Up icon: Selects the parent of the current element automatically.
- Configure icon: Displays additional configuration options for the element.
- Trash icon: Deletes the element from the canvas.
Notifications
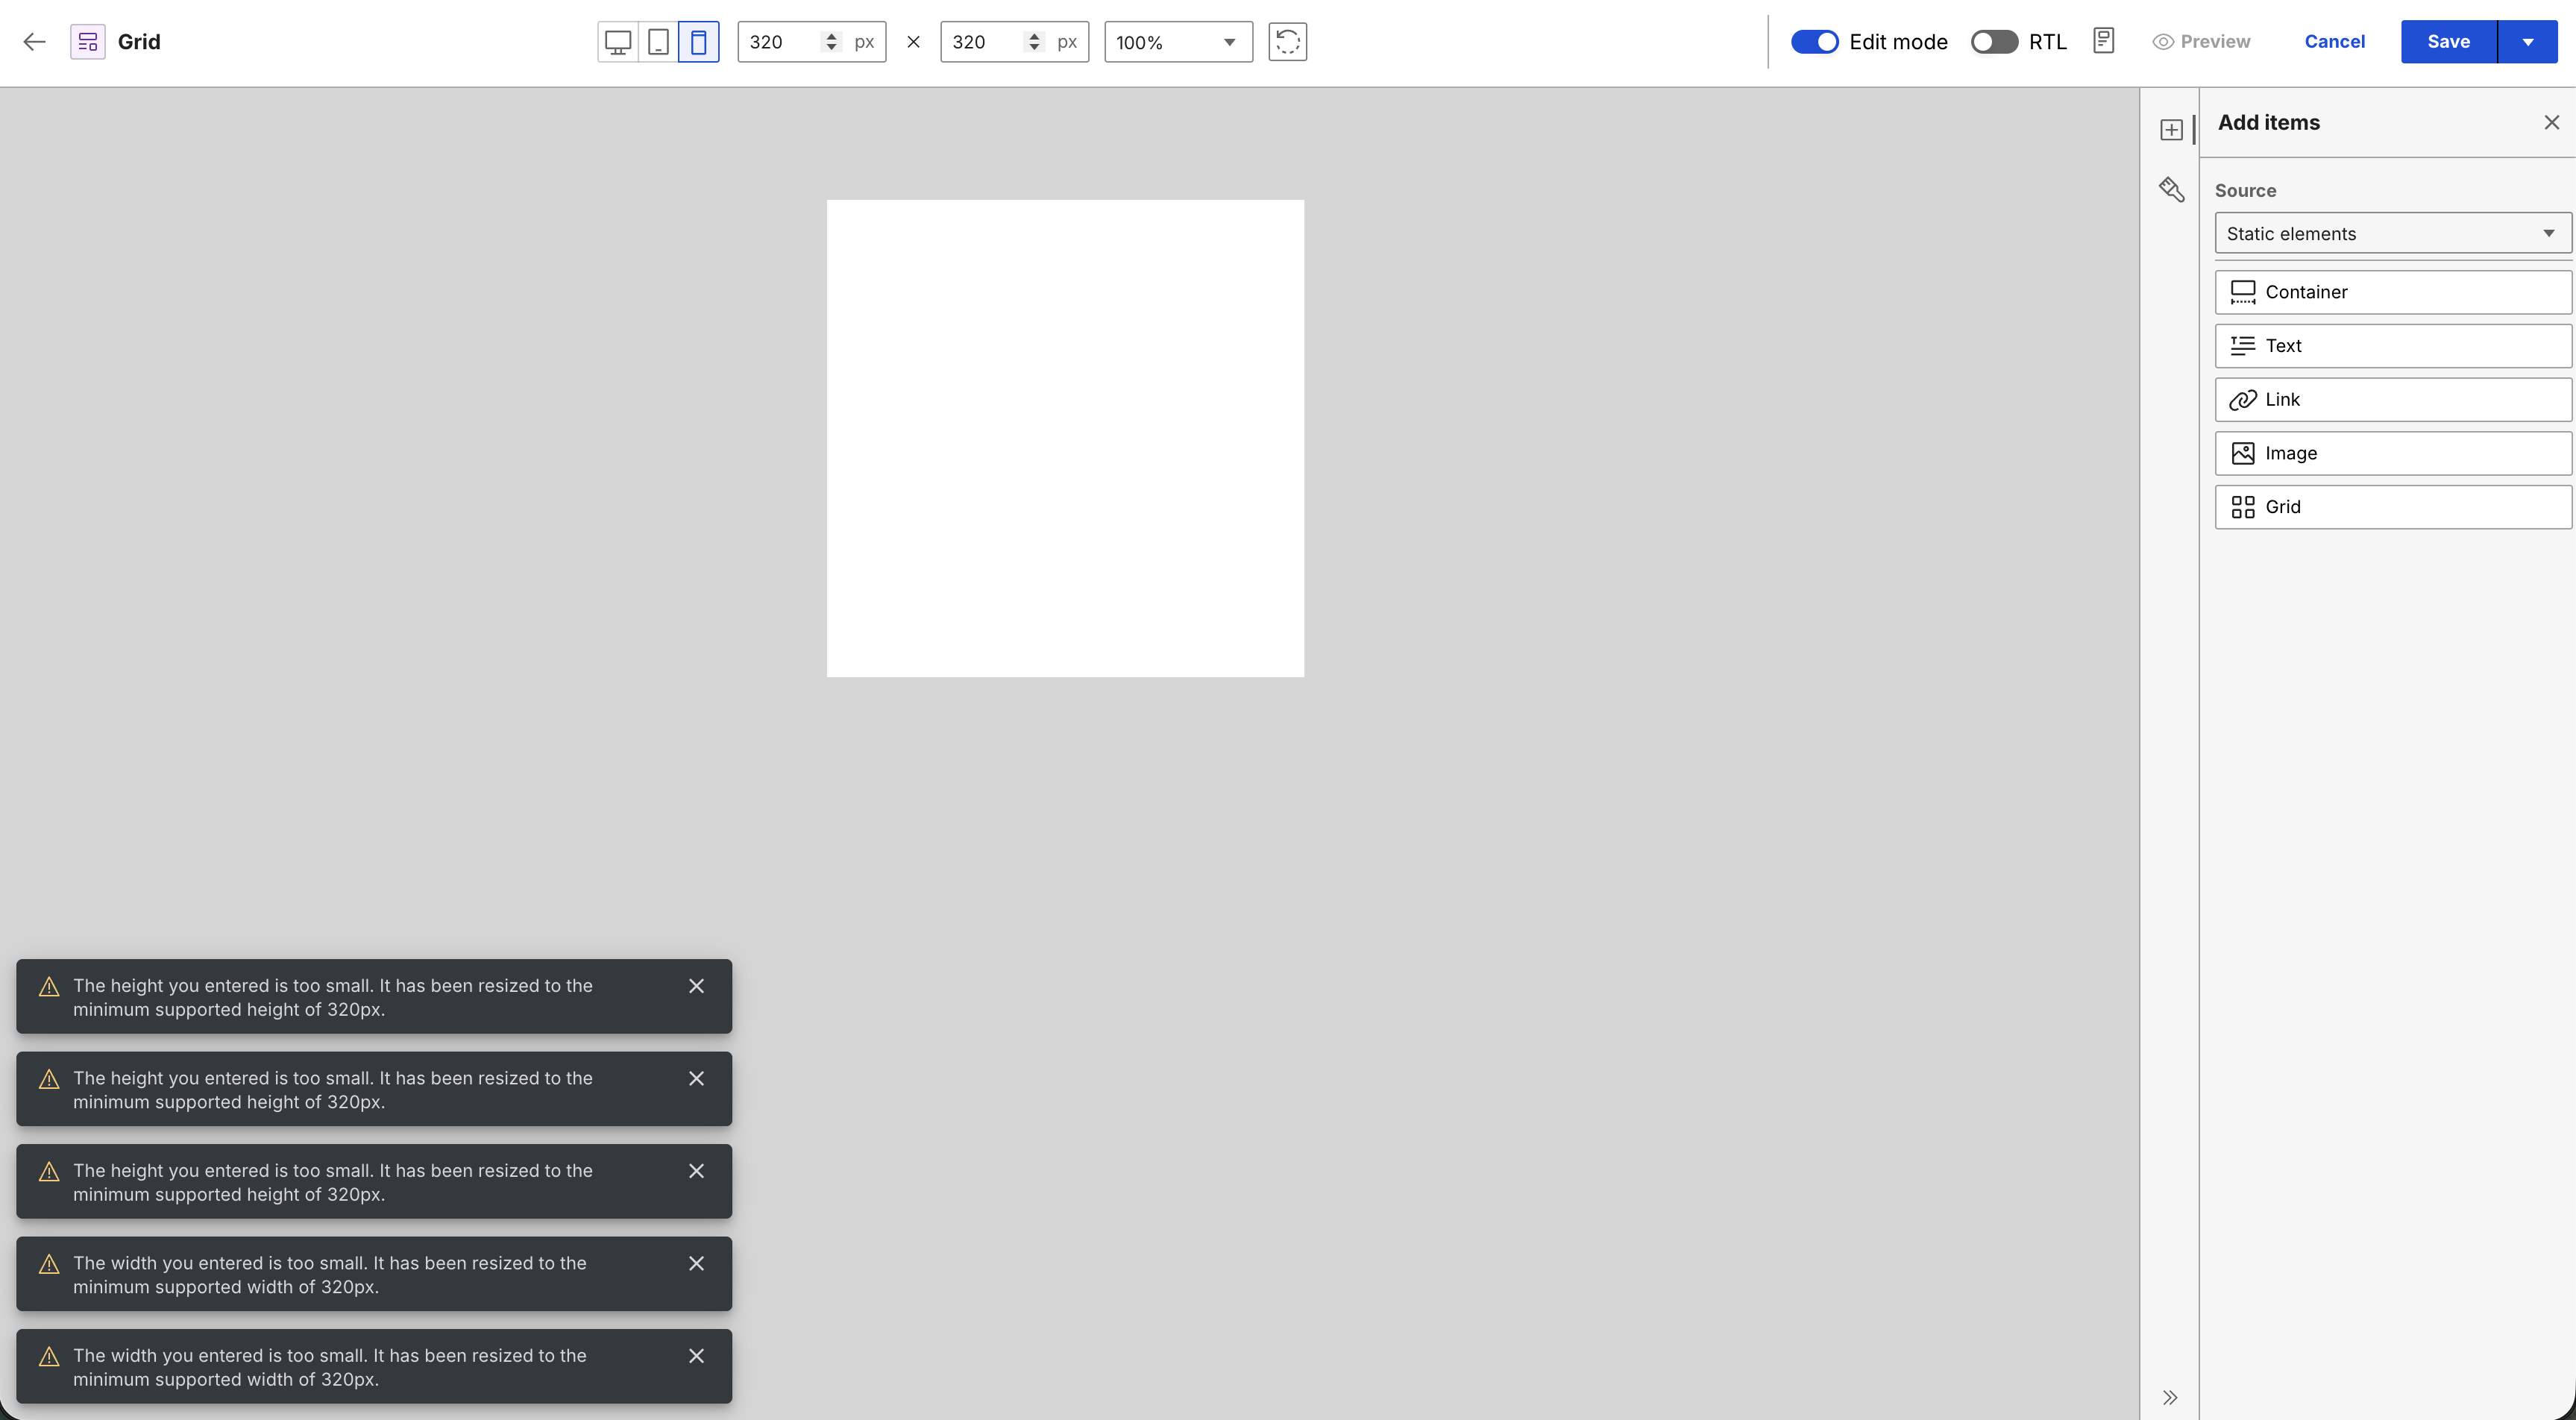
The Presentation Designer uses a stacked notification system to display real-time status updates and operation alerts directly on the workspace.
-
Multiple notification snackbars queue up and display vertically in the bottom-left corner of the screen instead of instantly replacing active messages. This lets you track rapid operations without losing sight of previous alerts.
-
The system automatically manages these active alerts using a maximum display cap. When a new action triggers an update and the stack reaches its limit, the oldest notification drops off the top of the stack to make room for the incoming message at the bottom.