Validating the deployment
This section provides instructions for verifying that your deployment is healthy and operational at any stage of the installation process. Use these steps to confirm that IQ services are running, pods are healthy, and communication is established with external systems, including HCL Digital Experience (DX) Core, DX Compose, and the LiteLLM Proxy. This validation applies to all IQ installations, regardless of your database configuration.
Verifying pod health
Check that all IQ pods are running:
kubectl get pods -n <YOUR_NAMESPACE> | grep dx-iq
Expected output:
NAME                                    READY   STATUS    RESTARTS   AGE
dx-iq-integrator-xxxxxxxxxx-xxxxx       1/1     Running   0          5m
dx-iq-mcp-server-xxxxxxxxxx-xxxxx       1/1     Running   0          5m
If the pods are not running, check the pod description:
kubectl describe pod -n <YOUR_NAMESPACE> -l app=dx-iq-integrator
Checking pod logs
Examine the logs to verify successful initialization and check for configuration errors:
# Integrator logs
kubectl logs -n <YOUR_NAMESPACE> deployment/dx-iq-integrator --tail=50

# MCP Server logs
kubectl logs -n <YOUR_NAMESPACE> deployment/dx-iq-mcp-server --tail=50
Verifying database connectivity
Verify that the IQ service can connect to its database:
kubectl logs -n <YOUR_NAMESPACE> deployment/dx-iq-integrator | grep -i "database"
Expected output (persistent PostgreSQL database):
Database mode is ENABLED. Using PostgreSQL database.
Database connection initialized.
Database initialized successfully.
Expected output (SQLite fallback):
Using database: In-memory SQLite
If the initial command returns errors such as Connection refused or Password authentication failed, the IQ Integrator cannot reach the database. For steps on troubleshooting database connection issues, refer to Troubleshooting - Connection failures.
Testing WebSocket connectivity
Verify that the client can establish a WebSocket connection to the IQ backend:
-
Retrieve the IQ service endpoint:
kubectl get service -n <YOUR_NAMESPACE> | grep dx-iq -
Open your DX environment in a browser and navigate to a page with the IQ chatbot integration. The chatbot should be visible and interactive. For detailed instructions on accessing your DX environment and configuring IQ UI components, refer to Accessing the DX environment.
Verifying MCP Server integration
Check the Model Context Protocol (MCP) Server logs to confirm tool registration status:
kubectl logs -n <YOUR_NAMESPACE> deployment/dx-iq-mcp-server | grep -i "Registering\|disabled"
Expected output (tools enabled):
Registering WCM tools
Registering DAM tools
API endpoints available at https://localhost:...
Expected output (tools disabled):
WCM tools are disabled
DAM tools are disabled
If tools are unexpectedly disabled, verify that mcpServer.enableWcm and mcpServer.enableDam are set to true in your Helm values.
Testing end-to-end functionality
- Open the HCL IQ user interface in your DX environment.
- Submit a test query (for example, "What is HCL Digital Experience?").
-
Verify the following:
-
The WebSocket connection is established:
- In your browser developer tools, open the Network tab.
- Select Socket (Chrome), WS (Firefox), or WebSockets (Safari).
-
Confirm the
wsconnection is established (status: "open").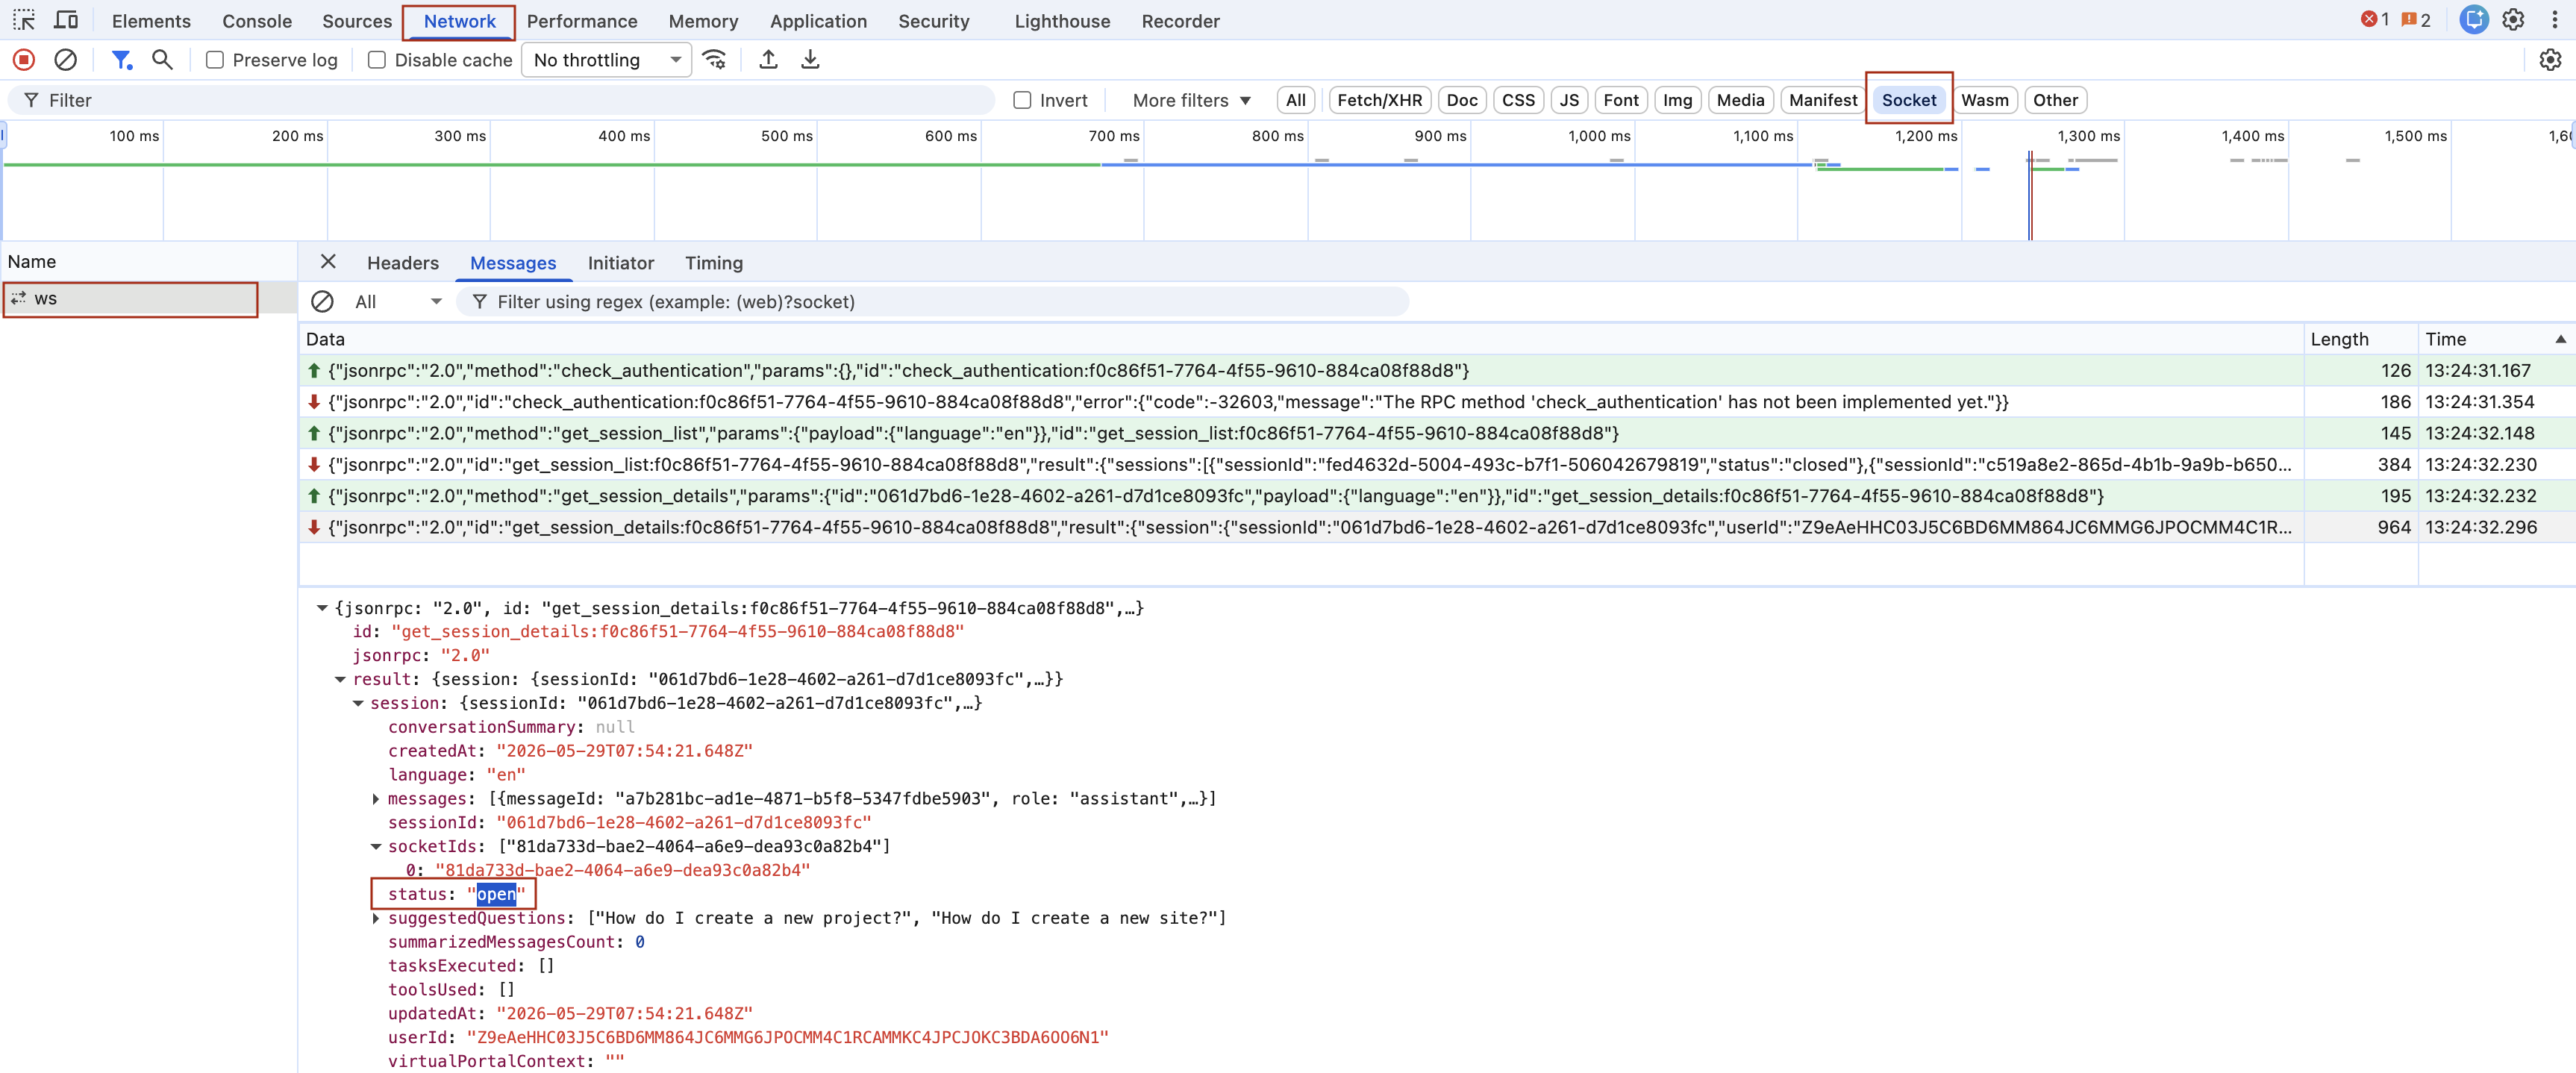
-
The query is processed:
- In the same
wsconnection, open the Messages tab. -
Verify that an outbound JSON-RPC message with
method: "send_message"is sent for your query.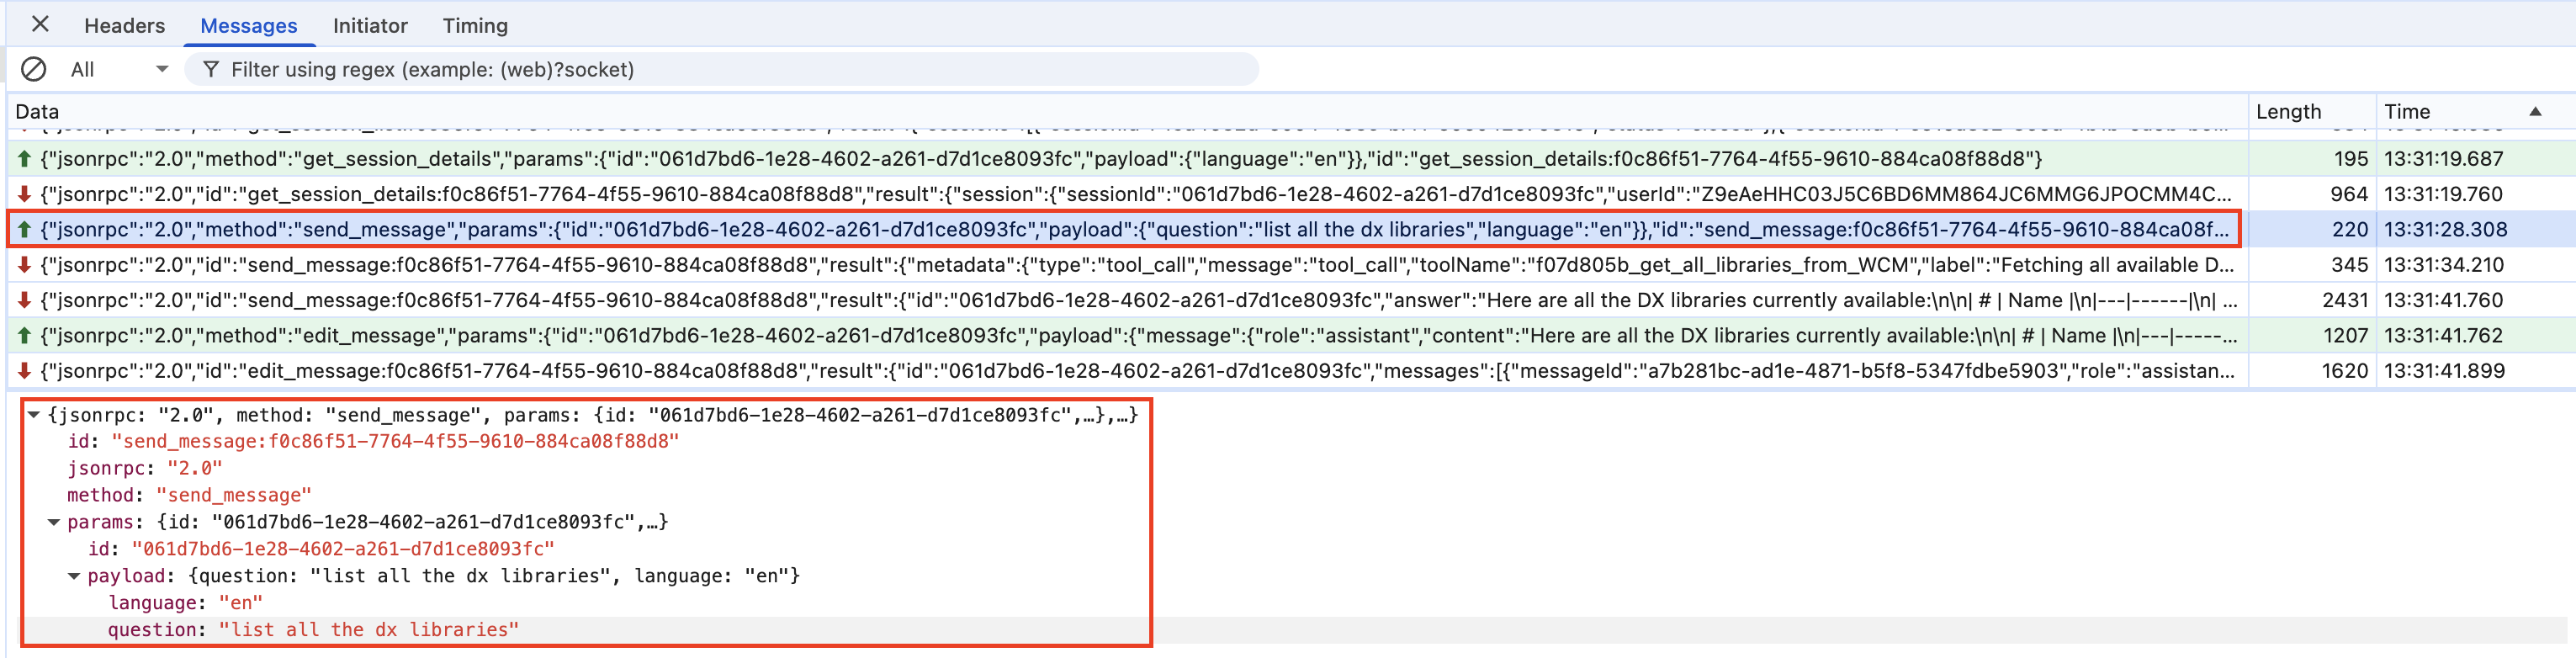
- In the same
-
A response is returned from the AI model:
In the same Messages tab, verify an inbound JSON-RPC response is returned for your
send_messagerequest and includes the AI-generated answer payload.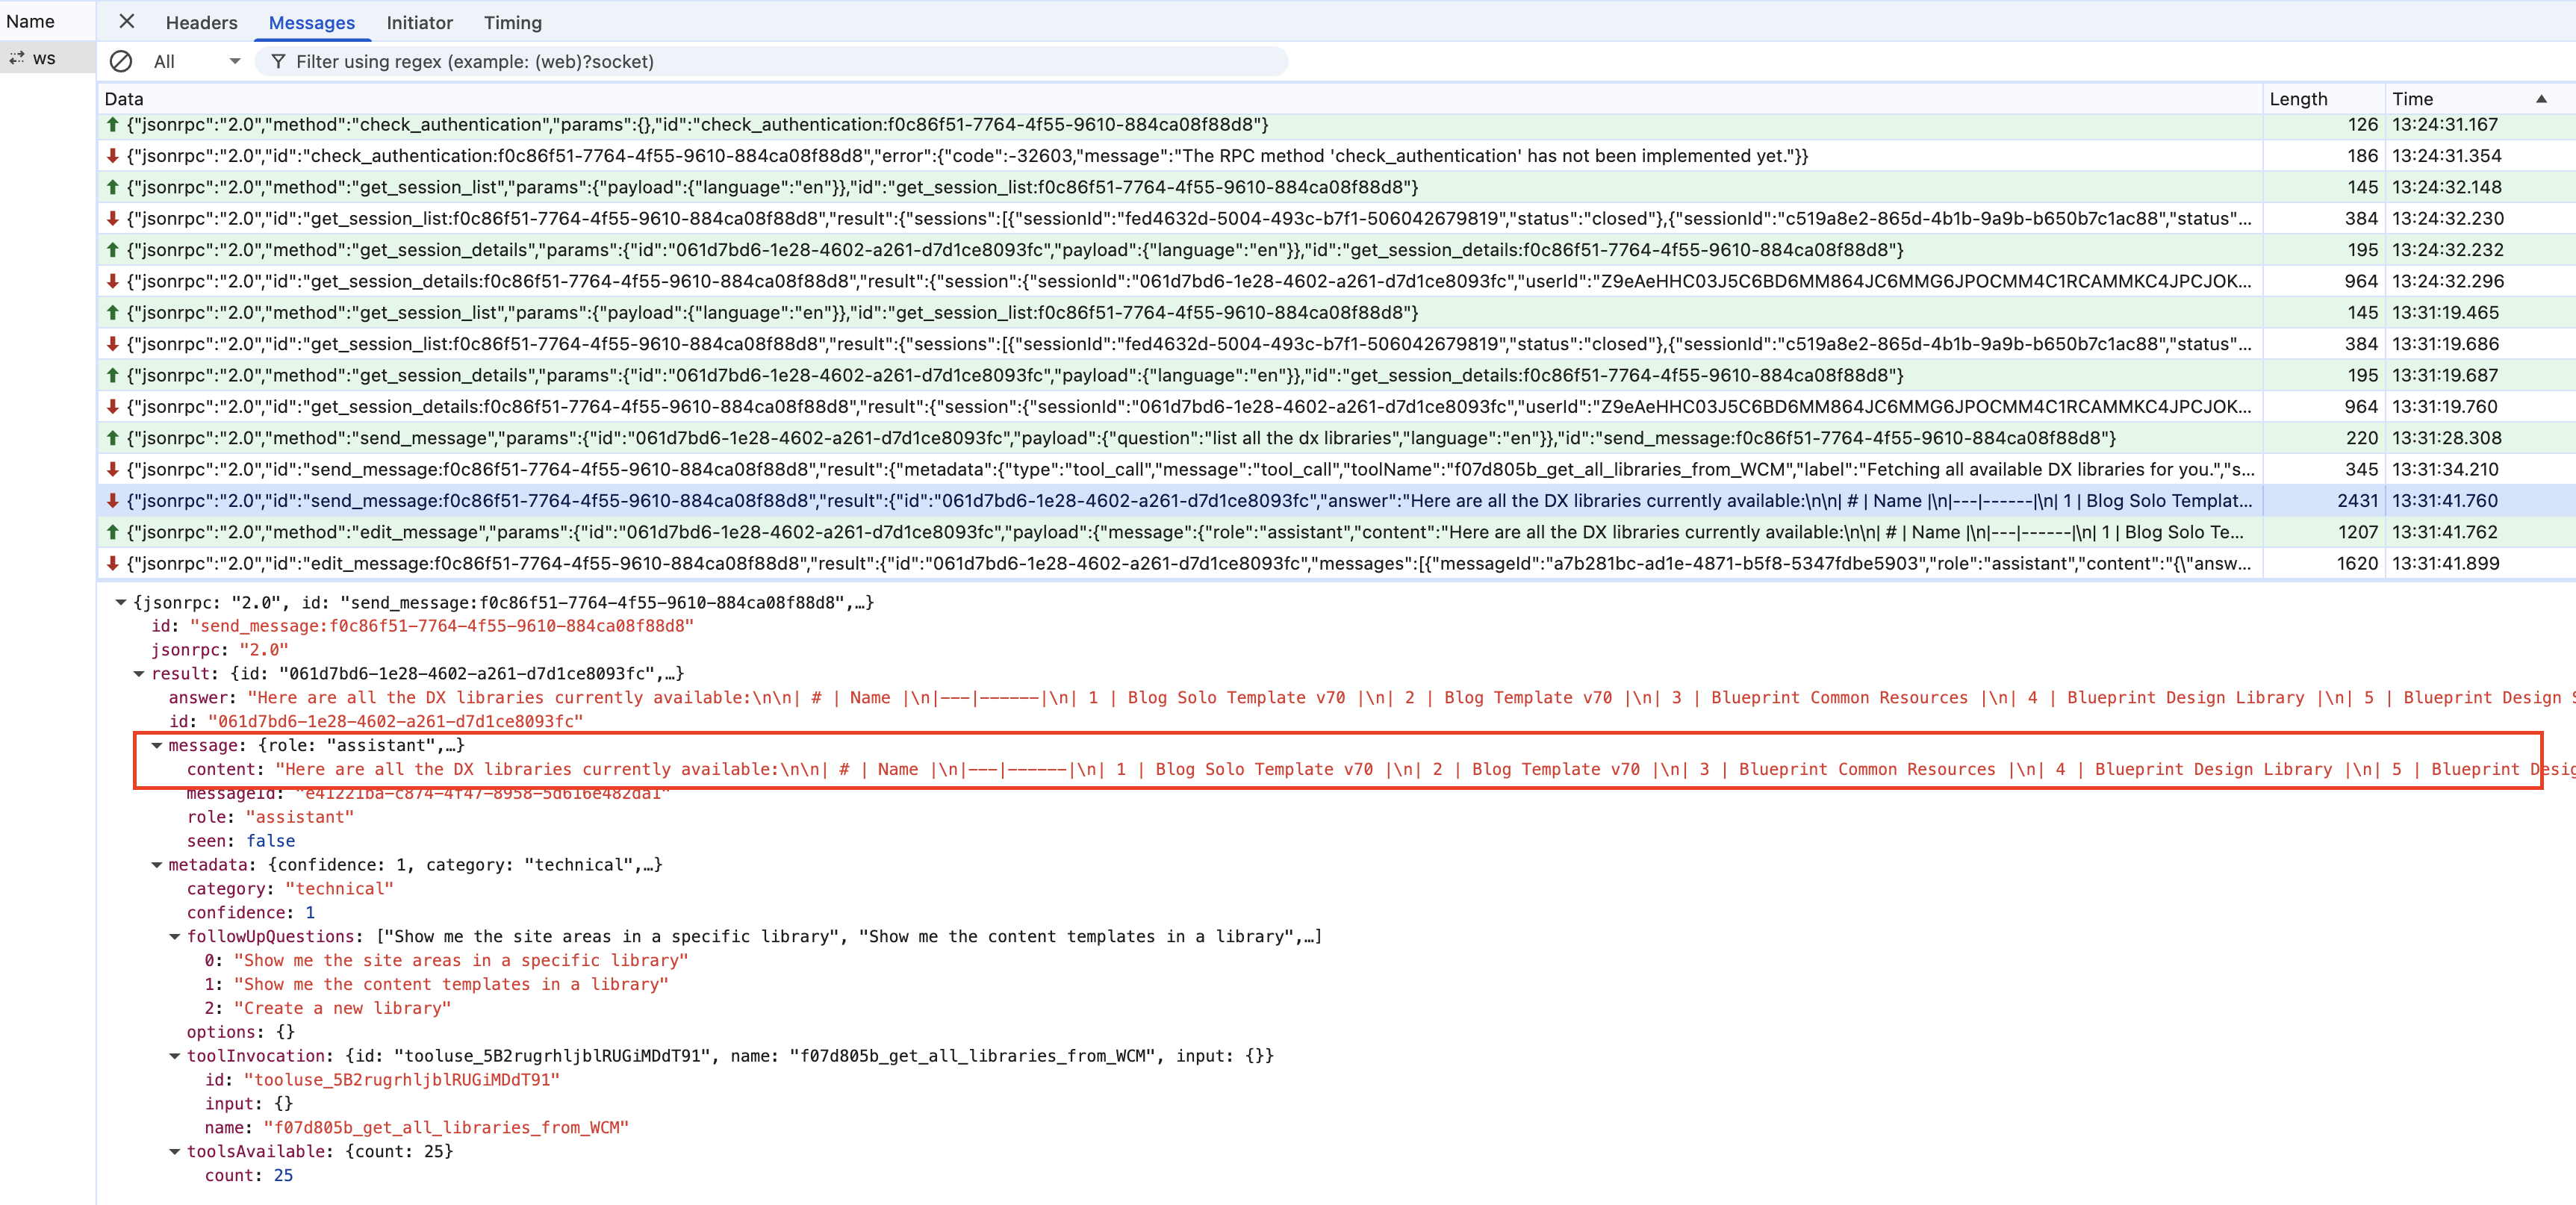
-
The conversation state is preserved:
- Refresh the page and confirm the prior conversation remains available.
- Log out and log back in, then verify that the same conversation state is restored.
-
Next step
After deploying IQ services and validating your deployment, enable and configure the IQ assistant.