Manage media assets
This section describes how to manage media assets and view configuration settings using HCL Digital Asset Management (DAM).
Prerequisite
Ensure HCL DAM CF181 or higher is installed and configured for the HCL Digital Experience (HCL DX) 9.5 Container Release update. For more information, refer to Install the HCL DX 9.5 Container components.
Viewing supported file formats
Follow these steps to view the list of file formats supported by HCL DX 9.5 DAM.
-
Log in to your HCL DX 9.5 platform and select Digital Assets from the Practitioner Studio navigator.
The HCL DX 9.5 DAM can also be accessed from the Practitioner Studio Digital Assets tile.
-
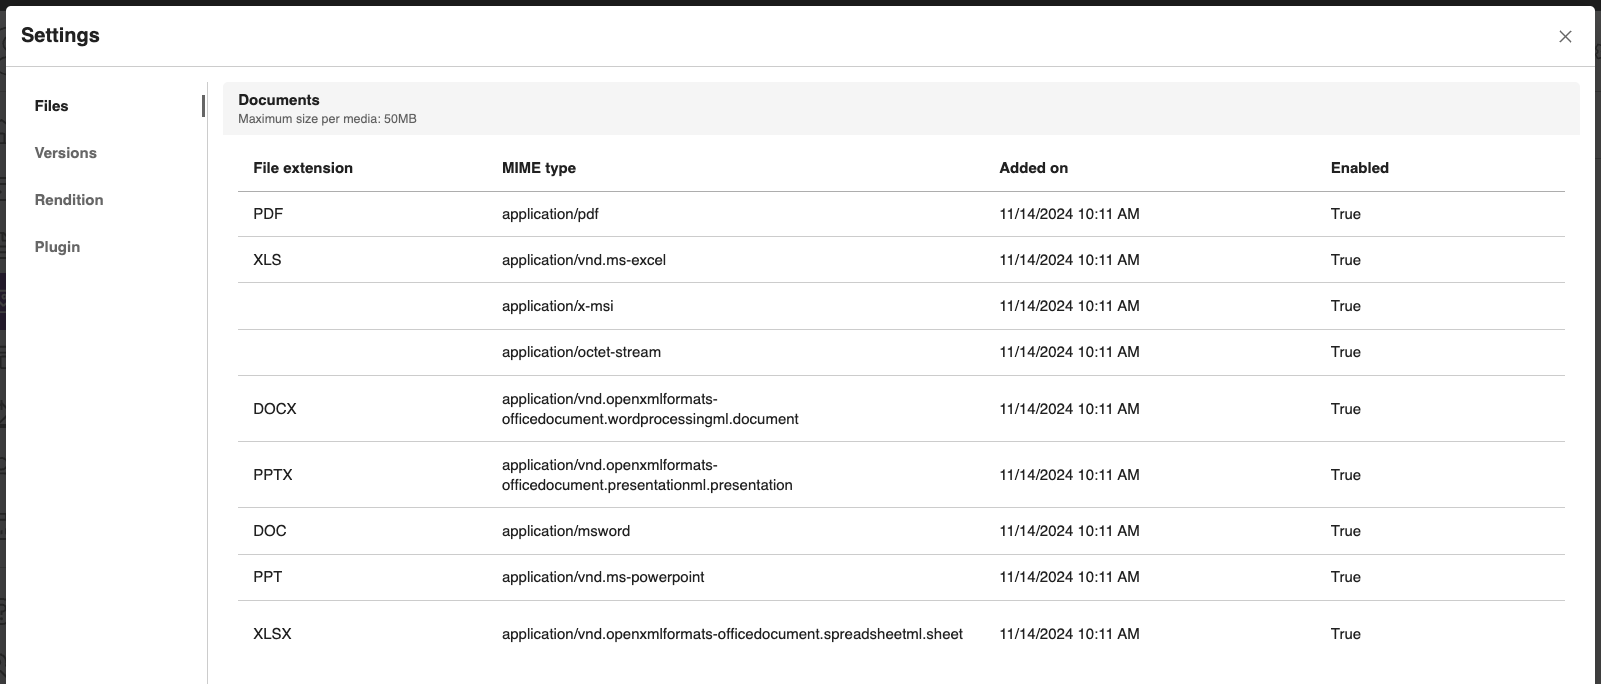
From the HCL DX 9.5 DAM user interface, select the gear icon (for Settings) located at the top right of the DAM menu bar.
-
Settings will display the Supported file formats section by default.
Images
The following image file formats are supported media asset in HCL DX 9.5 Container:
| File extension | MIME type |
|---|---|
| .png | image/png |
| .gif | image/gif |
| .jpg | image/jpeg |
| .jpeg | image/jpeg |
| .tif | image/tiff |
| .tiff | image/tiff |
| .webp | image/webp |
- You can set the maximum file size for DAM asset uploads. For more information on configuring file size, refer to the MediaTypeGroupController.updateById API documentation topic.
- SVG files are disabled by default. To enable
.svgfiles (extensionimage/svg+xml) for asset uploads, use the API and set theenabledparameter totrue. For more information, refer toMediaTypeController.updateById. For step-by-step guidance, refer to Add a new MIME type in DAM. - If you cannot upload files to DAM, refer to Cannot upload files to DAM.
Videos
The following video file formats are supported media asset in HCL DX 9.5 Container:
| File extension | MIME type |
|---|---|
| .ogv | video/ogg |
| .mp4 | video/mp4 |
| .webm | video/webm |
-
Videos are automatically synchronized once they are uploaded. Auto-synchronization is a background activity in HCL DAM that happens when any video is uploaded and when Kaltura integration is configured and enabled.
-
You can set the maximum file size for DAM asset uploads. For more information on configuring the file size, refer to the MediaTypeGroupController.updateById API documentation topic.
-
Videos are automatically synchronized after they are uploaded. Auto-synchronization is a background process in HCL DAM that occurs when a video is uploaded and Kaltura integration is configured and enabled.
Documents
The following document file formats are supported media asset in HCL DX 9.5 Container:
| File extension | MIME type |
|---|---|
| .pptx | application/vnd.openxmlformats-officedocument.presentationml.presentation |
| .xls | application/vnd.ms-excel application/octet-stream application/x-msi |
| .doc | application/msword |
| .docx | application/vnd.openxmlformats-officedocument.wordprocessingml.document |
| .xlsx | application/vnd.openxmlformats-officedocument.spreadsheetml.sheet |
| .ppt | application/vnd.ms-powerpoint |
| application/pdf |
Note
DAM does not scan uploaded files for viruses or vulnerabilities. PDF files and similar file types can be manipulated to include active code. Users with access to DAM should scan files for potential security issues. If scanning is not possible, disable file types that could be exploited by active code (for example, PDF files).
Enabling or disabling other file types
To enable file types that are not listed in the Viewing supported file formats section for HCL DX DAM, you can use the DAM MediaTypeController API. The process involves adding new file types and enabling or disabling them for uploads.
Note
The SVG file type is disabled by default. To enable .svg files (image/svg+xml) for asset uploads, use the enabled parameter in the MediaTypeController.updateById API. For more information, see the MediaTypeController.updateById API documentation.
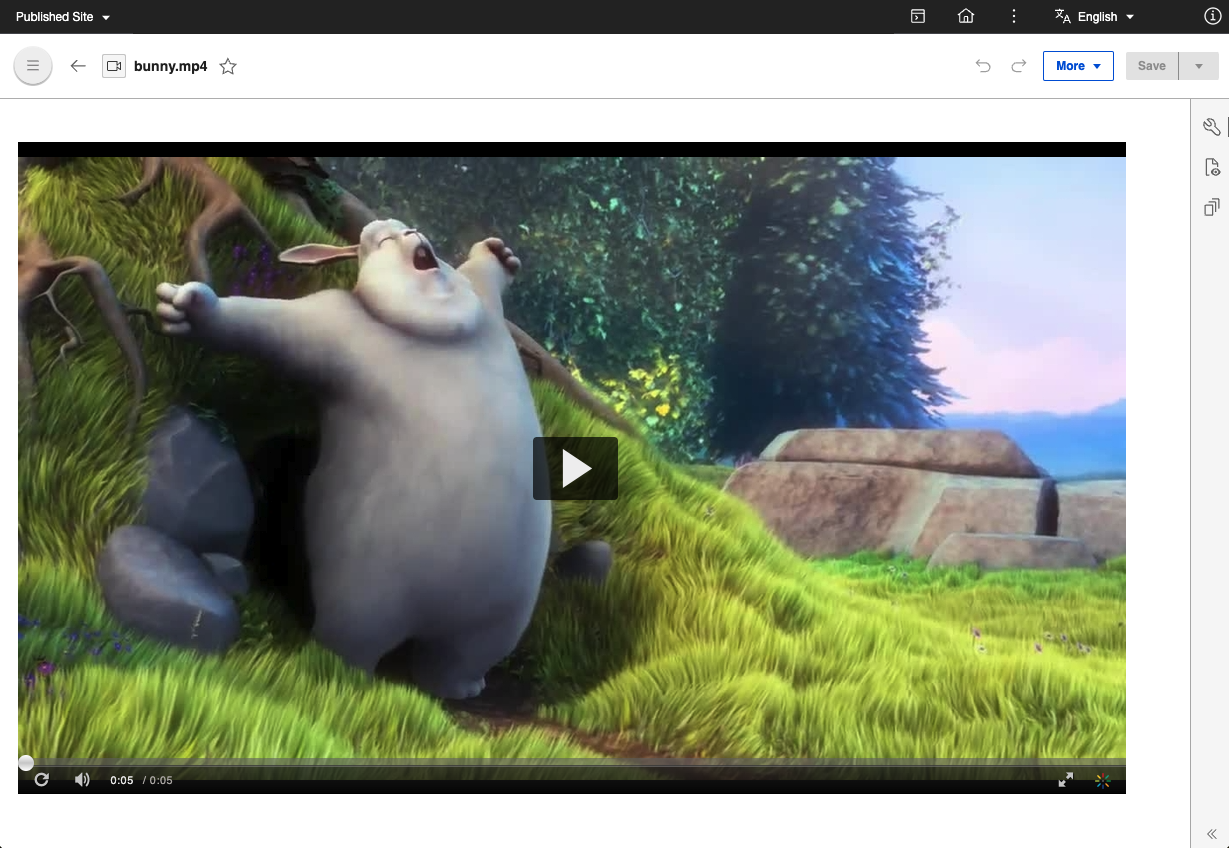
Playing a video in DAM
Play uploaded videos in DAM using the DAM binary URL or the Kaltura Player (if the Kaltura plugin is configured and enabled):
-
Use the DAM binary URL when:
- The uploaded video synchronization status is
SYNC FAILED. - The Kaltura plugin is not configured and enabled.
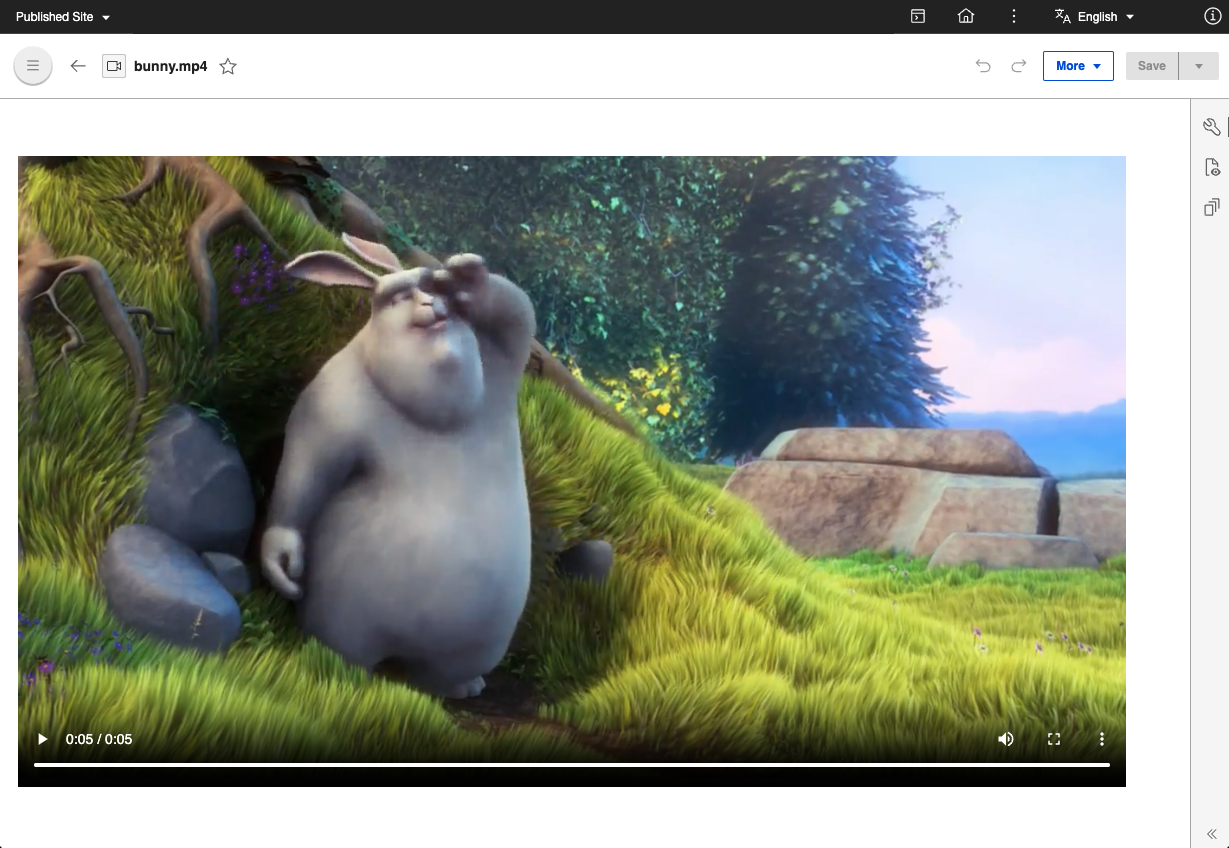
- The uploaded video synchronization status is
-
Use the Kaltura Player when:
- The video synchronization status is
SYNCED. Play the video based on the configured Player ID. - The Kaltura plugin is configured and enabled.
 For more information on the video synchronization statuses for uploaded videos, see Upload rich media assets.
 - The video synchronization status is
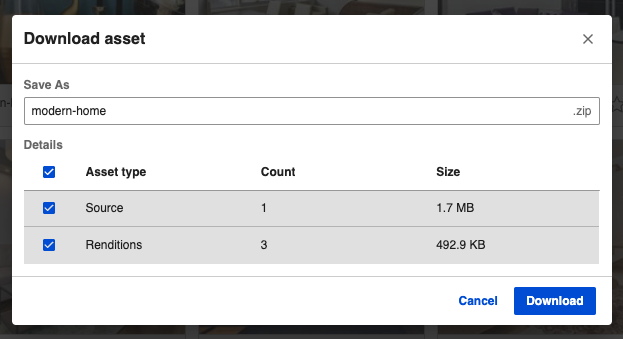
Downloading a media asset source, version, or rendition
Use the HCL DX 9.5 DAM editor to download a media asset source, version, or rendition:
-
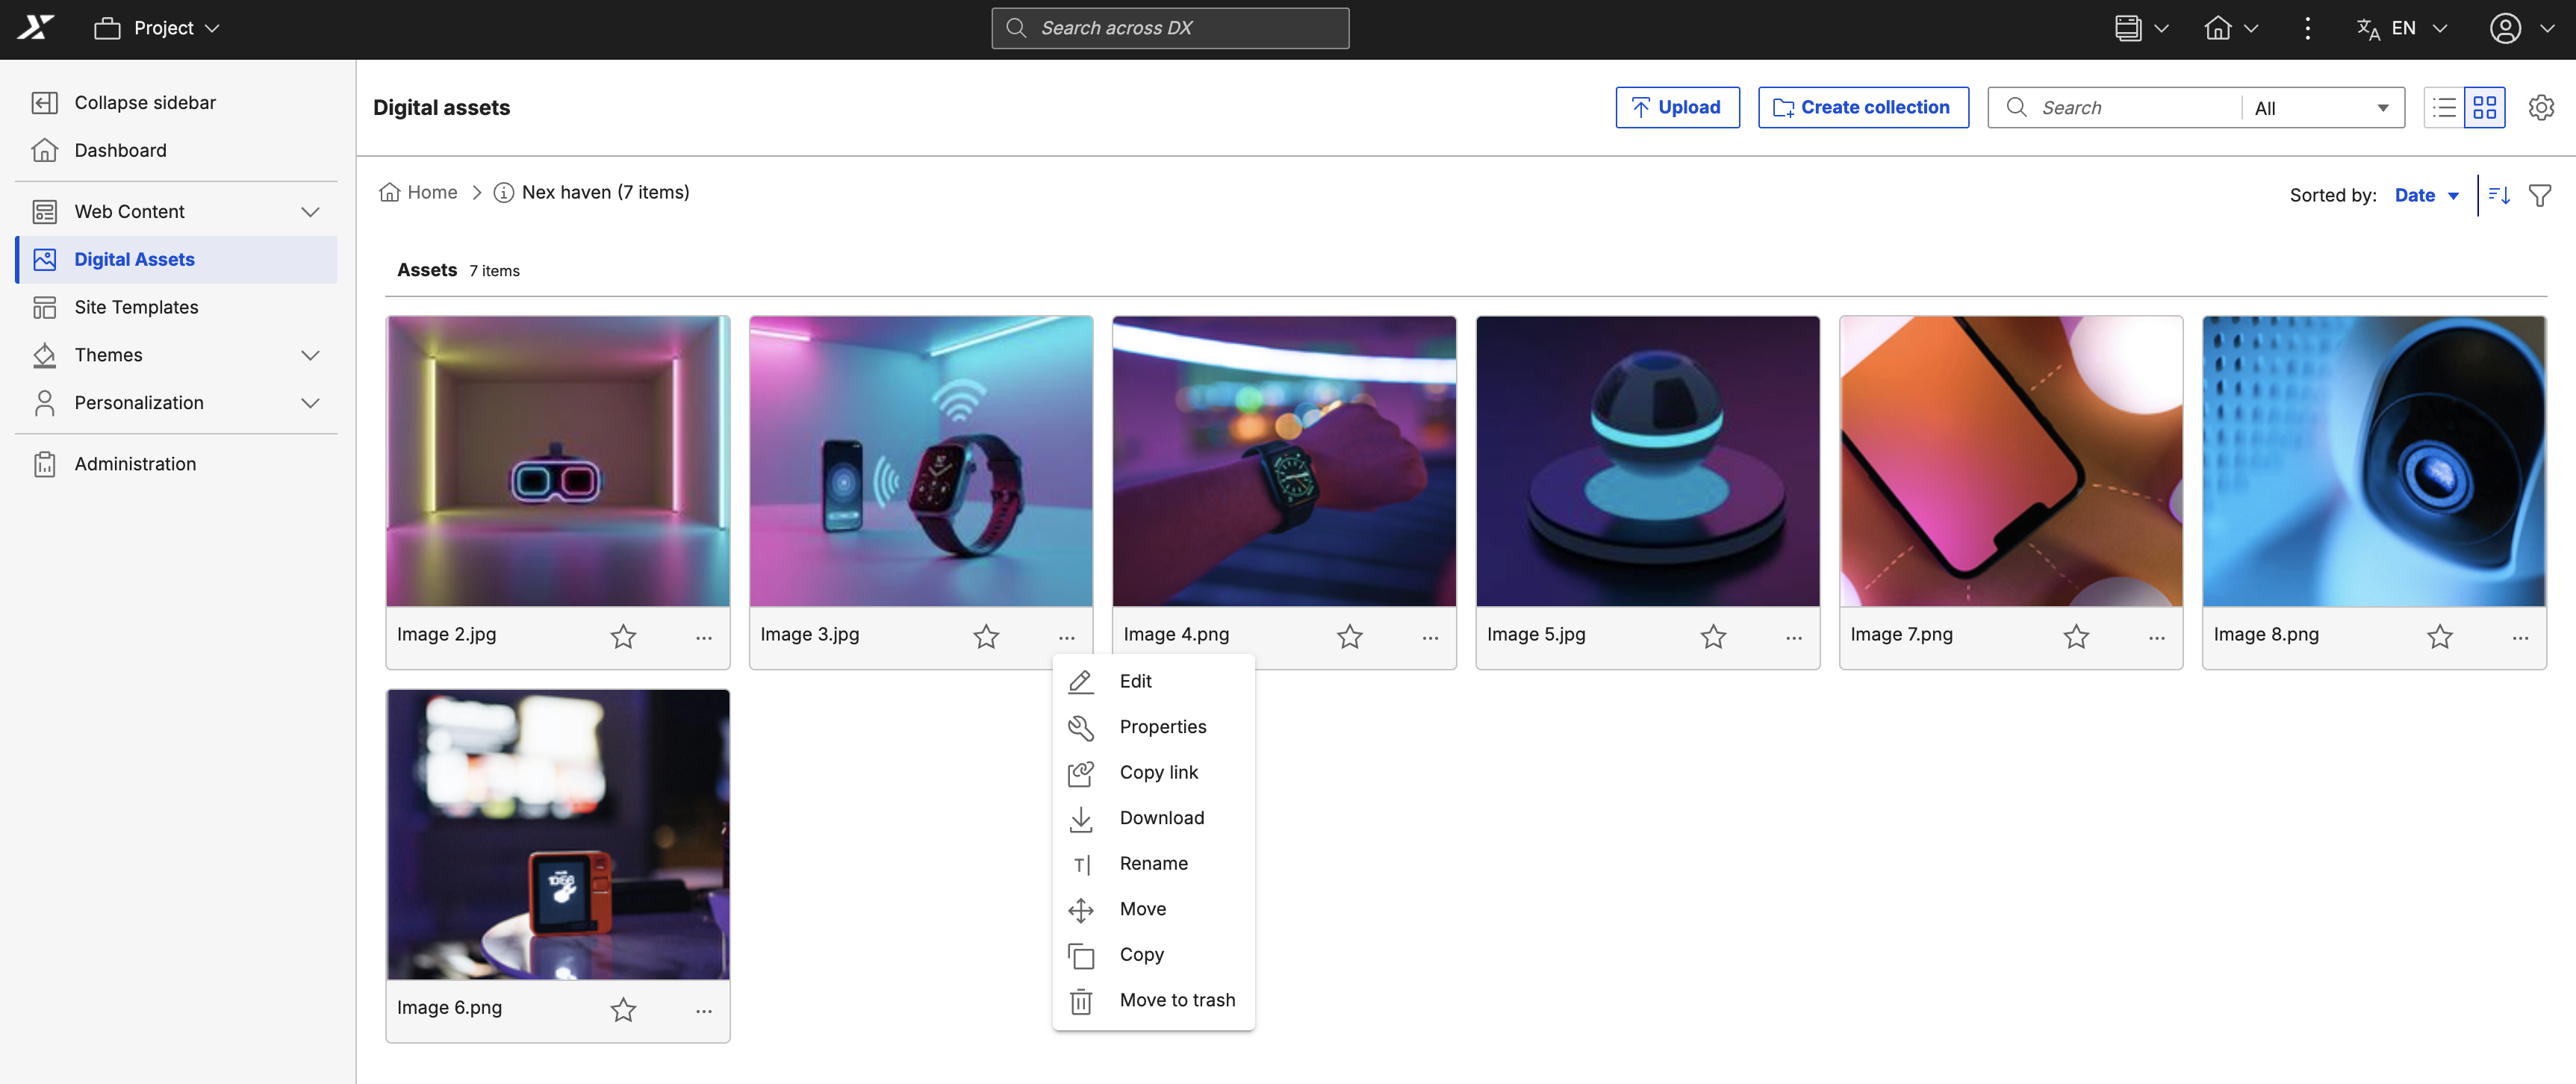
From the HCL DX 9.5 DAM user interface, click the More actions menu (three horizontal dots icon) for a media asset, then click Download.
-
A pop-up appears where you can select download actions. You can rename the downloaded media asset and choose to download Source, Renditions, or all asset types.
-
Click Download to proceed.
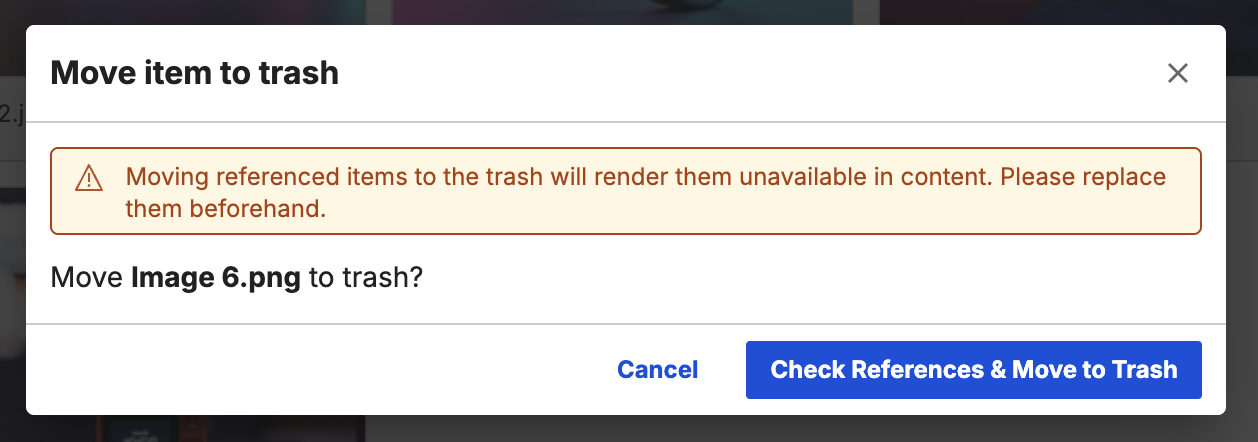
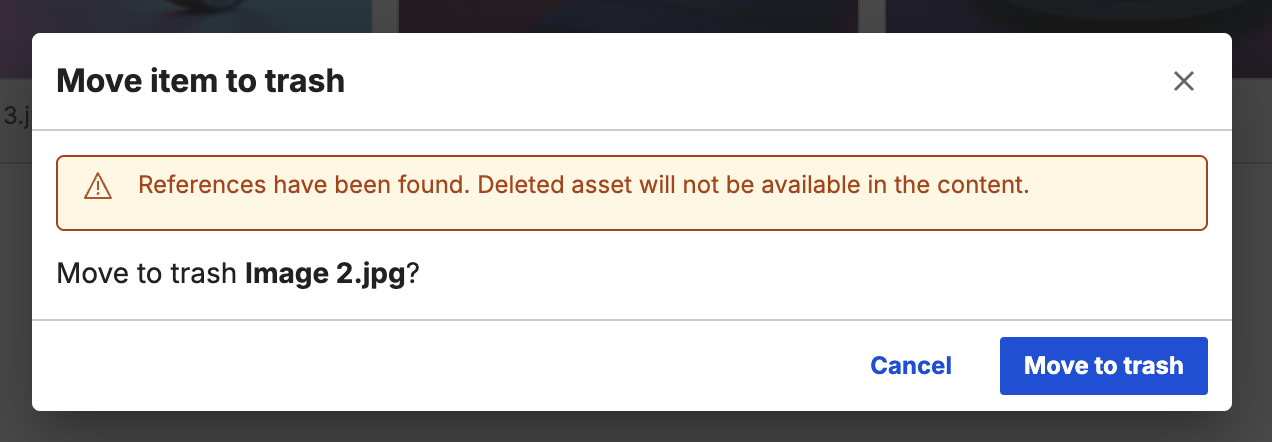
Moving a media asset to trash
Use the HCL DX 9.5 DAM editor to move a media asset to trash, including its renditions:
- From the HCL DX 9.5 DAM user interface, click the More actions menu (three horizontal dots icon) of a media asset. Click Move to trash.
-
A pop-up will appear for you to select your move to trash action. If the selected media assets will not affect any references, click Check for references and move to trash to complete action. If there are references, additional dialog appears citing the presence of reference item. Clicking on that will complete the action
Note
To permanently delete an asset, see Permanent delete media asset.
Copying a media asset
When copying a media asset, only the latest version of the source assets is copied.
Refer to the following steps if you want to copy a media asset from one collection to another.
-
Click the More actions menu for the asset.
This displays actions such as Edit, Properties, Preview, Copy Link, Download, Copy, Move, Rename, and Move to trash.
-
Click Copy.
A dialog box appears that shows the list of collections. You can search for a specific collection or navigate inside a collection if a subcollection is present.
-
Navigate to the collection where you want to copy the asset and click Paste here.
If you copy an asset to the same collection, a dialog box appears to rename the asset.
-
Click View Location to navigate to the collection.
Moving a media asset
Refer to the following steps if you want to move a media asset from one collection to another.
Note
Moving an asset can break its links if it is referenced in WCM or external systems. To update the link, manual relinking is required. To view asset references, go to Properties > Insights.
-
Click the More actions menu for the asset.
This displays actions such as Edit, Properties, Preview, Copy Link, Download, Copy, Move, Rename, and Move to trash.
-
Click Move.
A dialog box appears that shows the list of collections. You can search for a specific collection or navigate inside a collection.
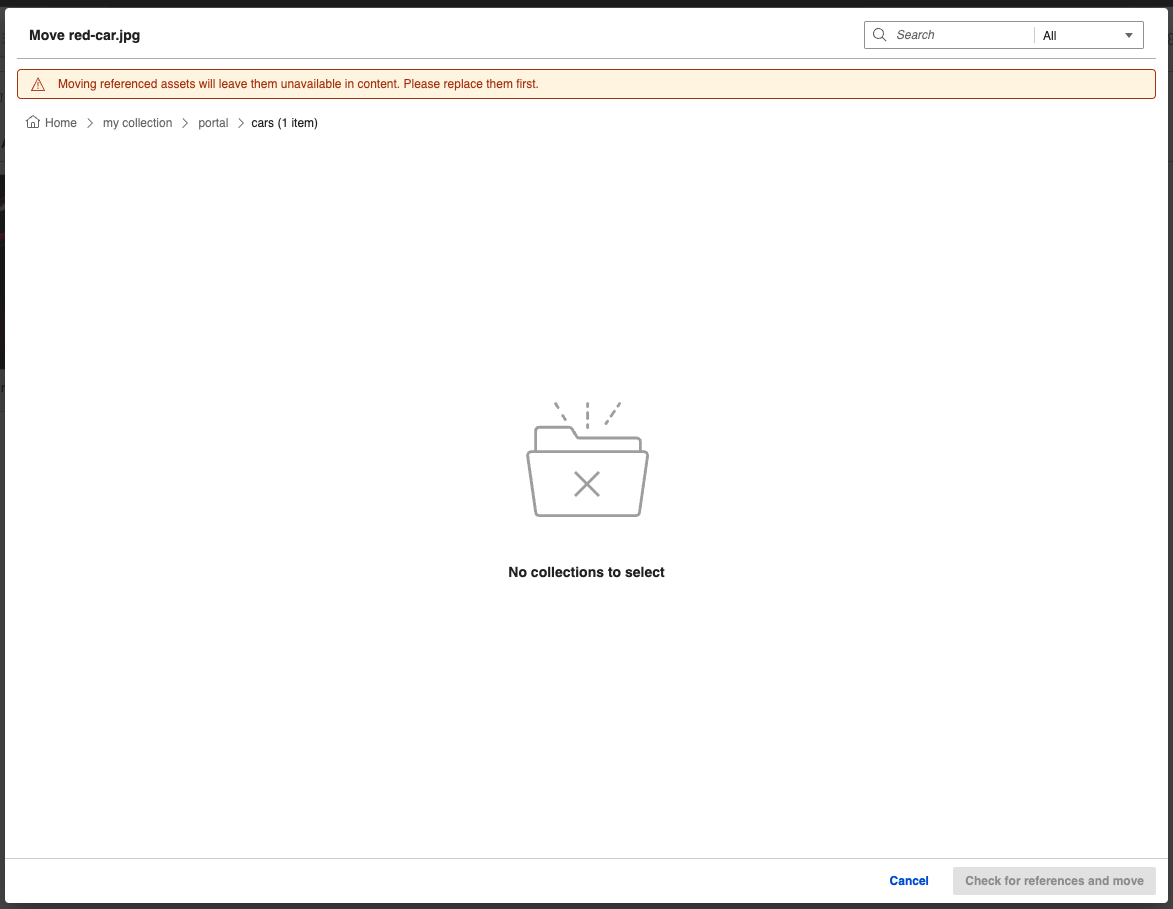
-
Navigate to the collection where you want to move the item and click Check for references and move.
The confirmation dialogue appears if the asset is referenced in WCM. If an asset with the same name exists in the target collection, a dialogue box to rename the asset appears.
-
Click View Location to navigate to the collection.
Renaming a media asset
Refer to the following steps to modify the name of a media asset.
Note
Renaming an asset breaks existing references to the asset name in WCM or external content. To update the asset name, manual relinking is required.
-
Click the More actions menu for the asset.
This displays actions such as Edit, Properties, Preview, Copy Link, Download, Copy, Move, Rename, and Move to trash.
-
Click Rename.
A dialogue box appears for renaming the media asset.
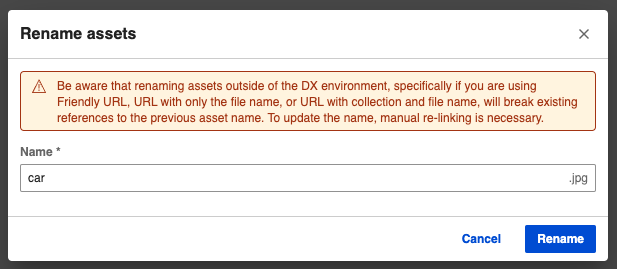
-
In the Rename dialog box, enter the new name of the media asset, then click Rename.
Another way to rename a media asset is to edit the asset by clicking the Pencil icon. Go to Properties. You can edit the Name, Title, and Description of the media asset. Click Save.
Enabling or disabling file types
Use the DAM MediaTypeController API to enable or disable supported file types for asset uploads in HCL DX DAM. For more information on how to configure the HCL DX server to recognize other images, refer to How to enable support for additional image formats in HCL Web Content Manager
The SVG file type is disabled by default. To enable the .svg file type (image/svg+xml) for asset uploads, use the enabled parameter with the MediaTypeController.updateById API described in this documentation topic.
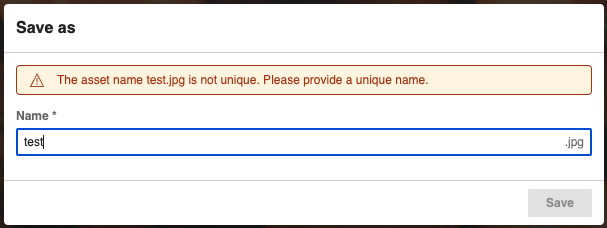
Changing duplicate asset names using DAM
If an asset has the same name as another asset in a collection, a rename dialog appears when editing the asset.
Copying friendly URLs for assets
You can copy the friendly URL and UUID URL of an asset from the URLs section of the asset's inspector panel.
