Test cycles overview and management
A test cycle is a container for tests and test suites that spans multiple users and projects. The result of each test that is executed inside a Test Cycle is persisted to the database, regardless of whether the test is inside a suite or not. To work with test cycles, you use the Test Cycle Manager window.
Test cycles overview
Test cycles allow organizations to have a common parent for all test runs, such as those runs executed by individual users who might be working across multiple projects. You can then browse for the results of these test runs by using the test cycle parent, navigating down to all the individual tests and test suites.
You can create test cycles on demand. Once a test cycle is created it can be immediately associated with projects, by using all project environments or a subset of them, and multiple projects can be associated with a single test cycle.
The state of the project in regards test cycles is displayed in the status bar at the bottom of the HCL DevOps Test Integrations and APIs (Test Integrations and APIs) window. If the project is not associated with a test cycle, <No Test Cycle> is displayed. If the project is associated with a test cycle, the name of the test cycle is displayed. A project can be added to or removed from (join or unjoin) a test cycle at any time.
When the test cycle is active, indicated by the ![]() icon, all executed
tests are stored against the test cycle. If the test cycle is paused, indicated by the
icon, all executed
tests are stored against the test cycle. If the test cycle is paused, indicated by the ![]() icon Test Integrations and APIs runs as before (that is, test results are not persisted,
and test suite results are persisted for the suite but not for the test cycle).
icon Test Integrations and APIs runs as before (that is, test results are not persisted,
and test suite results are persisted for the suite but not for the test cycle).
Test cycles can be marked to include tests that are executed externally (for example, from the command line). In these cases, if tests are executed externally and their containing project is associated with a test cycle, all tests are part of the test cycle and their results are saved to the database.
Before creating test cycles, you must configure a project results database. For details, see Configuring the project results database.
- If a project is already associated with a test cycle, Test Integrations and APIs prompts you to join the
test cycle the first time that you open the project. If you accept, you join immediately and remain
so until the test cycle is closed or otherwise unjoin from the project. If you choose not to join
when prompted, the project and test cycle can be associated later.
If you open a project after another user has joined a test cycle associated with the same project, you will be prompted to join. If you do not join the test cycle, your results will not be logged. You can join the test cycle later by using the option.
- Suite archive policies do not apply to test suites that are run in a test cycle. Test suites run outside of a test cycle do show in the Suite Run History dialog, only if you set the application preference (Prompt for Suite Run Archive Policy) to run a suite with a policy.
Test cycle manager
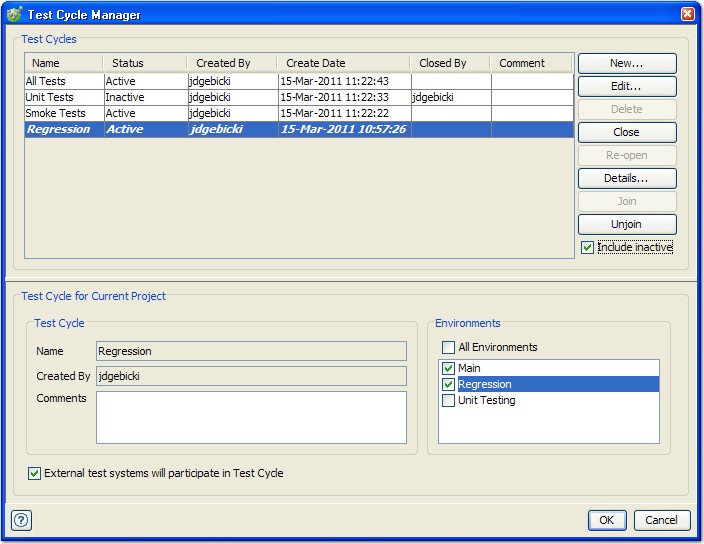
Test cycles are managed in the Test Cycle Manager window, available by right-clicking the test cycle status indicator and selecting Manage from the menu, or by selecting from Test Integrations and APIs main toolbar.

The Test Cycle Manager displays a list of all test cycles and their details, as follows:
| Name | The name of the test cycle, provided when the test cycle was created. The name can be modified when you are editing the test cycle. |
| Status | Active indicates that the test cycle is open and can be joined to the current project. Inactive indicates that the test cycle was closed, and it cannot be edited or joined to the project until opened again. |
| Created By | The ID of the user that created the test cycle. |
| Create Date | The date and time when the test cycle was created. |
| Closed By | If closed, the ID of the user that closed the test cycle. |
| Comment | Displays any comments that were added to the test cycle when created or edited. |
If the current project is associated with one of the listed test cycles, its entry in the list is displayed in bold and italicized type.
By default, only active test cycles are displayed in the Test Cycle Manager. To show all test cycles, including test cycles that were closed, enable the Include inactive option to the right of the Test Cycles table.
Regardless of which test cycle is selected in the list, the details of the current projects test cycles are displayed in the lower portion of the window. The details that are shown are the test cycle to which the current project is associated (joined).
The Test Cycle panel displays the test cycle name, who created the test cycle, and any comments that were added.

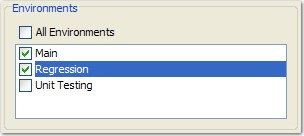
The Environments panel displays which environments in current project are active within the test cycle. Results are stored only for tests that are executed within selected (active) environments.

By default, the All Environments option is enabled when a project is joined to a test cycle. To use only a subset of the current projects environments, disable the All Environments option and check the box next to one or more wanted environments.
The External test systems option enables or disables the storage of results for tests in the project that are executed externally (for example, from the command line). This option is enabled by default.
Test cycle details
More test cycle details (that is, current and previously associated projects and joined users) can be displayed by selecting the test cycle and clicking Details.