Importing resources from WebSphere® Application Server
Use the WebSphere® Application Server - Deploy plug-in to import information about an IBM® WebSphere® Application Server system into a collection of resources. Typically, importing information by using the plug-in takes less time than manually creating resources to match the IBM® WebSphere® Application Server.
Before you begin
- Install the WebSphere® Application Server - Deploy plug-in. To download plug-ins, see the HCL™ Plug-ins website. Use the most recent version of the plug-in.
- Create a top-level resource group to contain agents. See Creating groups.
- Install an agent on the WebSphere® Application Server system and add the agent as an agent resource under the top-level resource group.
About this task
Plug-ins can be developed and updated more frequently than HCL Launch provides release cycles. For the latest version of the WebSphere® Application Server - HCL Launch plug-in and the latest documentation, see the HCL ™ Plug-ins website.
Procedure
- On the HCL Launch server, click Resources to view the Resource Tree page.
-
If the wsadmin file is in a different location than one of the default
locations, specify the file location as the value of the wsadmin.path property
on the agent resource.
The default location of the wsadmin file on Linux™ is /opt/IBM/WebSphere/AppServer/bin/wsadmin.sh. The default locations on Microsoft™ Windows™ are C:\IBM\WebSphere\AppServer\bin\wsadmin.bat and C:\Program Files\IBM\WebSphere\AppServer\bin\wsadmin.bat.
- Click the Actions push button that is associated with the top-level group, and then click Add Agent.
-
In the Create Resource window, select the agent and then click
Save.
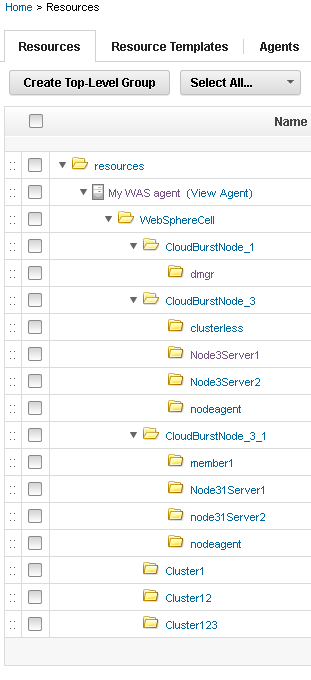
The new agent resource is displayed in the resource tree. Eventually, another resource is displayed under the agent resource. This resource is named
WebSphereCelland represents the WebSphere® Application Server cell. You might need to click Refresh to see the cell resource, and it can take several minutes for the cell resource to be displayed. -
Click the WebSphere® Application Server cell
resource and then click .
The cell resource has the
WebSphereCellrole, which includes several properties that are related to the cell. -
In the section that is labeled Role Properties for the
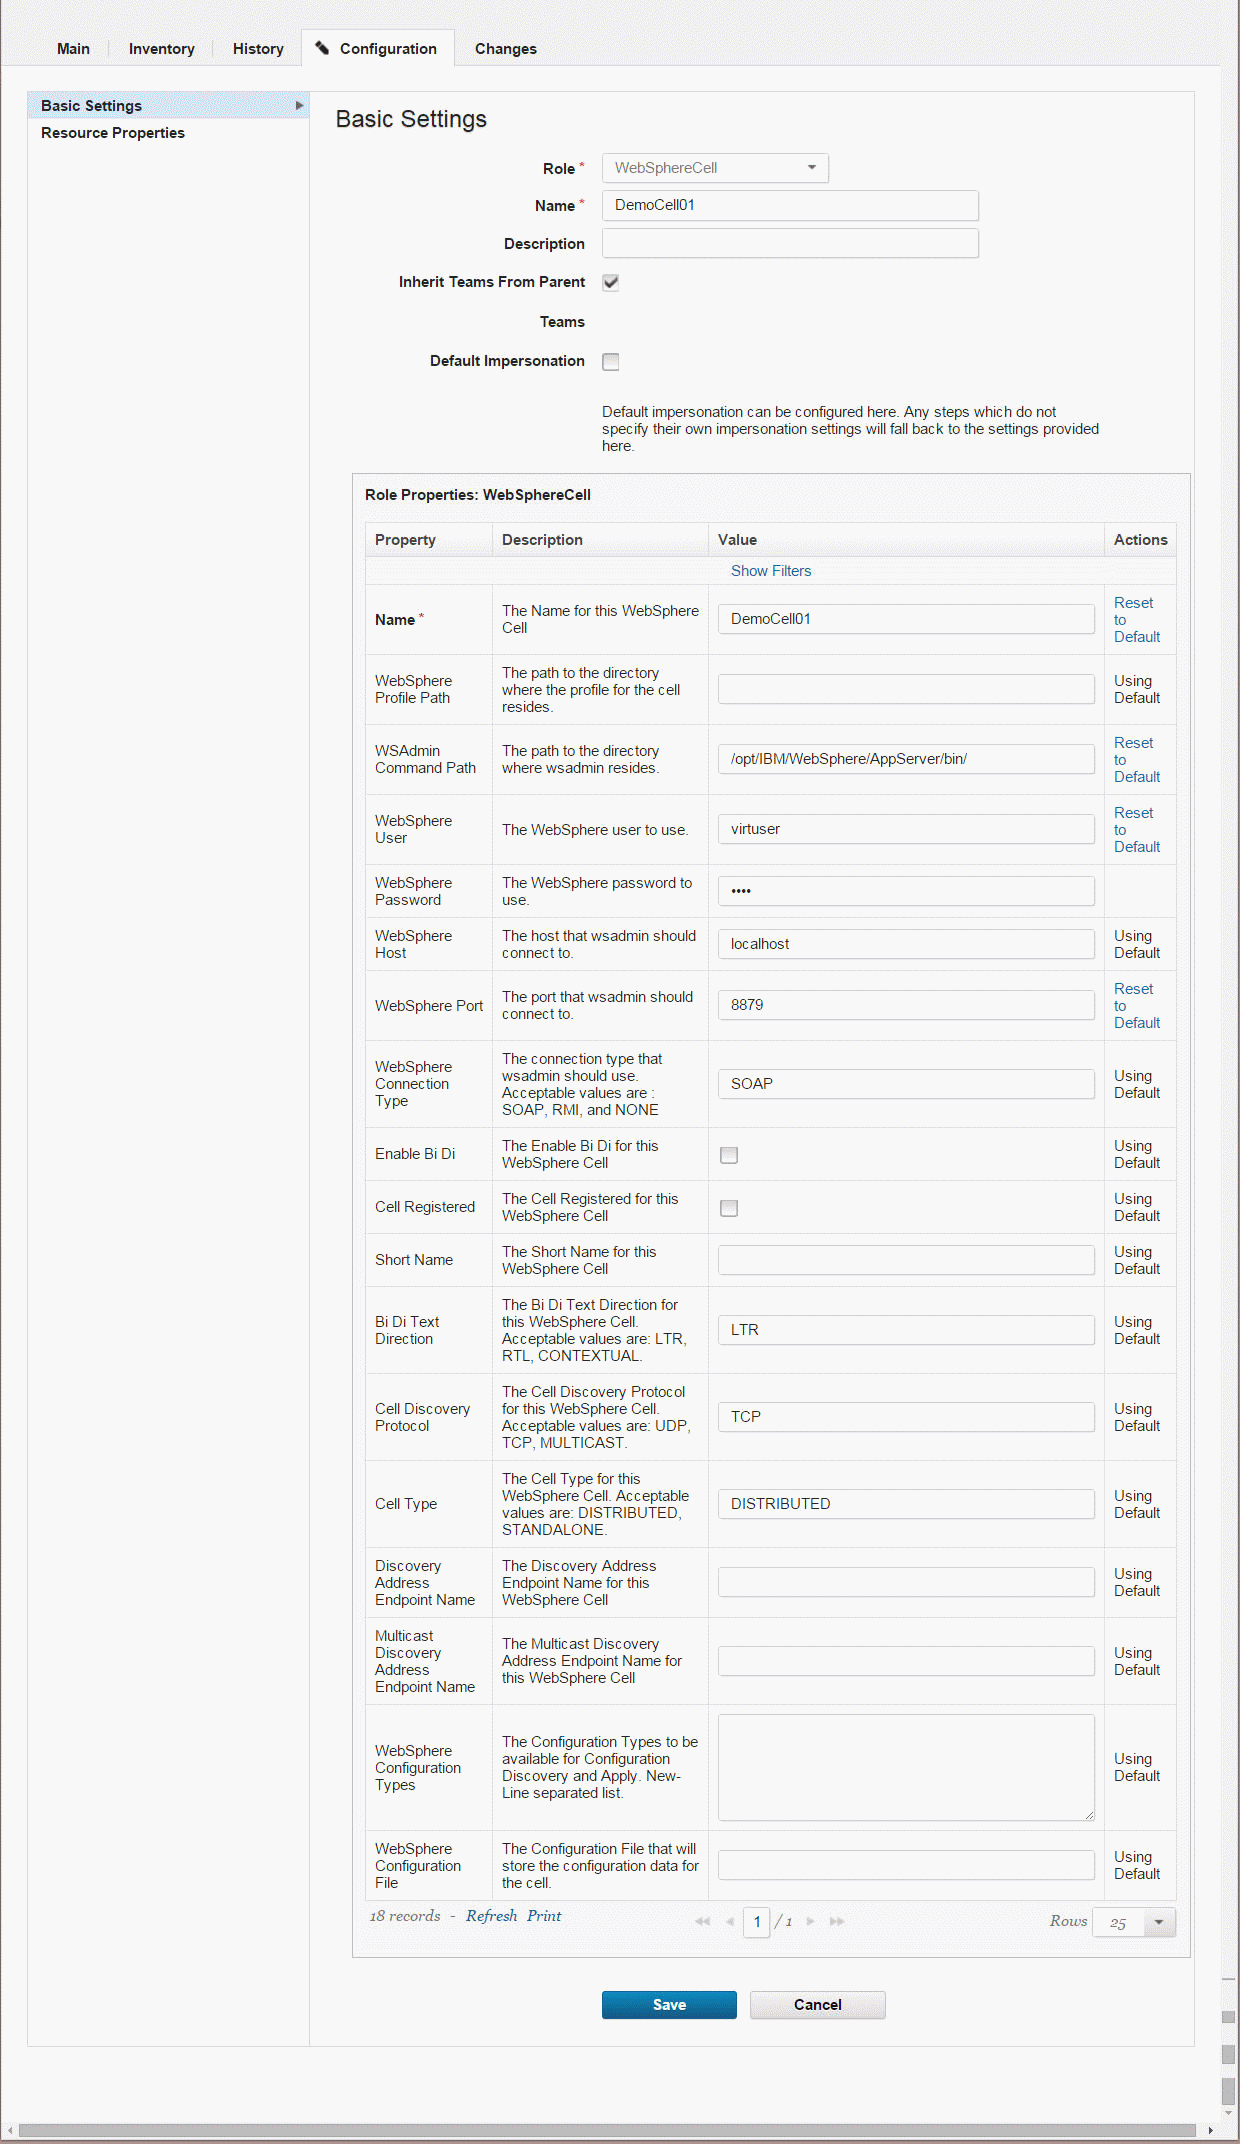
WebSphereCellrole, specify the connection information for the cell, including the locations of the profile and wsadmin file and the user name and password for the WebSphere® Application Server system, as in the following figure:
- Click Save.
-
On the Resources page, click the Actions push
button that is associated with the cell resource, and then click Configure using
WebSphere Topology Discovery.
The discovery step runs. This step might take several minutes. A log is displayed to show progress.
-
When the discovery process completes, close the log window, and then refresh the resource
tree.
Note: If you have multiple profiles defined for your WebSphere installation, you may discover all the profiles by using the websphere.profilePath property. See, https://hcl-software.com/plugins/666-2/
Results
