

Installation guide (Cluster Enablement)
Understanding the release archive
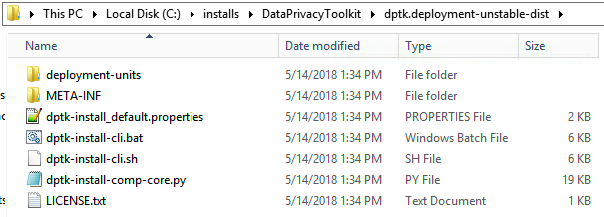
Each Data Privacy Toolkit release is shipped within a release archive that contains all binaries and the configuration items. After unzipping the archive you’ll find following folder structure:
dptk.deployment-1.11.0-dist.zip
 |- db-setup
 |- deployment-units
 |- META-INF
 |- dptk-enable-cluster.bat
 |- dptk-enable-cluster.sh
 |- dptk-install_default.properties
 |- dptk-install-cli.bat
 |- dptk-install-cli.sh
 |- dptk-install-comp-cluster.py
 |- dptk-install-comp-core.py
 `-LICENSE.txt
Within the folder deployment-units you’ll find all application binaries and XML descriptions of all installable units. Within the folder db-setup you’ll find scripts for DB2 and Oracle database setup.
Following files are going to be used during the scripted installation:
- dptk-enable-cluster.bat: The executable script that enables the Data Privacy Toolkit for clustering (Windows)
- dptk-enable-cluster.sh: The executable script that enables the Data Privacy Toolkit for clustering (Linux)
- dptk-install_default.properties: provides default property values (e.g. Cell name, WAS installation path, …)
- dptk-install-cli.bat: The executable script that installs the Data Privacy Toolkit (Windows)
- dptk-install-cli.sh: The executable script that installs the Data Privacy Toolkit (Linux)
- dptk-install-comp-cluster.py: Jython scripts that is invoked by the root script, for enabling cluster functionality in WAS components (EJB times, JDBC provider, data sources …)
- dptk-install-comp-core.py: Jython scripts that is invoked by the root script, for installing WAS components (ObjectCaches, ResourceEnvironmentEntries, …)
Database Configurations
DB2 - General Database Setup
-
Copy the scripts essapps-createDatabase_DB2.ddl and dptk-createTables_DB2.ddl that are located in the release archive’s db-setup folder to the Database server
-
Login on the database server
ssh user@dbserver
- Change user to the DB2 instance user
[sudo] su - db2inst1
- Verify if DB2CODEPAGE property is set to 1208
db2set
- If not, set it
db2set DB2CODEPAGE=1208
- Import the DDL by issuing following command
db2 -td@ -vf essapps-createDatabase_DB2.ddl
DB2 - DPTK Setup
- Login on the database server
ssh user@dbserver
- Import the DDL by issuing following command
db2 -td@ -vf dptk-createTables_DB2.ddl
Oracle - General Database Setup
- Copy the scripts essapps-createDatabase_Oracle.ddl and dptk-createTables_Oracle.ddl that are located in the release archive’s db-setup folder to the Database server
scp /tmp/dptk.deployment-1.11.0-dist/essapps-createDatabase_Oracle.ddl user@dbserver:~/essapps-createDatabase_Oracle.ddl
scp /tmp/dptk.deployment-1.11.0-dist/dptk-createTables_Oracle.ddl user@dbserver:~/dptk-createTables_Oracle.ddl
- Login on the database server
ssh user@dbserver
- Import the DDL (as a user that has at least the SYSDBA role) by issuing following command:
sqlplus sysdba/password @essapps-createDatabase_Oracle.ddl
NOTE: The above command will create a user named ESSAPPS and will prompt for a password. If you prefer to specify the password right when calling the command, use the following syntax:
sqlplus sysdba/password @essapps-createDatabase_Oracle.ddl password
Installation
-
Copy the release archive to the server where the DeploymentManager is installed on.
- Linux: use WINSCP or the scp command: scp /some/local/path/dptk.deployment-1.11.0-dist.zip some-valid-user@your.dmgr.host:/opt/IBM/installs
-
Open a Remote Desktop Session and navigate to the release package
- Windows

- Linux: cd /opt/IBM/installs
- Windows
-
Extract the archive and navigate into the extracted folder
- Windows
- Linux:
- unzip -d dptk.deployment-1.11.0-dist dptk.deployment-1.11.0-dist.zip
- chmod +x dptk.deployment-1.11.0-dist/dptk-install-cli.sh
- Windows
-
Create a copy of dptk-install_default.properties in the parent folder, or re-use a file from a previous installation
- Windows
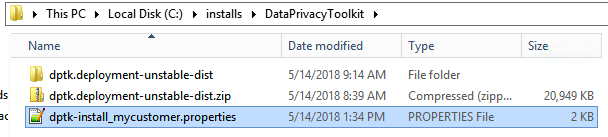
- Linux: cp dptk.deployment-1.11.0-dist/dptk-install_default.properties dptk-install_mycustomer.properties
- Windows
-
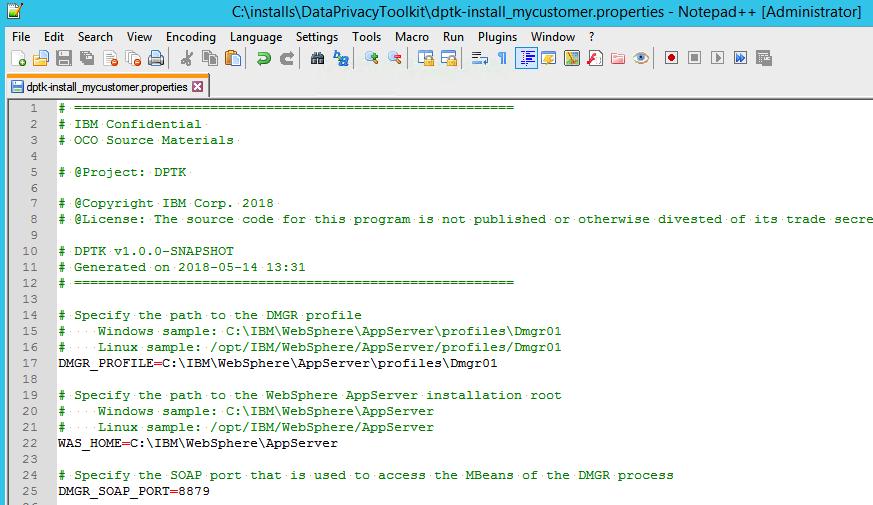
Open the file and adjust all values that are listed in the table below
- Windows
- Windows
- Linux: vi dptk-install_mycustomer.properties
| Name | Description | Default |
|---|---|---|
| DMGR_PROFILE | Specify the path to the DMGR profile | C:\IBM\WebSphere\AppServer\profiles\Dmgr01 |
| DMGR_SOAP_PORT | Specify the SOAP port that is used to access the MBeans of the DMGR process | 8879 |
| DPTK_CLUSTER_NAME | Specify the cluster name of the DPTK cluster. This value can be retrieved by looking into the config directory dir %DMGR_PROFILE%\config\cells\%CELL_NAME%\clusters | DPTKCluster |
| WASADMIN_USER | Specify the username of the wasadmin user (e.g.: wasadmin) | NO VALUE SET PER DEFAULT |
| WASADMIN_PASSWORD | Specify the password of the wasadmin user | NO VALUE SET PER DEFAULT |
| DPTK_USER | Specify the id of the user that should be granted the application role dptk. For multiple users, seperate via pipe | | NO VALUE SET PER DEFAULT |
| DPTK_GROUP | Specify the id of the group that should be granted the application role dptk. For multiple groups, seperate via pipe | | NO VALUE SET PER DEFAULT |
| DPTK_ADMINUSER | Specify the id of the user that should be granted the application role dptkAdmin. For multiple users, seperate via pipe | | NO VALUE SET PER DEFAULT |
| DPTK_ADMINGROUP | Specify the id of the group that should be granted the application role dptkAdmin. For multiple users, seperate via pipe | | NO VALUE SET PER DEFAULT |
Note: Setting the dptk user, group admin user or admin group is optional and can be done after successful installation as well. However, if no values are set, the app will remove all roles upon reinstallation/update via this install script. Use the User ID used in the WebSphere Registry.
Note2: All properties that are starting with ree. will be created as Resource Environment Entry properties. Therefore, this property file can be used to setup the DPTK behavior.
-
Open a Windows Command Shell and navigate to the install folder and invoke the install command
- Windows dptk.deployment-1.11.0-dist\dptk-install-cli.bat dptk-install_mycustomer.properties
- Linux: dptk.deployment-1.11.0-dist/dptk-install-cli.sh dptk-install_mycustomer.properties
-
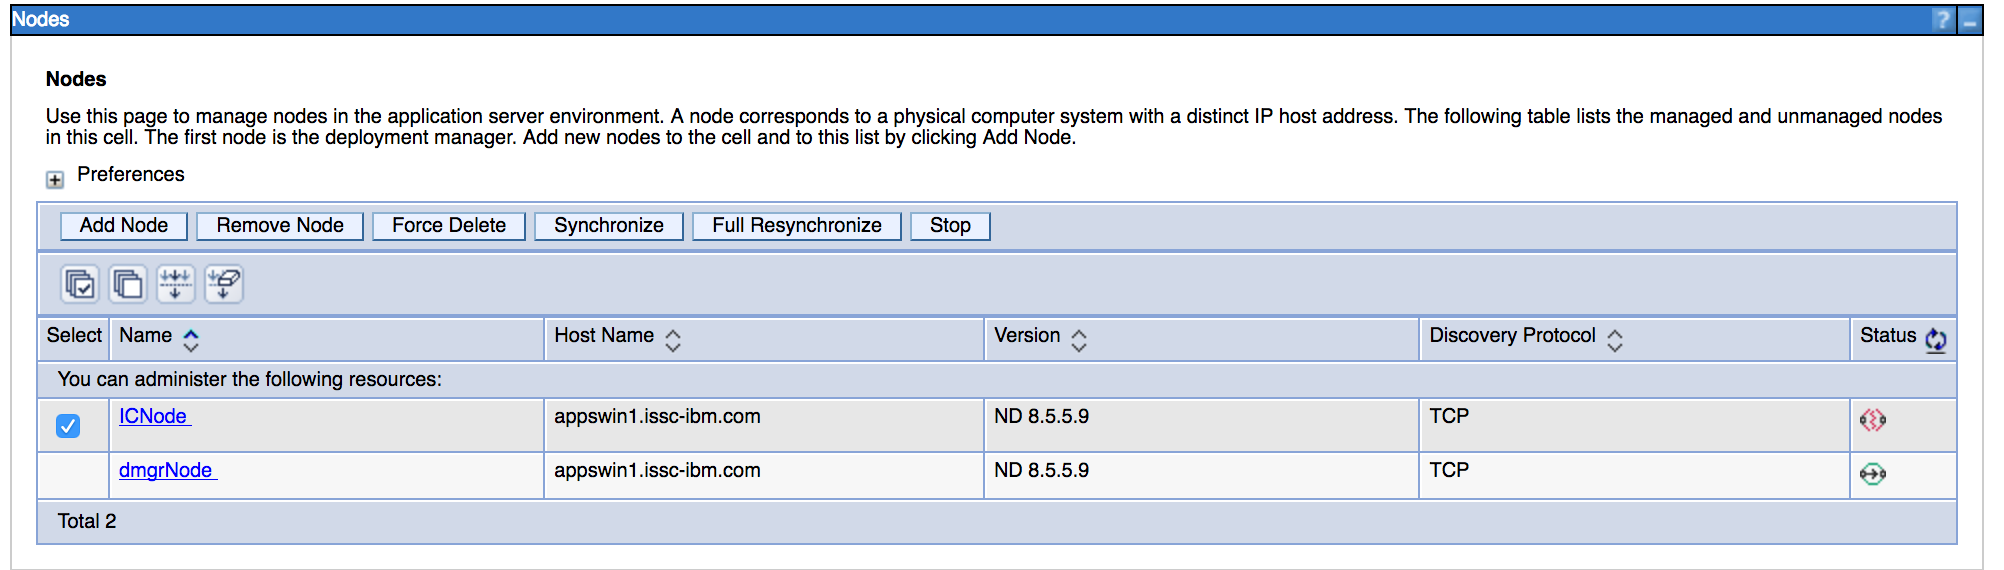
Enter the WebSphere administrative console (e.g.: https://your.dmgr.host:9043/ibm/console) and navigate to System administration > Nodes, select all nodes and click Full Resynchronize
-
Restart all DPTK servers
Post-installation tasks
Ensure that all Post-installation Tasks steps are executed or verified. Refer to this document for first steps as well.