In this lesson, you learn how to customize the store widget to use the new data
that is returned by the custom profile that you created in the previous
lesson.
Procedure
-
Examine the storefront by using Firebug.
-
Open the Mozilla Firefox browser.
-
Open the Aurora B2B starter store in a web browser. Go to
https://localhost/webapp/wcs/stores/servlet/en/aurorab2besite.
-
Click Sign In/Register and log in to the store as a Site
Administrator.
For example, wcsadmin.
-
Click My Account to load the My Account page.
-
On the left pane, click the Requisition List tab under the
Order section.
The values in the Requisition list columns are returned by the default
IBM_Store_Summary profile by using REST service calls. For example:
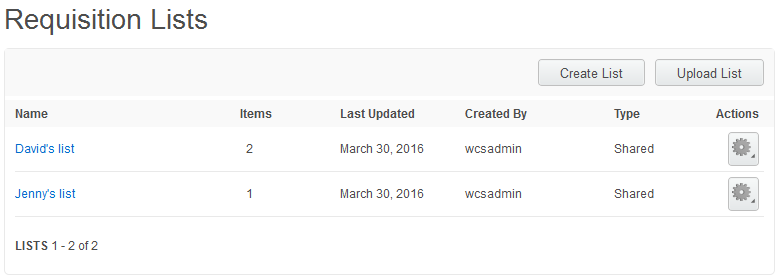
You can now replace the default table column. For example, replace
Last
Updated, with new custom data such as
Owner, which is returned by
the custom
MyCompany_Store_Summary profile by using REST service calls.
-
Click the Firebug icon (
 ) to open the Firebug pane.
-
In the left pane, click the Inspect icon to inspect an element in the
page.
-
Highlight the requisition list table area.
By referring to the debug pane, you can see that this table is managed by the
com.ibm.commerce.store.widgets.RequisitionLists widget, which is under
wcsstore/Widgets_701/com.ibm.commerce.store.widgets.RequisitionLists.
-
Update the storefront to display the customized information.
-
Open WebSphere Commerce Developer. Switch to the Enterprise Explorer view.
-
Go to
Stores\WebContent\Widgets_701\com.ibm.commerce.store.widgets.RequisitionLists.
-
Select and open the RequisitionLists_Data.jspf file.
-
Locate the following code snippet:
<wcf:rest var="response" url="store/{storeId}/requisition_list">
	<wcf:var name="storeId" value="${storeId}" encode="true"/>
	<wcf:param name="q" value="usable"/>
	<wcf:param name="pageNumber" value="${currentPage}"/>
	<wcf:param name="pageSize" value="${pageSize}"/>
	<wcf:param name="orderBy" value="D-lastUpdate"/>
</wcf:rest>
-
Add the following line of code to the end to specify your custom profile:
<wcf:param name="profileName" value="MyCompany_Store_Summary"/>
-
Locate the following code snippet:
<wcf:set target="${reqListMap}" key="updated" value="${formattedReqLastUpdate}"/>
-
Replace it with the following code snippet, which comments it out and inserts its own
code:
<%--<wcf:set target="${reqListMap}" key="updated" value="${formattedReqLastUpdate}"/> --%>
<wcf:set target="${reqListMap}" key="updated" value="${requisitionList.Owner}"/>
-
Save your changes and close the file.
-
Go to Stores\WebContent\Widgets_701\Common\Properties.
-
Select the widgettext_B2B_en_US.properties and
widgettext_B2B.properties files. Open the files for editing.
-
Locate the following code snippet:
REQUISITIONLIST_UPDATED = Last Updated
-
Replace it with the following code snippet:
REQUISITIONLIST_UPDATED = Owner
-
Save your changes and close the files. Restart the test server.
Next, verify your storefront customization.