

Contribute content
In this lesson, you assume the role of the Content Contributor Joe who is assigned to work on the Product introductions task group. You use the Tasks tool in the Management Center to complete the work for the task group.
 Note: The Workspace Administration
Tool is deprecated. The Workspace Management tool replaces all of
the workspace management features in the Workspace Administration
Tool and the Tasks tool. If your site uses the Workspace Management
tool, do not follow the steps that are contained within this tutorial.
Instead, see Workspace Management tool.
Note: The Workspace Administration
Tool is deprecated. The Workspace Management tool replaces all of
the workspace management features in the Workspace Administration
Tool and the Tasks tool. If your site uses the Workspace Management
tool, do not follow the steps that are contained within this tutorial.
Instead, see Workspace Management tool.About this task
The following Management Center images are based on a B2B store.
Procedure
-
Select the workspace task on which to work:
-
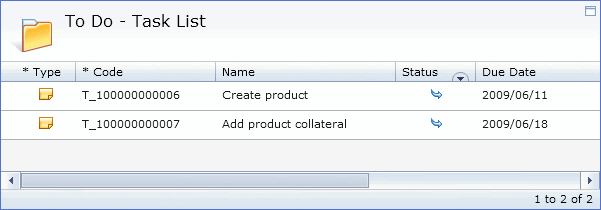
Select the To Do folder from the explorer view. A list of all active
tasks that are assigned to you is displayed.
-
In the context menu, click Work On. The status icon changes to Work in
progress
 , and the Management Center changes from
read-only mode to working mode.
, and the Management Center changes from
read-only mode to working mode.

-
Select the To Do folder from the explorer view. A list of all active
tasks that are assigned to you is displayed.
-
Review any additional information that is provided about the task groups to which the task
belongs:
-
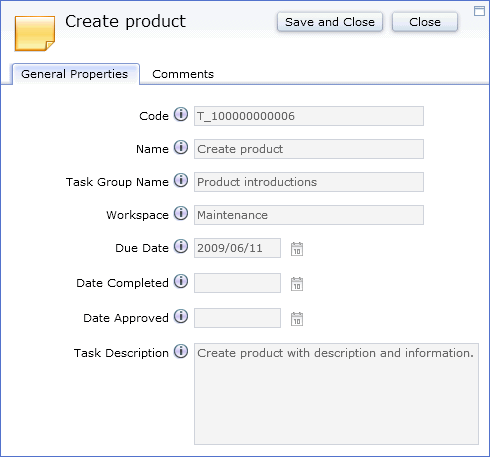
Double-click the task in the list view, or right-click and select Open.
The General Properties view of the task displays:
-
Double-click the task in the list view, or right-click and select Open.
The General Properties view of the task displays:
-
Create a product in the master catalog:
-
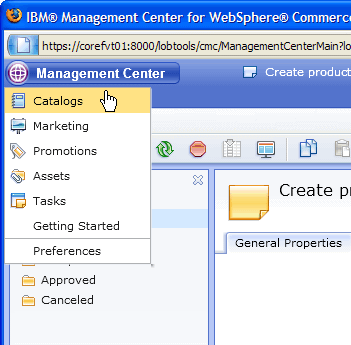
In Management Center, open the Catalogs
tool.
-
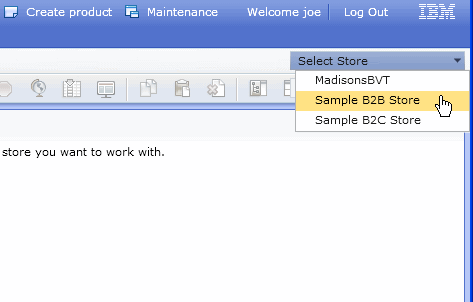
Select the B2B store.
-
In Management Center, open the Catalogs
tool.
-
Find the new product:
-
Navigate to the Find area.
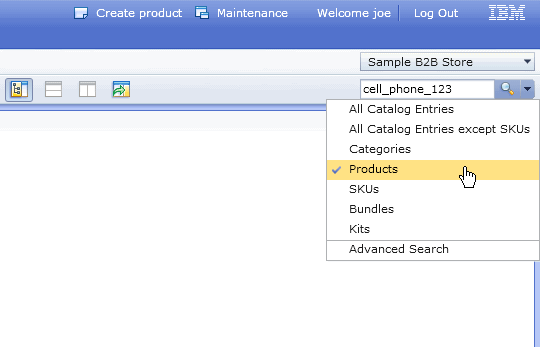
-
Click Search
 .
.
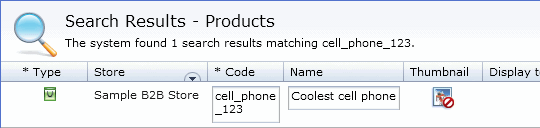
The product displays in the Search Results view.
-
Navigate to the Find area.
-
Update the new product with pricing information:
-
In the Offer Price table, click
 ; then enter 19.99 for the USD value.
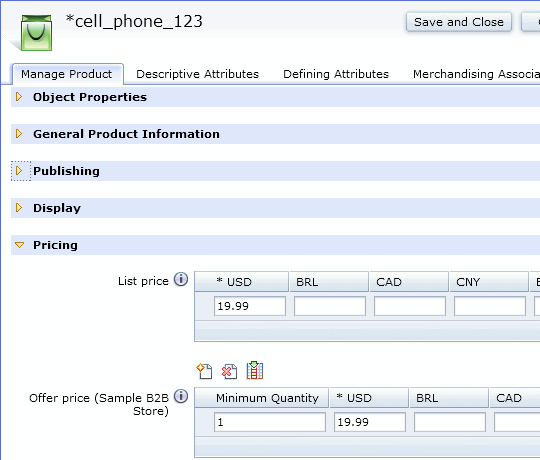
-
In the Offer Price table, click
-
Update the new product with SKU information:
-
In the explorer view, right-click the product that you created in the Active Work folder; then
select New Product-level SKU.
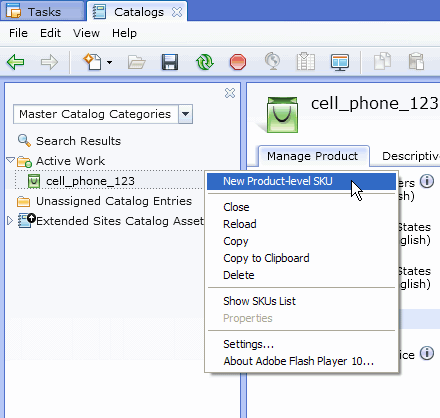
The SKU properties view displays.
-
In the explorer view, right-click the product that you created in the Active Work folder; then
select New Product-level SKU.
-
Complete the task:
-
Right-click the task you were working on in the list view, then click Mark
Complete in the context menu.

The task status icon changes from work in progress to completed  .
. -
Let other users that are working on tasks in the same task group know about your changes by
adding a comment:
- In the explorer view, click the Completed folder.
- In the list view, double-click the task that you completed.
- In the Comments tab, click . A new row is added to the Comments table.
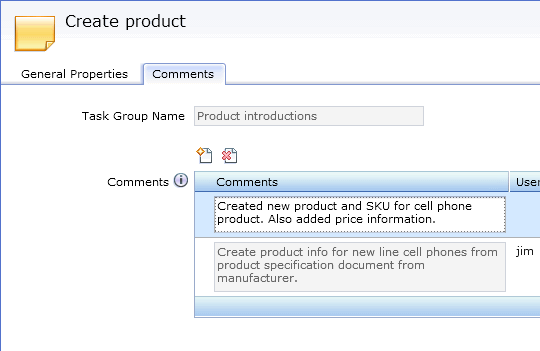
- Select the new row and type in the following comment:
Created new product and SKU for cell phone product. Also added price information.
- Click Save and then click Close.
Note: Joe would now go on to complete the next task. For the interest of this tutorial, assume that the task is complete. In the list view, right-click the Add product collateral task; then click Mark Complete. -
Right-click the task you were working on in the list view, then click Mark
Complete in the context menu.