Tutorial: Using Struts tags, action forms, and validation
In this tutorial, you learn how to use Struts tags, action forms, and validation in the context of WebSphere Commerce store development. In this tutorial, you replace the default Madisons starter store Contact Us page. The new Contact Us page contains a form to submit comments, and validate that the fields are completed before you submit the form.
Note: The steps in this tutorial are specific to the Madison Starter Store and may need to be
modified for your storefront.
Learning objectives
After completing this tutorial, you should
be familiar with the following concepts:
- Struts
- Action forms
- Validation
- JSPs
- Controller commands
After completing this tutorial,
you should be familiar with the following tasks:
- Creating HTML forms
- Creating dynamic action forms
- Changing the implementation of a view
- Adding validation
- Adding messages to a store as a struts
Time required
Expect this tutorial to take 2 hours to complete. The tutorial takes longer if you explore concepts that are related to this tutorial.
Skill level
This tutorial is intended
for WebSphere Commerce Store developers responsible for customizing
the store appearance and enhancing store features. To complete this
tutorial, you should be familiar with the following terms and concepts:
- Java programming language.
- JSP pages, including JSTL.
- Struts.
System requirements
Before beginning this tutorial, ensure that you complete the following:
- Install WebSphere Commerce Developer version 7.
- Publish the Madisons starter store archive.
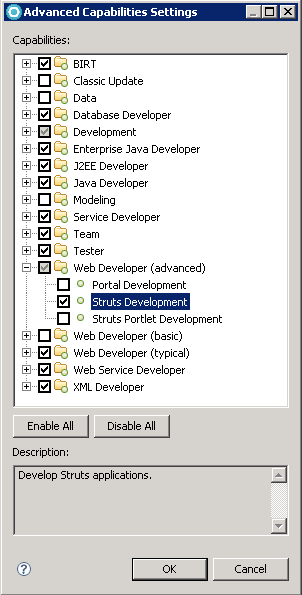
- Enable Struts Development in WebSphere Commerce Developer, if it is disabled:
- Select .
- Select .
- Click Advanced... and select , if it is disabled.

- Click OK to accept your changes and close the Advanced Capabilities Settings window.
- Click OK to accept your changes and close the Preferences window.
Tutorial resources
Download the WC7StrutsSample.zip to a temporary directory. This file contains the starting point for this programming tutorial.