Create Integrations
- Click Create Integrations from the left navigation.
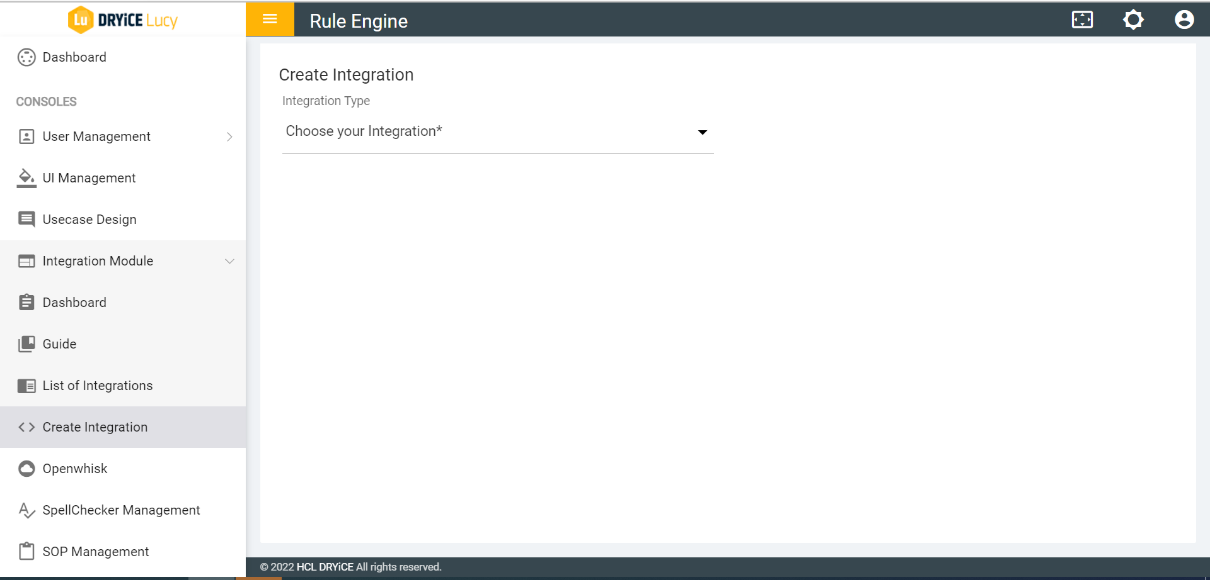
- This opens the Create Integration page.
Figure 2. Figure 22 – Integration Creation 
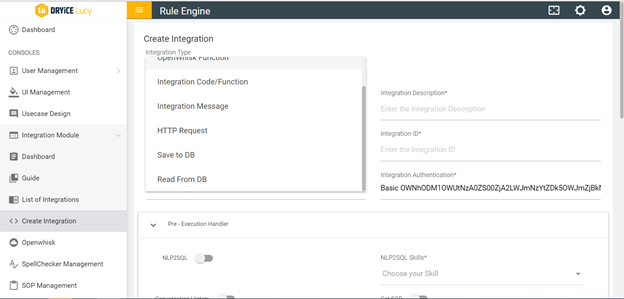
- Select Integration Type from the pull-down list.
Figure 3. Figure 23 – Integration Type Selection 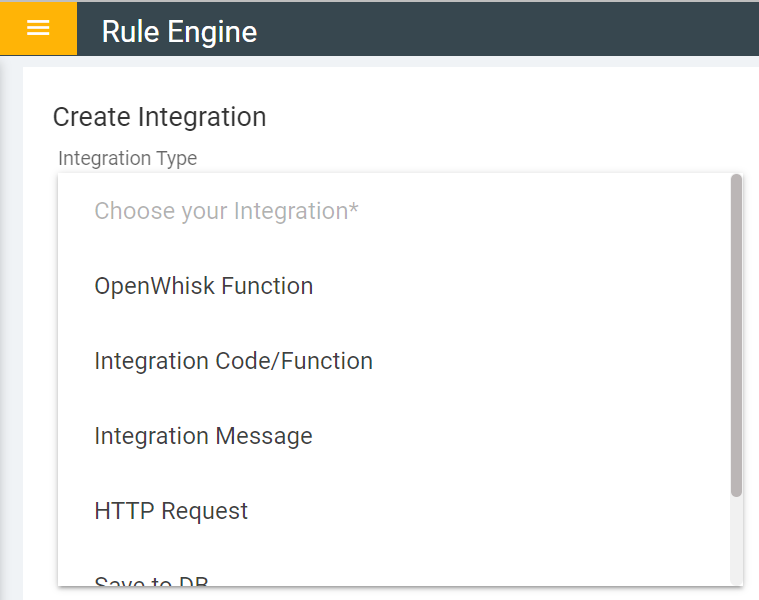
The following type of Integrations are available for configuration.
Table 1. Table 2 Integration Types Integration Type Integration Purpose OpenWhisk Function With this Integration type, you can call an OpenWhisk function. Please see the section on OpenWhisk in this document to understand how to create functions in OpenWhisk. Integration Code/ Function In this Integration type, you can create custom internal functions. The function can be written in Node JS and the Integration Management back-end will execute it when you need the function. Your function should return a string as output to make the Integration work. See Output Type and various Output Styles to design the internal function. Integration Message In this Integration type, you can configure any custom message or response for an Integration Management response to provide the user with a fixed or pre-defined response. See Output Type and various Output Styles to design the correct response. HTTP Request In this Integration type, you can make HTTP requests, API calls, or HTTP request calls to an URL or endpoint. Sometimes, the use case requires integration with a third party or a customer enterprise system, which requires calling an API or endpoint with certain parameters or values to get relevant data as a response. Save to DB In this Integration type, you can create an Integration to save data in JSON format in the database, considering the database to be a NoSQL database. Any document you would like to save can be designed and saved using the parameters in the Parameters and Session Object fields. See Output Type and various Output Styles for more details. Read from DB In this Integration type, you can create an Integration to read or fetch information from the database by using the query parameters available in the Integration. See Output Type and various Output Styles for more details. - Selecting an Integration Type opens the Integration Creation form and populate fields based on the Integration Type selected.
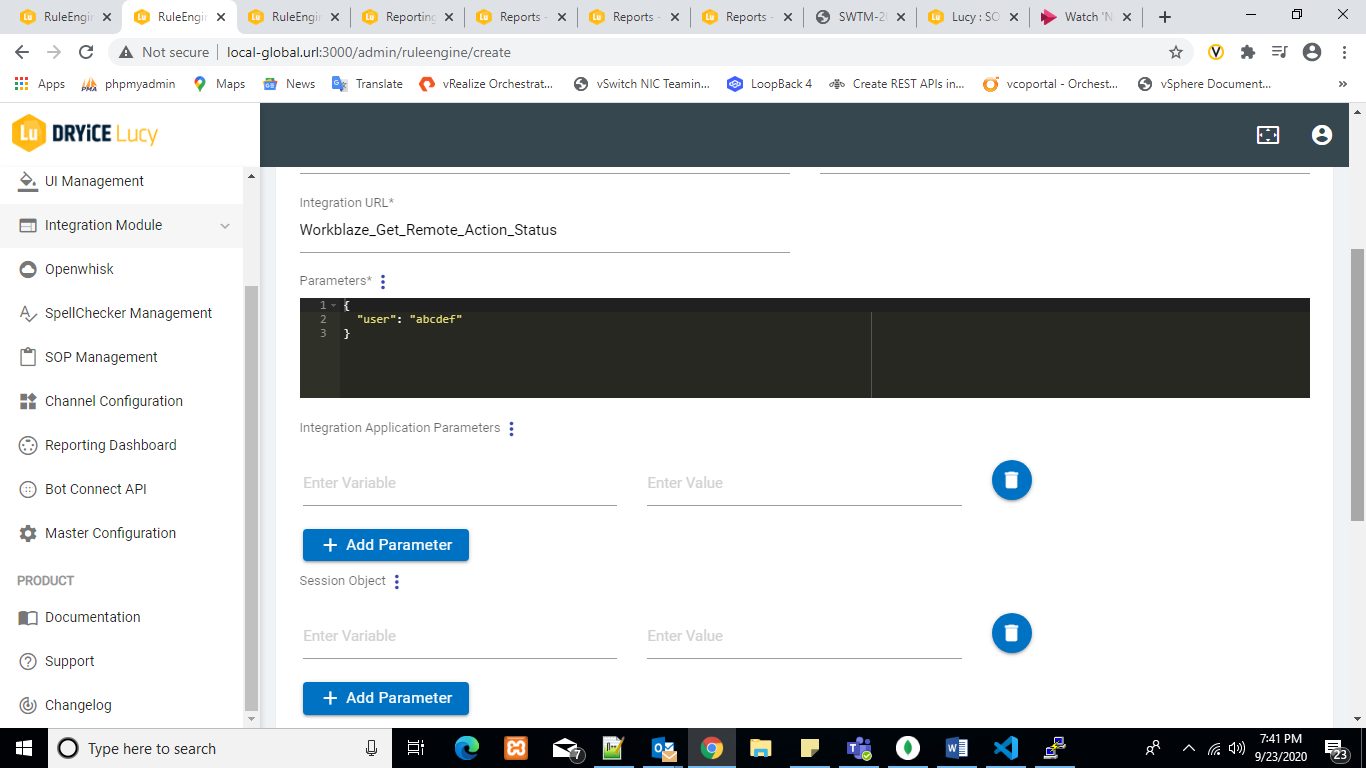
- A sample form containing the fields to be filled in is shown below.
Figure 4. Figure 24 – Sample Integration Creation Form 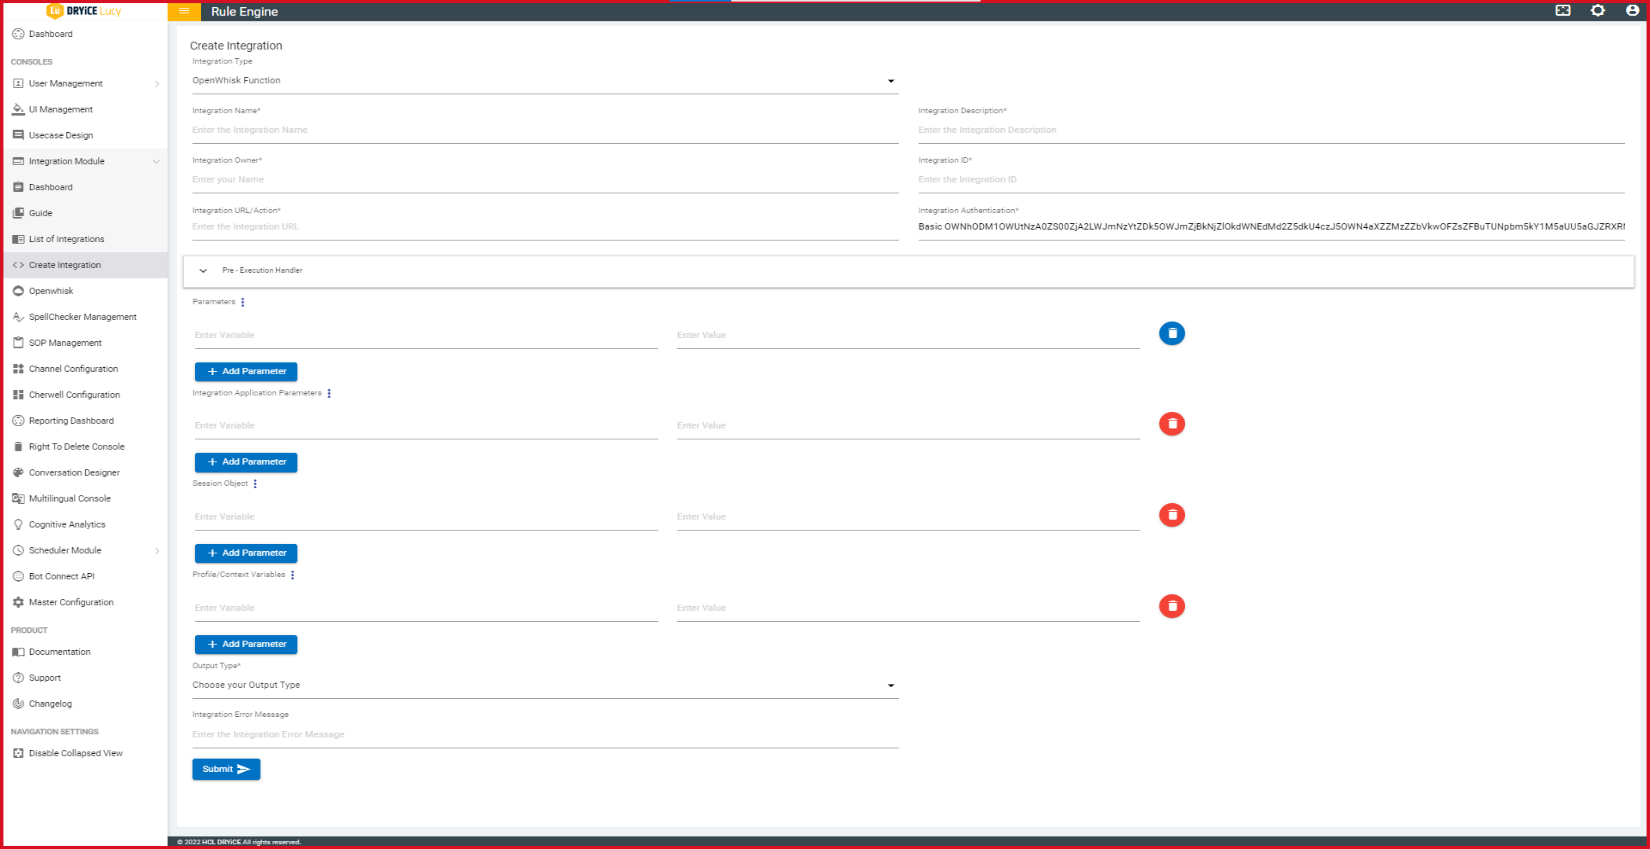
Refer to the table below to understand what to fill in the various fields based on the Integration Type.
Table 2. Table 3 Integration Fields Description Field Sub-Field Description Integration Name Name of the Integration that helps you remember the purpose of the Integration Integration Description Description of the Integration that provides some details on the Integration’s purpose and behavior Integration Owner Name of the user who is the owner of the Integration Integration ID Unique ID to identify the Integration. This ID is used while making a reference to the Integration in Watson Assistant. Integration URL URL that will be called by BigFix AEX to execute the Integration in case of OpenWhisk and HTTP Integration types. For OpenWhisk, you can get the URL from the OpenWhisk action list covered in OpenWhisk Module. Integration Authentication A unique basic AUTH token, which is a base 64 encoded string generated for OpenWhisk and HTTP Integration types by default to authorize a particular Integration. Please do not change the value generated in this field and use it as such. Parameter Any parameters you would like your Integration to possess or to send over to OpenWhisk or internal function, mention them as the Integration Parameters in Integration Creation page. The parameters should be in JSON or Object format with key value pairs.
For example: If you want to pass 2 parameters called URLStatus and URLCreate with their values, you can write the following in this field:
{“URLStatus”: “https://www.urlstatus.com”,
“URLCreate”: “https://www.urlcreate.com”}
If you would like to add any parameter whose value has to be fetched from the application like Session Value, then use '$' and then write the entire parameter you would like to access. You will have access to all parameters from Watson Assistant or session to use with. For example, to access the session variable username, you can use:
{'username: $session.username'} This will create a param called “username” and fill it with the value of username variable from the session.
Integration Application Parameter With this parameter, you can control the behavior, such as sending a response of your Integration to Watson Assistant directly instead of the user or modifying the response to be sent to the user.
This includes the following:
Prefix - To add any string before your Integration Response just before sending to it the user.
Put the following in the field:
{“prefix”:“<message>”}
For example: If the Integration is returning the ticket status value only, you may want to add a prefix:
{“prefix”:“Your ticket status is:”}
Suffix - To add any string after your Integration Response just before sending it to the user.
Put the following in the field:
{“suffix”:“<message>”}
For example: If the Integration is returning the yearly sales revenue only, you may want to add a prefix:
{“suffix”:”US Dollars. “}
Response -To send a response from Integration Management directly to Watson Assistant instead of sending it to a user. When this option is used, the Watson Assistant processes the message sent to it from the last node it processed in the conversation flow and the process resumes as if the user sent this message to Watson Assistant.
Put the following in the field:
{“response”:true} to send the response to Watson Assistant.
Default value is false
Note: The prefix and suffix strings are not sent to Watson Assistant. They are used only when sending responses to users.
Disable User Input- Restrict users to only selecting an option from the Watson Assistant UI elements-based Response (buttons, checkboxes, radio buttons, etc.) and not getting the ability to type in a text response. This restriction is valid only for the response of this Integration and this flag is reset after the user gives the response.
Put the following in the field:
{"user_input_disabled":true} to restrict the user.
Default value is false.
Session Object You can save any values in the session by using this field. Your session values sent will be saved in 'session.ruleengine_session' for you to access it anytime later.
Put the following in the field:
{“param_name”:“param_value”}
Apart from setting session variables in Integration Creation page, you can also set the session variables while returning from an OpenWhisk function. This is required when the value to be set for a session param is dynamically generated while executing the OpenWhisk function.
To do so, use the following format while returning from the OpenWhisk function:
{message: "YOUR RESPONSE GOES HERE", session: {“param1”:”value1”, “param2”:”value2”}
If same parameter as set in the Integration creation page is also set in the OpenWhisk function, then the value from the OpenWhisk function is over-written in the param.
Profile/ Context Variables To set the profile/context variables of Watson Assistant from the Integration creation page of Integration Management or while returning from OpenWhisk actions.
In the Integration creation page, enter the following in the field:
{“context_var”:”value”}
While returning from the OpenWhisk function:
{message: "YOUR RESPONSE GOES HERE", profile_vars: {ANY PARAMETER TO BE SENT TO PROFILE VARIABLES OR CONTEXT VARIABLES}}
Output Type Once the Integration based on its Integration Type gets executed, the Output Type field determines what post-execution processing, if any, is carried out on the response. The result of the post-execution is finally sent to the user or Watson Assistant.
Various output types are available depending upon the selection of the Integration Type, such as Function, Response Result, Response Value, Value formed by Array, and Pre-Defined Message.
After selecting the output type, you must design your output in the “Output” field provided.
Following output types are available based on the Integration type:
Integration Type Output Types OpenWhisk Function, Response result, Response Value, Value formed by Array, Predefined Message Integration Code/Function Function (pre-selected) Integration Message Value formed by Array, Predefined Message HTTP Request Function, Response result, Response Value, Value formed by Array, Predefined Message Save to DB Function, Response result, Response Value, Value formed by Array, Predefined Message Read From DB Function, Response result, Response Value, Value formed by Array, Predefined Message Output Function You can write your own function for creating an output. Your function should return a string as output to make the Integration work.
Refer to the following function format:
(function IntegrationFunction(callback) {callback (message, profile_vars,Integration_app_params) })
Where the argument message passed to the callback function is mandatory and should have the response that should be displayed to the end user after the execution of the integration.
Failing to call the callback function will not provide any response to the end user after the execution is completed.
Response Result Response Result looks for a message parameter from the result of your Integration. This is especially appropriate for your OpenWhisk action where the message parameter is a result. Use only, if you are sure the response from your Integration action or function will have an object with a result and message inside it. The output returned will be from 'response.result.message'. Response Value Use the Response value when you have a specific value in the JSON response which needs to be used. The response value will need an array that comprises the path of the key in the JSON response.
For example: if following was the JSON response from an HTTP Call:
{“result”:{“userdata”:{“name”:“John Smith”, “Emp ID”:”UAN5683”}}}
And you want to return the Emp ID, put the following in the output field:
["result","userdata",“Emp ID”].
Value Formed by Array Use this, if you want to display a complex response to the user with the response you received from the Integration. You can create an array of arrays to create any form of a complex sentence.
Each array will be inside the main array comprising a sentence formation. The array will have the first element as the value to be used. The second element is an array with both prefix and suffix strings that need to be added around your value if it is present. The third element is the message added if the value is not present.
Example:
To create a complex sentence from the JavaScript Object Notation (JSON) object of the user below, use the array format mentioned below.
Response from the Integration:
{name: "testuser", email: "testuser@hcl.cogm", username: "testuser", location: "abc"}
Response output to be sent to the user:
The name of the user is test user whose email address is testuser@hcl.com in case you would like to contact him. We can’t find his mobile number.
Put the following in the output field:
Array Format: [["$params.name",["The name of the user is ",""],"We cannot find the name of the user"],["$params.email",["whose email address is ","in case you would like to contact him."]," can't find the email id of the user."],["$params.mobile",["His mobile number is ",""],"We can't find his mobile number."]]
Predefined Message Any hardcoded message can be put here.
Put the message string in the Output Field:
“Put the response message here”
HTTP Methods The HTTP method in which the call must be made. It supports GET and POST request.
This option is available only for HTTP request Integration type.
HTTP Content Type The content type of the request that is being made and will apply to the request header when placing a request.
This option is available only for HTTP request Integration type.
HTTP Accept Type The accept type that is expected for the response to be mentioned. This will be applied to the request header while placing a request.
This option is available only for HTTP request Integration type.
HTTP Request Header Mention other request headers in the provided field as JSON which will be added to the header of the call while being made.
This option is available only for HTTP request Integration type.
JSON checkbox Select, to convert and accept the request in JSON format by applying application/ json for content-type. This option is available only for HTTP request Integration type.
Currently only JSON or string responses from the HTTP call are supported.
Integration Error Message A message to alert users of a problem that caused the Integration to fail during execution.
This can also be used as fallback message to inform user that the integration did not complete as expected. It is advised to add a reasonable error statement here.
- Click Submit to add the Integration to the Integration repository of the Integration Management .
- The newly added Integration can be seen in the List of Integrations shown in Figure 23 – Integration Type Selection .
Calling an Integration from Watson Assistant
Any Integration added to Integration Management can be triggered from Watson Assistant by sending a certain Integration Management Trigger pattern in the Watson Assistant Response. The pattern has an Integration Management Trigger word API_INTEGRATION followed by semi-colon (;) which is then followed by the Integration ID. After the Integration ID there will be stringified JSON of Integration Parameters and Application parameters.
_API_RULE_;INTEGRATION_ID;{<Integration Parameters Here>};{<Integration Application Parameters Here>}
Once an Integration is created and ready to be integrated with BigFix AEX, you can send the ID of the Integration to anyone configuring the use case in Watson Assistant to use the trigger in the Watson Assistant conversation flow design. The respective person can also get the generated Integration trigger from the Integrations list as explained in the section below.
The form editor functionality on the Create and Edit page of Integration Module is to give a form like field apart from the json editor so that user can add data in the fields. Now there are two editors: JSON editor and Form editor, both are dependent of each other. Whenever there is any change on any of the editor, it will reflect on another.
On Create Integrations page when Openwhisk function is chosen, autocomplete has been implemented on Integration URL field which will get all the openwhishk functions available on a tenant and if anything is selected, Integration Authentication field becomes invisible.


After submitting the form successfully, it will route to the List of Integrations page.
If add parameter button is clicked before adding a variable to the first row, then it gives an alert.
