Adding Self-Service Application Options
Configure a distribution task to generate useful information that will be handled and shown by the Self-Service Application. You can enable SSA Options for new and existing tasks.
About this task
- Set a custom icon for the created task that will be shown in the SSA catalog.
- Set a custom label that is shown in SSA and used as the name of the button to
click to run the task; it will be translated according to the target OS
language. This is the full list of available labels that can be selected:
- Repair
- Install
- Remove
- Get
- Run
- Default
Note: If you select the Default
option, it means that the label of the SSA button will have the standard behaviour
(Run for Action Requests,
Get for Offers).
Important: The custom label can be seen only if the
target machine has the Self-Service Application installed and active. Moreover, the
options Repair, Get, and
Run are supported for all Self-Service Application
versions >= 3.4.2.
Procedure
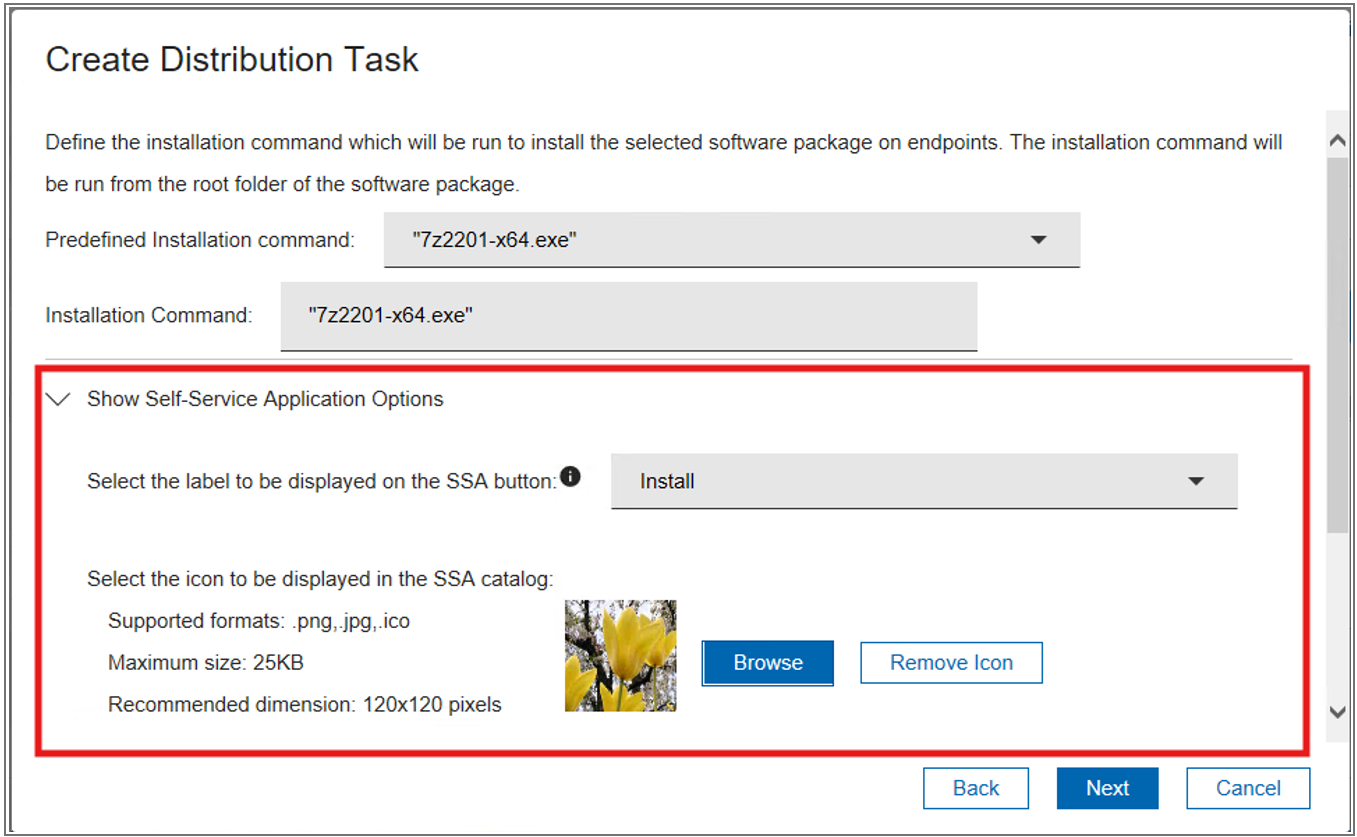
- From the Create Distribution Task window of the Manage Software Distribution Packages dashboard, click Next until you see Show.
- Click Show Self-Service Application Options.
- Click the dropdown to select the label to be displayed on the SSA button, and choose the desired entry from the list.
- Click the Browse button to select a custom icon from your device.
-
Once the icon is selected, a preview will be shown, and a remove
Icon button will appear in the modal.
Note: The file types supported for the icon are .jpeg, .png, and .ico. The size must be less than 25 KB, and the recommended dimensions are 120x120 px.
-
Click remove Icon if you want to remove the custom icon
from the task.
Figure 1. Create Distribution Task window