Using the Import SCAP 1.3 Content wizard
The Import SCAP Content wizard is a tool that allows users to load SCAP compliant content, such as security baselines and checklists, into a system for automated compliance scanning.
Overview and Function
The SCAP 1.3 Wizard is an import utility within the BigFix console that enables administrators to import SCAP (Security Content Automation Protocol) benchmark content and automatically generate Fixlets and Analyses for compliance assessment.
This wizard supports both DISA STIG and CIS Benchmarks, allowing you to evaluate endpoints against industry-standard configuration baselines such as DISA STIG and CIS.
The wizard parses XCCDF, OVAL, and CPE components defined in SCAP datastreams and generates corresponding BigFix content for assessment and remediation.
Accessing the SCAP Wizard
- Launch the BigFix console.
- Navigate to .
- Double-click Import SCAP 1.3 Content to open the wizard interface.
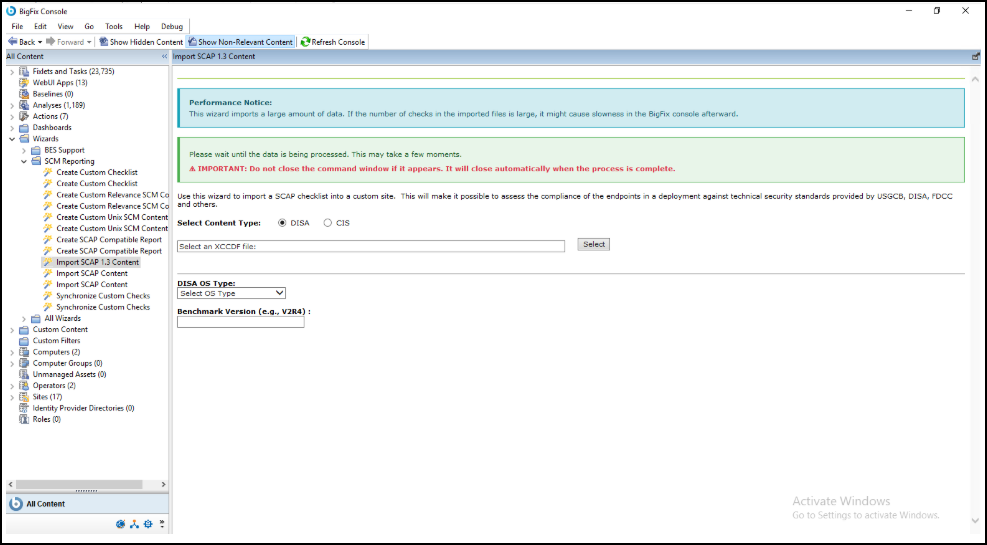
Wizard Interface Overview
- Content Type Selection (DISA / CIS)
- File Selection Panel
- Datastream / Benchmark / Profile Auto-population
- Target Platform Selection
- OS Type and Benchmark Version Fields
- Import Action & Console Feedback
Using the SCAP 1.3 Wizard
-
Select Content Type
Choose the benchmark type:
- DISA - for DISA STIG SCAP benchmarks
- CIS - for CIS SCAP benchmarks
This selection determines which fields and file upload options appear below.
-
Browse and Load Files
Depending on your selection:
-
If "DISA" is selected:
- Upload a single XCCDF file (e.g., U_MS_Windows_10_V3R3_STIG_SCAP_1-3_Benchmark.xml).
- Click Select, browse to the file location, and choose the file.
- Once loaded, the wizard will automatically read the datastream, benchmark, and profile identifiers.
Figure 3. DISA Import View Auto-populated dropdowns 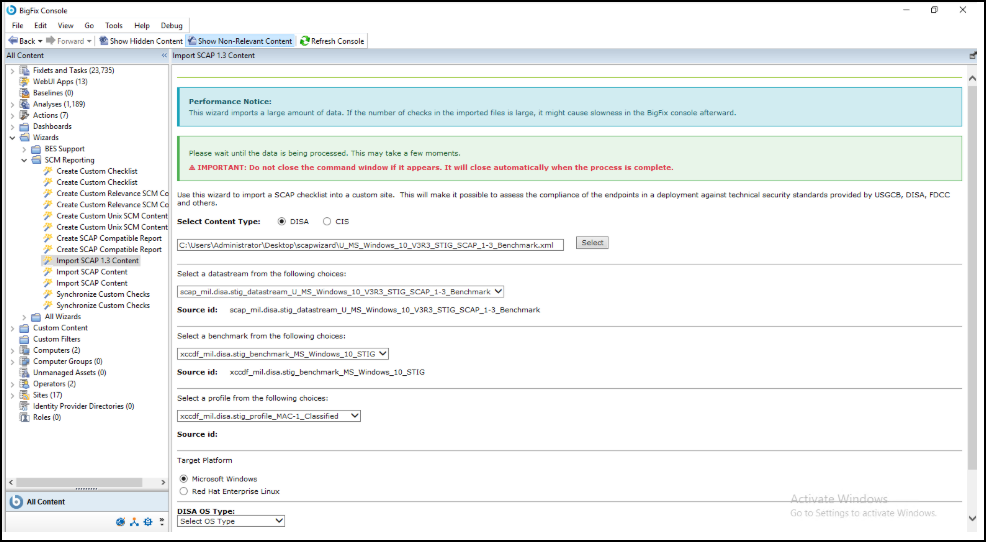
-
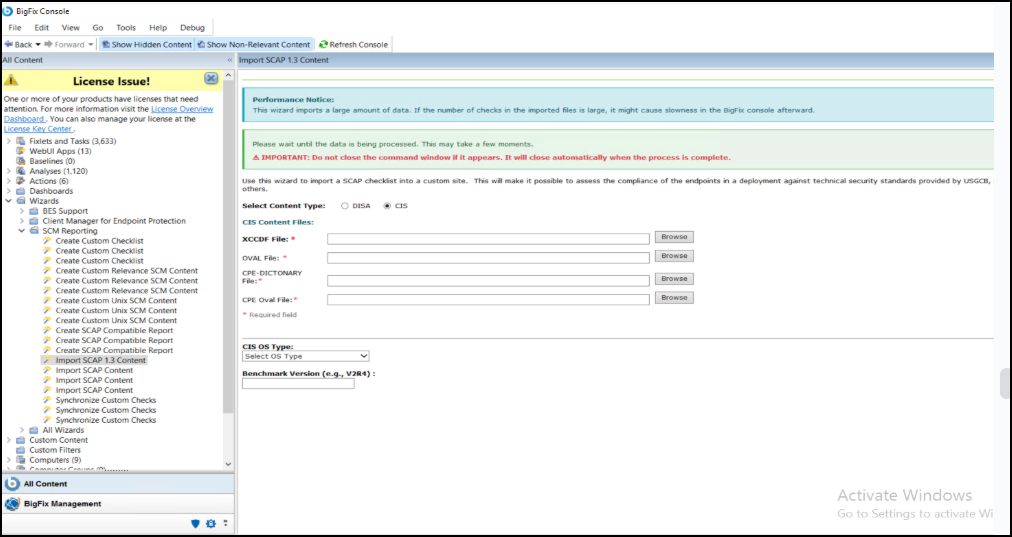
If "CIS" is selected:
- Upload four files in the correct order:
- XCCDF File
- OVAL File
- CPE Dictionary File
- CPE OVAL File
- Ensure the file names match the CIS benchmark structure. For example, CIS_Microsoft_Windows_10_Enterprise_Benchmark_v3.0.0.
- The wizard will use these files to populate benchmark and profile choices.
Figure 4. CIS Import View Auto-populated dropdowns 
- Upload four files in the correct order:
-
If "DISA" is selected:
-
Wait for Dropdown Auto-population
After selecting the files, wait for the wizard to populate the dropdowns:
- Datastream
- Benchmark
- Profile
Note: The wizard may temporarily appear unresponsive while parsing XML files. Do not close or switch windows during this time. -
Select Target Platform and OS Type
Choose the Target Platform (e.g., Microsoft Windows or Red Hat Enterprise Linux).
Then select the OS Type from the dropdown. Example: Windows 10, Windows Server 2019 DC, RHEL 8, Edge Browser, etc.
Figure 5. OS Type Selection Multiple supported platforms 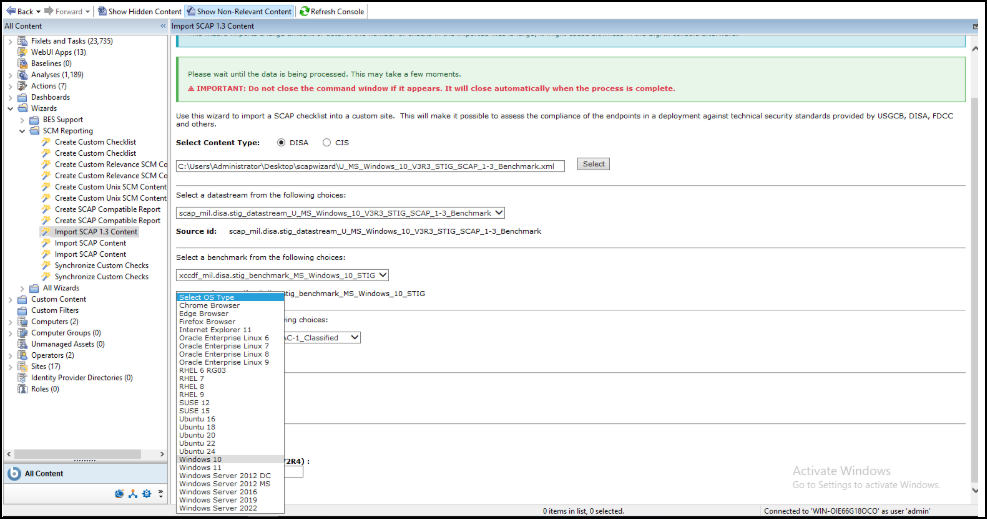
-
Enter Benchmark Version
Provide the Benchmark Version as indicated in the SCAP benchmark file name.
- For DISA, use the following format:
v3r3,v2r4, etc. - For CIS, use the following format:
v3.0.0.
This version uniquely tags the generated site content.
- For DISA, use the following format:
-
Import the Content
After verifying all fields:
- Click Import.
- A Command Prompt window opens and executes internal SCAP import logic.
- The console will display a progress message.
Note: Do not close the command prompt window manually. It will close automatically when the import completes successfully.Figure 6. Processing Stage Command window in execution 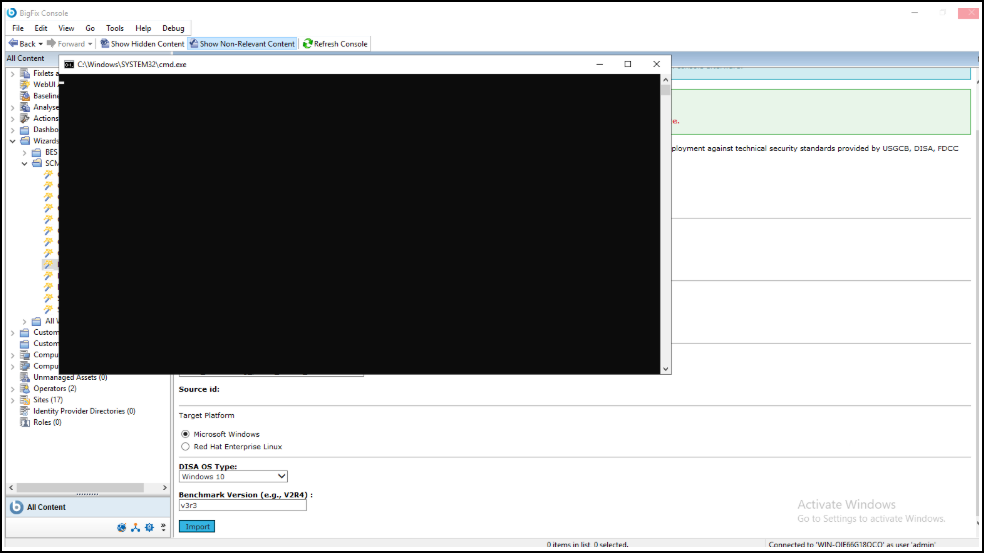
-
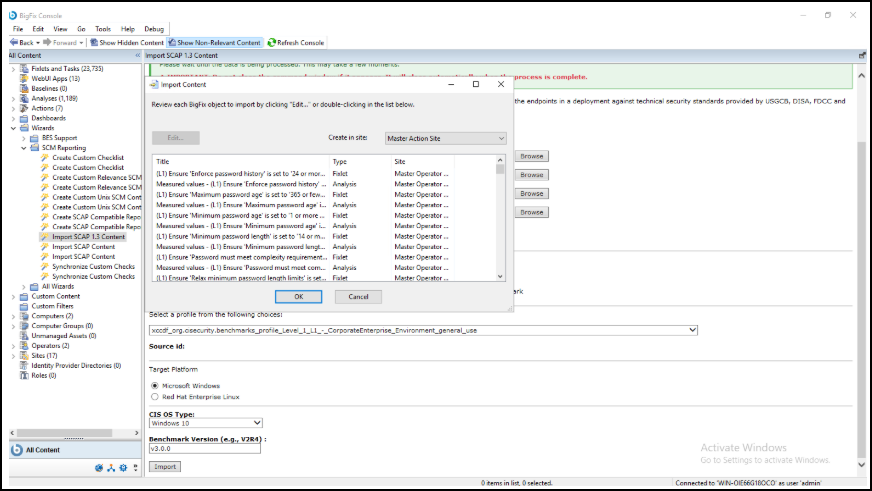
Review and Create Site
Once the import is successful:
- A Fixlet Review dialog appears showing all generated Fixlets and Analyses (e.g., password policy checks, audit rules).
- Review the objects if needed.
- Choose the destination site (recommended: a custom site created for this benchmark).
- Click OK to finalize the import.
The new Fixlets and Analyses appear under the selected site in the BigFix Console.
Example Workflow
Example: DISA Import
- Select DISA.
- Browse and upload: U_MS_Windows_10_V3R3_STIG_SCAP_1-3_Benchmark.xml
- Wait for auto-populated fields:
- Datastream: scap_mil.disa.stig_datastream_U_MS_Windows_10_V3R3_STIG_SCAP_1-3_Benchmark
- Benchmark: xccdf_mil.disa.stig_benchmark_MS_Windows_10_STIG
- Profile: xccdf_mil.disa.stig_profile_MAC-1_Classified
- Set OS Type: Windows 10.
- Set Benchmark Version: v3r3.
- Click Import and wait for the process to complete.
Example: CIS Import
- Select CIS.
- Upload the following:
- XCCDF: CIS_Microsoft_Windows_10_Enterprise_Benchmark.xml
- OVAL: CIS_Microsoft_Windows_10_Enterprise_OVAL.xml
- CPE Dictionary: CIS_Microsoft_Windows_10_Enterprise_CPE_DICTIONARY.xml
- CPE OVAL: CIS_Microsoft_Windows_10_Enterprise_CPE_OVAL.xml
- Wait for benchmark and profile dropdowns to populate.
- Set OS Type: Windows 10.
- Set Benchmark Version: v3.0.0.
- Click Import and wait for the import dialog.
- Select the target site and click OK.
Important Notes and Warnings
-
Performance Notice:
The wizard imports a large amount of data. If the benchmark contains hundreds of checks, it may slow down the BigFix Console after import.
-
Do Not Interrupt:
When the Command Prompt window opens, do not close it manually. It will automatically close once the process completes.
-
Console Responsiveness:
The BigFix Console may appear unresponsive during processing; this is expected behavior.
-
Site Load Time:
Import time depends on the number of checks and system resources. You may experience slowness while the Fixlets are created and indexed.
Troubleshooting
| Issue | Possible Cause | Resolution |
|---|---|---|
| Dropdowns not populated | Large file or slow XML parsing | Wait 2-3 minutes; ensure files are SCAP 1.3-compliant |
| Command prompt closes instantly | File path or syntax issue | Ensure all file paths are valid and accessible |
| Console hangs | Large dataset (e.g., >1000 Fixlets) | Wait until processing completes; do not force close |
| Missing Fixlets post-import | Incomplete upload or invalid XML | Verify benchmark integrity and re-import |
References
- NIST SCAP 1.3 Specification: https://nvlpubs.nist.gov/nistpubs/SpecialPublications/NIST.SP.800-126r3.pdf.
- DISA STIG Benchmarks: https://csrc.nist.gov/projects/security-content-automation-protocol/scap-releases/scap-1-3
- CIS Benchmarks: https://www.cisecurity.org/cis-benchmarks