Creating a stub by using MEP
You can use the message exchange pattern (MEP) properties for an operation, which define binding and timeout details, to create a stub.
Before you begin
About this task
To create a stub by using the MEP properties for a selected operation:
Procedure
- Open the HCL OneTest™ API Test Factory perspective.
-
Expand the list of the Create New Stubs icon
 by clicking the
arrow button
  on the toolbar.
Alternatively, right-click the operation where you want to create the stub, and then select .
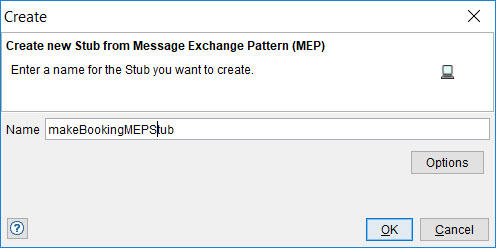
Note: If at least one stub is already created, you can right-click the Stubs folder or one of the existing stubs, and then select .The Create new Stub dialog is displayed.
- Enter a name for the stub in the Name field.

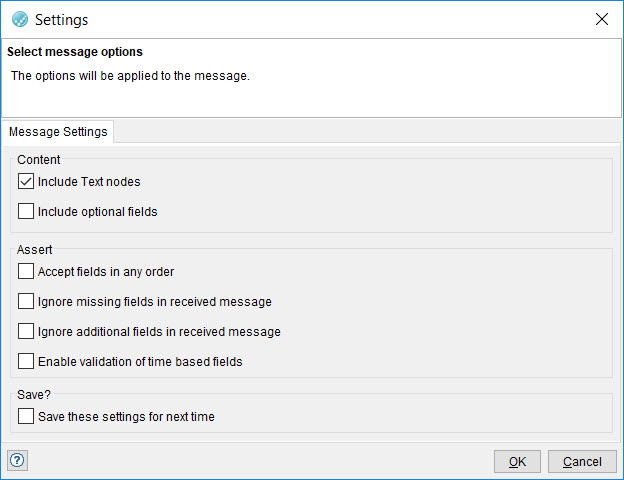
- Click Options to open the Select message
options dialog, and enter additional settings for messages.

- Click OK.
The stub is opened for editing.
For information about using the Stub Editor to modify or enhance an MEP stub, see related links.
-
Make changes to the stub and then save it by clicking the Save icon
 on the toolbar.
Alternatively, you can save the changes to the stub by using any of the following methods:
on the toolbar.
Alternatively, you can save the changes to the stub by using any of the following methods:- Clicking on the menu bar.
- Pressing the keyboard shortcut keys Ctrl+S.
Results
You have created a stub based on the MEP.
What to do next
You can run the stub. See Publishing and running stubs.