Creating an OneDB Database using OneDB Explore
About this task
Procedure
-
Login to OneDB Explore
using admin credentials.
-
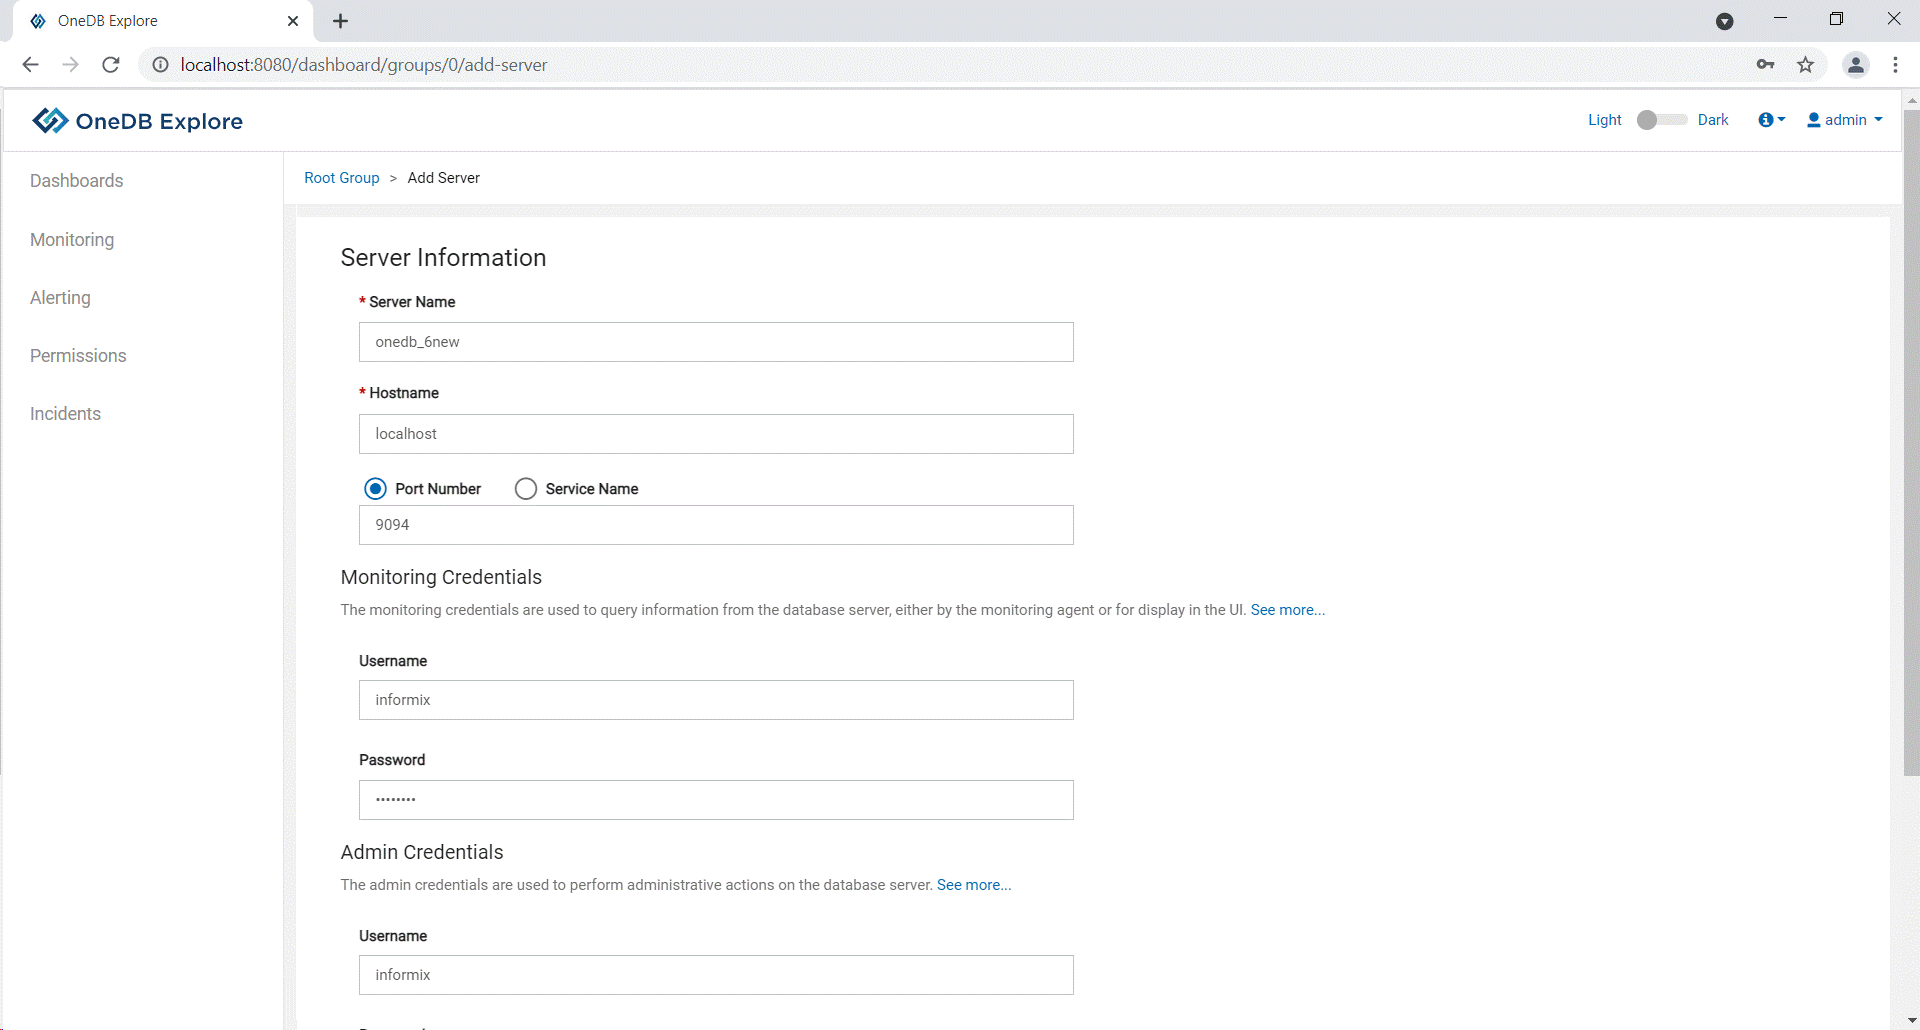
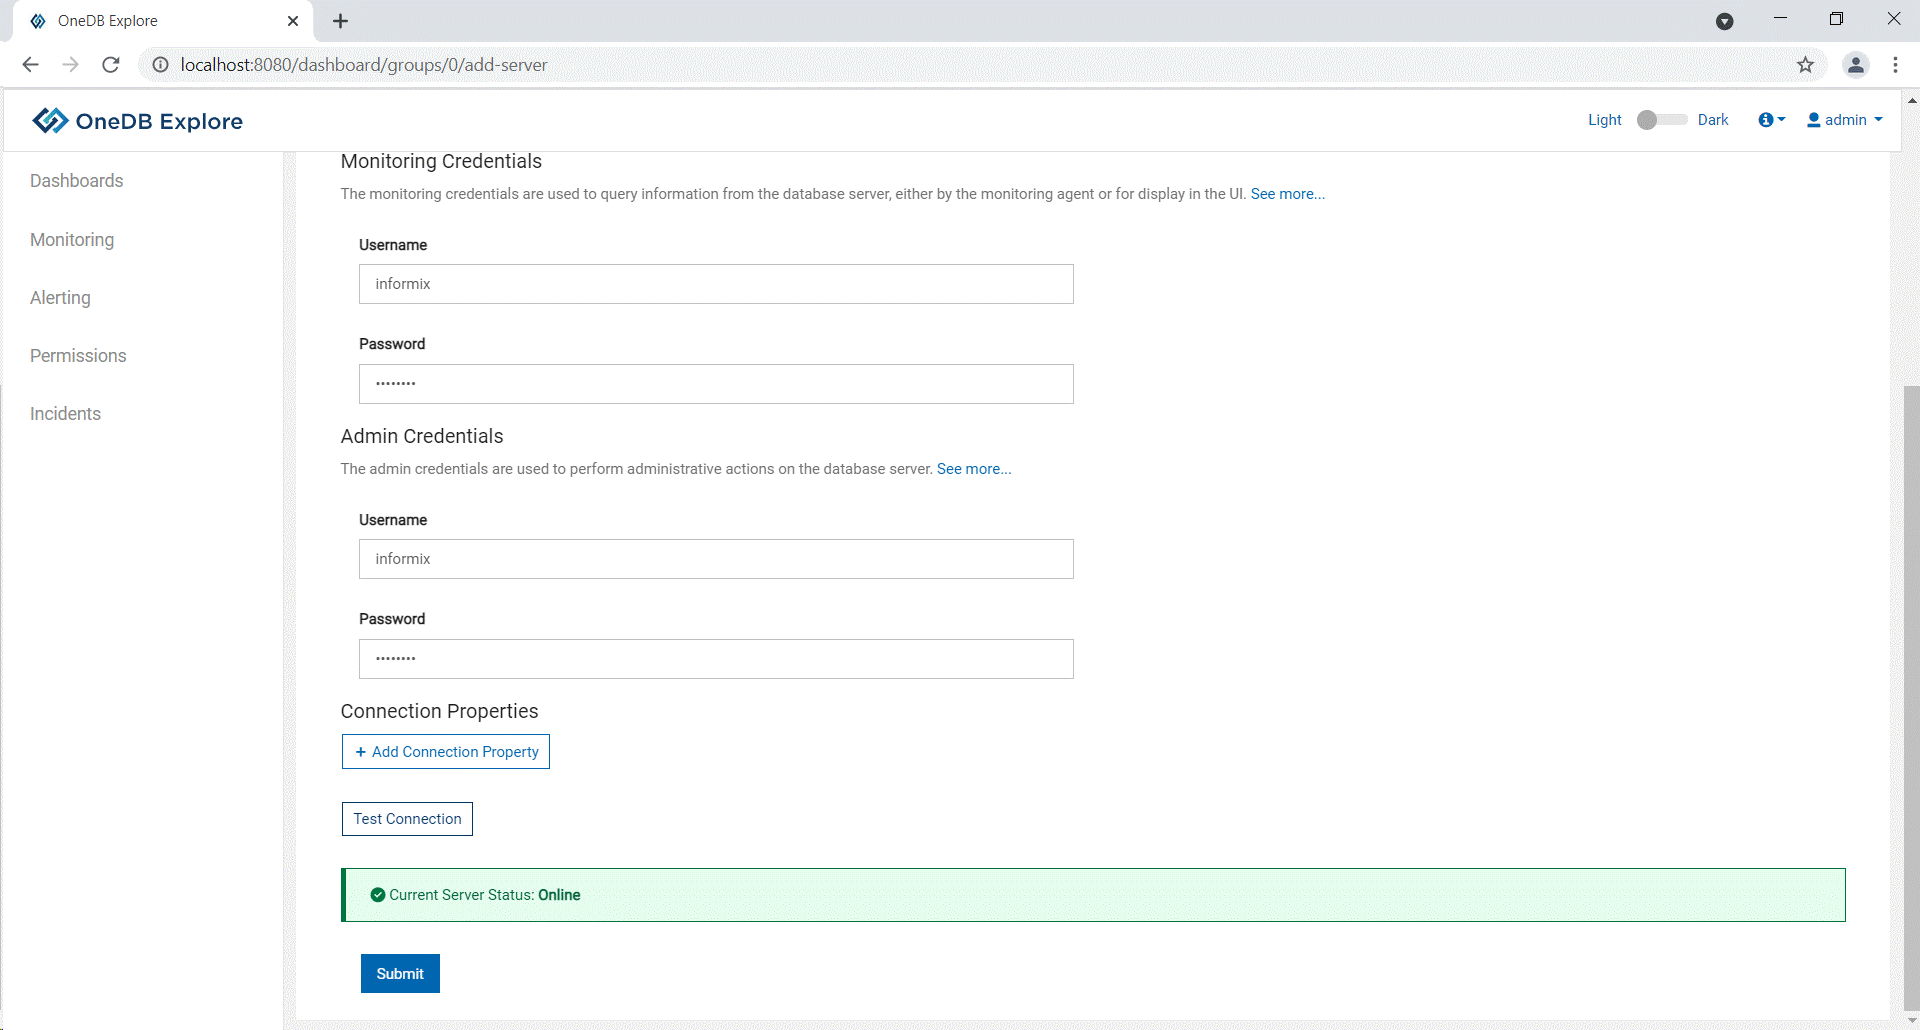
Click the Add Server button to enter the server
information and credentials to establish the connection.
-
Click the Test Connection button to verify if
the server is online and click Submit.

-
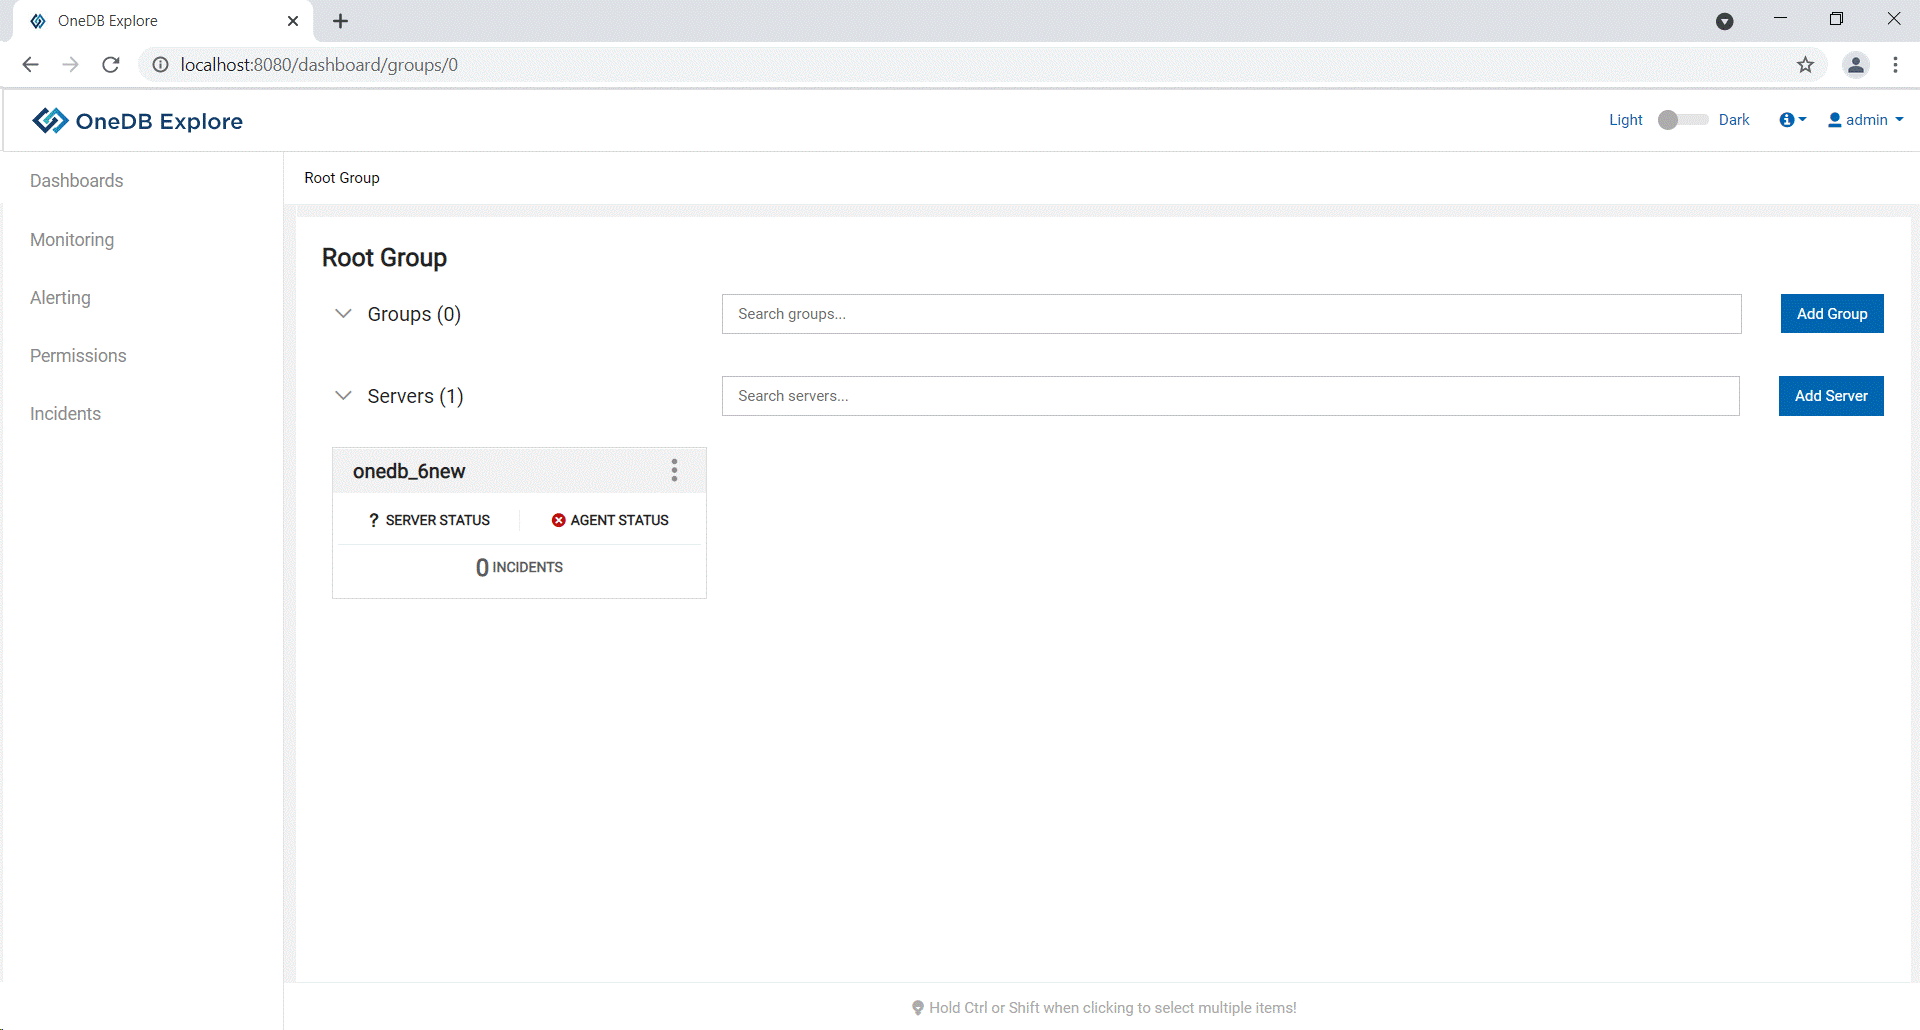
If the server is already configured, select the server and proceed to
next step.
-
Click the Test Connection button to verify if
the server is online and click Submit.
-
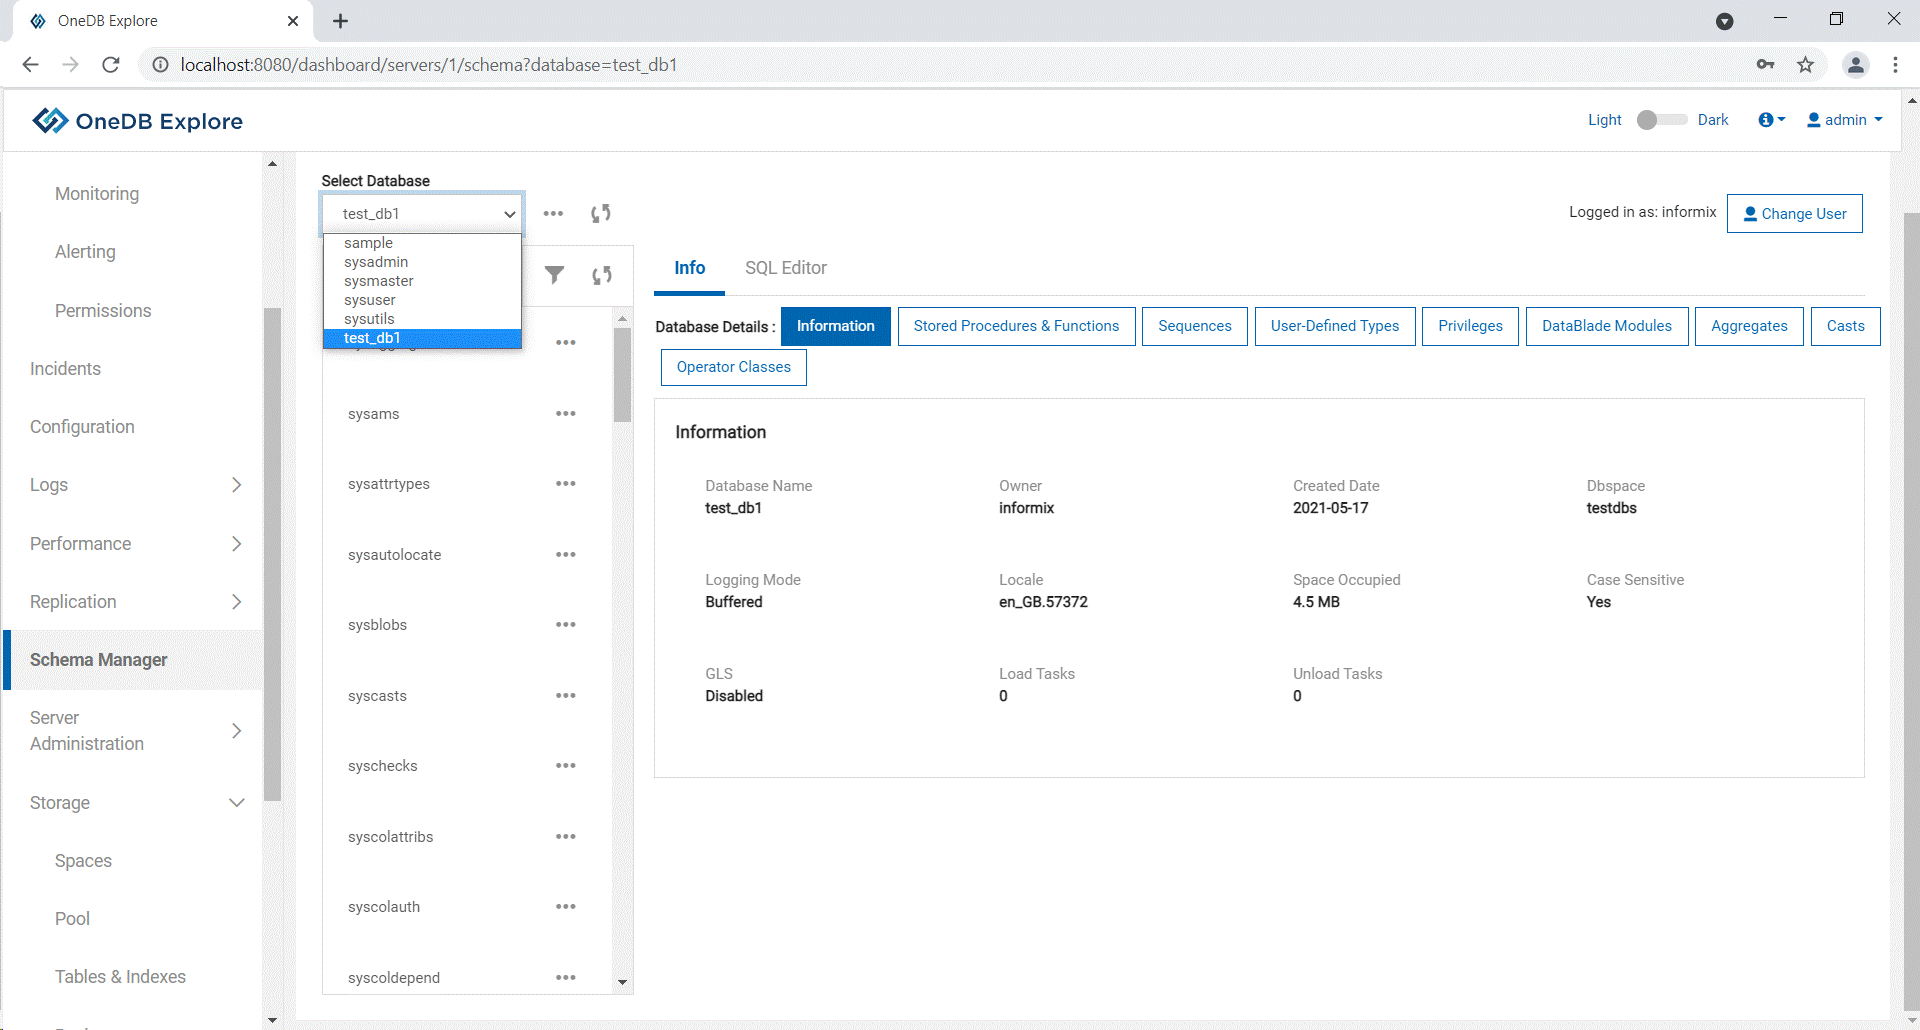
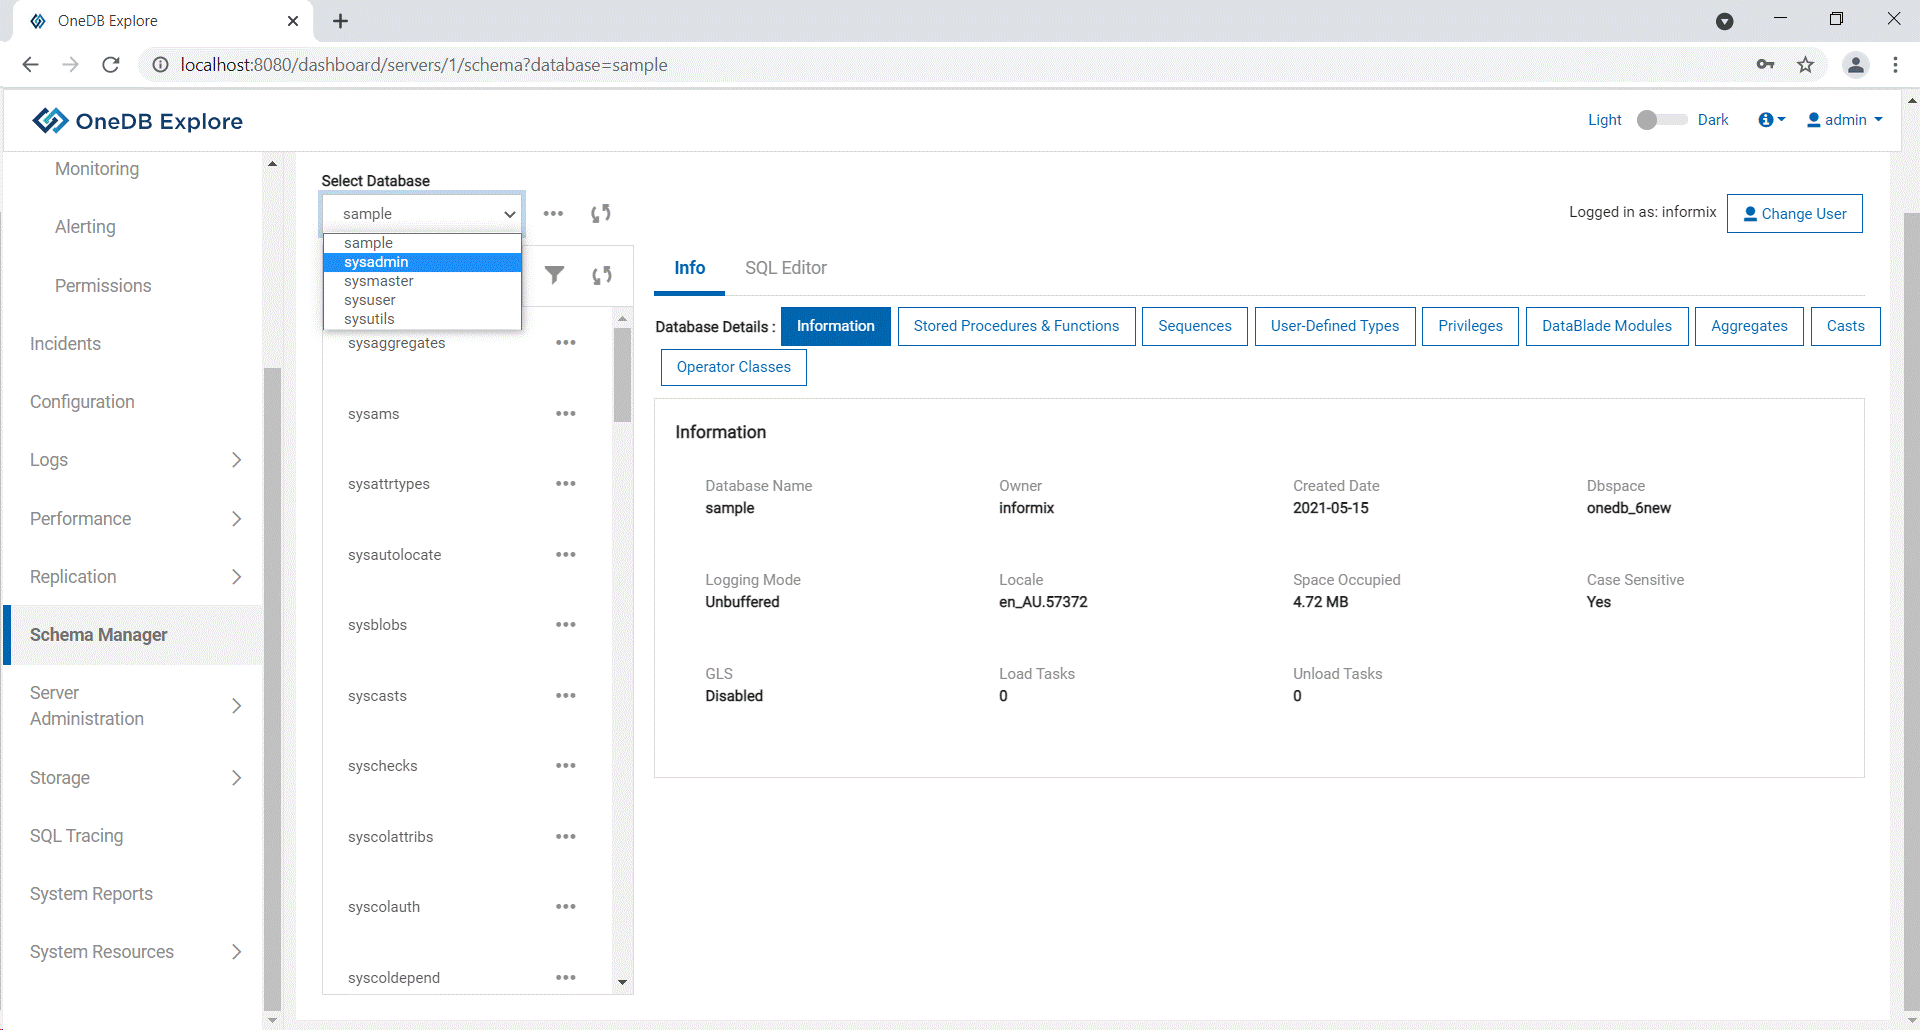
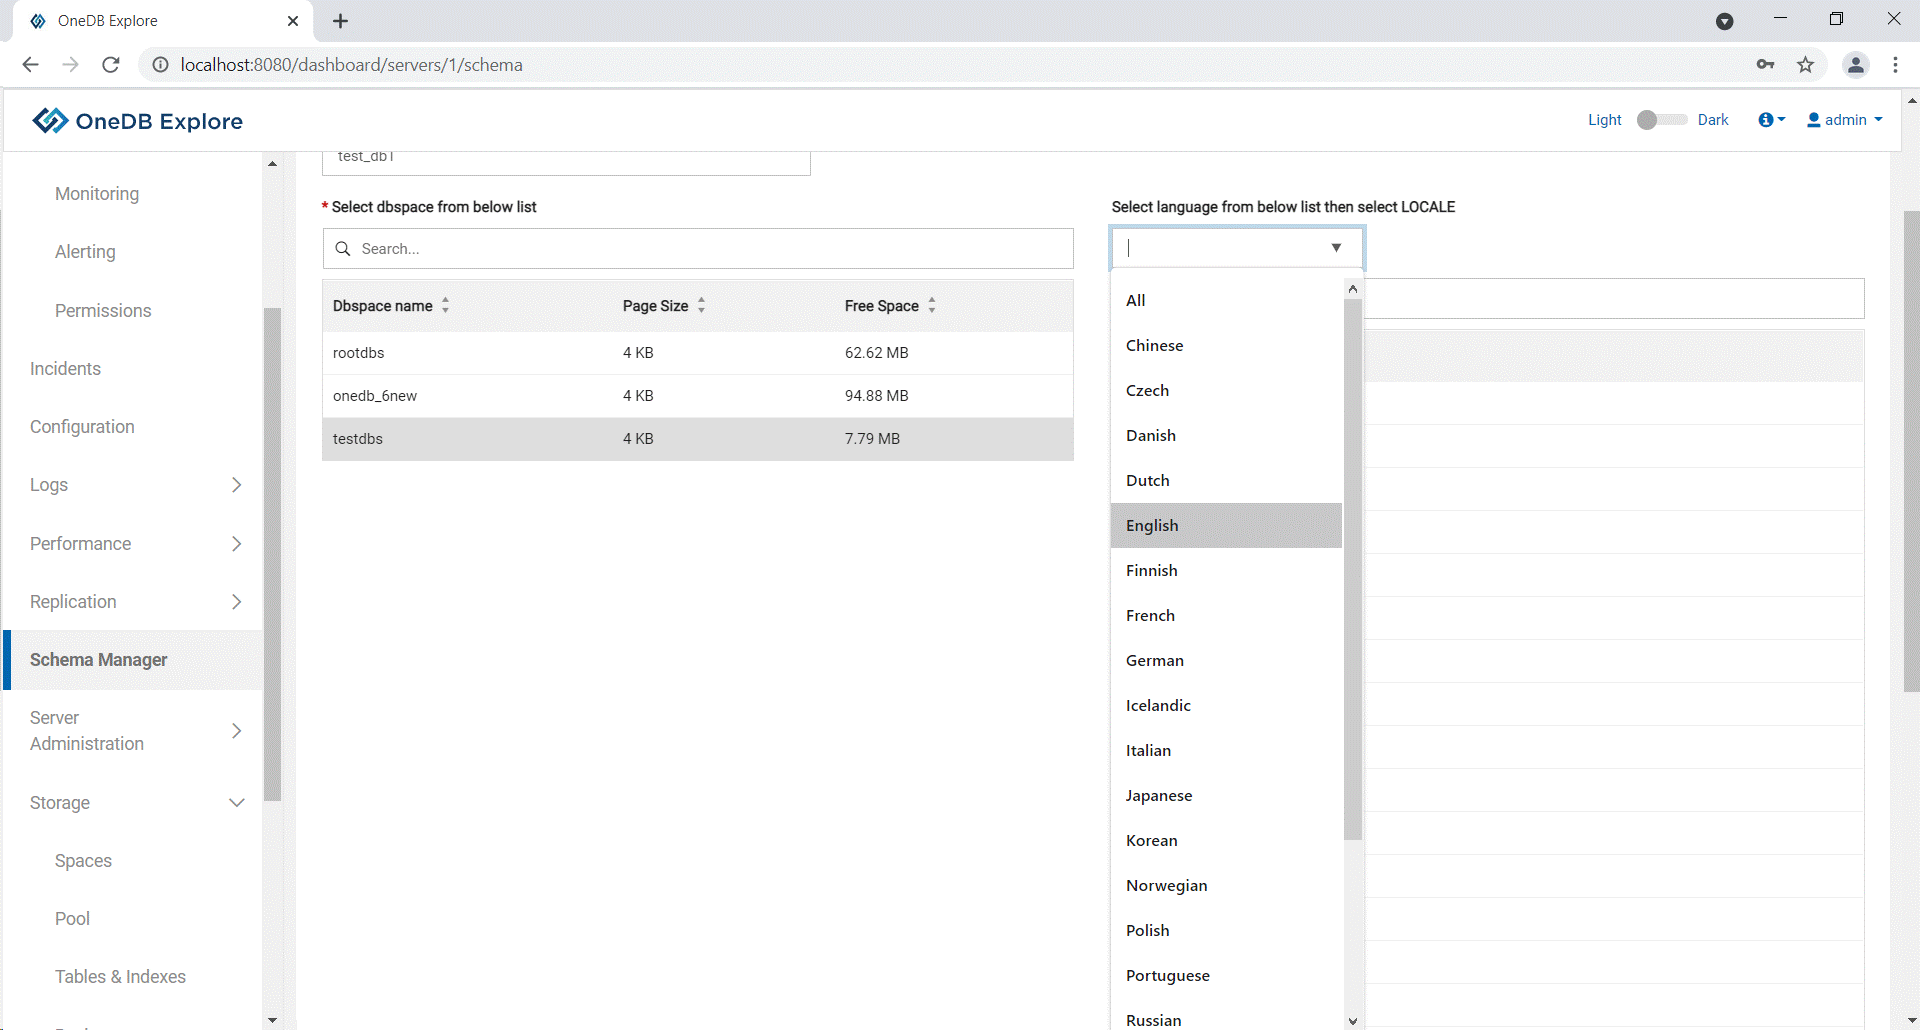
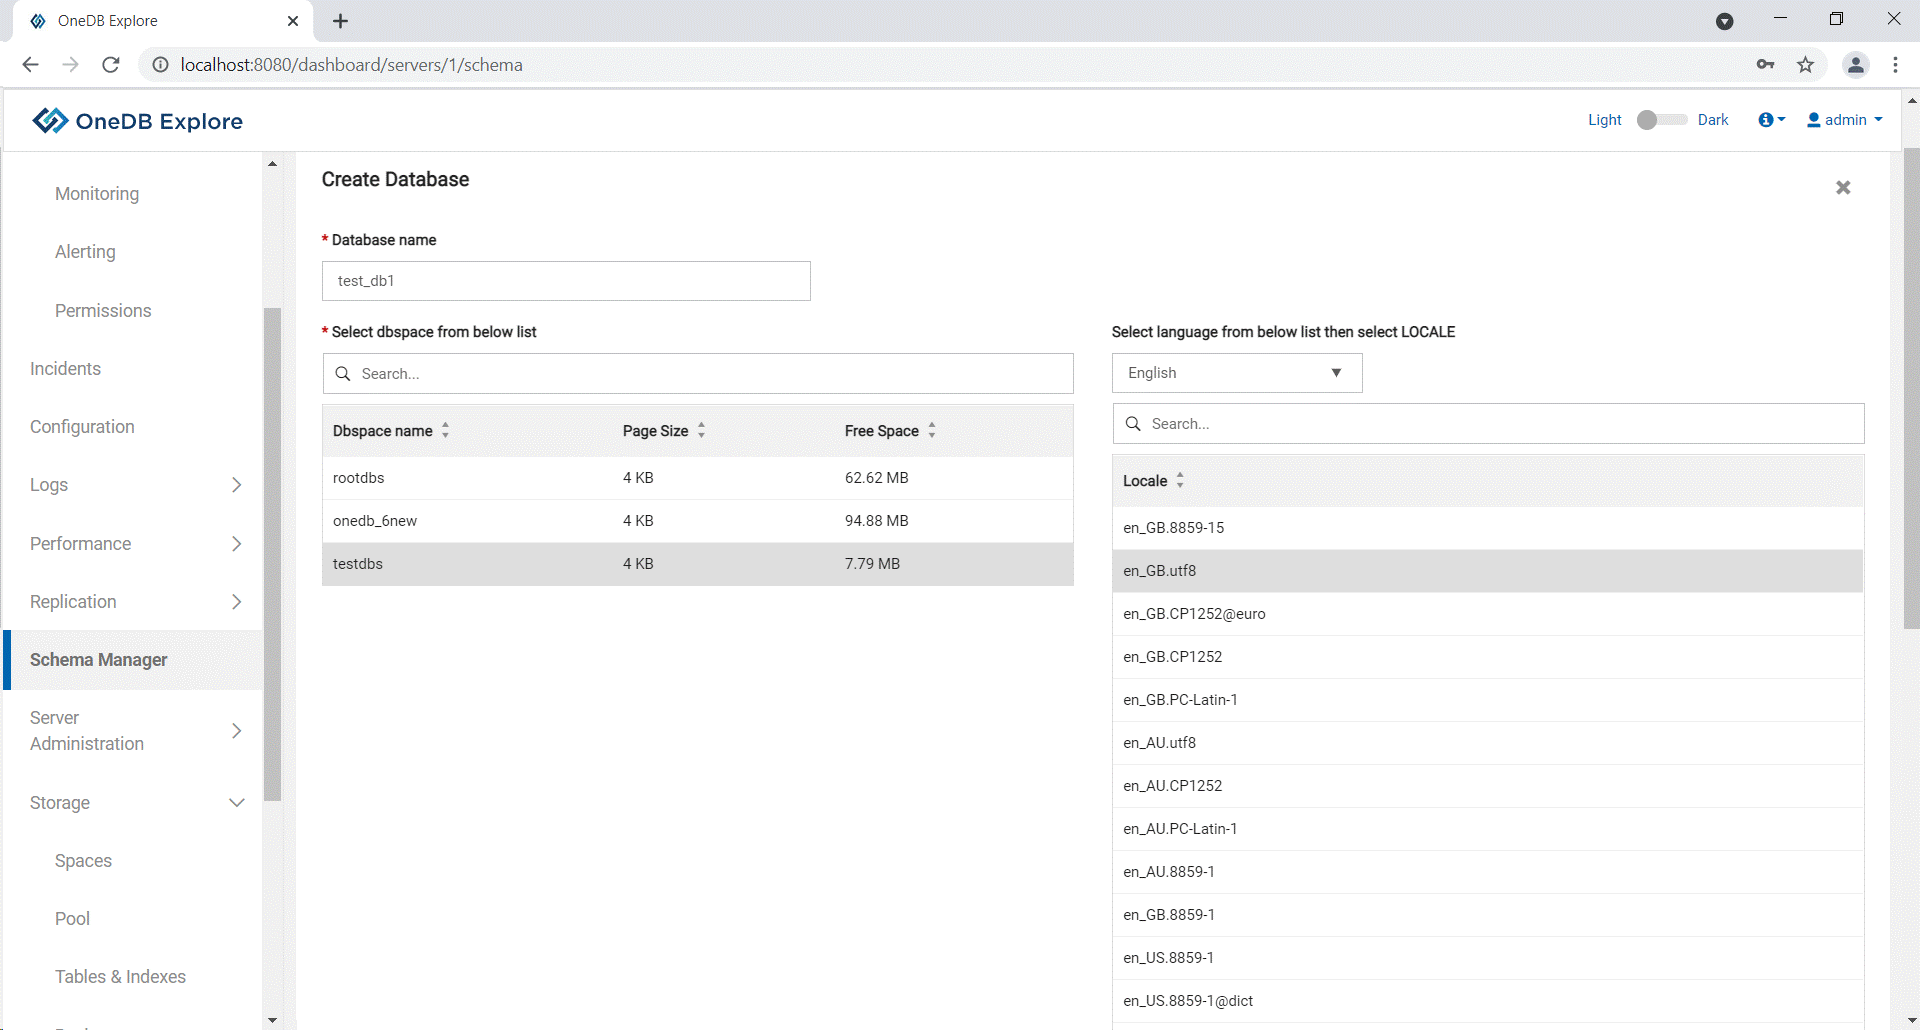
Select Schema Manager from the left pane and existing
databases will be displayed in the Select Database
drop-down list.
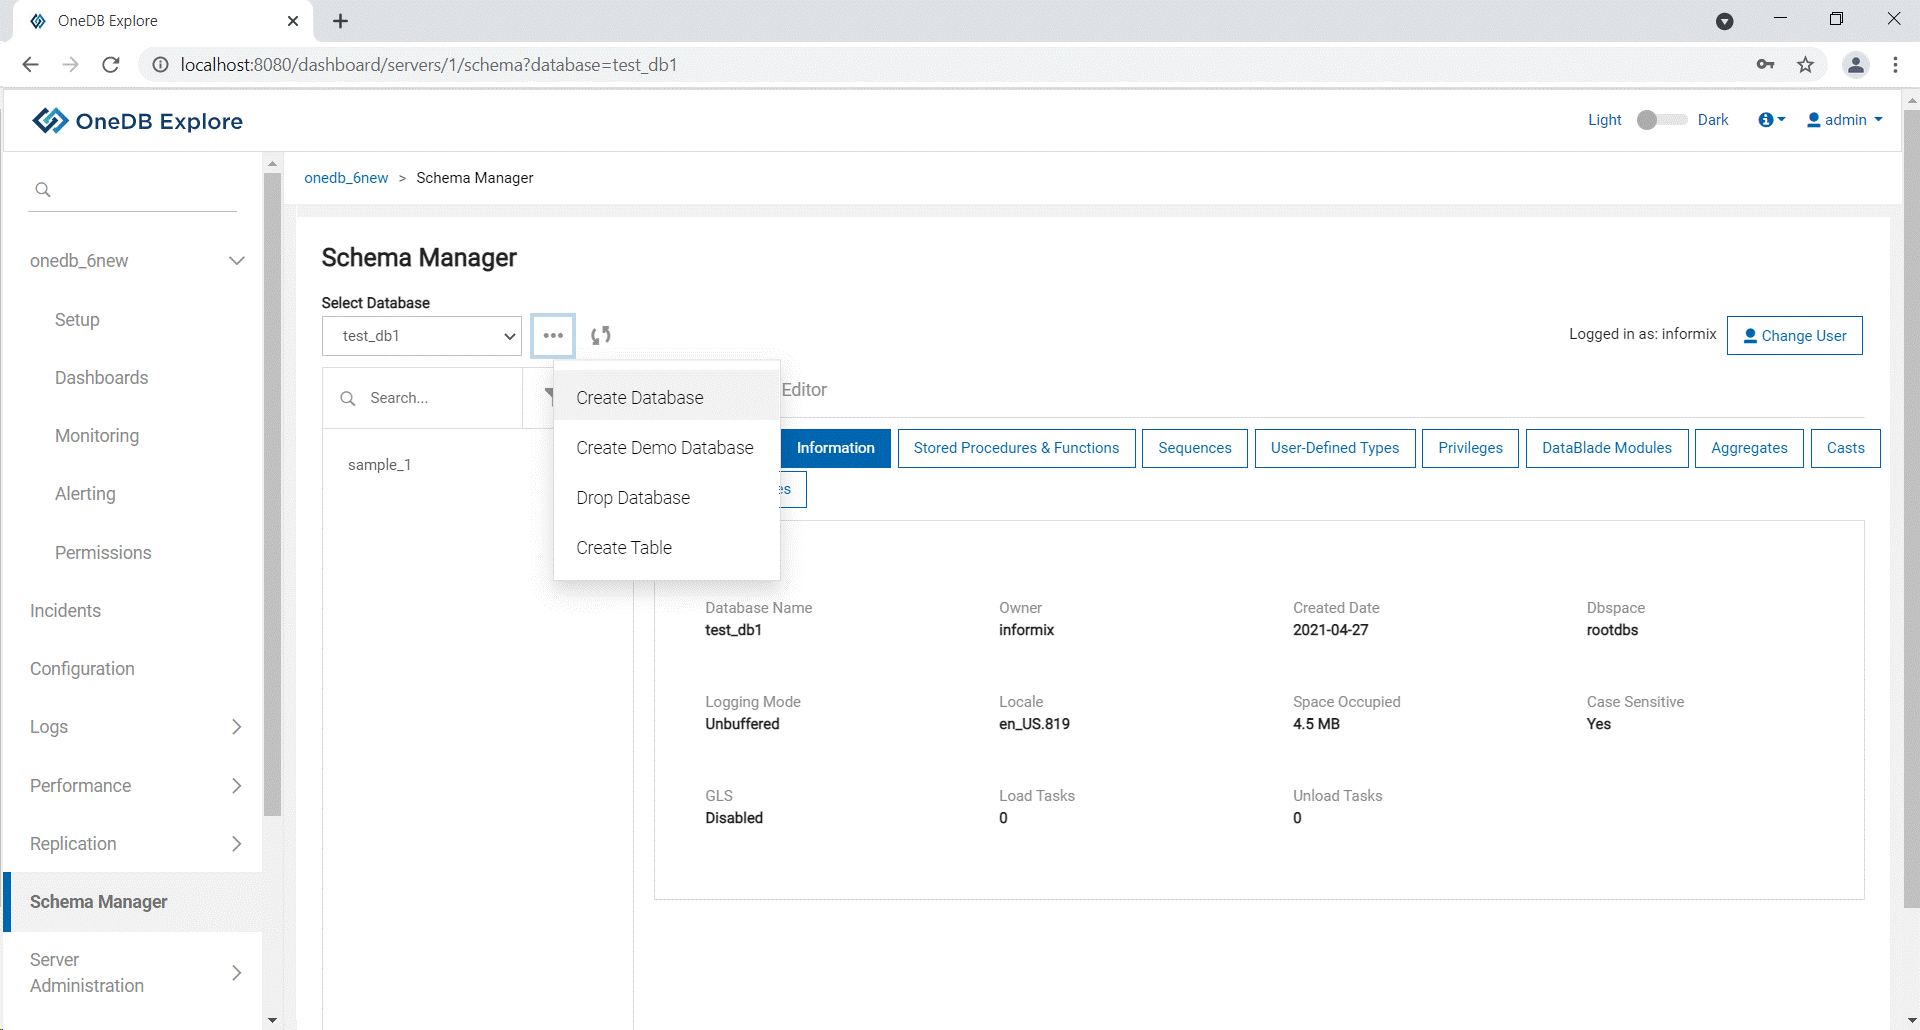
-
Click on … and select Create
Database to create a new database.
-
Enter the details and then click Finish button to create
the database.
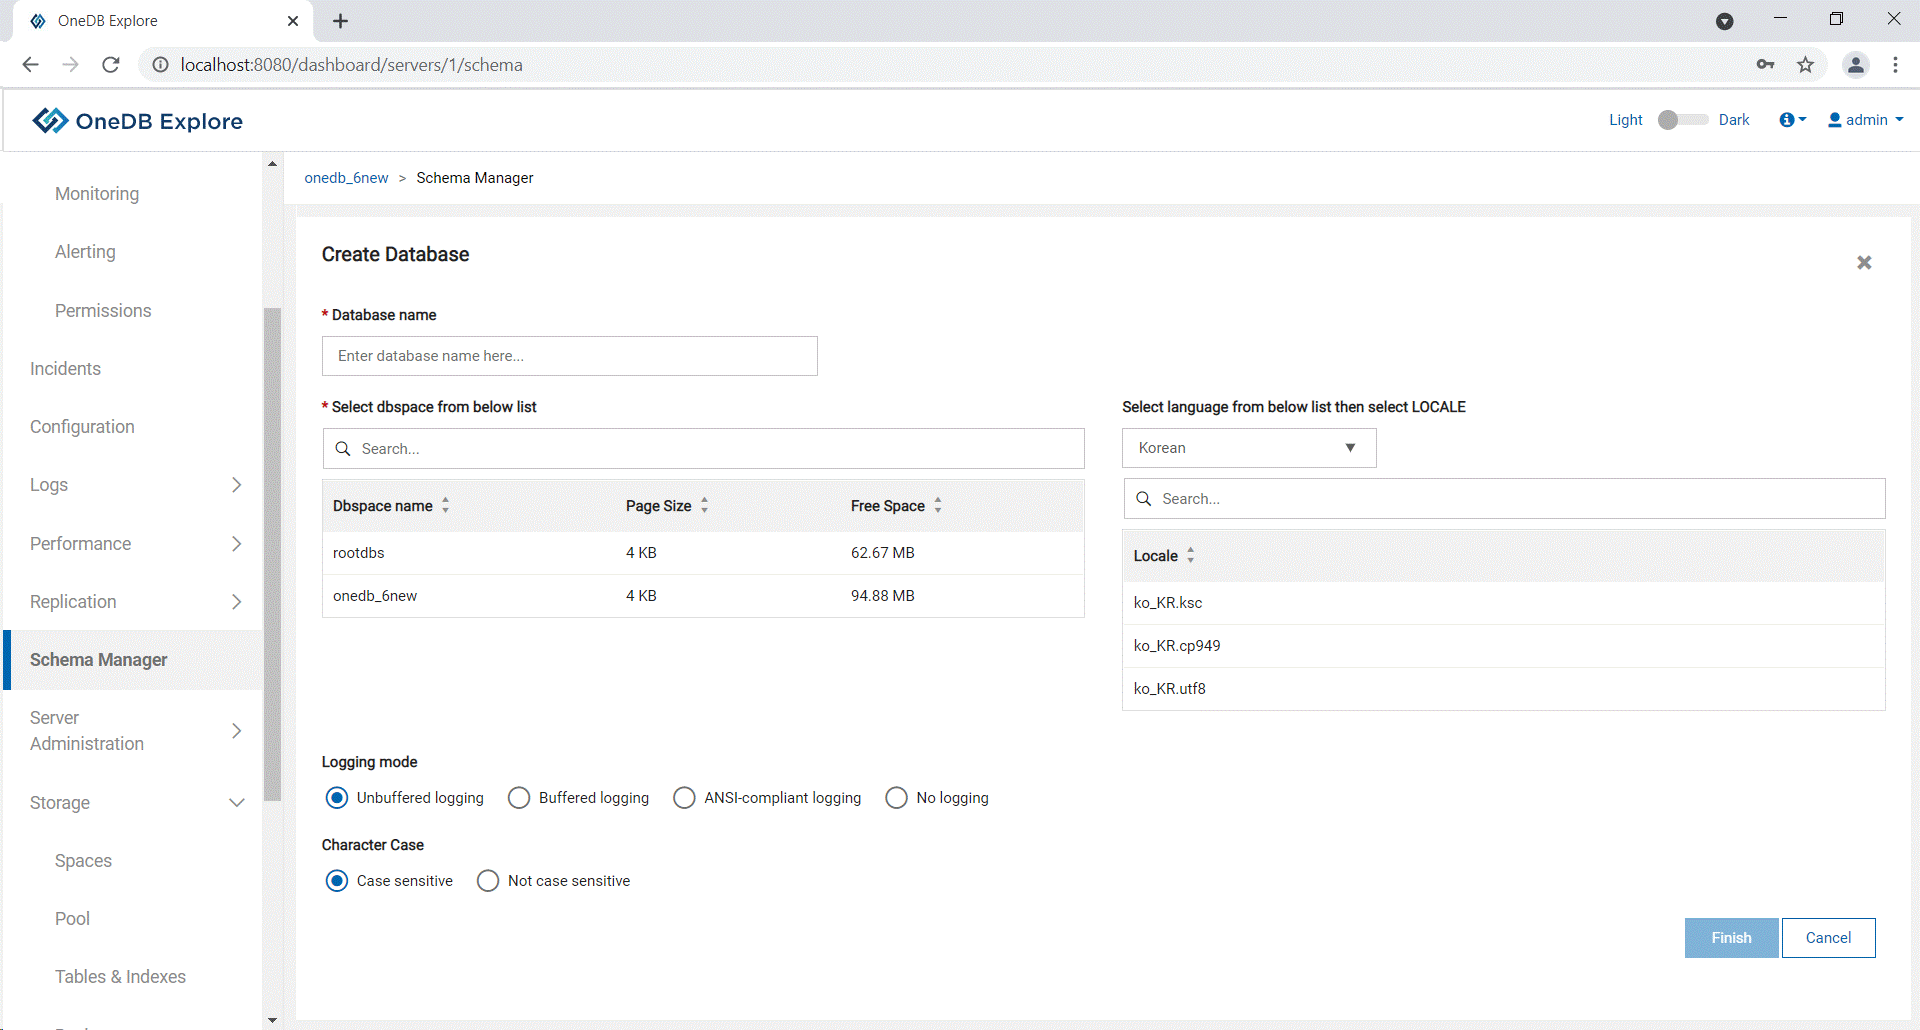
- Database name –Name of the new database. Must be a unique name.
- Dbspace – Storage space allocated to store all the data related to this
new database. It lists down all the available dbspaces in the server and
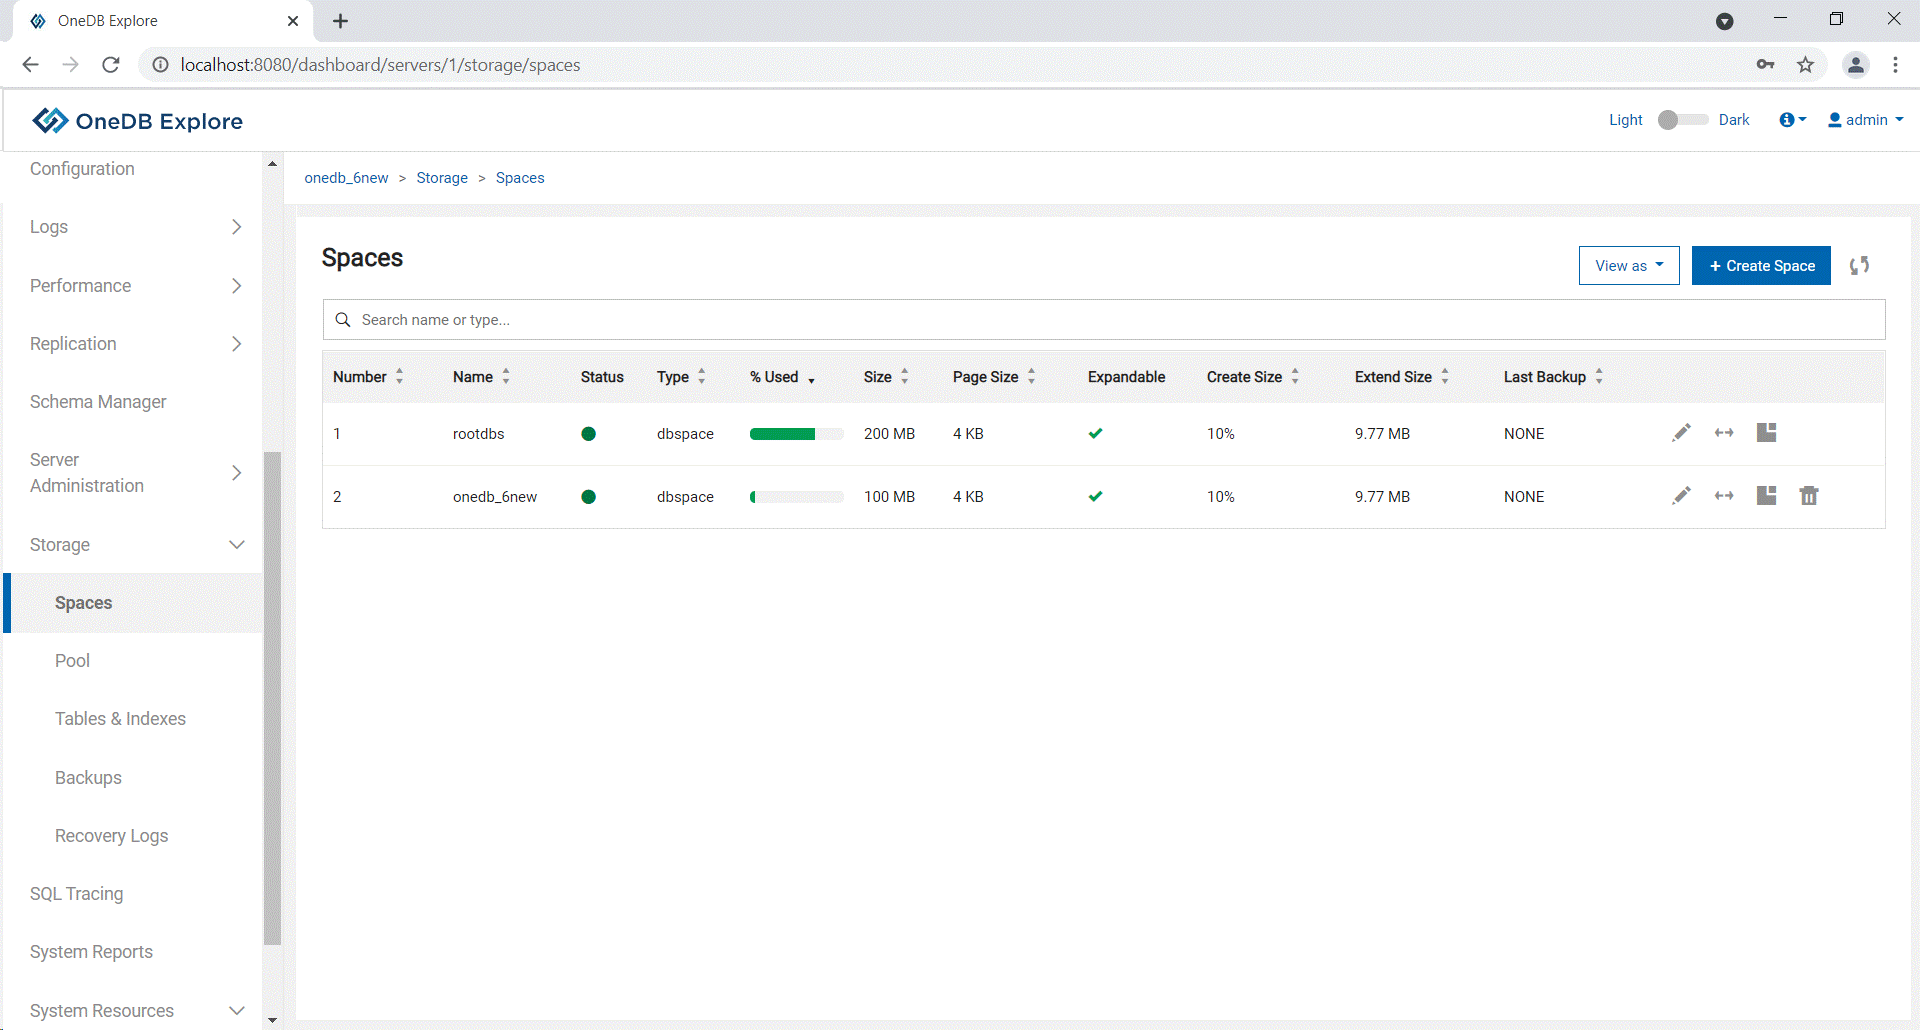
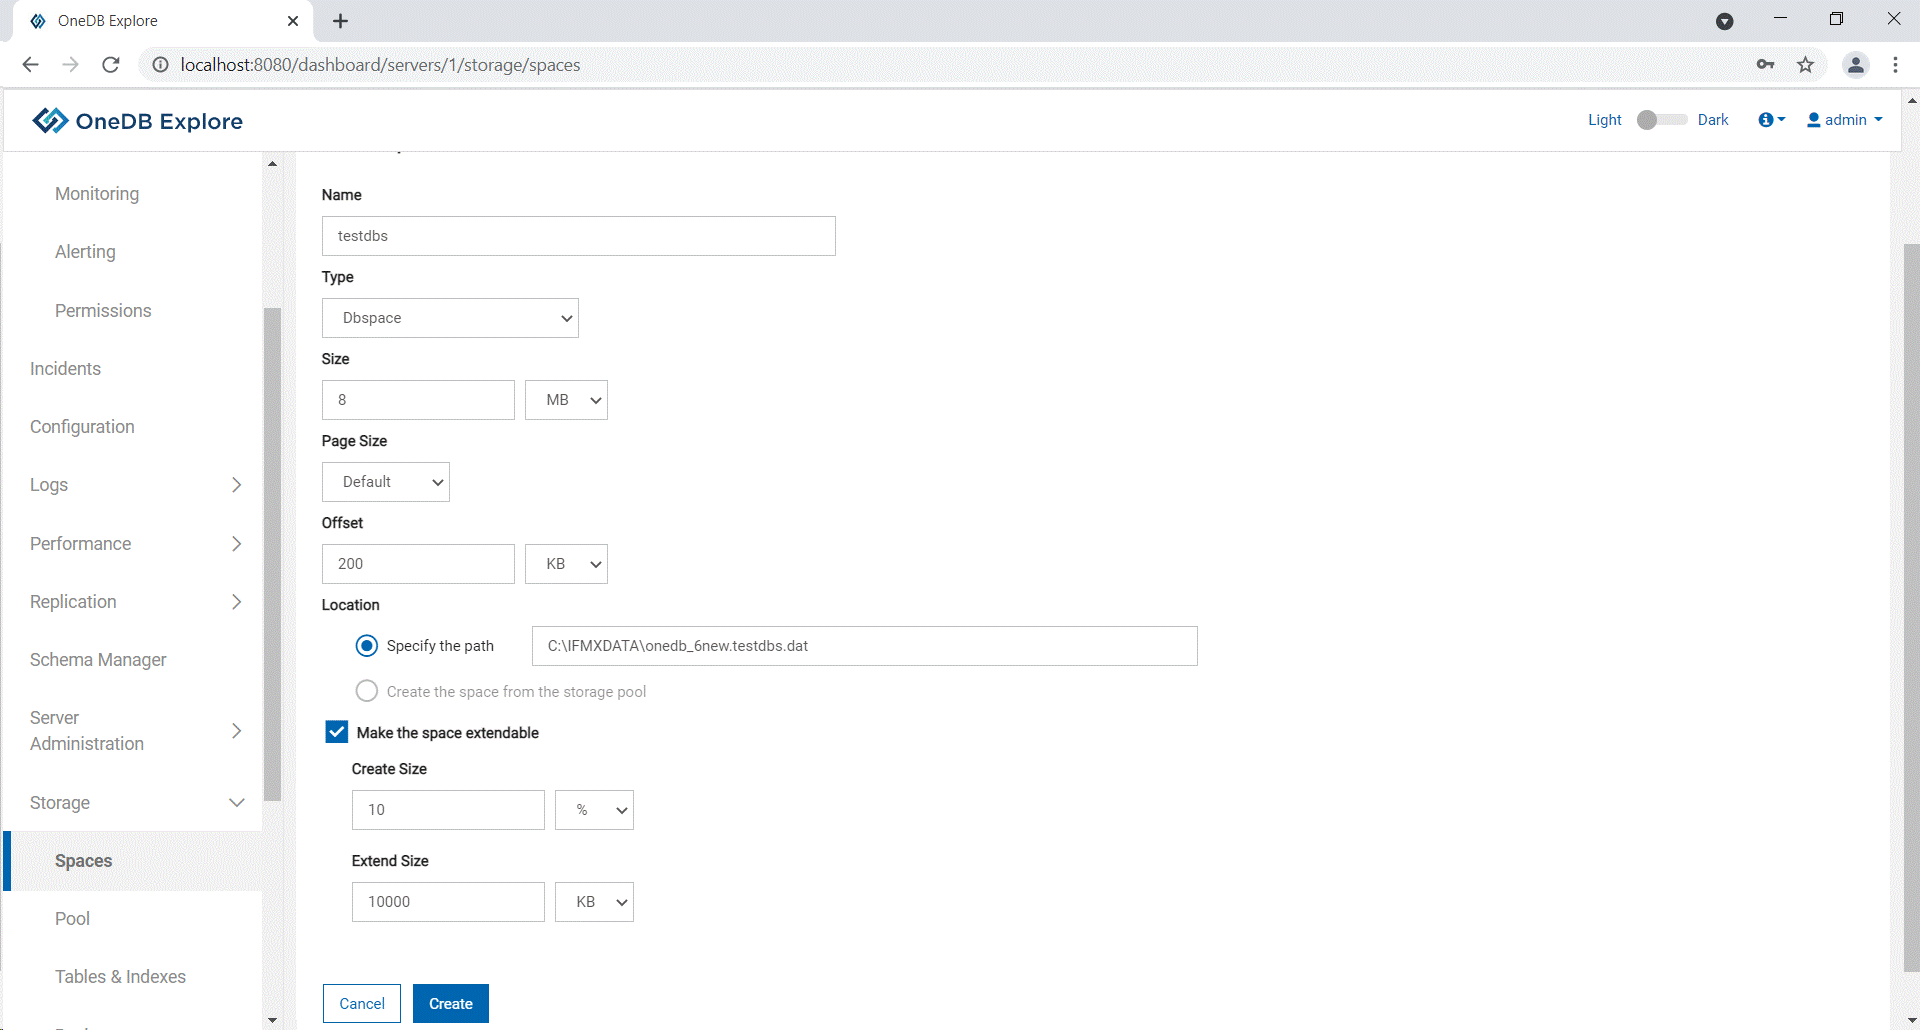
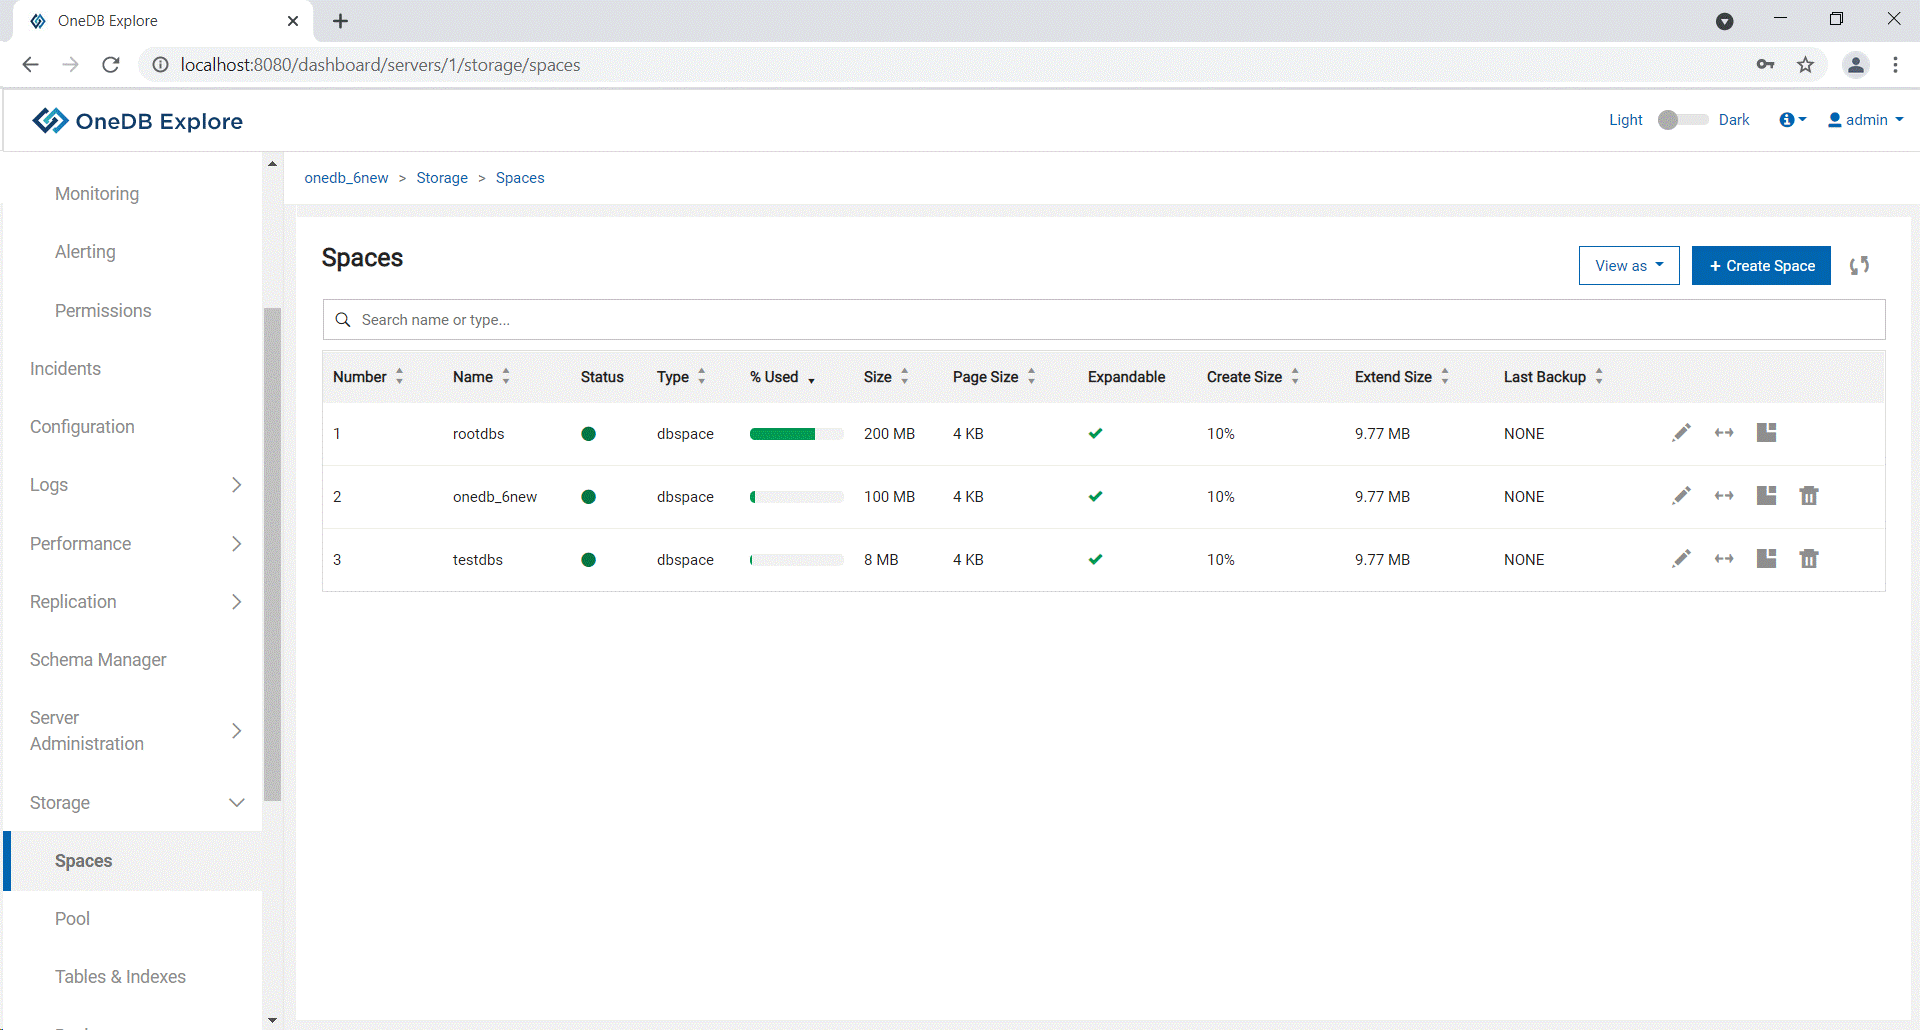
the default is root dbspace.Note: User can create a dbspace of required size using the Storage – Spaces option from the left pane and click Create Space.
- Language and Locale – Select a language, the database uses to store the
data and then select the locale with the required code set to correctly
interpret locale-sensitive data types (NCHAR and NVARCHAR).
- Logging mode – Select one of the four options:
- Unbuffered logging – All transactions are written to disk which makes it slower but recommended.
- Buffered logging – Transactions can be used, and all logs are stored in buffer before written to disk.
- ANSI-compliant logging – It enables implicit transaction.
- No logging – Fast but not safe as transactions are not allowed.
- Character Case

Results