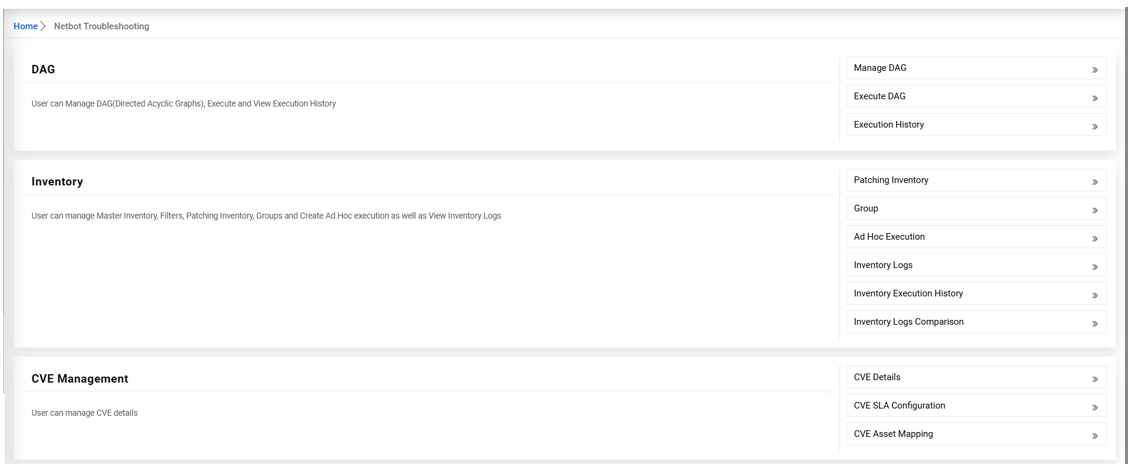
CVE Management is the continuous process of discovering, analyzing, prioritizing, and
remediating known vulnerabilities (CVEs) affecting an organization’s IT assets.Figure 1. CVE Management in Netbot troubleshooting
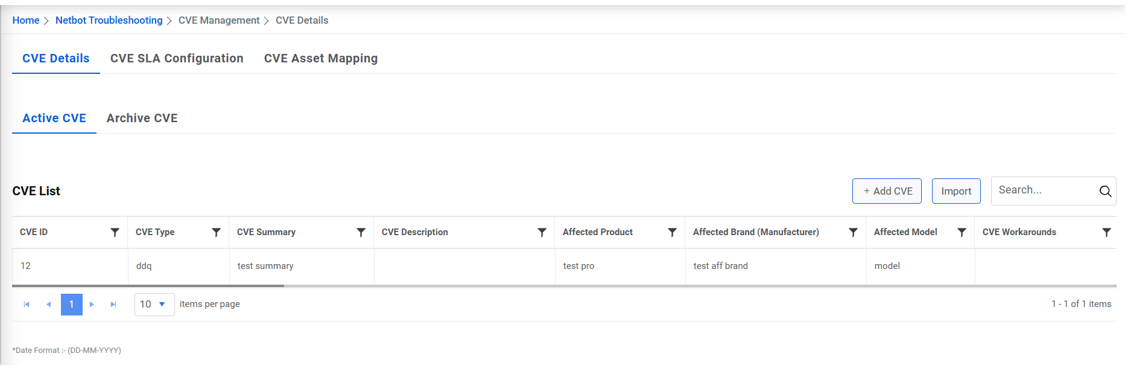
CVE Details - CVE details contains two sub Tabs, Active CVE and Archive CVE.
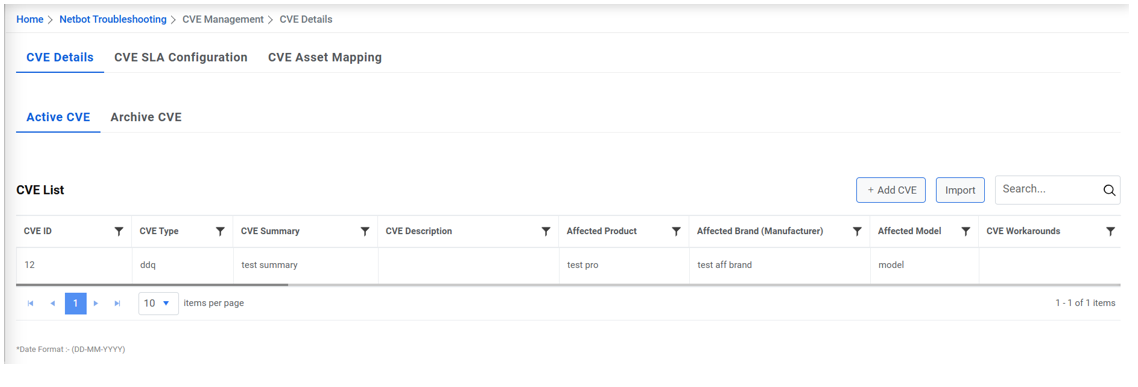
Active CVE - Users can add or import CVE details, once added all details will be visible
into the grid, all active CVE data with edit action.Figure 2. CVE Management
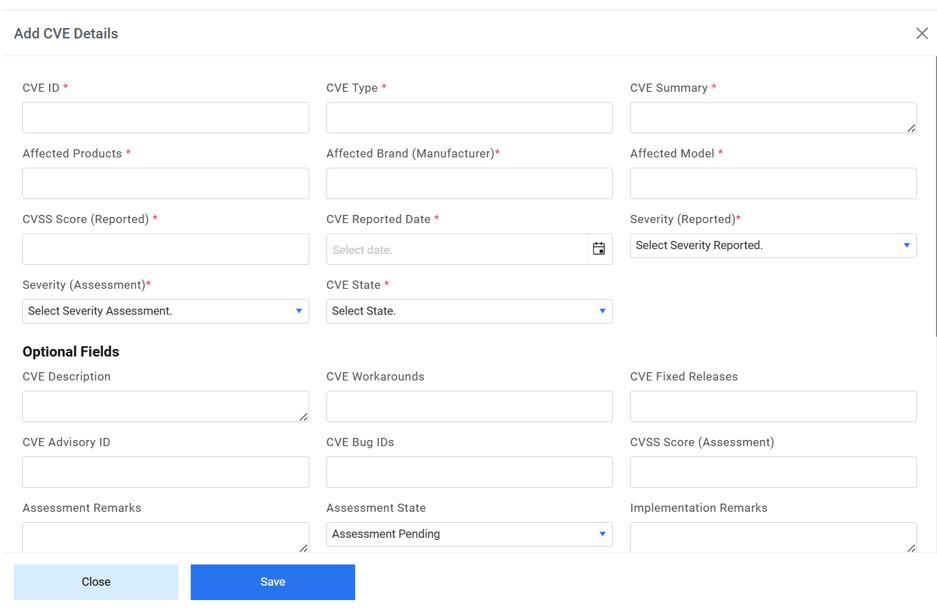
Once the user clicks on the Add button Popup will open where the user can add details,
once user clicks on save details will be visible in Active CVE.Figure 3. CVE Management (Cont.)
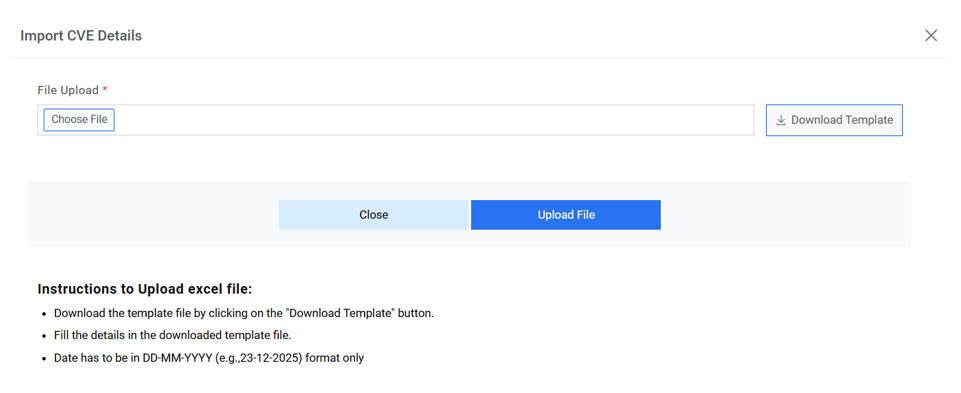
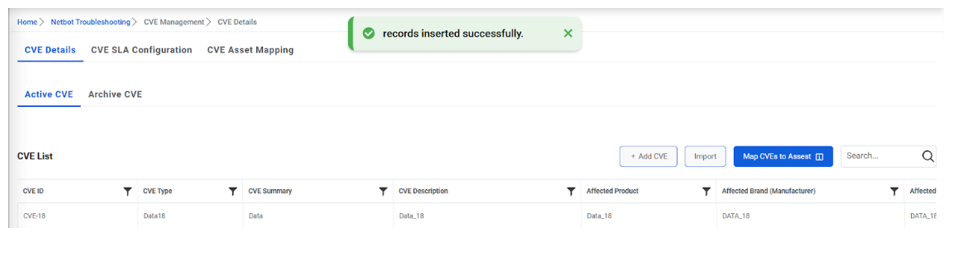
Once the user clicks on the Import button, a popup will open where the template file can
be downloaded. After filling in the required details, the user can select the file and
click the Upload button. The uploaded records will then be visible in Active CVE.Figure 4. Import CVE Details
Once the user clicks the 'Map to Asset Mapping' button, the record will be removed from
Archive CVE and will appear under the CVE Asset Mapping tab. For a CVE to be mapped, its
status must be marked as completed, and its Brand, Model, and Product must match the
corresponding data in the Master Inventory. Figure 5. CVE Asset Mapping
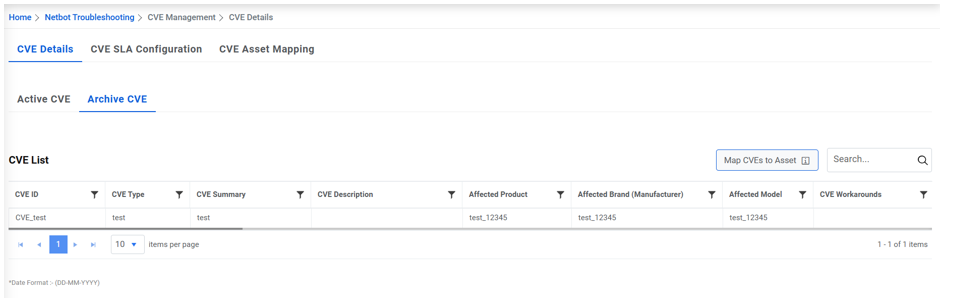
Archive CVE - All CVE with completed status will be visible here, users can not edit CVD
details here. Figure 6. CVE Asset Mapping (Cont.)
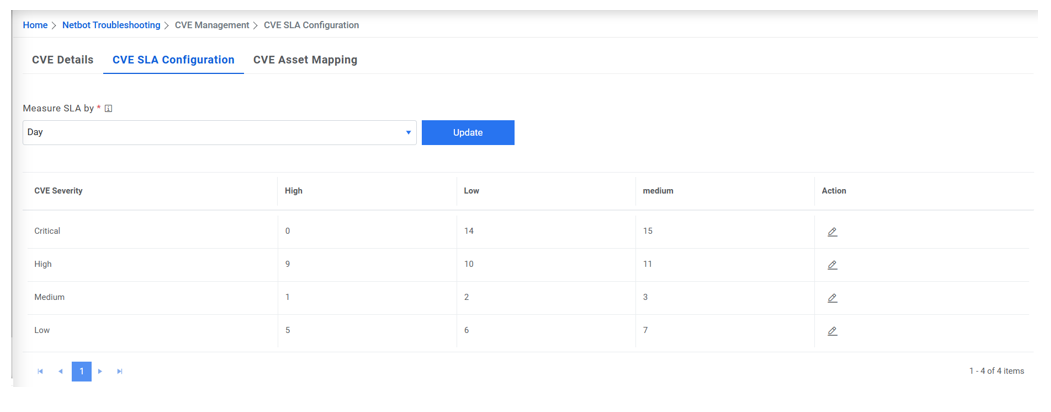
CVE SLA Configuration - It will show the configuration of Severity and CriticalityFigure 7. CVE SLA Configuration
CVE Asset Mapping
It will show the CVE and Asset mapping details list.Figure 8. CVE Asset Mapping