Creating and Managing Segments
This page explains how to create, manage, and utilize segments using the HCL CDP Marketing Automation Platform. Segments allow marketers to target specific groups of users based on defined criteria, automate campaigns, and analyze performance.
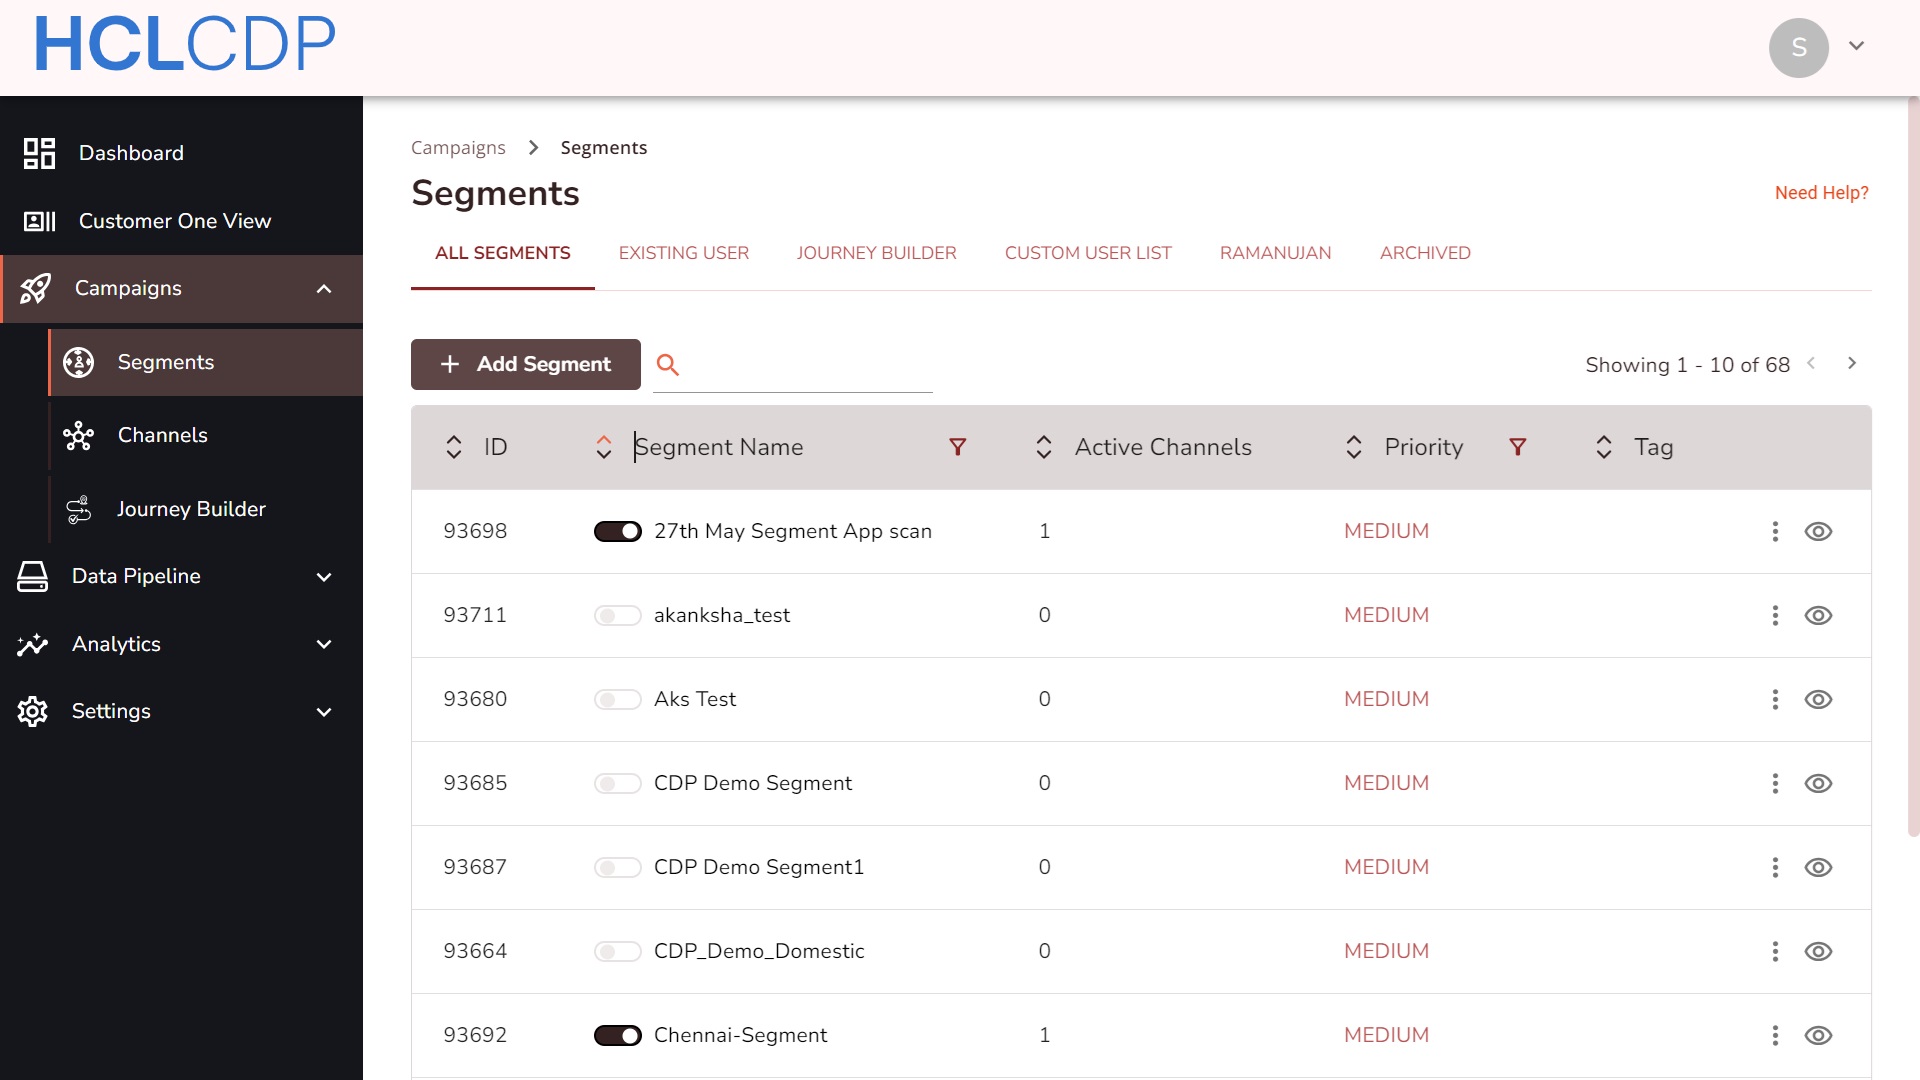
Segments Page
The Segments page displays all active, existing users, journey and archived segments and includes the following attributes:
- Toggle Switch: Activate or deactivate a segment.
- Segment Name: The name of the segment.
- Active Channels: The total number of channels with engagements for this segment.
- Segment ID: A unique identifier for each segment.
- Priority: Priority level (High, Medium, Low).
- Tags: Labels for segment identification.
Create a Segment
To create a segment, follow the steps below:
- On the Segments page, click +Add Segment to create a new segment.
- In the Create New Segment, select one of the following segment types:
- Existing User: Users who have previously visited your website or app and have at least one parameter recorded (e.g., cookie ID, device ID, or PII).
- Journey Builder: For building automated journeys targeting users based on workflows.
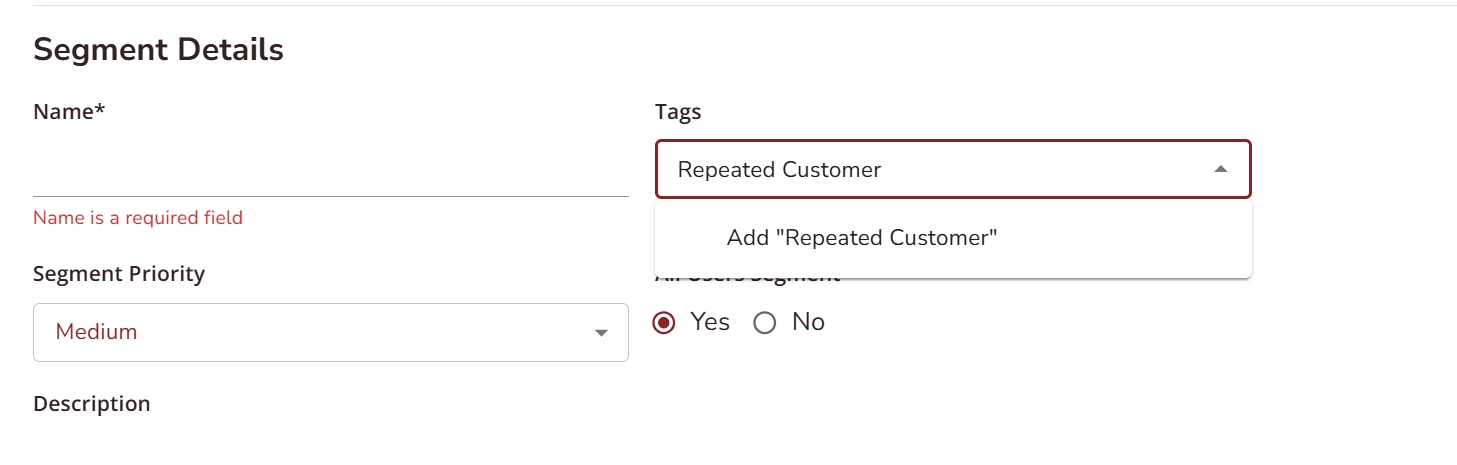
- Enter the following Segment details:
- Name: Enter a unique name (6–25 characters).
- Segment Priority: Assign a priority (default is Medium). Adjust to High or Low as needed.
- Tags: Add descriptive keywords to organize and analyze the segment. You can add multiple tags to a segment. For more information about adding tags, refer Add a Tag.
- All Users Segment: Specify if the segment includes all users (Yes/No).
- Description: Provide a brief description (at least 6 words).
- To apply rules to the segments, in the Add Dimension field, define rules using parameters such as "Last Page Visited" or "Purchase Value". Contact your HCL CDP Campaign Manager to add custom dimensions.
- Choose operators: Use one of the following:
- String/Number: Equals, Not Equals, Contains, Not Contains.
- Time: After, Before (format: HH:MM:SS Zzzz).
- Date: Before, After, On.
- Set Values: Assign values to dimensions.
- Click the check icon to apply the rule or the delete icon to
delete a particular rule.Note: At least one rule is required to create a segment.
- Click the (👁️) icon at the right side of the Applied Rules palette to view the
Segment Audience and Reachability.Remember: Check the Segment Audience after each rule is applied.
- Click Add Rule to add a rule, or click Add Group to group multiple rules using AND/OR logic for complex segmentation.
- For Group rules, click AND/OR logic as per the applied rules.
- AND: Includes users who meet all conditions.
- OR: Includes users who meet any condition.
- Click "Save Segment" to save the Segment.
Edit a Segment
To edit your segment and make changes to it, follow the steps below:
- On the Segments page, click the the name of the segment you want to edit.
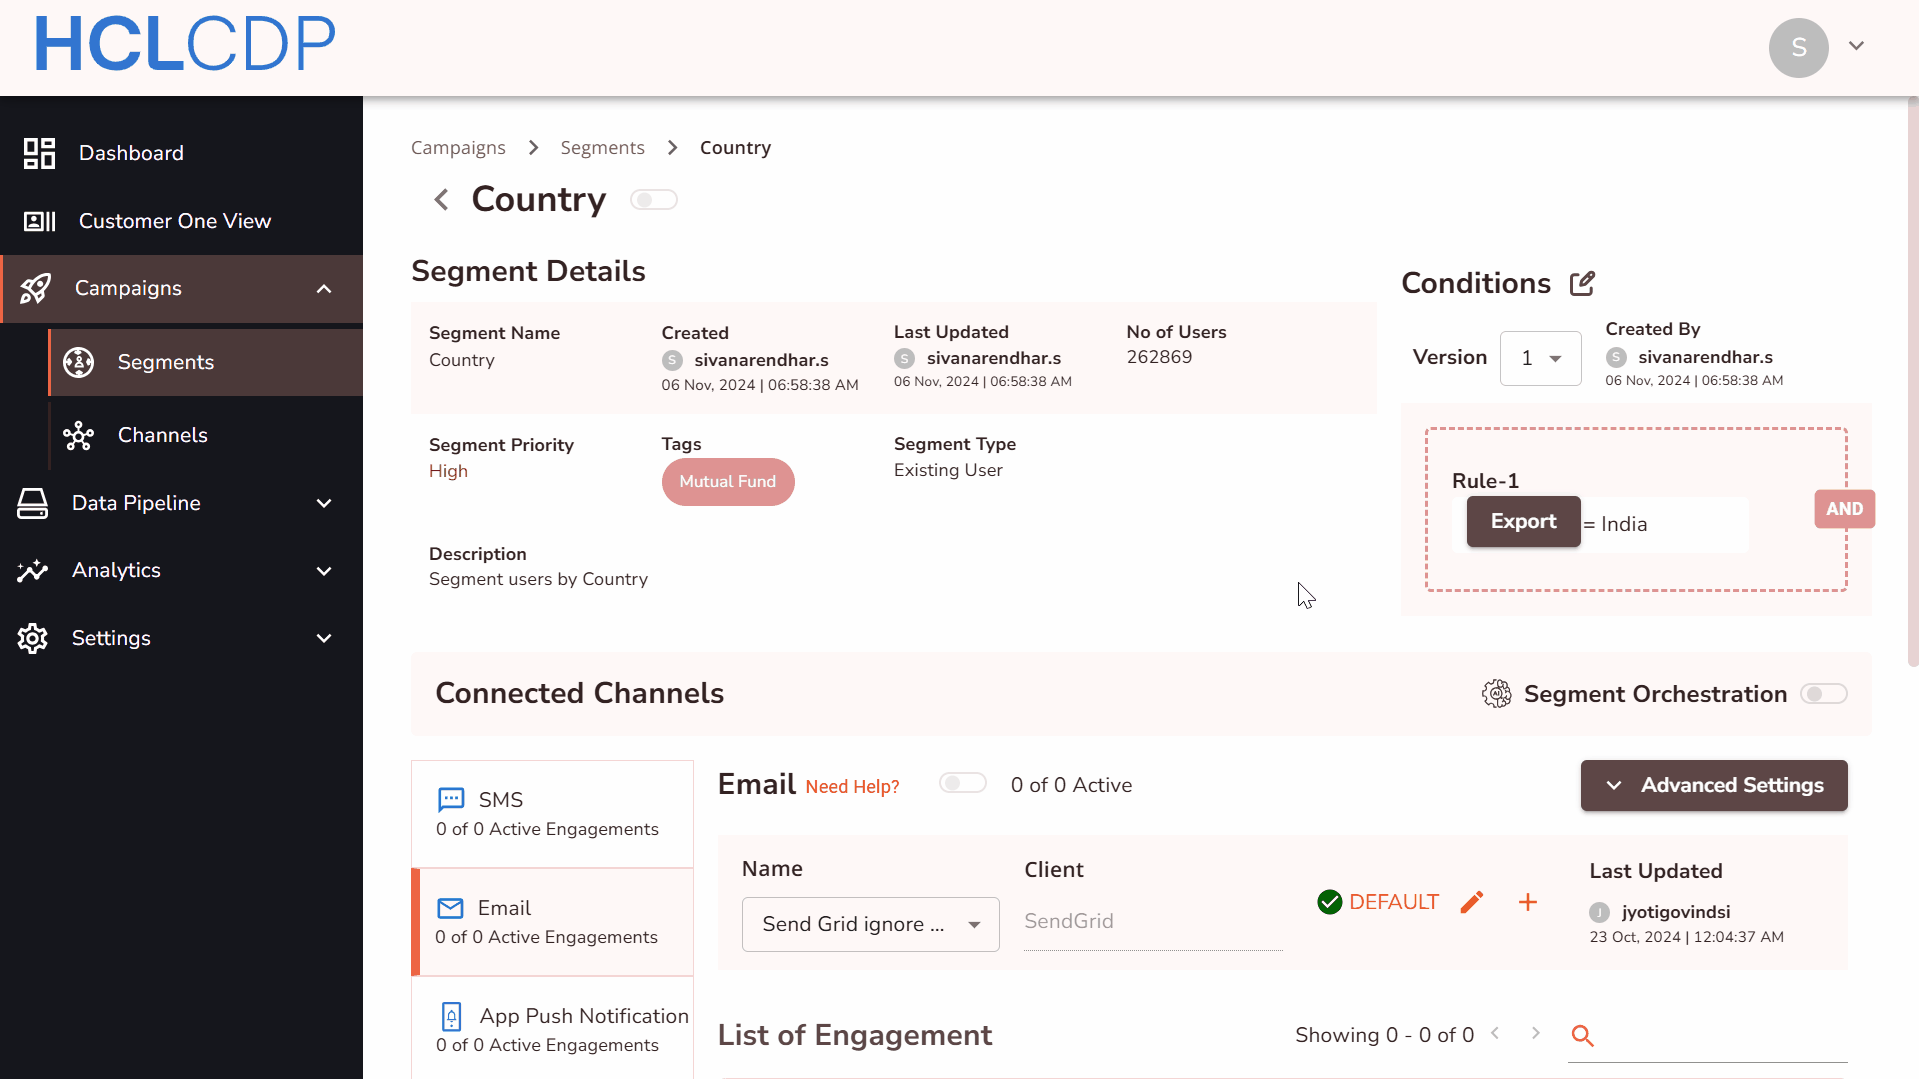
- Click the edit (📝) icon next to Conditions, to start the editing, and implement changes to the Segment.
- Click Save to apply the changes made. As a result, a pop-up window will appear to review the active engagements and journeys linked to the segment.
- Click Confirm Segment Edit after reviewing the changes made.
- As a result, a pop-up window will appear notifying the Segment Edited Successfully.
- Click View the Segment to examine the changes made, and click the
Version drop-down to view different versions of the segment.
Duplicate a Segment
To duplicate a segment, follow the steps below:
- Click the three dots next to the desired segment and click Duplicate.
- Rename the duplicated segment, and modify the rules, tags, or attributes of the
segment as needed.Note: Make sure the segment name should be unique.
- Click Save Segment.
Export Segment
You can select the user profile attributes and schedule exports to send the segmented user data to either Amazon S3 or Minio. To export segment data, follow the steps below:
- In the Segments page, select a segment, and click Export.
- On the Export Segment pop-up, in the Send Data and Time calendar, select the date and time for sending the segment data to the Amazon S3 or Minio.
- In the Profile Attributes menu, select the check-boxes of profile attributes to export.
- To automate exports, select the Repeat checkbox to schedule the export. You can schedule the export on daily or weekly. Also, you can specify the frequency and end date to stop the frequency of the export.
- Click Update to schedule the export. The exported data will be sent as a CSV file to the configured server.
Archive a Segment
You can archive or unarchive the segments created. If a segment is Archived, all the engagements under that Segment will be deactivated and hidden from the UI.
- In the Segments page, click the three dots next to the segment you want to archive. Archived segments will appear in the Archived tab and engagements under them will be deactivated.
- In the Segments page, click the Archived tab.
- Click the three dots next to the desired segment and select Unarchive.
Add a Tag
You can add multiple tags to a segment in the HCL CDP Marketing Automation platform to categorize and organize it effectively. These tags can be edited for existing segments as well.
To add a tag, in the Tags drop-down, enter the tag name and click Add tag name.