Enable running Domino as a non-admin user
As part of our ongoing work to continuously improve security for Domino, we have updated the Windows installer to enable Domino to be installed to run as a non-admin user.
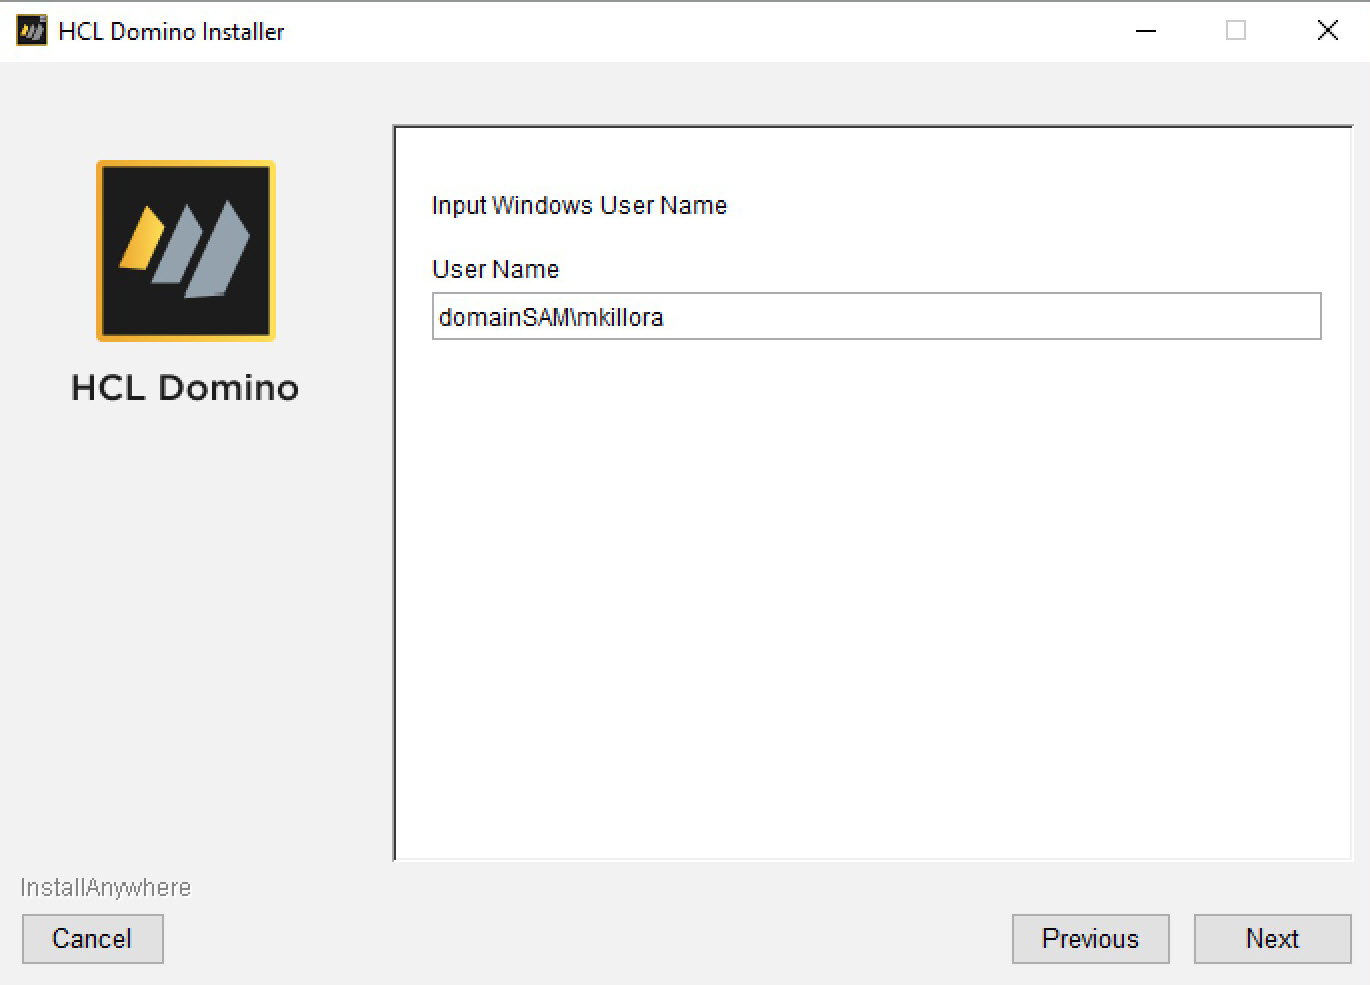
This can be done by setting both the owner of the data partition(s) and the user under which the Domino server will run when running as a service to the same user by default. The default setting for this user is "NT Authority\LocalService" but you have the option of changing this setting to any valid Windows user.
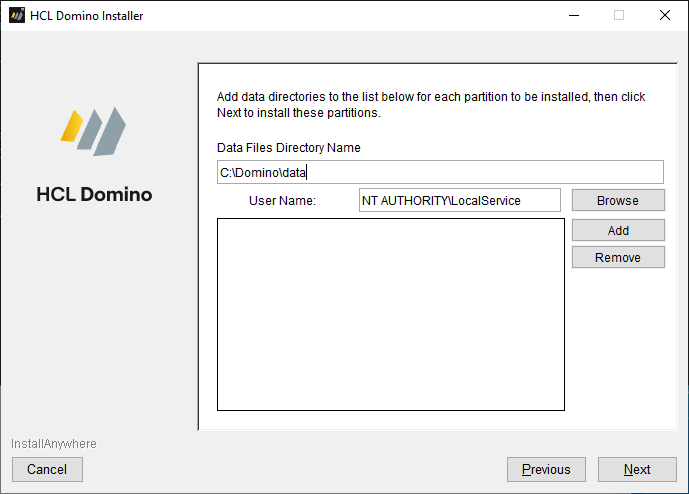
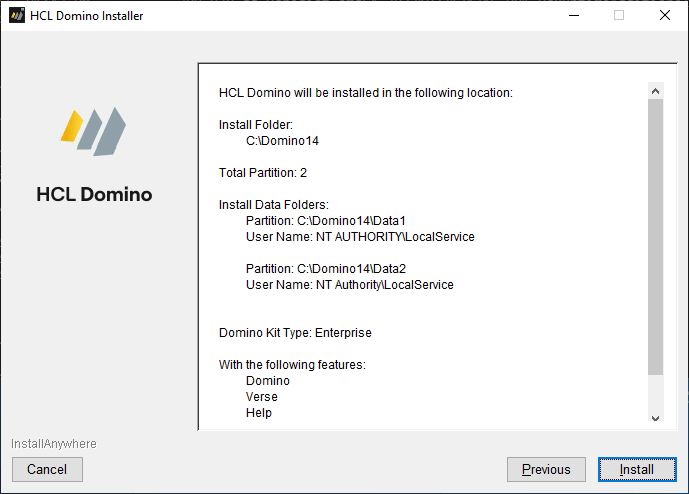
And the following is a sample of setting up two partitions. This example has both partitions with the same user, but the user can be different for each partition.
We chose "NT Authority\LocalService" as the default user primarily for the following reasons:
- This user has the permission/authority to run as a service but has no other admin rights
- This user has the minimal permissions/authority to run Domino
- This user exists on all Windows systems therefore you do not have to create a user to be able to run Domino
- This user has no password and you cannot log in as this user
- This user, having no password, will run as a service without any modifications (if you choose a user with a password, you must modify the Domino service and set the user password for Domino to run as a service)
Using the default user
- When you install Domino, you are running the install as a Windows Admin on the system and the icons will be added on your desktop. However, the icons will not be usable without changes to be explained later on in this article.
- Since you cannot log in to the system as this default user, only running Domino on Windows as a service is supported out of the box with this user.
- If you want to have Domino directly usable only by this default user for the
given data partition(s):
- For a clean install, you need to run the installation as a Windows Admin in order to run the Domino Server setup, and then set up the data partition(s). Any other user will not be able to modify the contents of the data partition(s).
- For a configured data partition, you can start Domino as a Service and run the Java console (as a Windows Admin) to check the Domino console. However, in general with this configuration, you should monitor the running Domino as a Service via the Domino Admin client and not as a Windows Admin on the system.
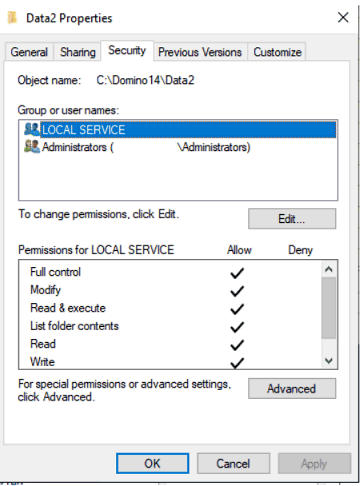
Here is an example of the security properties on a data partition after install has finished for this default "user" – to check, right click on the directory from File Explorer, then select . Note how "NT Authority\LocalService" shows up as "LOCAL SERVICE" in the dialog:
Changing the user
- After installation completes, log out as a Windows Admin.
- Log in as the user who will be running Domino.
At this stage, the icons will be on your desktop and you can now continue the Domino process, for example setting up Domino.
- Before running Domino as a Service, edit the service properties and enter your user password into the password field (future upgrades of Domino will preserve whatever password is in this field, but if you change the user password you must also change the password in the services as well).
Additional considerations
- The installer creates icons for Domino in such a way that any user logging into this system will see them. However, only a valid user will be able to use these icons properly.
- If you want another valid existing user (such as a non-admin user "domino"
that you created for this purpose) to be able to run Domino or Domino apps
for the given data partition(s) rather than the user chosen at install
time:
- As a Windows Admin, add the desired user to the security properties
of the data partition(s) with Full Control rights recursively to all
subdirectories. You must do this for any other additional
directories required by this data partition(s). The following image
shows the start of the process of adding the local user account
"domino" to a data partition:
 To verify the user, click Check
Names (this might also change how the user
displays).
To verify the user, click Check
Names (this might also change how the user
displays).Click OK to return to the permissions window, then tick the Full control checkbox to allow it for that user. Apply your changes to the directory by clicking OK.

- Prior to starting up Domino, either as the Windows Admin or logging in as the new valid user, you must add an SMAclAccess.ini file to the data partition(s) filled in with the default user "NT Authority\LocalService" and your new valid user. For details, refer to Standalone Domino processes may fail to start on Microsoft Windows.
- With the data partition(s) set up, you can either start Domino as a Service or as an Application, and this valid user will be able to interact with this data partition(s) and the processes running out of it.
- As a Windows Admin, add the desired user to the security properties
of the data partition(s) with Full Control rights recursively to all
subdirectories. You must do this for any other additional
directories required by this data partition(s). The following image
shows the start of the process of adding the local user account
"domino" to a data partition:
- If your data partition(s) is or will be using directories outside of the
data partition(s) itself, you will need to modify the security permissions
on those directories to give the user(s) Full Control rights following the
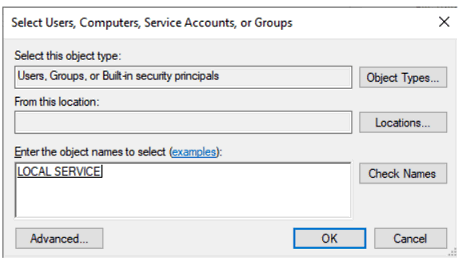
previous example.For example, if your transaction logs are or will be in c:\tlogs and your default user is "NT Authority\LocalServices" and you've added user "domino" to the SMAclAccess.ini file, you will need to modify c:\tlogs and add these two users with Full Control to the security on c:\tlogs in order for Domino to operate properly for these two users using this directory. This applies to any future directories you might add to be used by the data partition(s) but which are outside of the data partition(s). Of note, to add "NT Authority\LocalServices" you can add it as just "Local Service" like so:
 Then click Check
Names and it will show it has accepted the name as valid. Notice
that it slightly changes the display of the name:
- See also the section "Configuring LNSNMP and SNMP to run as Local Service on Windows" section in Configuring the Domino SNMP Agent for Microsoft Windows.