Content Reporting Bulk Update
Currently Content Reporting Bulk Update supports the following actions:
- Update expiration date
- Add an owner or author
- Remove an owner or author
- Replace an owner or author
These actions can be executed on content items returned in a report generated through HCL Content Reporting search.
Prerequisite
Beginning with HCL Digital Experience 9.5 release update CF214, Content Reporting is enabled by default. For HCL Digital Experience 9.5 release update CF213, Content Reporting should be installed and configured. For instructions on installing Content Reporting on supported environments, see the Install HCL Digital Experience 9.5 Content Reporting topic.
To update items in bulk, you must have edit access to the content items selected. If you kick off the bulk update operation without having the required access to the items, the update will fail with the error message Unauthorized access.
Using the Content Reporting Bulk Update feature
-
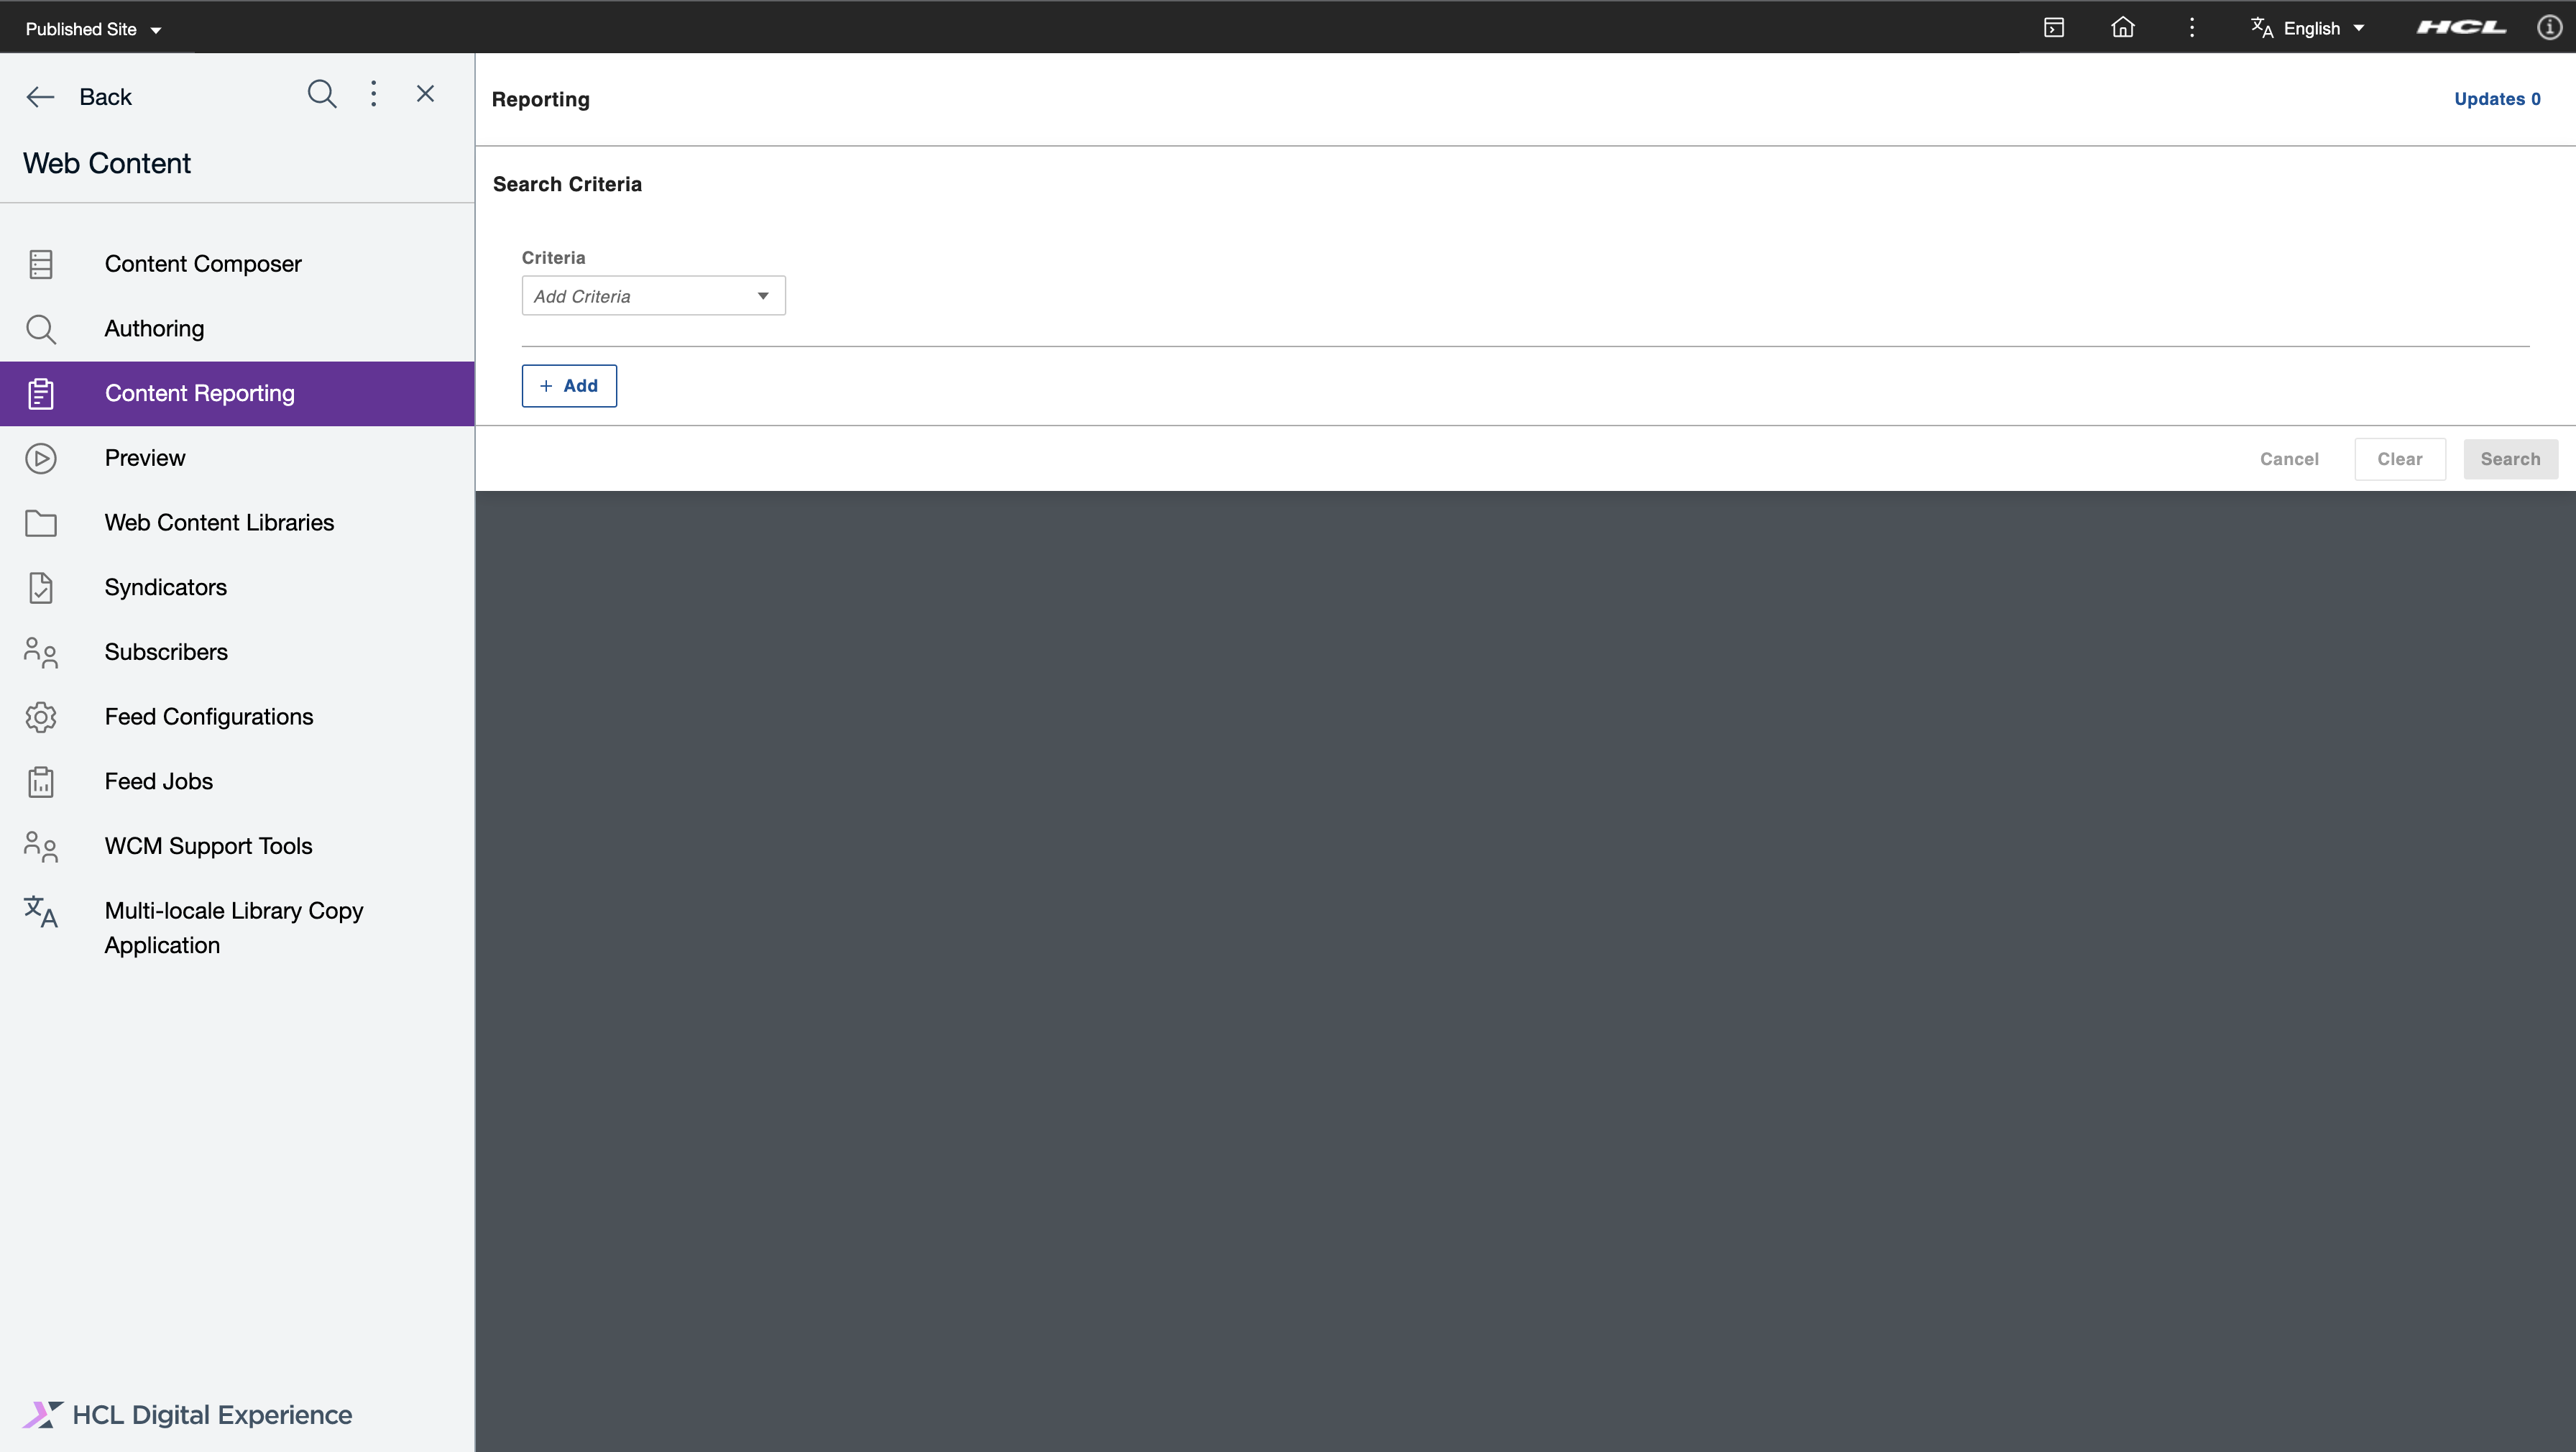
Log in to your HCL Digital Experience 9.5 platform and select Web Content. Select Content Reporting from the Practitioner Studio navigator. The following image shows the Content Reporting landing page.
-
Generate a report on items you want to update. See Generating a content report for instructions.
-
Export the report or execute one of the following supported bulk update operations: UpdateExpiry or Update Owners/Authors.
Using the Content Reporting Bulk Update UpdateExpiry feature
Content managers can trigger bulk updates to update the expiration dates of all queried items. This section provides steps on how to update the expiration date of content items in a report generated through HCL Content Reporting.
-
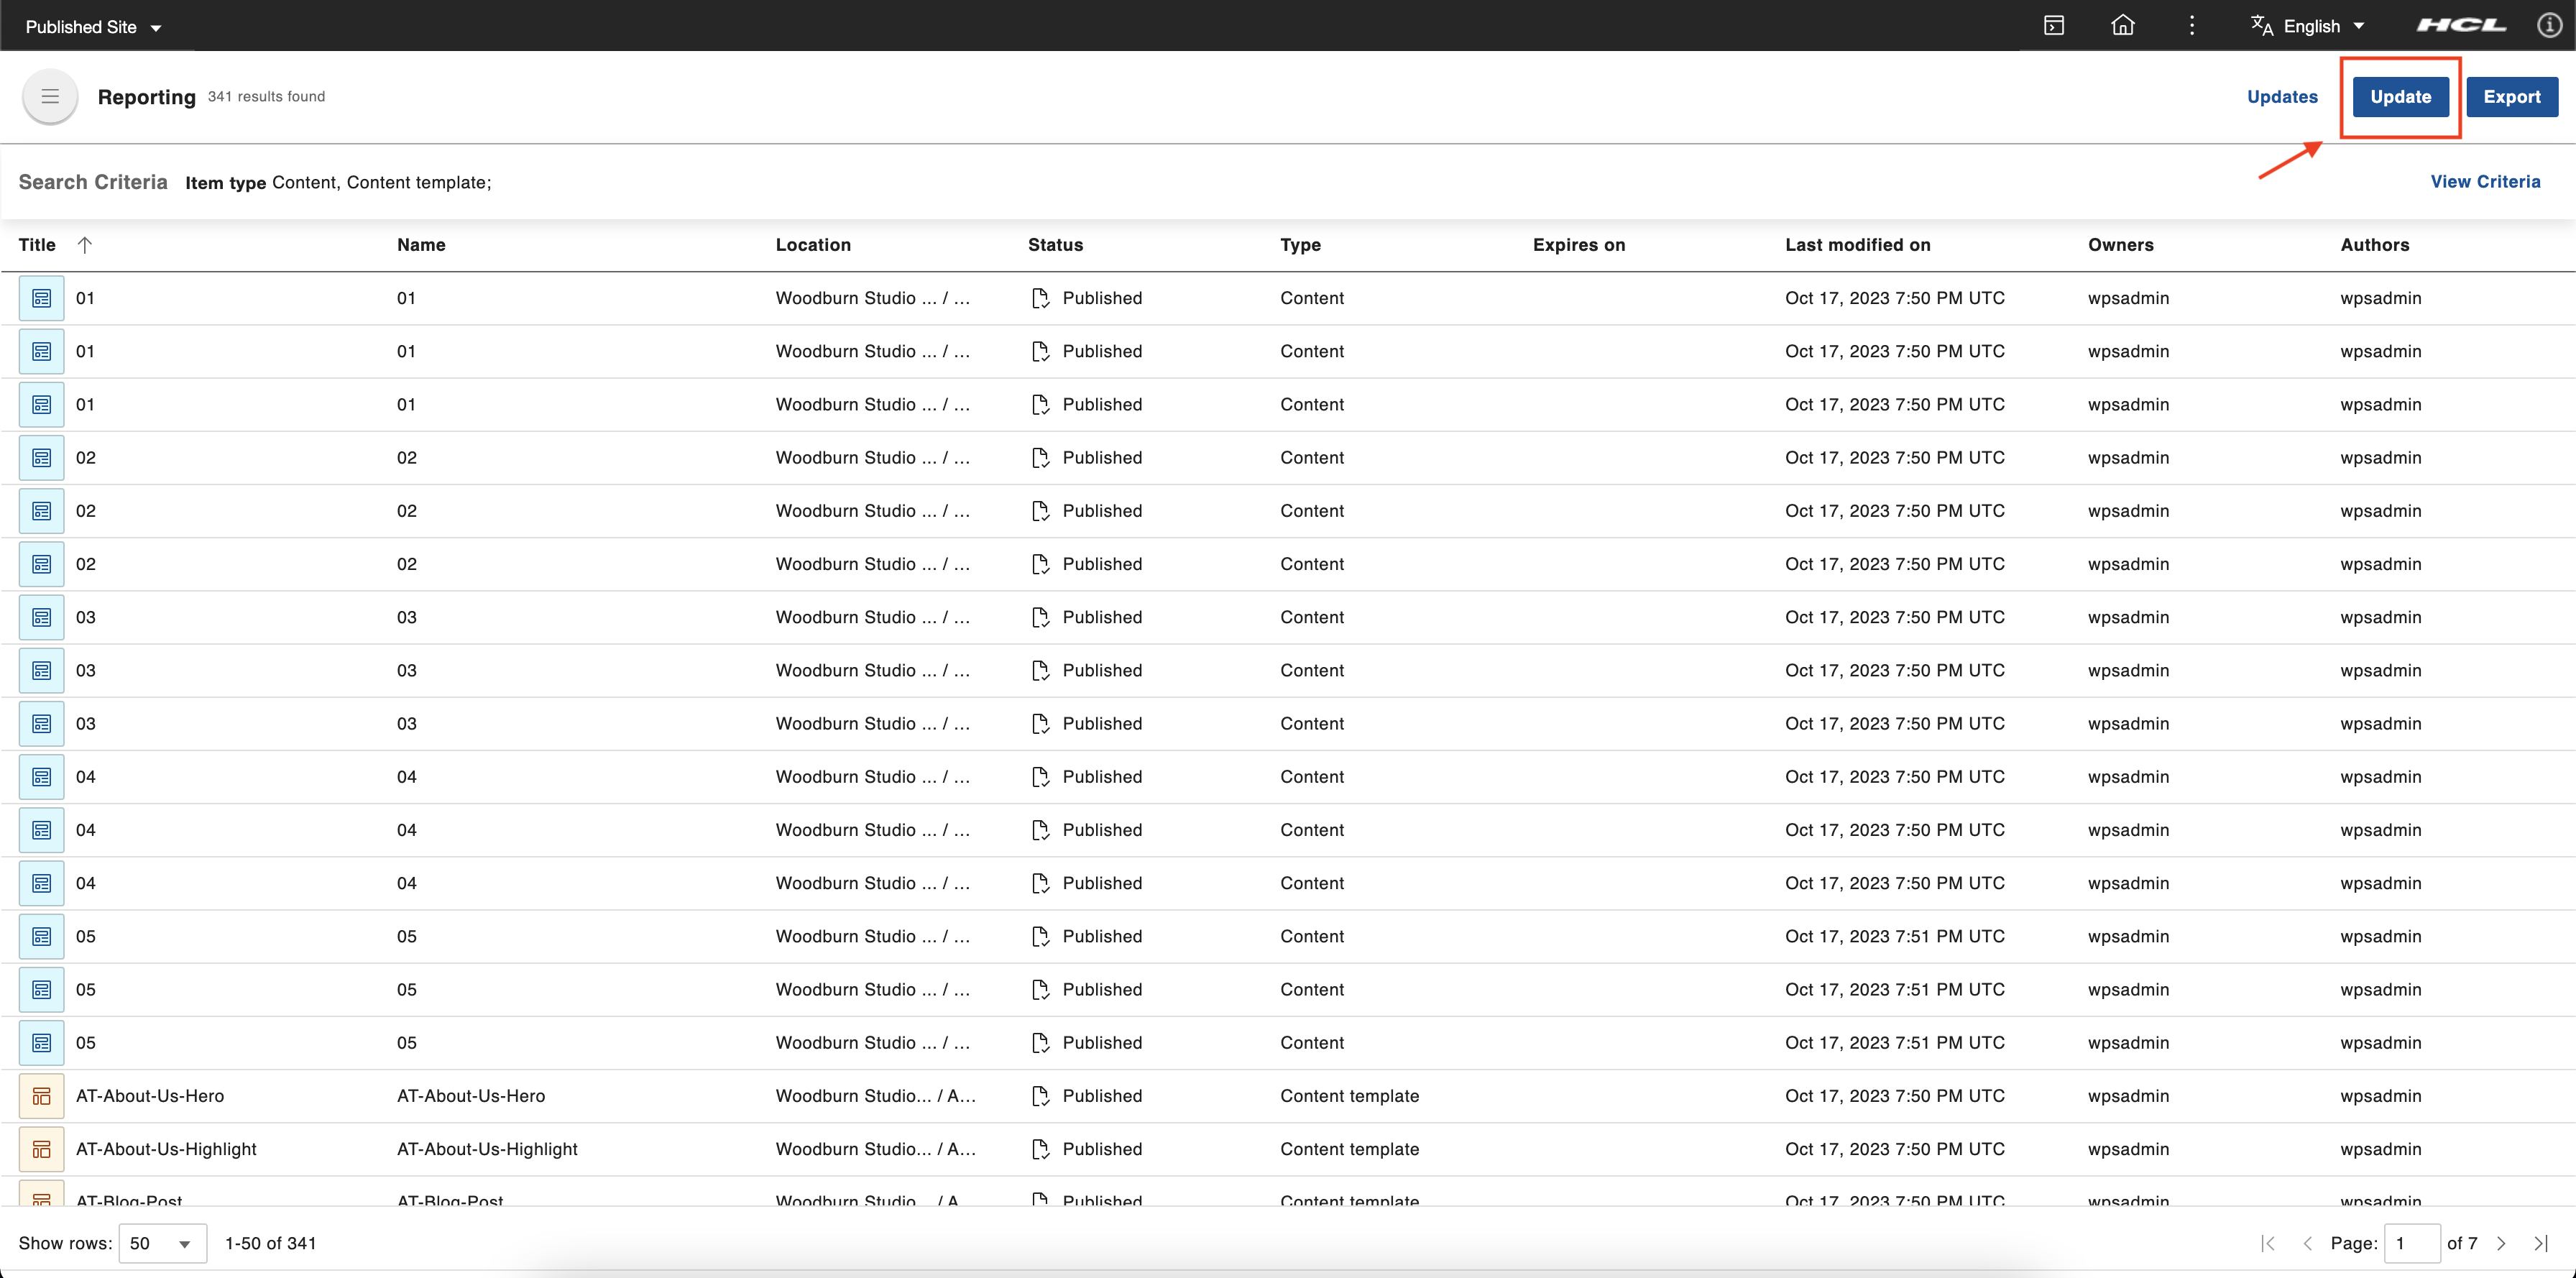
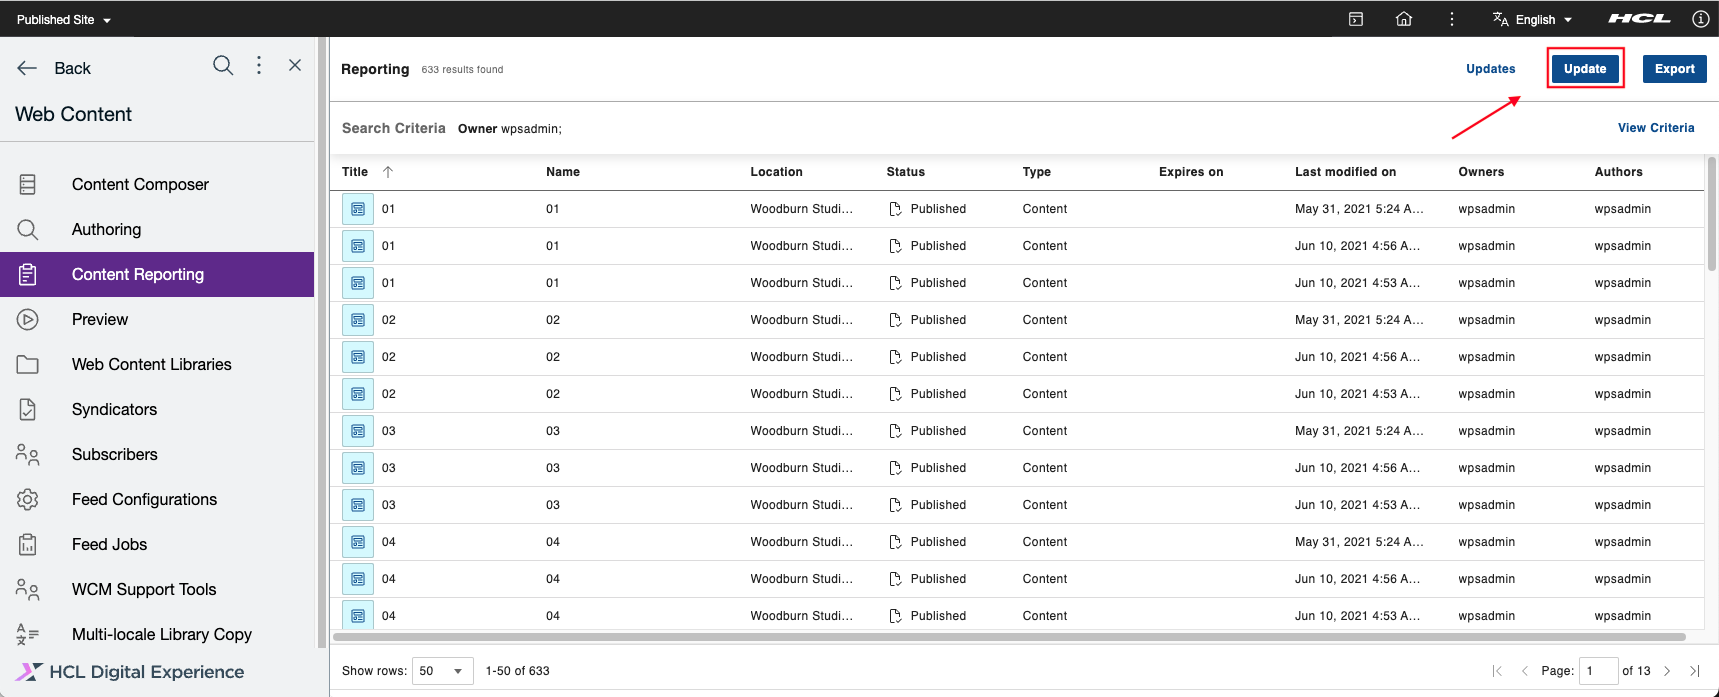
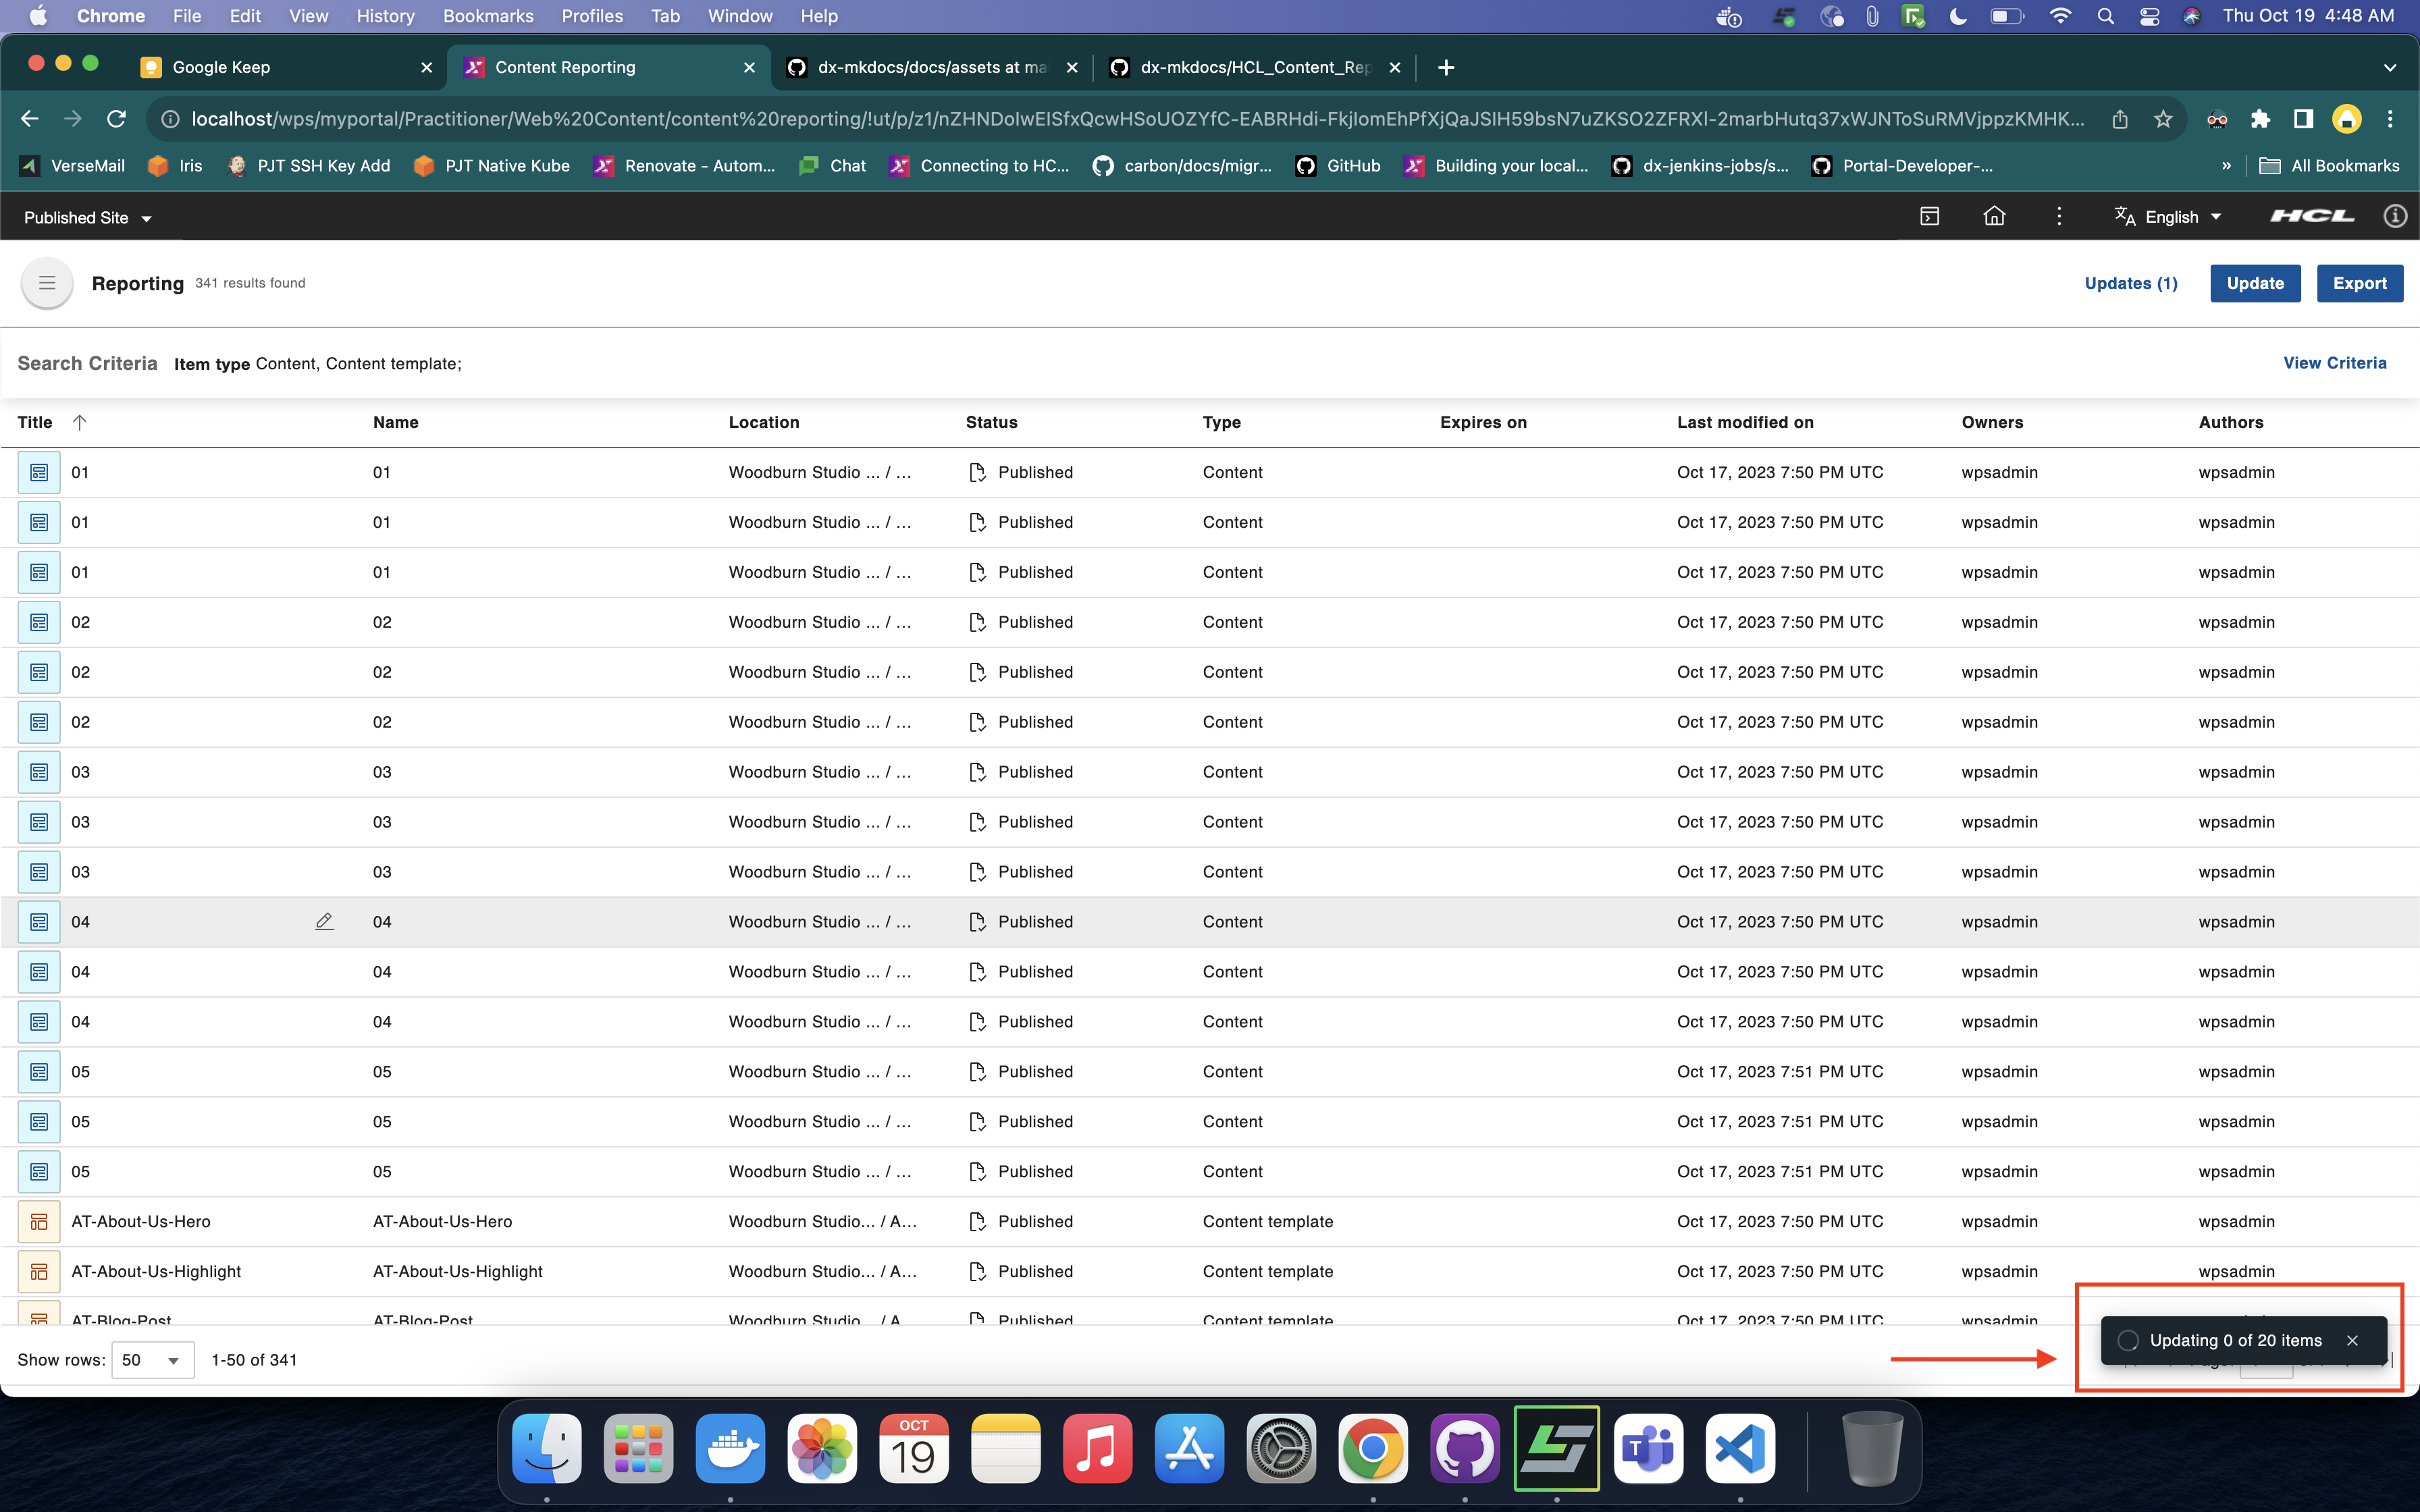
After you have generated a report and if there are results, the Update button appears in the application header. Click the Update button.
-
In the Update items dialog box, there are two options: Property, and Change to. In the Property field, choose Expiry date. In the Change to field, enter the new expiry date of the selected items. After entering the date, the Update button is enabled. Click the Update button.
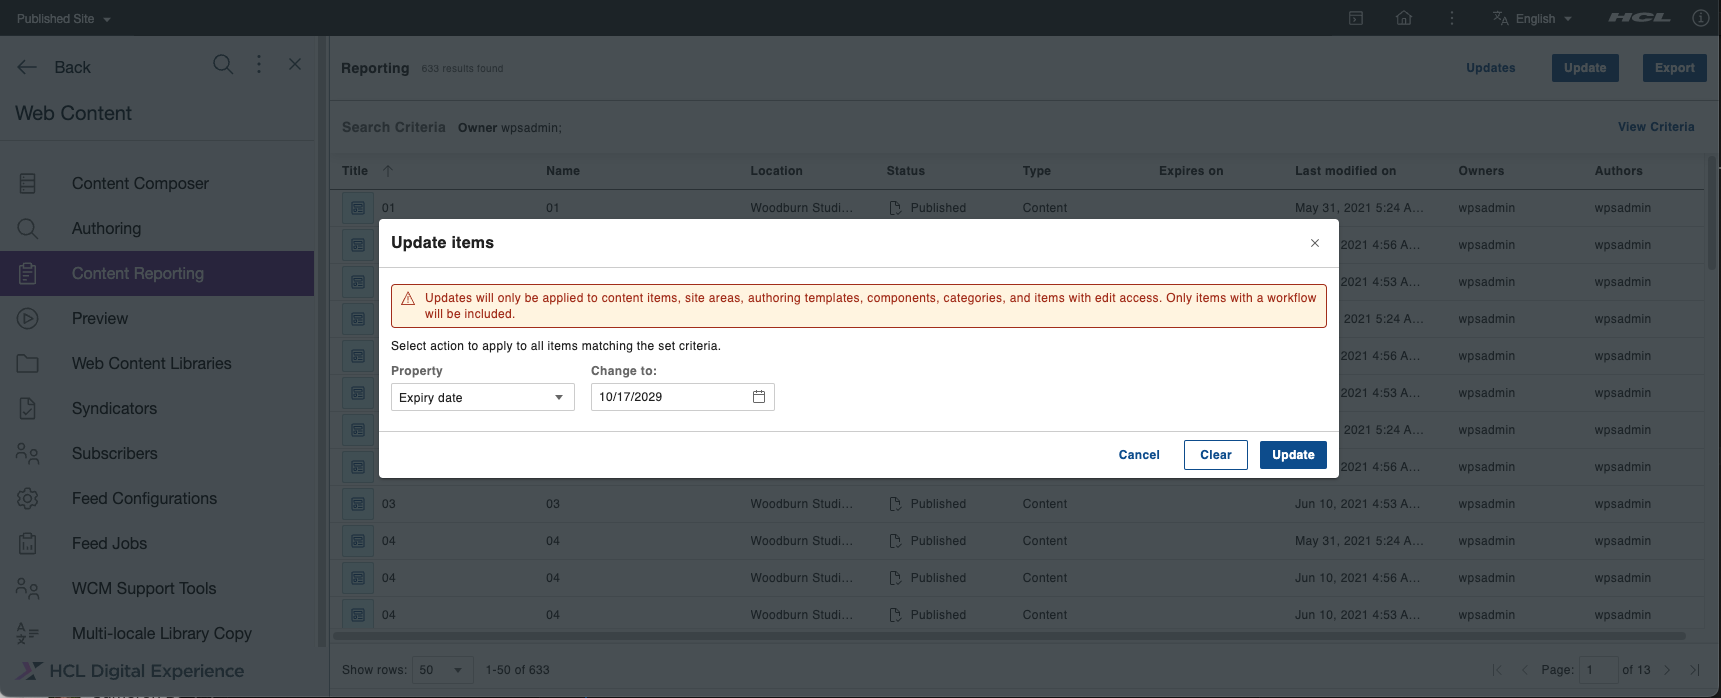
There are also Cancel and Clear buttons in the dialog box. Click Cancel to close the dialog box. Click Clear to remove all selected options.
Note
For CF213, there are three fields: Action, Property, and Change to. The Action and Property fields each have one option: Update and Expiry date respectively. Bulk updates for expiry dates can only be applied to content items, site areas, authoring templates, components, categories, and items to which you have edit access. Only items with a workflow are included.
-
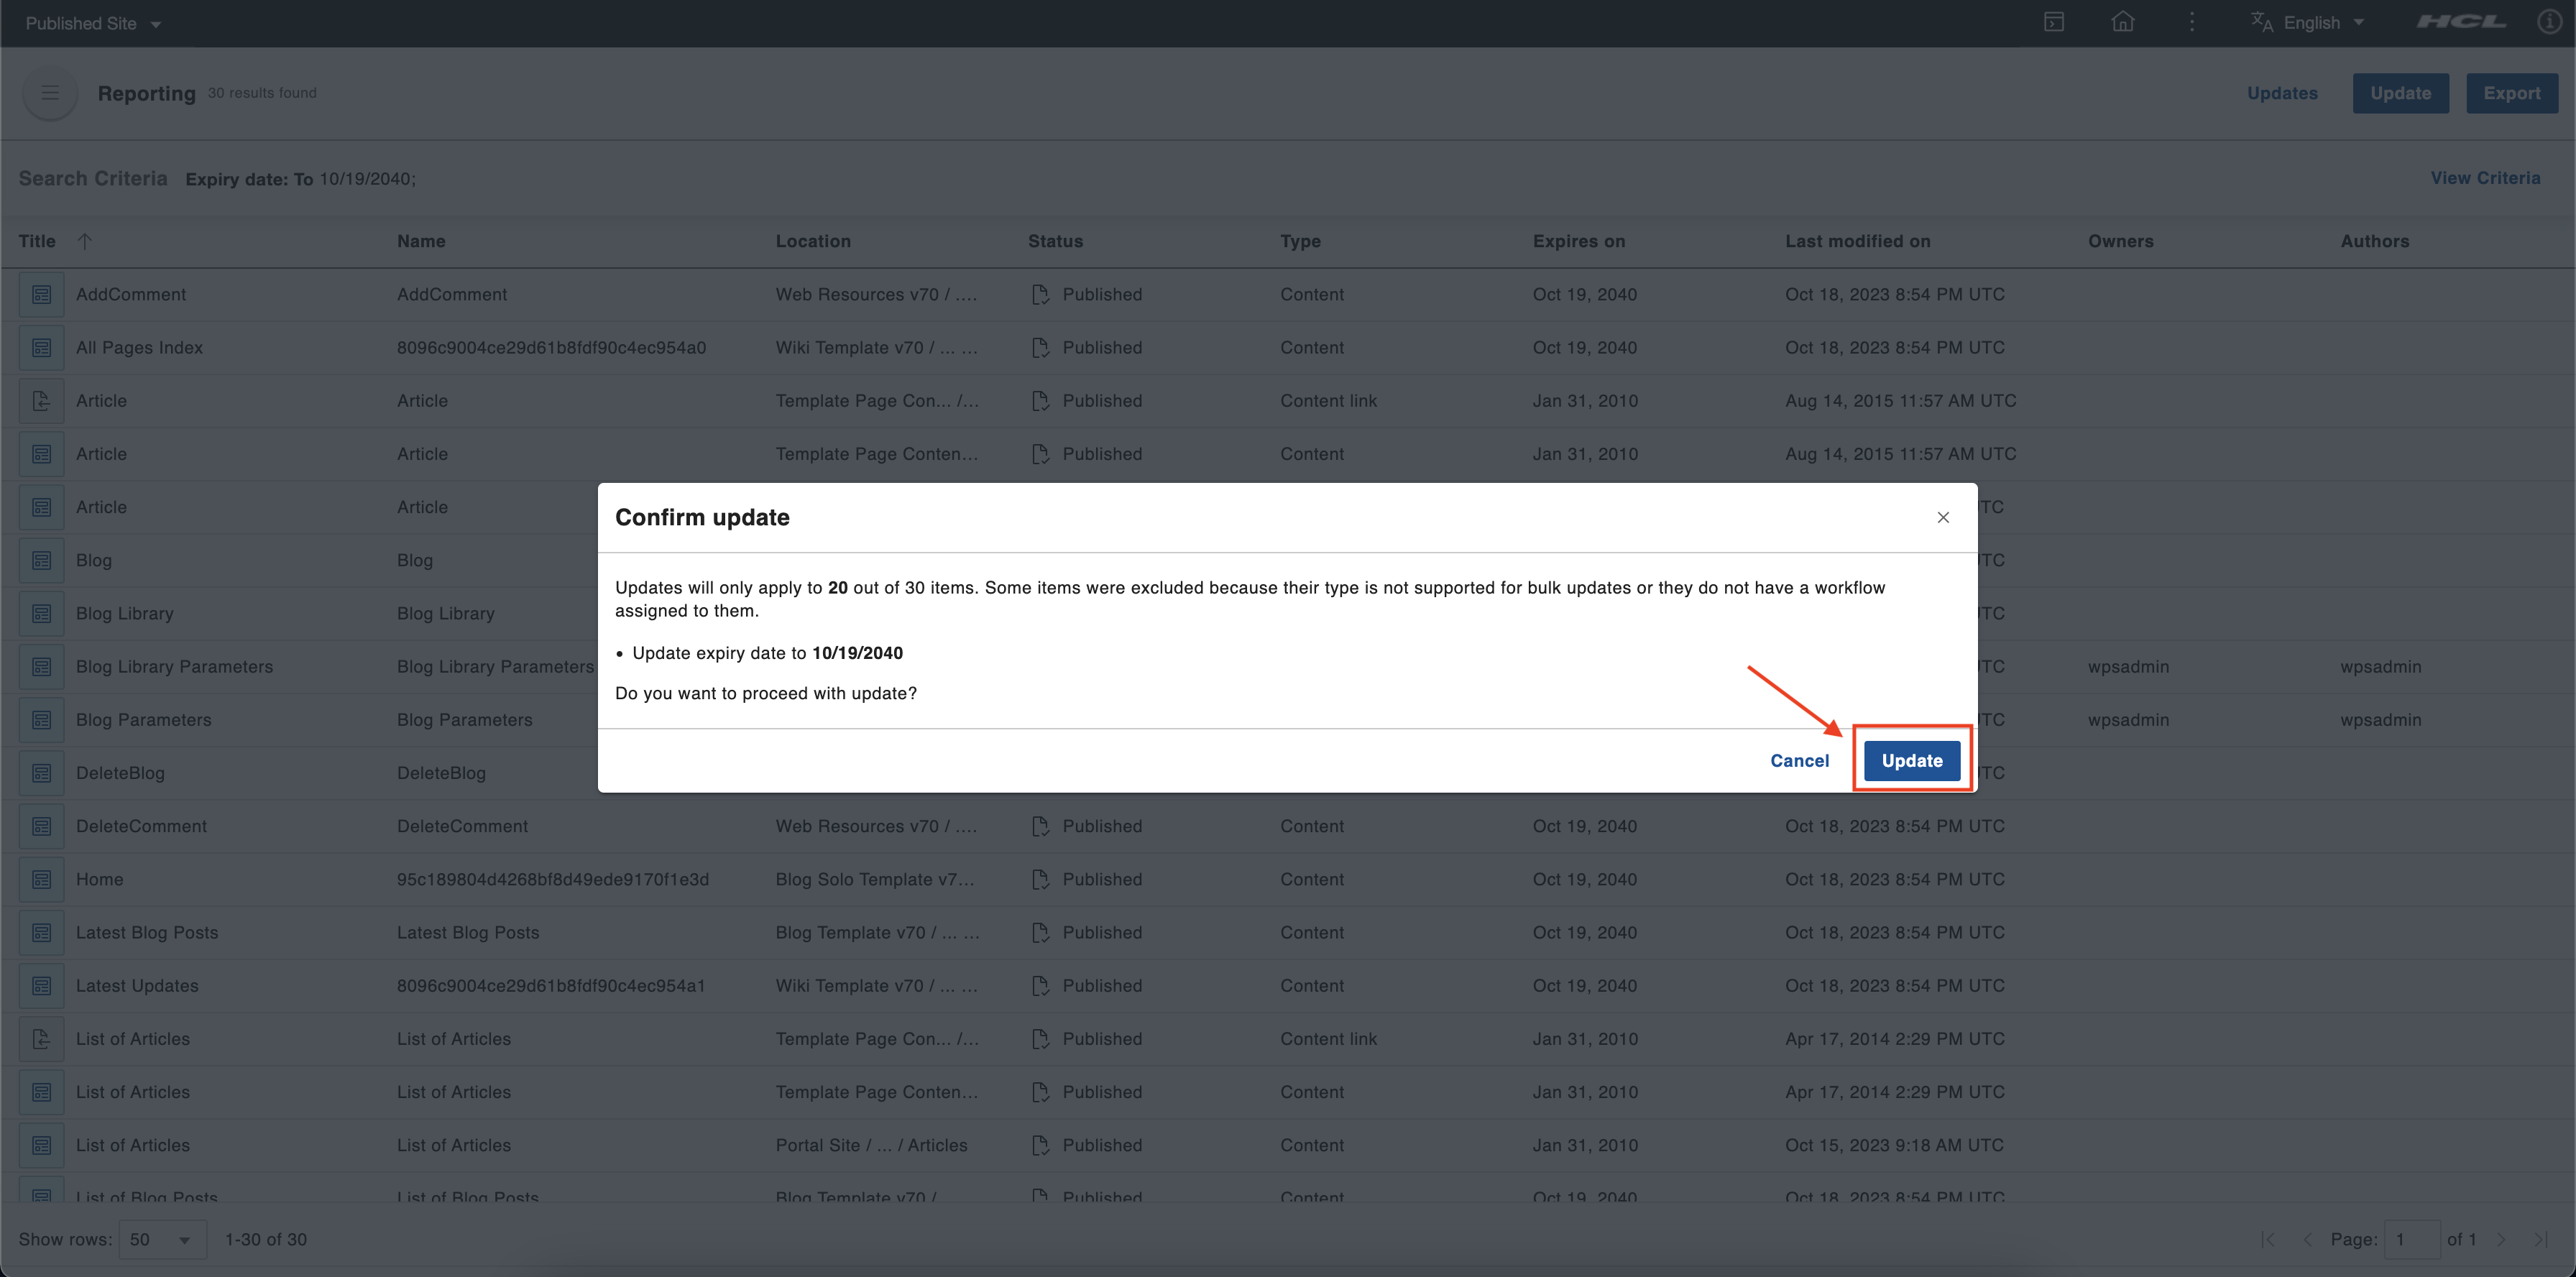
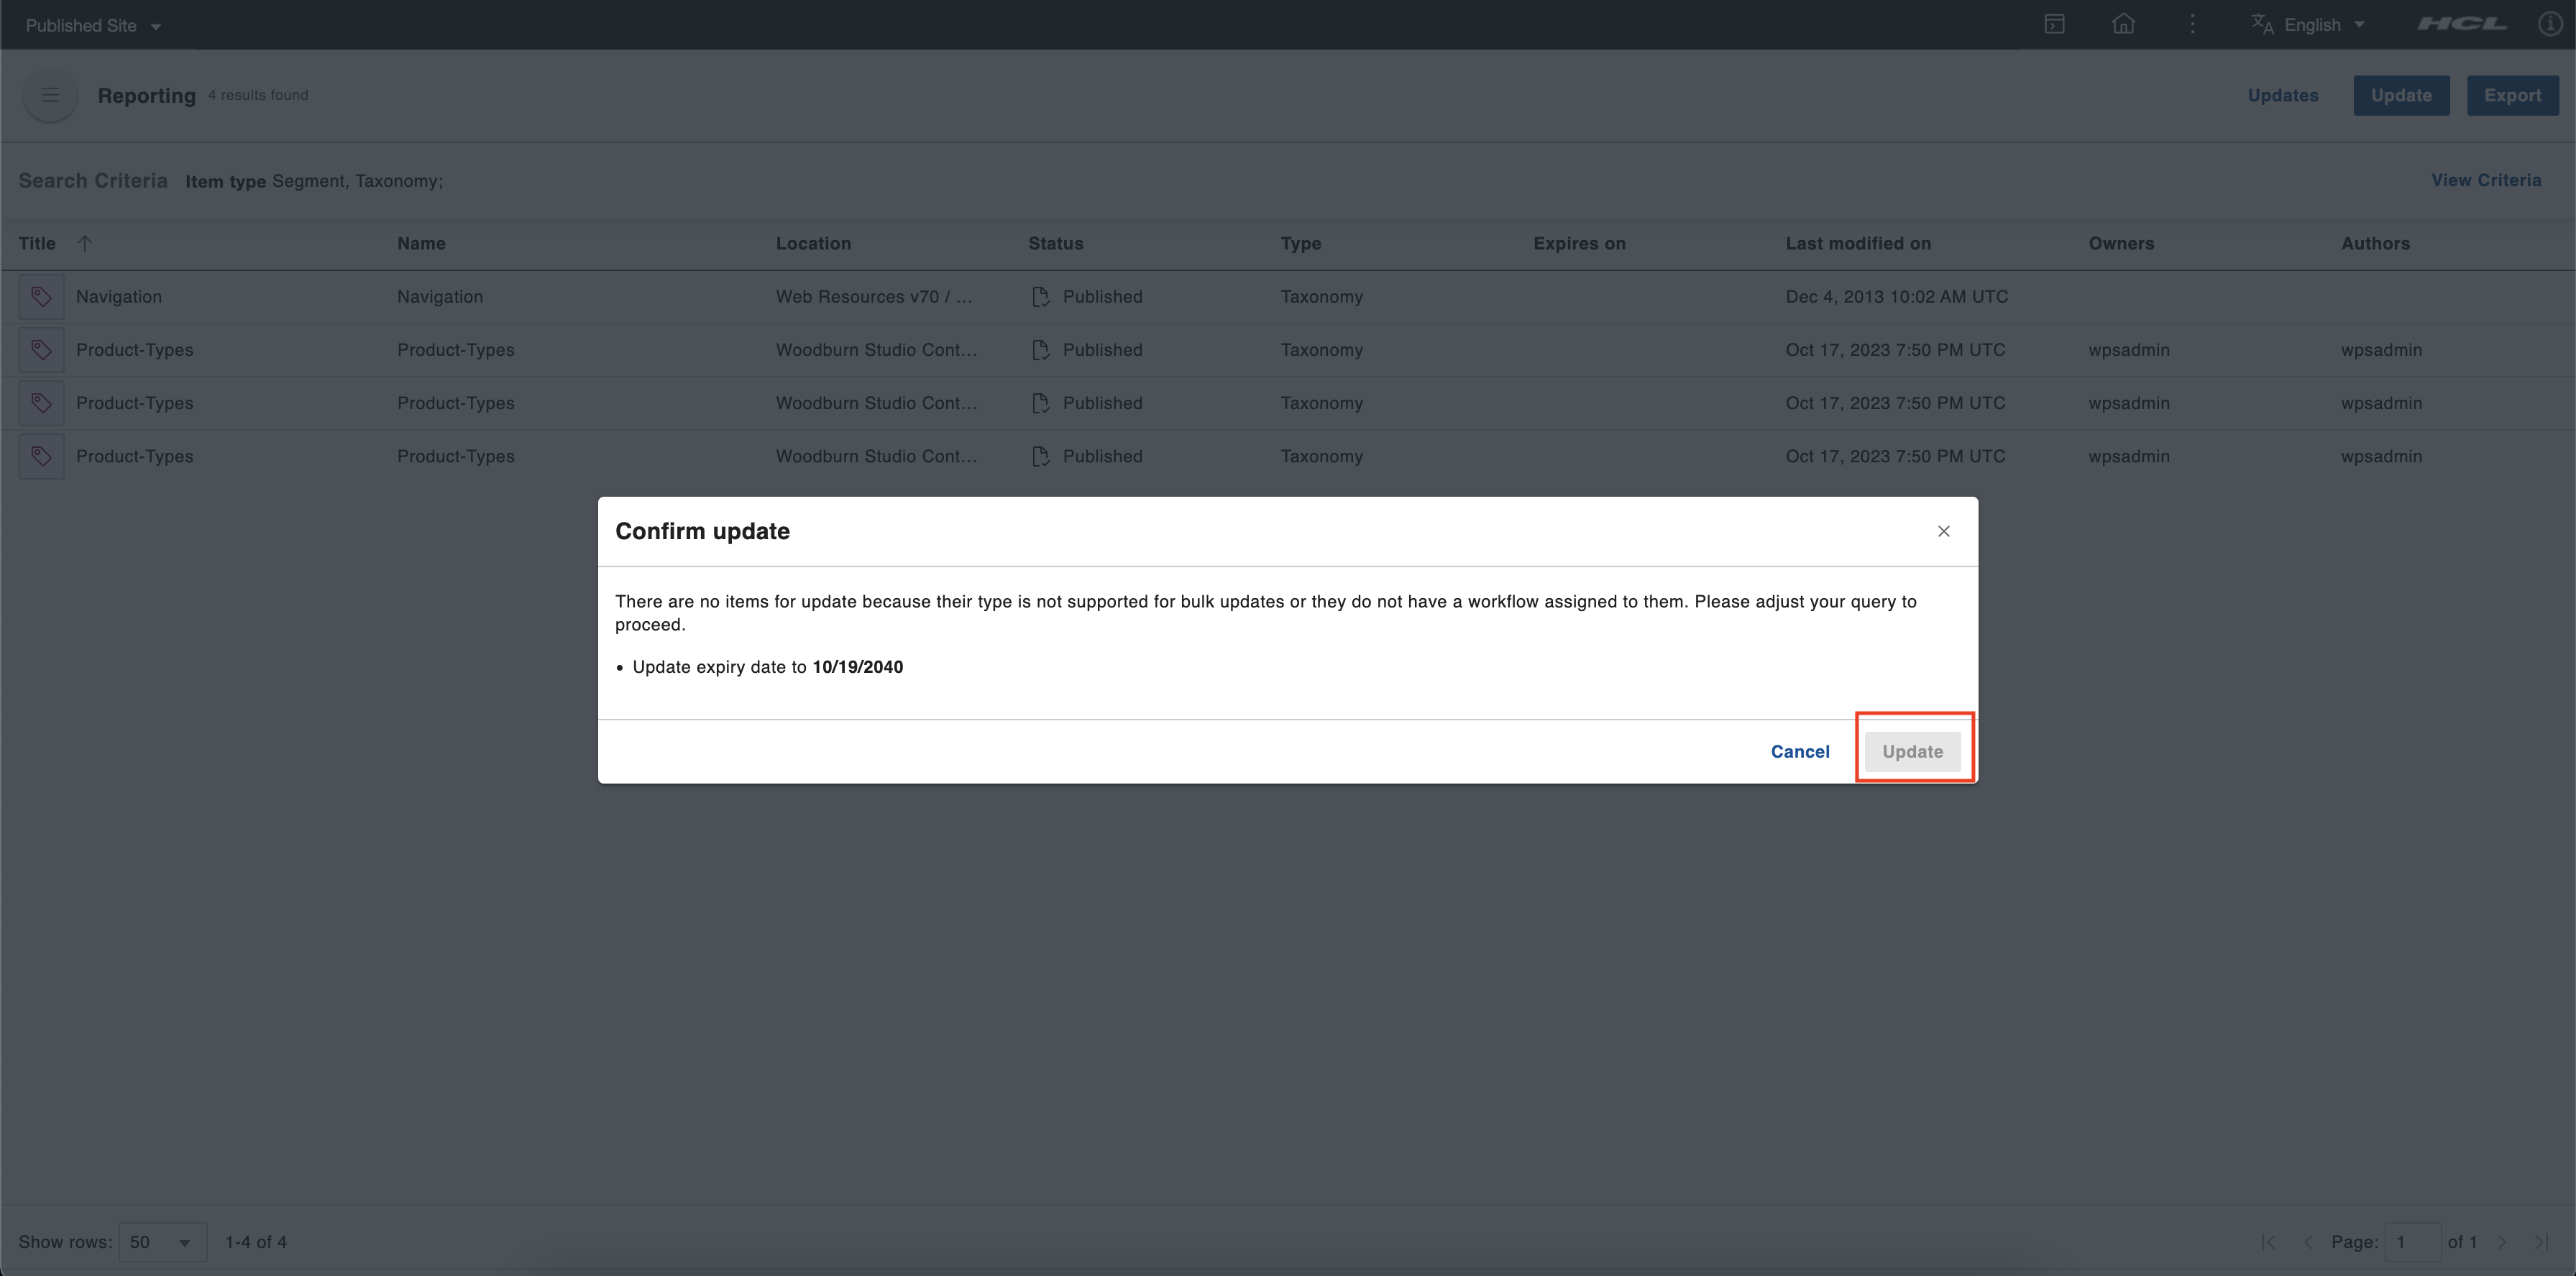
After clicking the Update button, a confirmation dialog appears. Verify the number of items you want to update and if you entered the correct expiration date. If the values are correct, click the Update button. Otherwise, you can click Cancel and return to the previous dialog where you can change the incorrect values.
Note
If there are no items to update because their type is not supported for bulk updates or they do not have a workflow assigned to them, the Update button is disabled.
You can track the bulk update through the snackbar or through the Updates page.
Using the Content Reporting Bulk Update Owners/Authors feature
Content managers can trigger bulk updates to update the owners and/or authors of all queried items. This section provides steps on how to update the owners or authors of content items in a report generated through HCL Content Reporting.
-
After you have generated a report and if there are results, the Update button appears in the application header. Click the Update button.
-
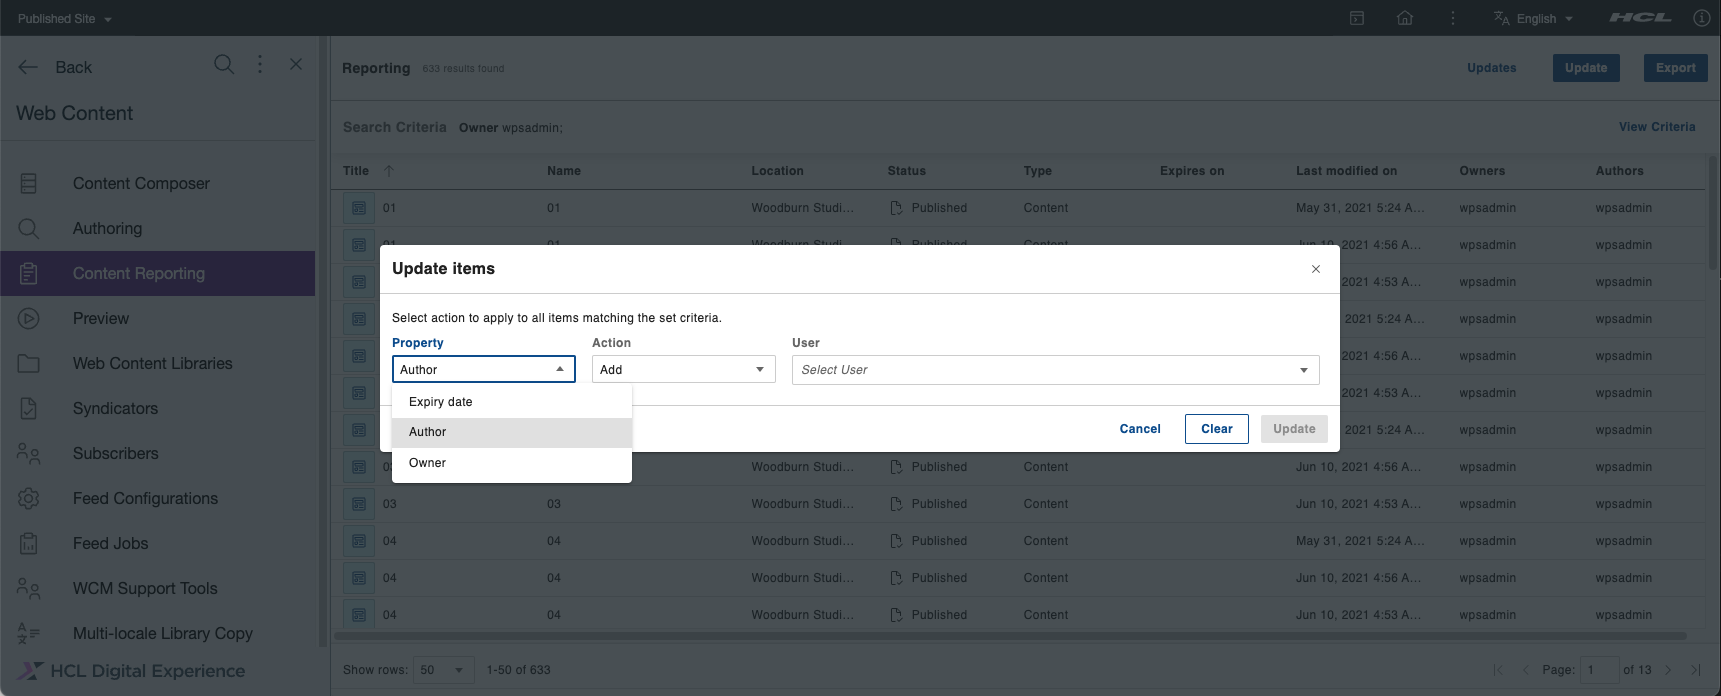
In the Update items dialog box, there are three options: Property, Action, and User. In the Property field, select the property to be updated, either Author or Owner. In the Action field, select the action to be taken on the selected items, either Add, Remove, or Replace. In the User field, enter the name of the user to be involved in the selected action. This field is a type-ahead input field that displays a list of suggested users according to the input. Only suggested users are considered valid. After filling out all the fields, click the Update button.
Note
For the Replace action, there are two fields for the users involved in the action: Add User and Remove User. In the Add User field, enter the name of the user you want to add. In the Remove User field, enter the name of the user you want to replace with the name you added in the Add User field.

-
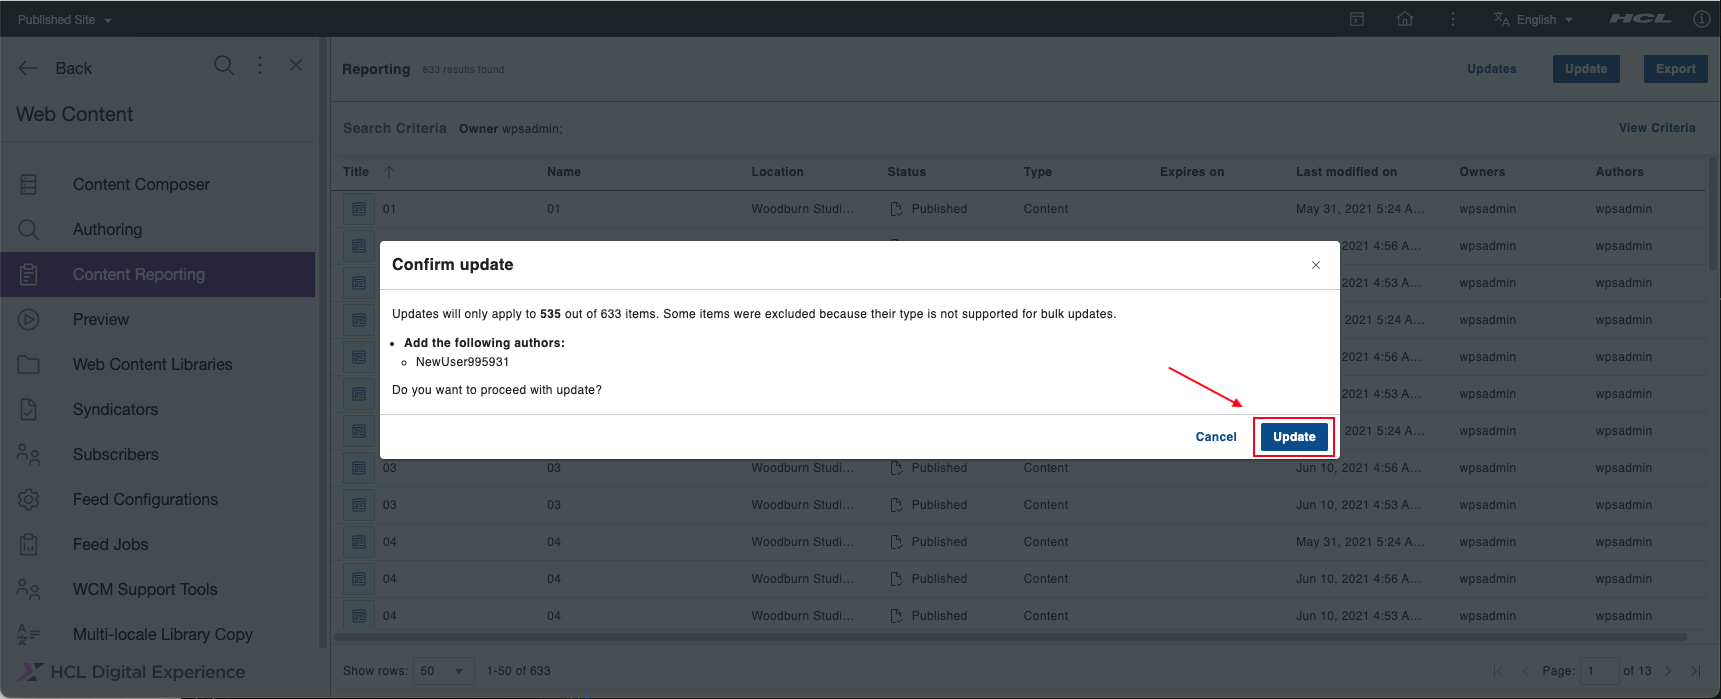
After clicking the Update button, a confirmation dialog appears. Verify the number of items you want to update and that you entered the correct user information. If the values are correct, click the Update button. Otherwise, you can click Cancel and return to the previous dialog where you can change the incorrect values.
There are also Cancel and Clear buttons in the dialog box. Click Cancel to close the dialog box. Click Clear to remove all selected options.
You can track the bulk update through the snackbar or through the Updates page.
Note
Bulk updates for owners or authors can only be applied to content items, site areas, authoring templates, components, categories, folders, projects, segments, workflow actions, portal pages and items to which you have edit access. To date, adding up to 100 users and updating up to 7000 items have been tested successfully.
Tracking Bulk Updates and viewing Bulk Update results
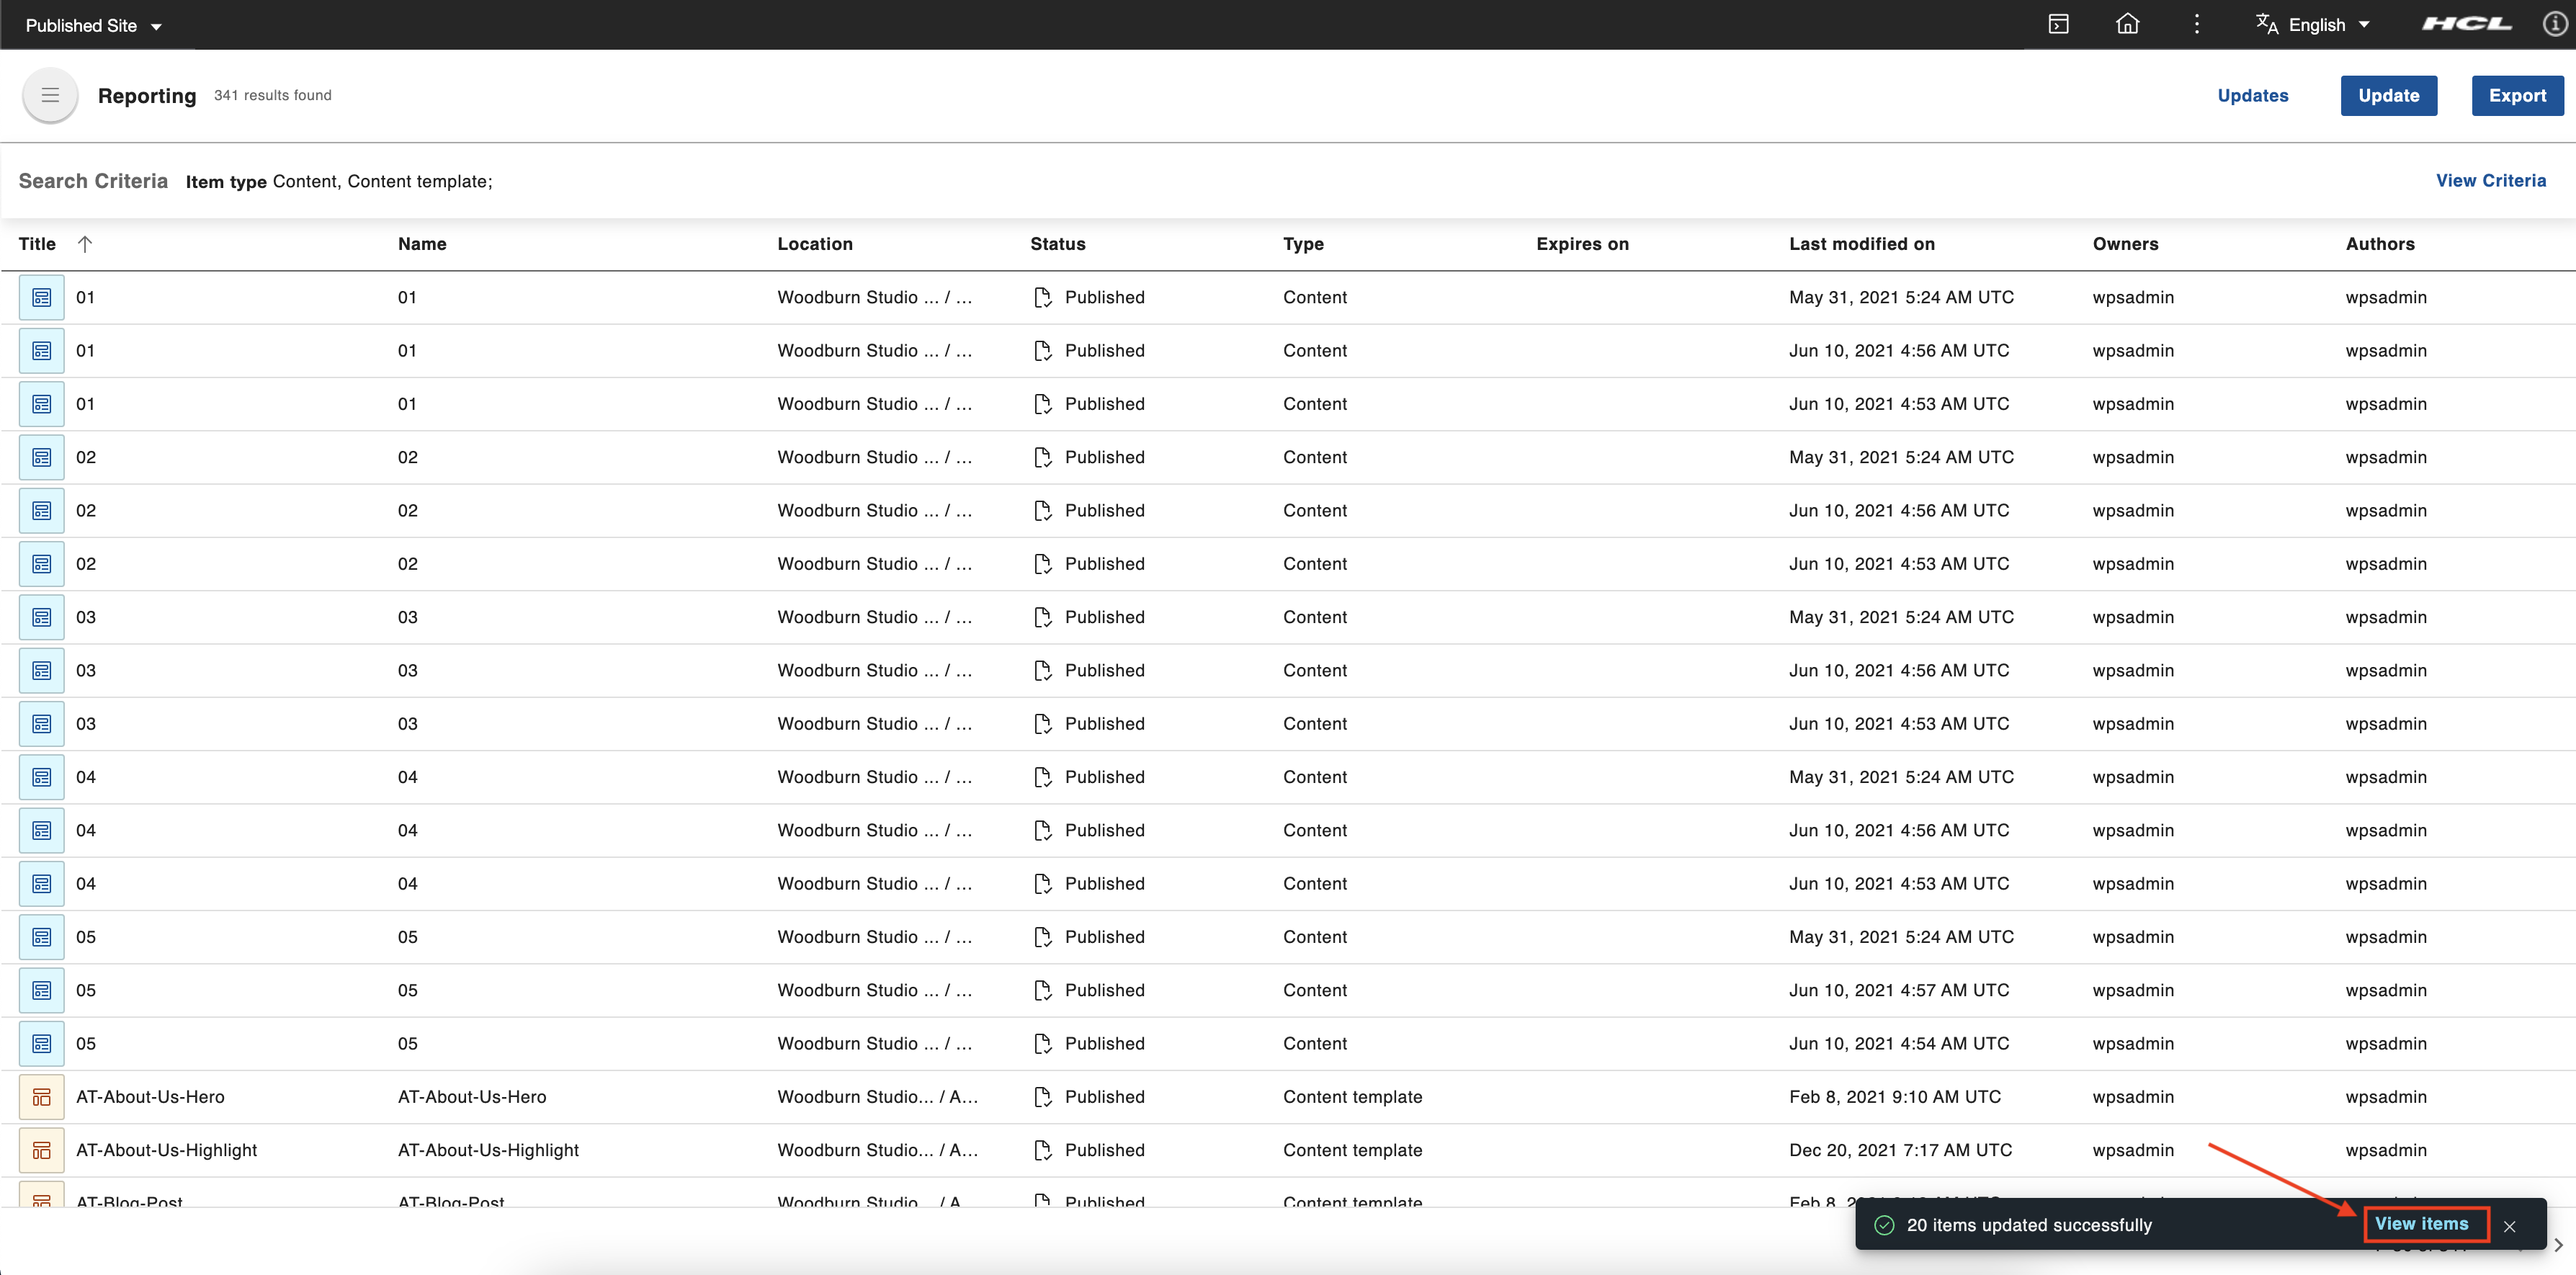
When a bulk update is triggered, a snackbar appears in the bottom right corner of the screen. The snackbar displays the status of the update. If the process is still ongoing, it shows how many items have already been processed against the total number of items. If the process has been completed, it shows how many items were updated and how many items were not.
There are two ways to track the bulk update: through the snackbar and through the Updates page.
Using the snackbar
The snackbar that appears when a bulk update is triggered tracks up to five bulk update processes.
This is the snackbar for an ongoing process.

This is the snackbar if every item was successfully updated.

This is the snackbar if some items were not updated.

This is the snackbar if all items were not updated.

-
On the snackbar, there is an option to view the items that have been processed only when the bulk update process is completed. Click View items to check the details of each item that has been processed. A dialog box for the reports appears.
-
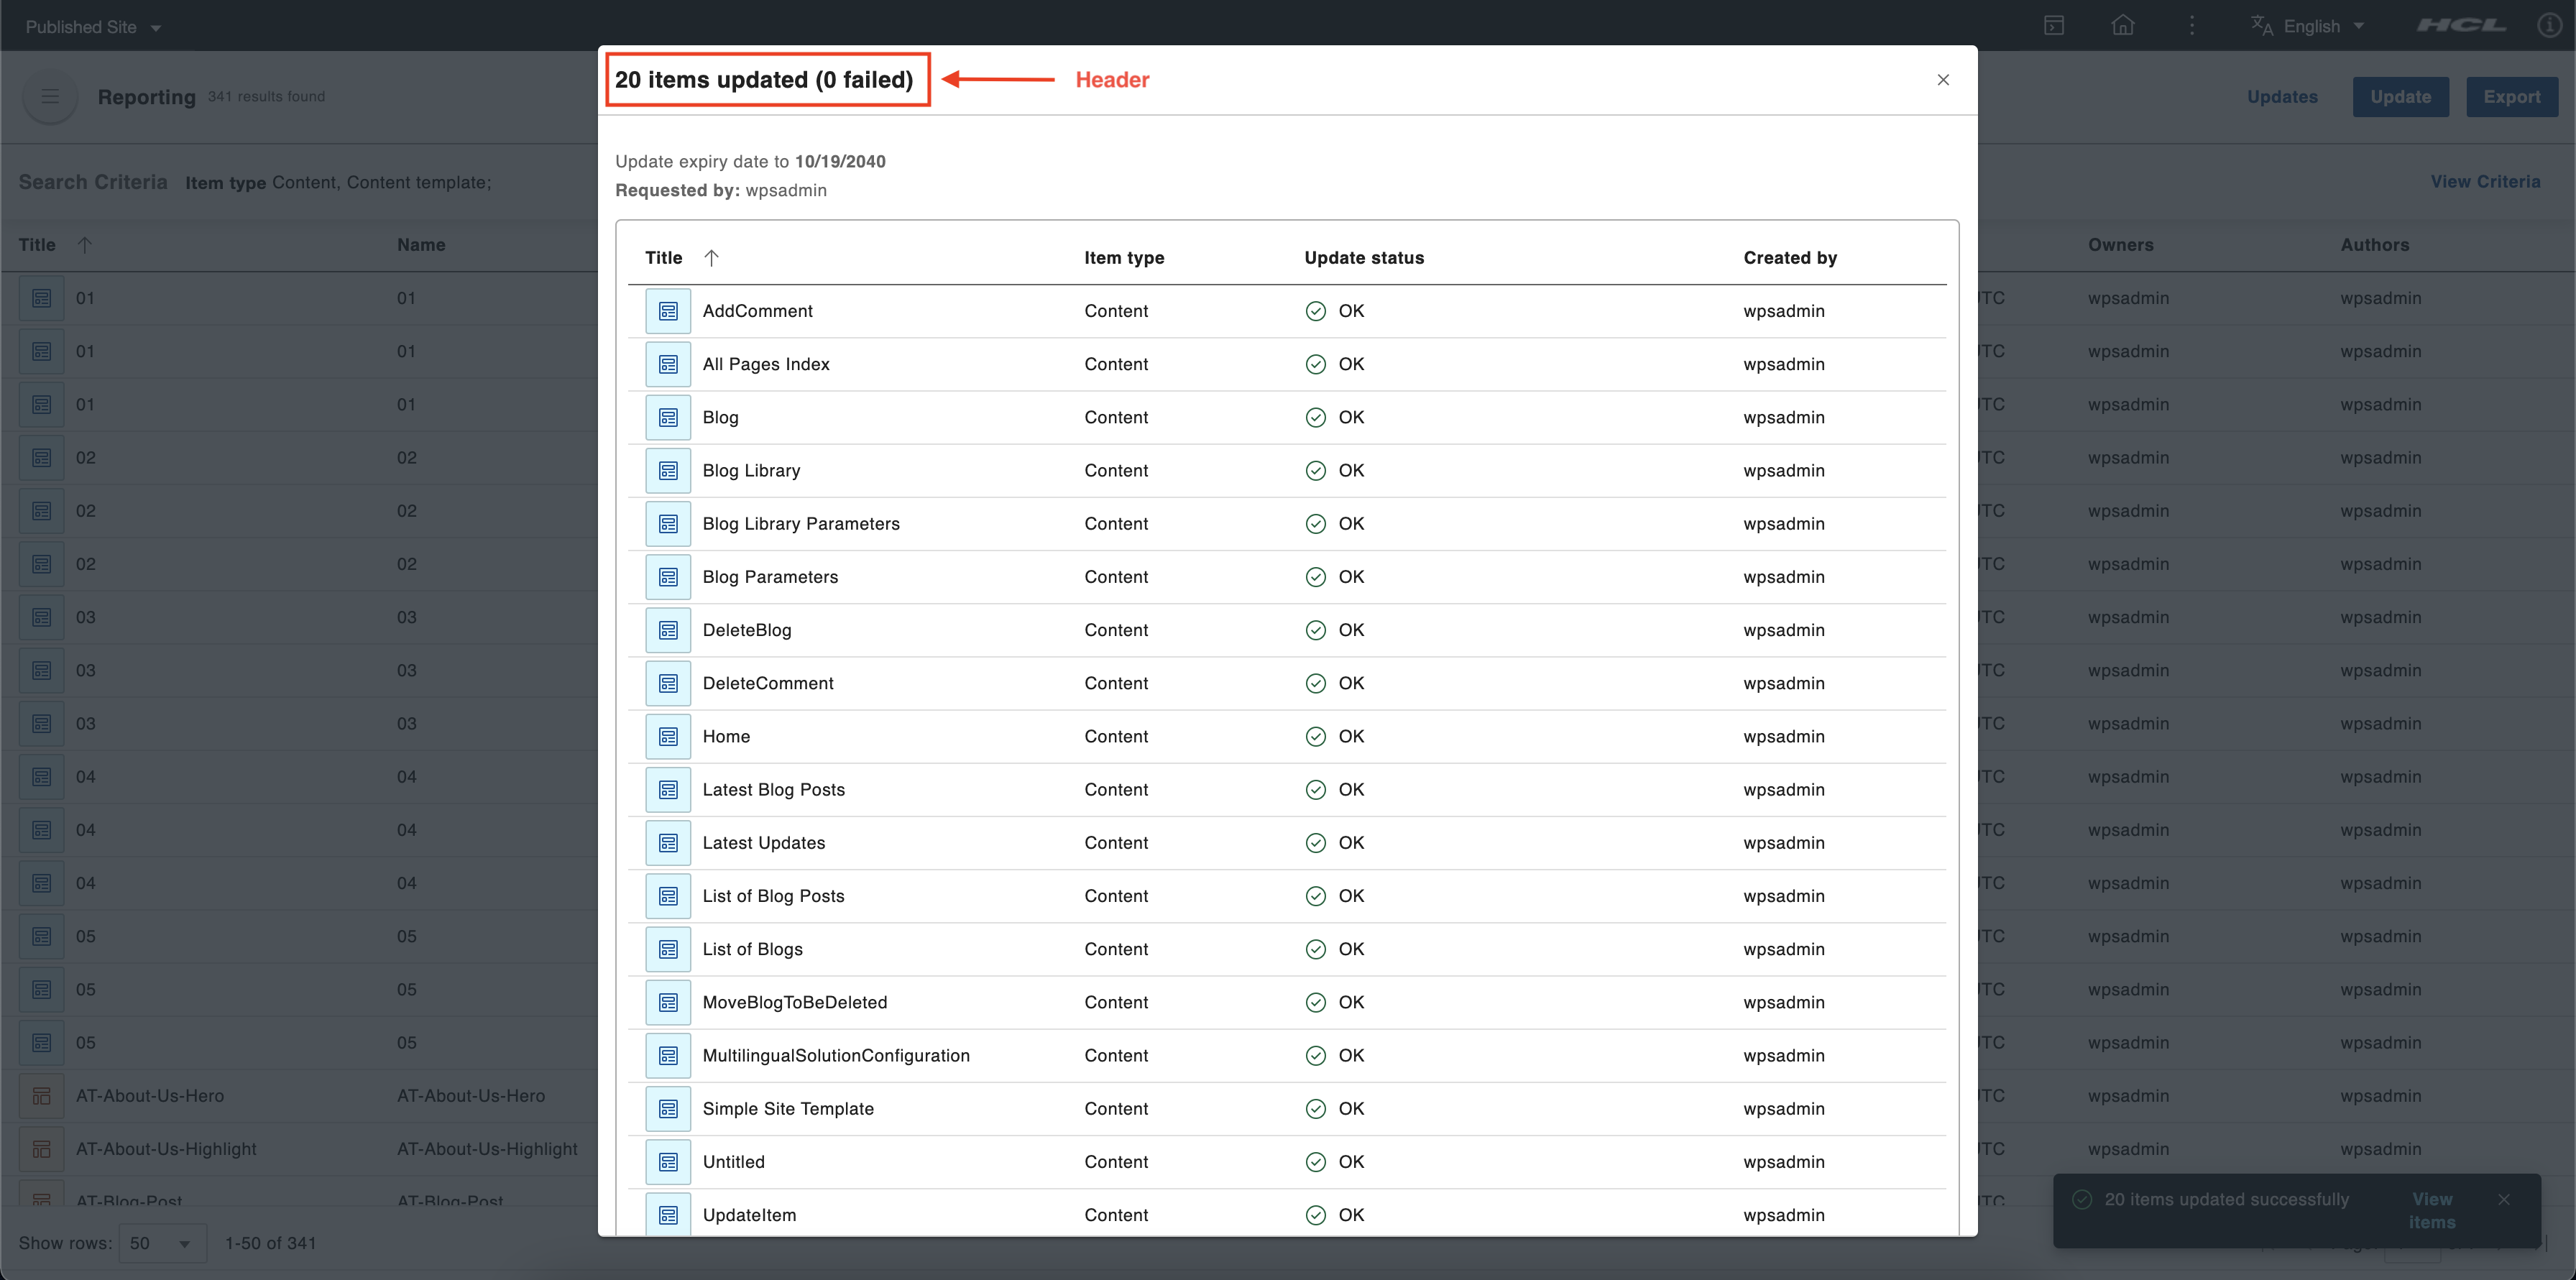
In the header of the dialog box, you can see the total number of items that was updated and the number of failed items. There are four columns on the dialog box:
- Title - This column shows the title of the item processed.
- Item type - This column shows the type of item processed.
- Update Status - This column tells whether the item was successfully updated (shown as OK) or not (an error message containing why the update failed is displayed).
- Created by - This column shows the creator of the item.
Using the Updates page
-
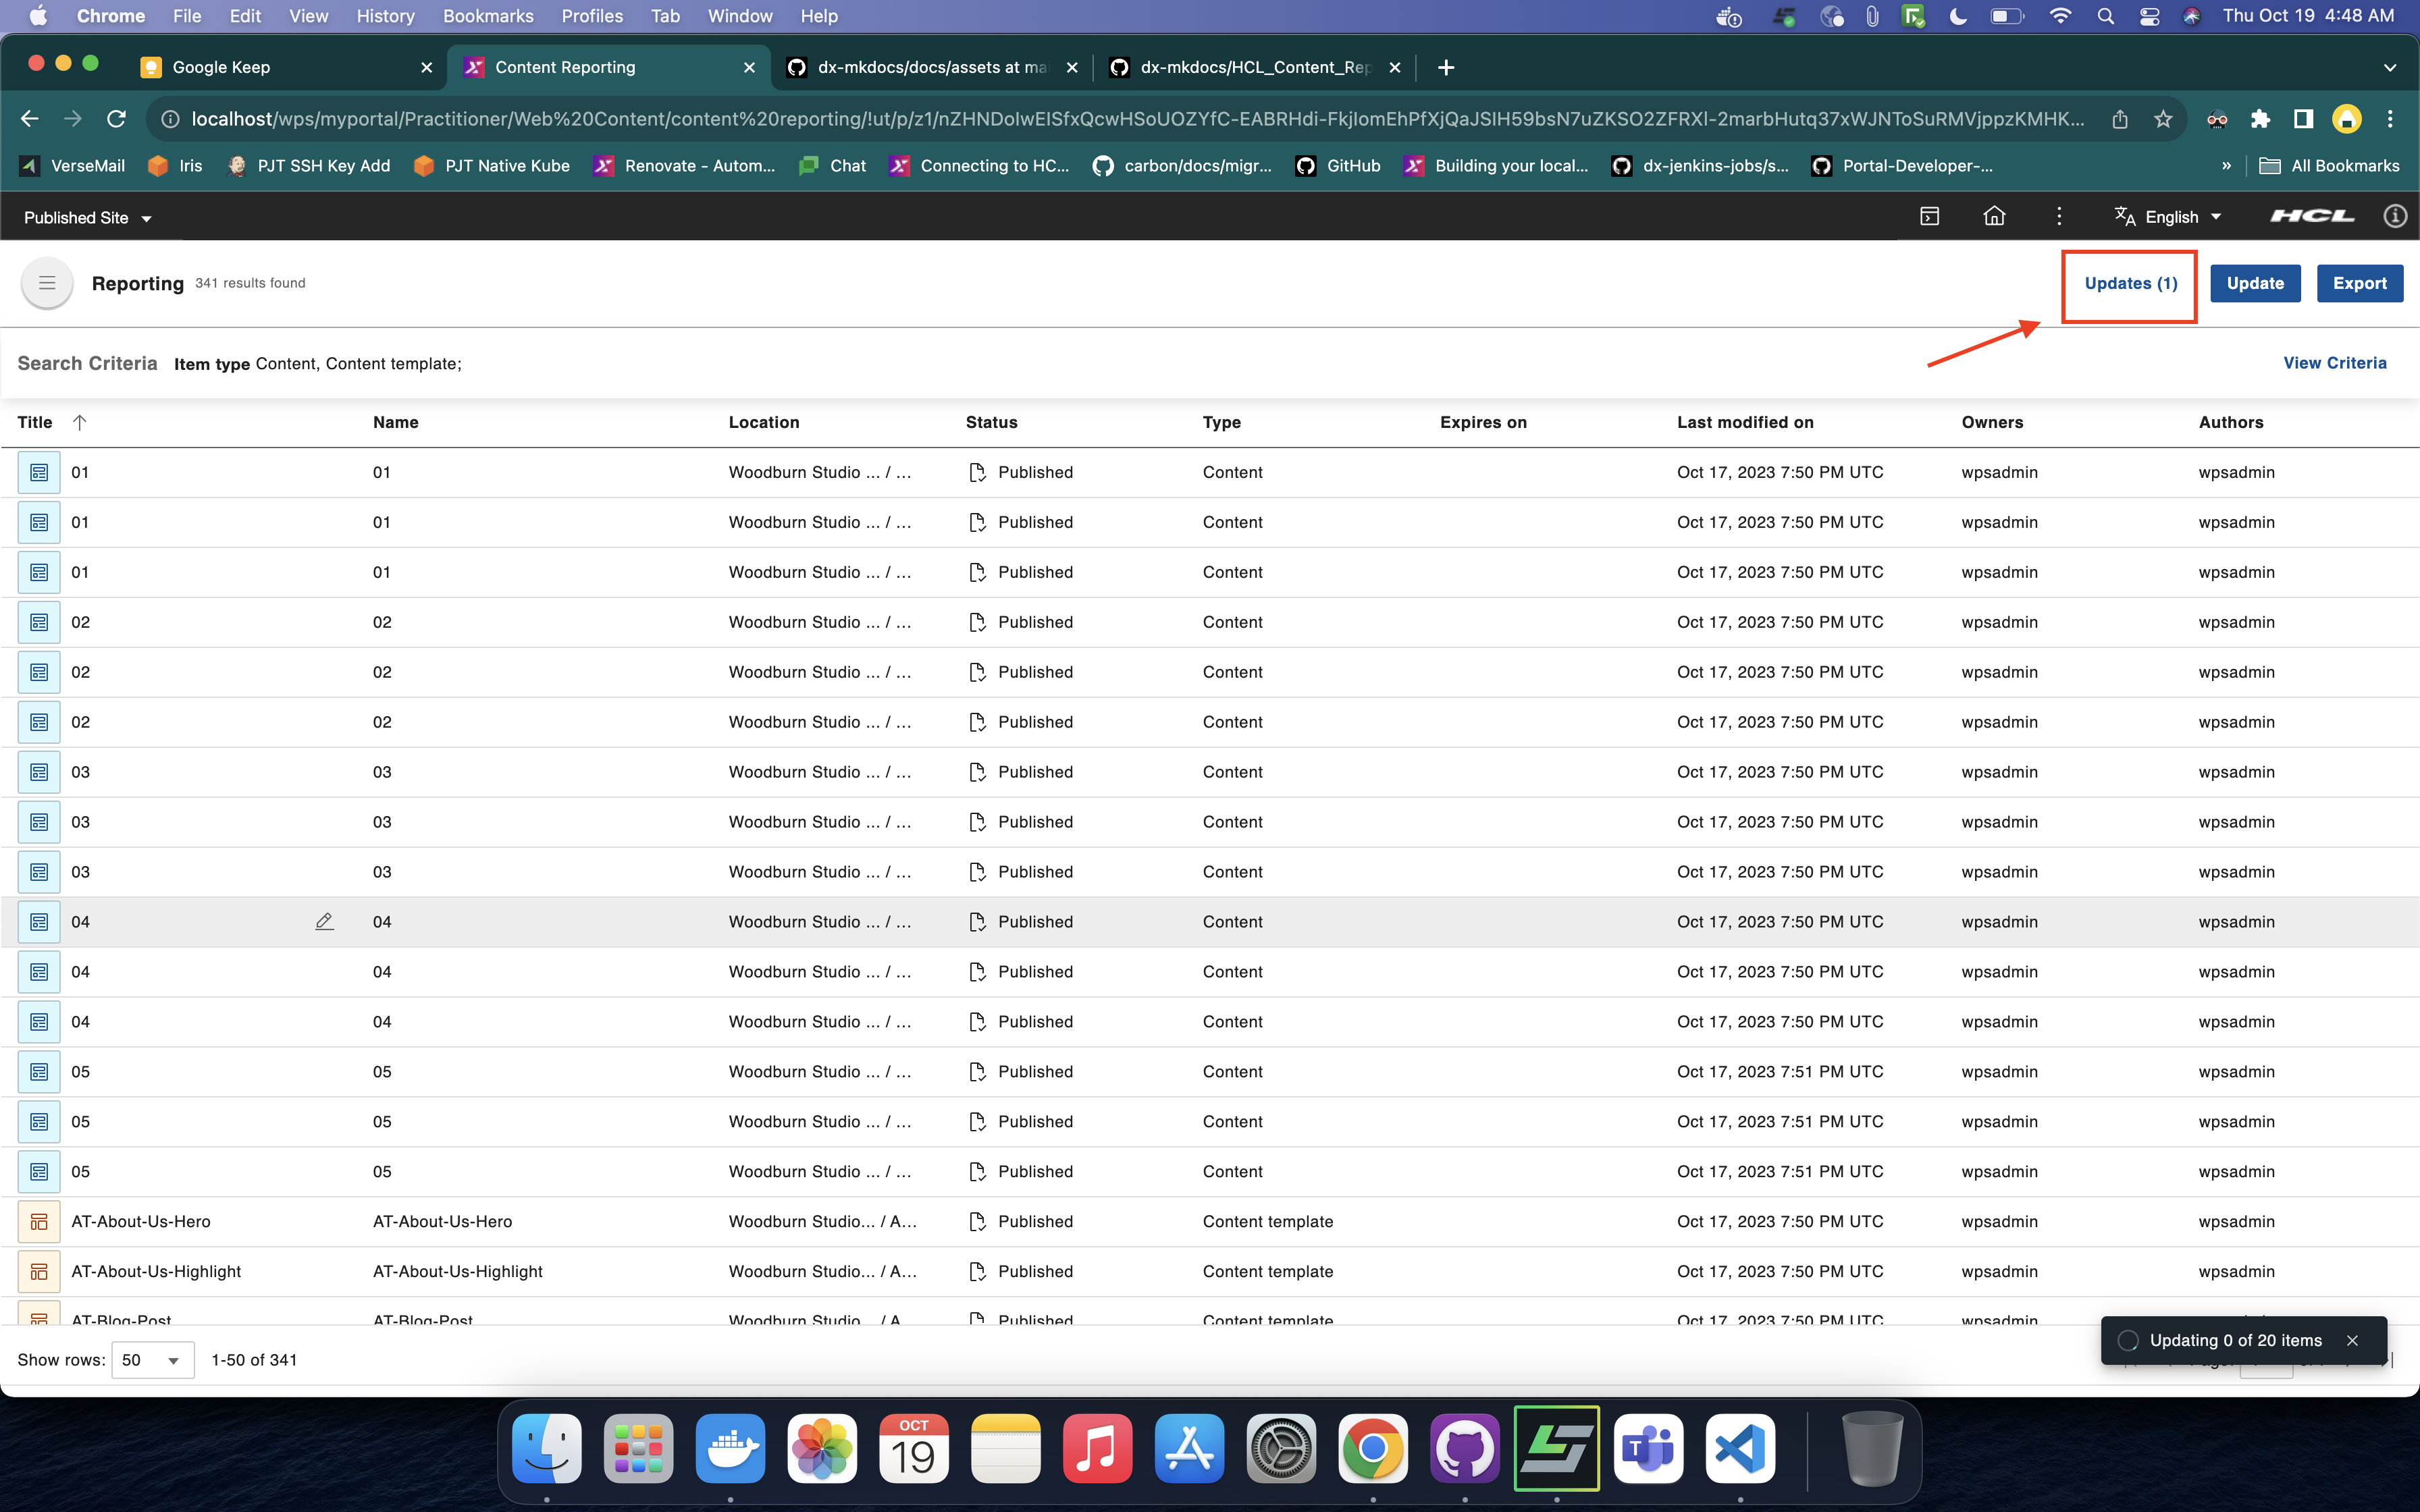
You can access the Updates page through the button on the application header. Click the Updates button to go to the Updates page. The Updates button also contains the total number of bulk update operations triggered.
-
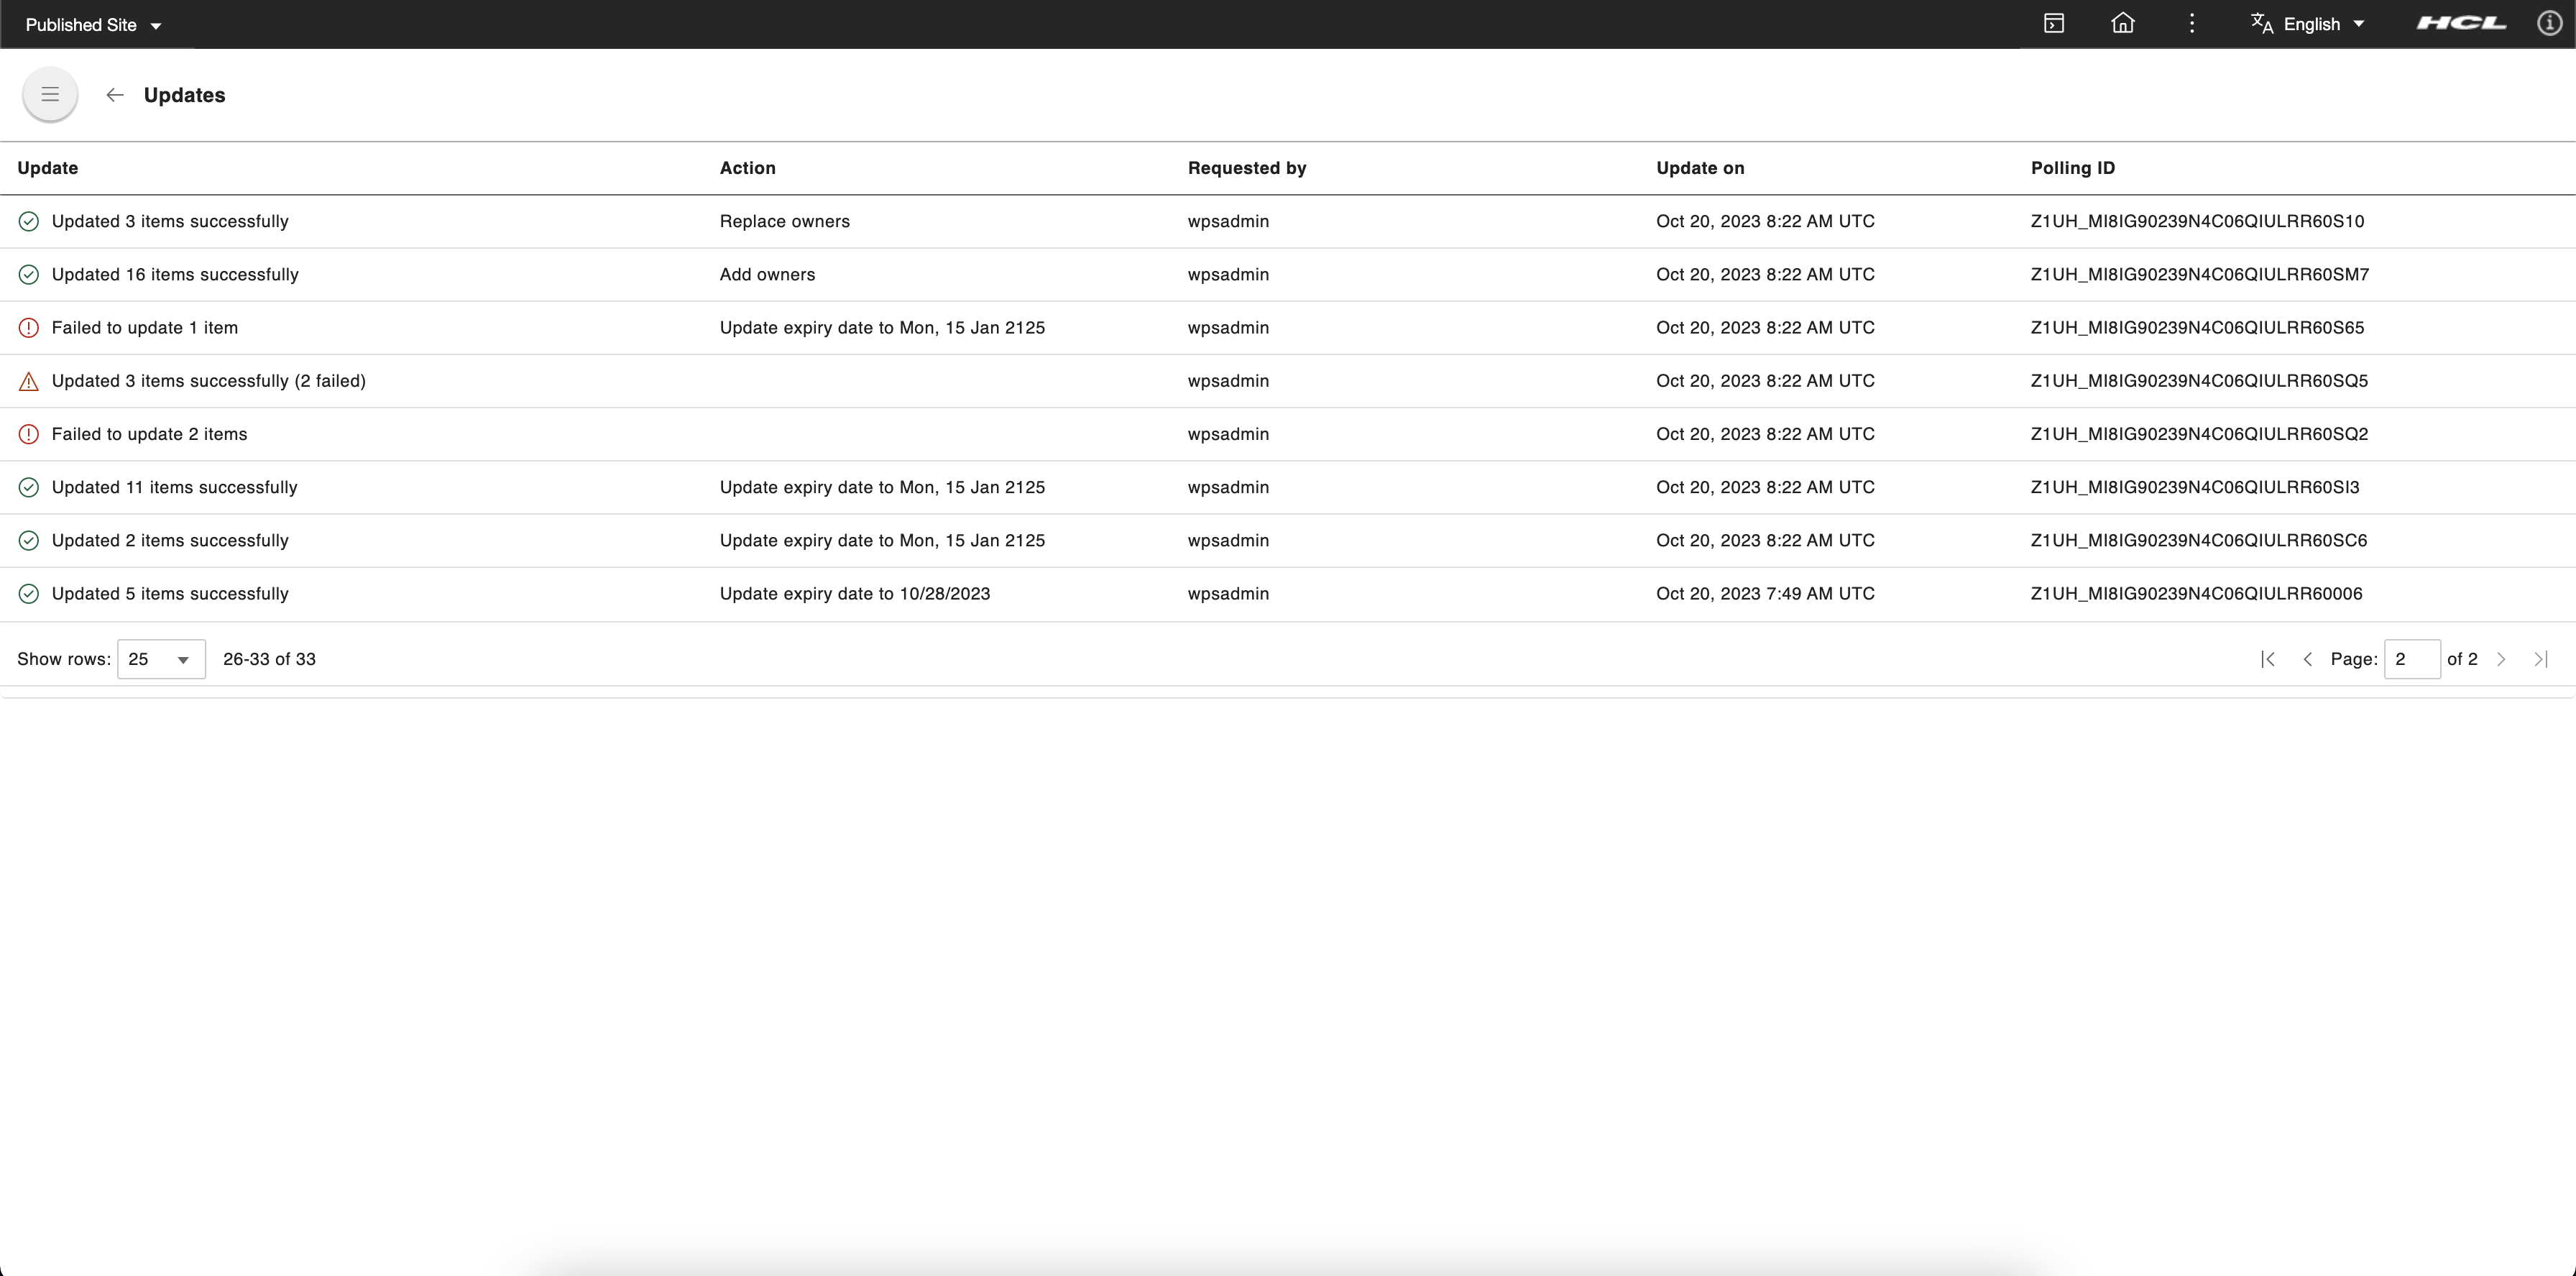
On the Updates page, there is a table showing the bulk updates that were triggered. This table has five columns:
- Update - This column indicates whether the bulk update is ongoing or completed. Once complete, there is a summary of items that have been processed. This summary shows how many items were updated and how many failed. This column also contains a button to show the report dialog where you can check the details of each item that has been processed.
- Action - This column shows actions that were taken during the bulk update.
- Requested by - This column shows who triggered the bulk update process.
- Updated on - This column shows when the bulk update was triggered.
- Polling ID - This column shows a unique identifier for the bulk process.
To return to the Content Reporting landing page, click the back button found on the upper left corner of the Updates page.
-
On the Updates page table, hover over a row of a completed bulk update to display the view action button. Click this button to display the dialog for the list of items processed and their details.
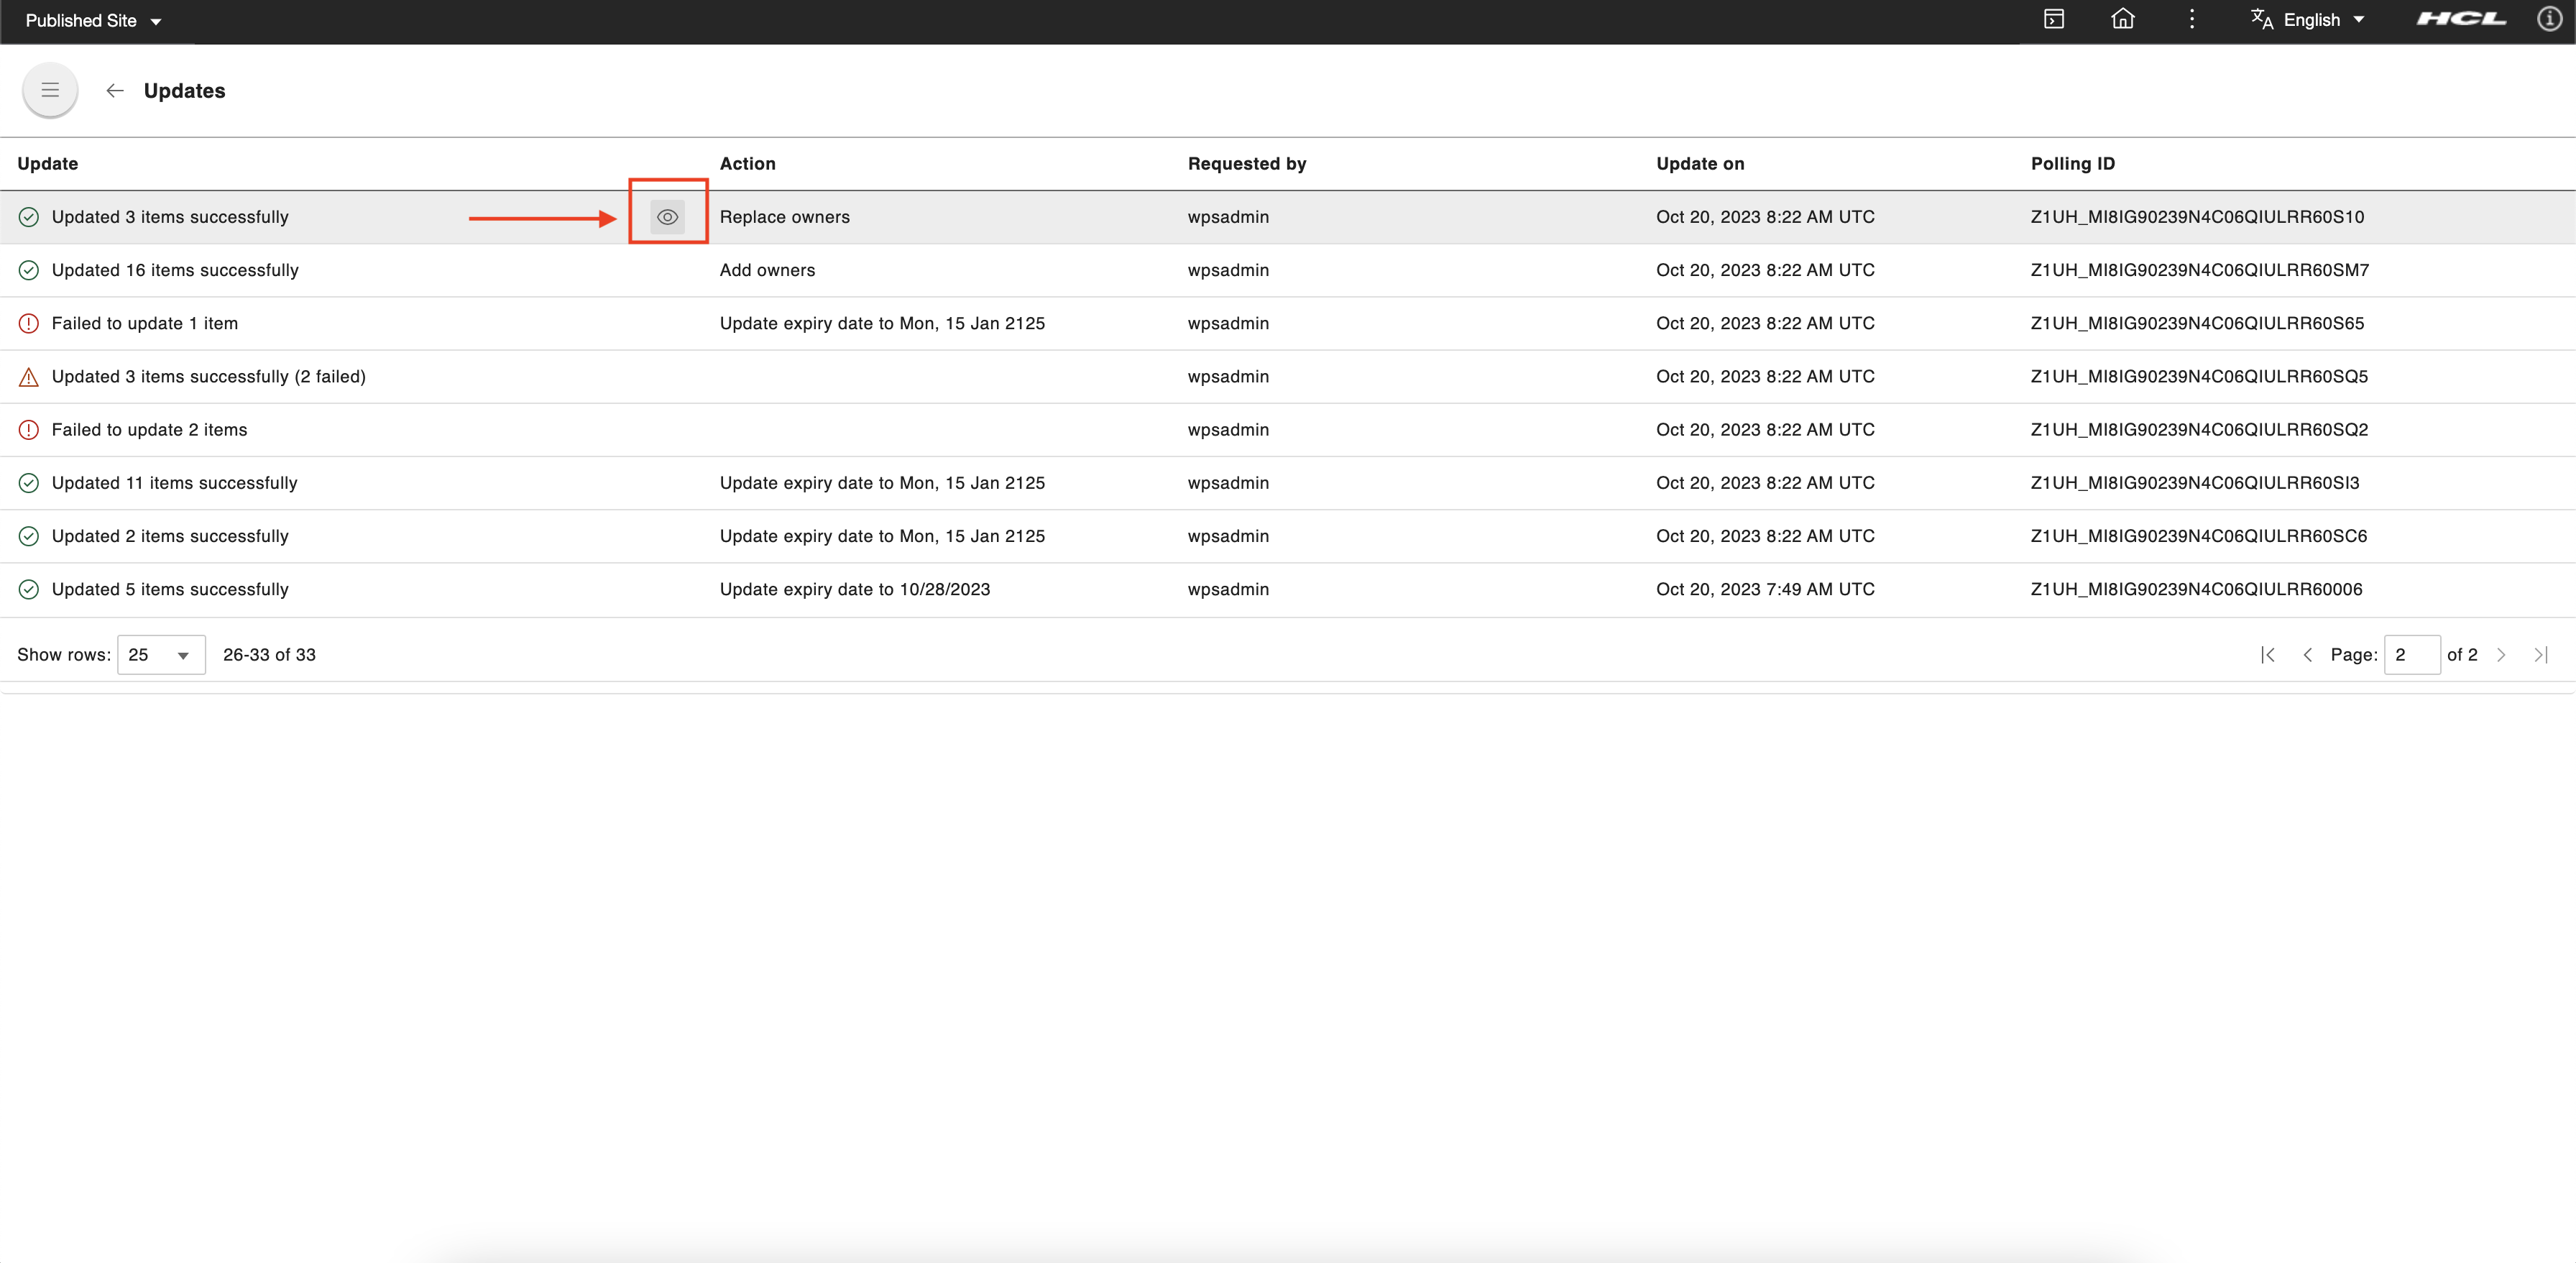
-
In the header of the dialog box, the number of updated items and the number of failed items are displayed. There are four columns on the dialog box:
- Title - This column shows the title of the item processed.
- Item type - This column shows the type of item processed.
- Update Status - This column tells whether the item was successfully updated (shown as OK) or not (an error message containing why the update failed is displayed).
- Created by - This column shows the creator of the item.