Configuring HCL Leap for integration with HCL DX
This page provides information on how to configure the integration of HCL Leap with the existing Digital Experience (DX) environment.
Access Layer for HCL DX and HCL Leap
You have two options for implementing the Access Layer in the DX deployment and Leap: Ingress and Gateway API. Choose the option that fits your specific needs and preferences.
Ingress for HCL DX and HCL Leap
Refer to the following steps to implement a generic Ingress on your Kubernetes cluster for use with DX and Leap. The actual implementation might vary depending on the cluster's setup and configuration.
Prerequisites
Ensure you follow the guidelines provided in the optional Ingress documentation to set up Ingress for DX.
Implementing Ingress for HCL DX and HCL Leap
-
Create a separate Ingress resource for Leap or extend the existing DX Ingress configuration. In Kubernetes, Ingress resources manage how external HTTP(S) traffic is routed to services within the cluster. You can either define a dedicated Ingress for Leap or incorporate its routes into the existing DX Ingress.
-
Ensure the Ingress resource is configured to match Leap’s deployment path. The specified path (for example,
/apps) should align with Leap’s context route so that incoming requests are correctly routed to the Leap service as accessed by end users.
The following YAML file demonstrates how to define an Ingress resource that routes traffic to the Leap backend service based on a specific path (for example, /apps):
apiVersion: networking.k8s.io/v1
kind: Ingress
metadata:
    name: custom-routes
spec:
    ingressClassName: nginx
    tls:
    - secretName: dx-tls-cert
        hosts:
        - your-kube-deployment.com
    rules:
    - host: your-kube-deployment.com
        http:
        paths:
        - path: /apps
            pathType: Prefix
            backend:
            service:
                name: leap-deployment-leap
                port:
                number: 9080
- The
metadatasection identifies the Ingress resource. - The
specsection outlines the routing configuration. - The
tlsblock sets up HTTPS for the specified domain. - Within the
rulessection, requests to the/appspath (including sub-paths) for the defined host are directed to the Leap service deployed in the cluster.
Gateway API for HCL DX and HCL Leap
Refer to the following steps to configure the optional Gateway API for DX and Leap. The Gateway API allows you to route requests to both products under the same hostname, enhancing the deployment's efficiency and management.
Prerequisites
Ensure you follow the guidelines provided in the optional Gateway API documentation to set up the Gateway API for HCL DX.
Implementing Gateway API for HCL DX and HCL Leap
-
Create a separate Gateway API resource for Leap or extend the existing DX Gateway configuration. The Gateway API offers a more flexible and expressive approach to traffic management than traditional Ingress. Consolidating routing for both DX and Leap under a single configuration can simplify access layer management.
-
Ensure the Gateway API configuration accurately reflects the context route used in the Leap deployment (for example,
/apps). This ensures that incoming requests to that path are properly routed to the Leap backend service.
The following YAML file demonstrates how to define a Gateway API HTTPRoute resource for routing requests to the Leap backend service:
apiVersion: gateway.networking.k8s.io/v1
kind: HTTPRoute
metadata:
  name: leap-http-api-route
spec:
  parentRefs:
  - name: gateway
    sectionName: https
  hostnames:
  - your-kube-deployment.com
  rules:
  - matches:
    - path:
        type: PathPrefix
        value: /apps
    backendRefs:
    - name: leap-deployment-leap
      port: 9080
- The
metadatasection assigns a name to the HTTPRoute resource. - The
specsection outlines the routing configuration. - The
parentRefssection links the route to a specific Gateway and its section (for example,https). - The
hostnamessection indicates the domain this route is intended for. - Within
rules, thematchesblock defines the path prefix condition (such as/apps) - The
backendRefssection specifies the target backend service and port where Leap is hosted.
Enabling LTPA SSO between HCL Leap and HCL DX in Kubernetes
Refer to the following steps to enable Lightweight Third-Party Authentication (LTPA) Single Sign-On (SSO) between Leap and DX in Kubernetes. These steps are based on a community post in HCLSoftware Community.
-
Ensure both DX and Leap use an identical user registry configuration.
- For DX, please refer to the doc on User Registry Options for details.
- For Leap, please refer to the Leap documentation for details.
-
Ensure both DX and Leap use the same realm name.
To set the realm name for DX:
- Log in to the WebSphere Integrated Solutions Console (
your-domain.com/ibm/console) as an administrator. - Click Security > Global Security > User Account Repository > Realm Name.
-
Under User account repository, set the Realm name (for example,
defaultWIMFileBasedRealm).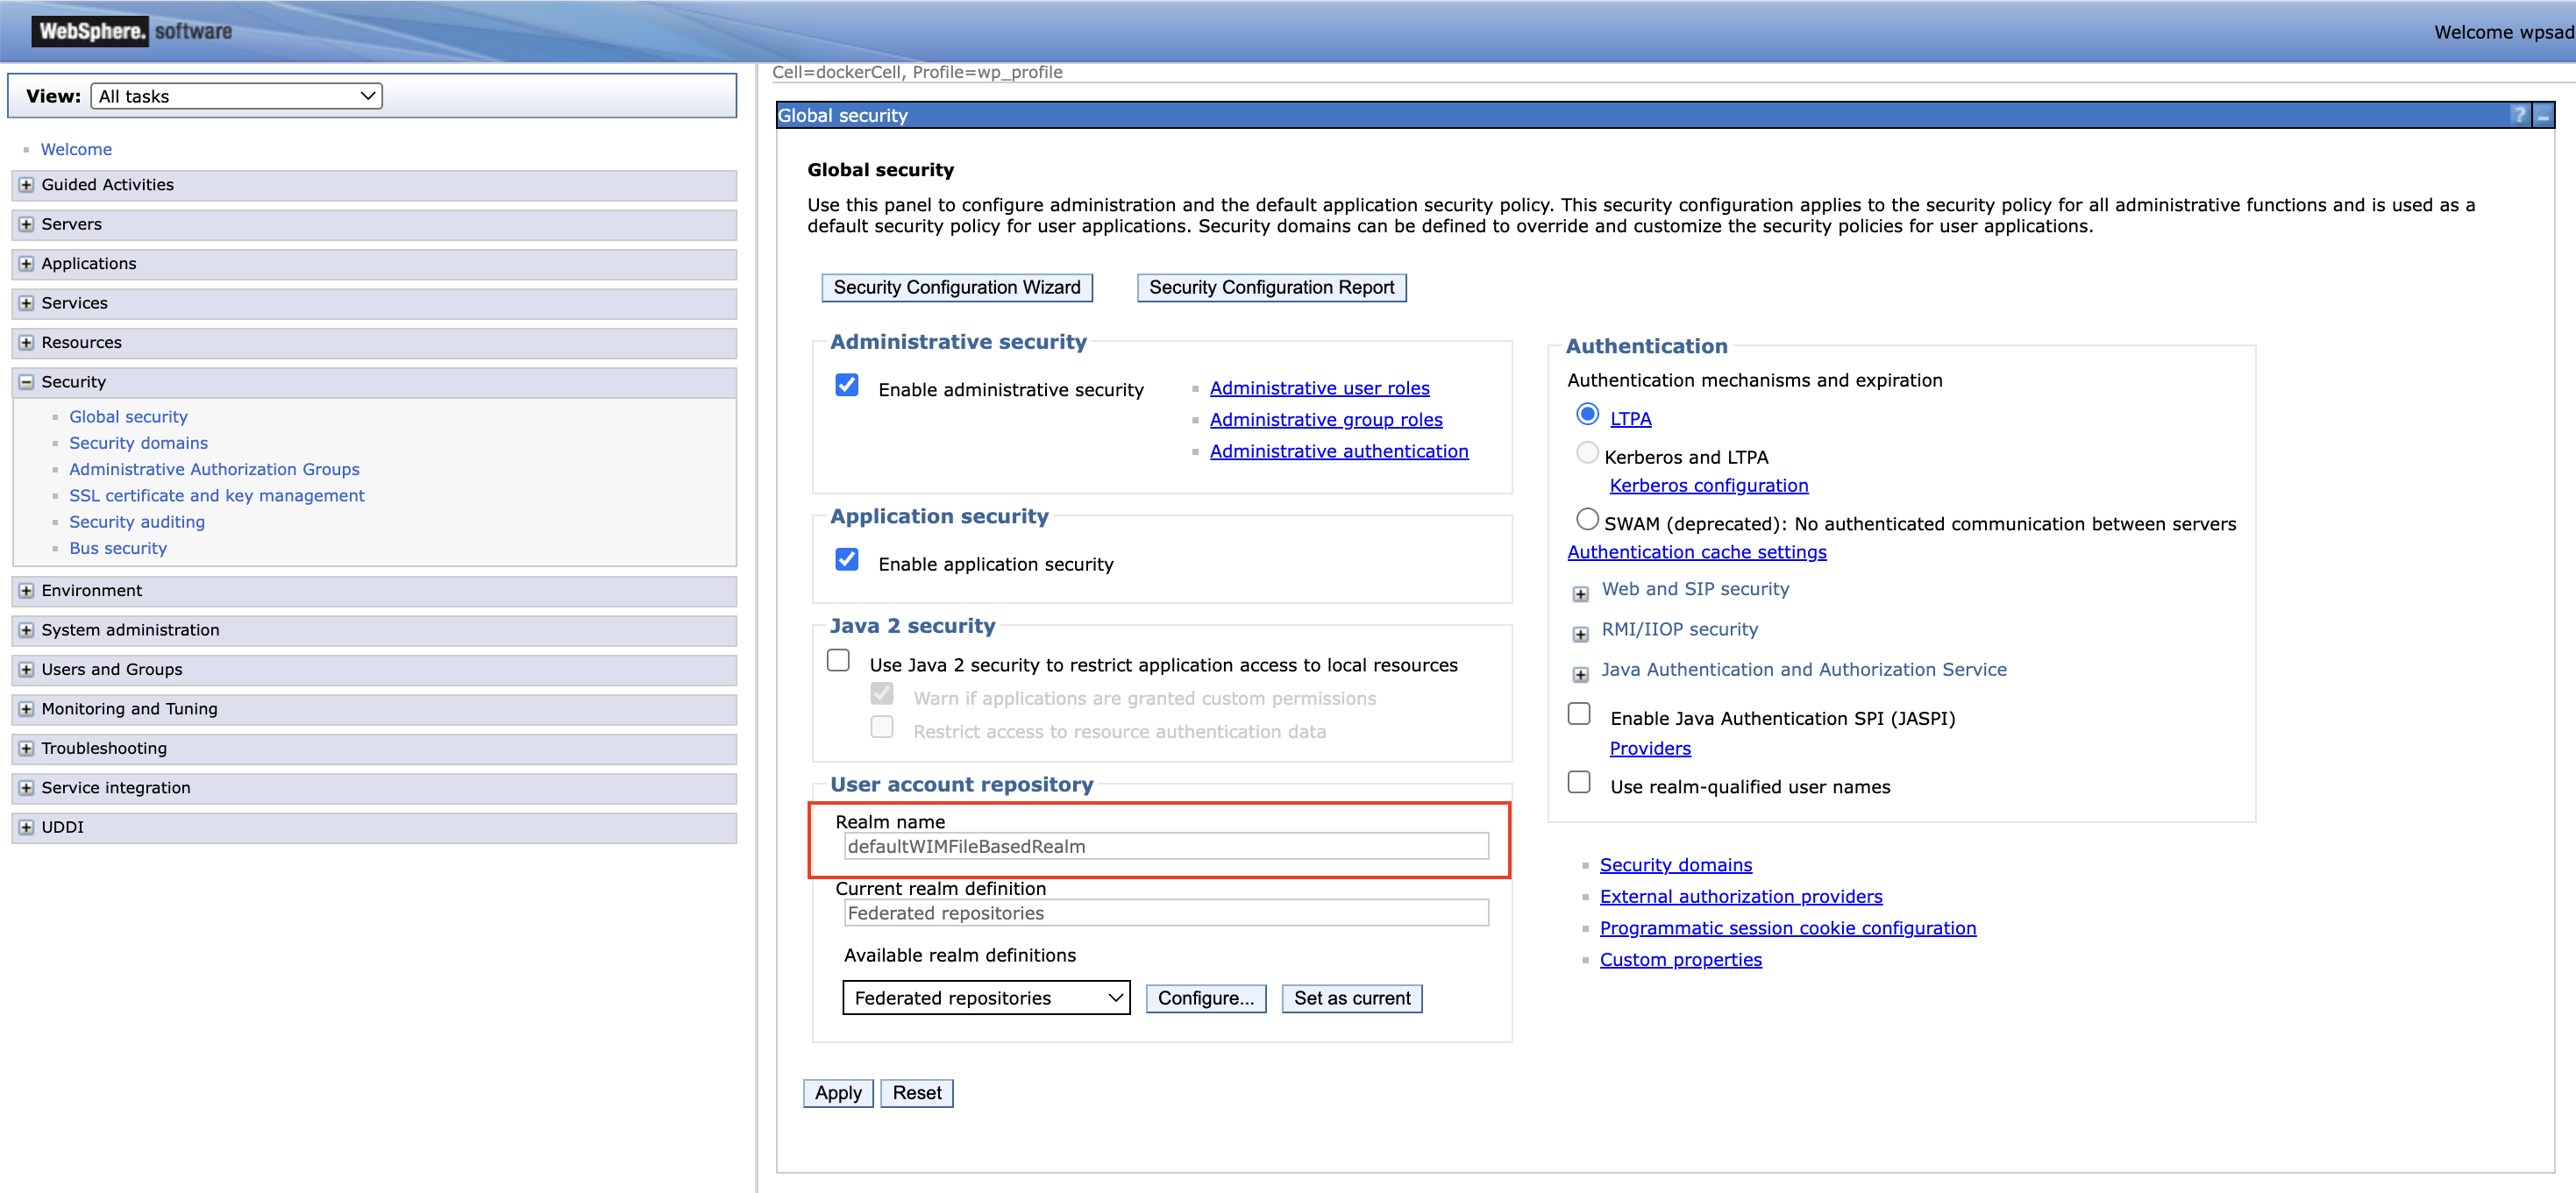
-
Click Apply.
- Click Save at the top of the console messages.
To set the realm name for Leap:
-
Edit the
configOverrideFilessection in your Helm chart'svalues.yamlfile. In the following example, the realm name for Leap is set todefaultWIMFileBasedRealm, similar to the realm name set in DX.configuration: leap: configOverrideFiles: mycustomoverride: | <server description="leapServer"> <federatedRepository id="leapRepo"> <primaryRealm name="defaultWIMFileBasedRealm" allowOpIfRepoDown="true"> <participatingBaseEntry name="o=defaultWIMFileBasedRealm" /> </primaryRealm> </federatedRepository> <basicRegistry id="leapRegistry" realm="defaultWIMFileBasedRealm" ignoreCaseForAuthentication="true"> <user id="<my-user-id>" name="uid=<my-user-id>,o=defaultWIMFileBasedRealm" password="<my-password>" /> </basicRegistry> </server> -
Perform a Helm upgrade to apply your changes.
Note
For more information regarding Leap's
configOverrideFilesparameter, refer to Open Liberty server customizations. - Log in to the WebSphere Integrated Solutions Console (
-
Ensure both DX and Leap use the same DNS domain. Refer to these steps for details.
-
Ensure LTPA cookies flow only over HTTPS.
To limit the flow of LTPA cookies to SSL only on the traditional WebSphere Application Server (WAS):
- Log in to the WebSphere Integrated Solutions Console (
your-domain.com/ibm/console) as an administrator. - Click Security > Global security > Web and SIP security > Single sign-on (SSO).
- Select the Requires SSL checkbox.
- Click Apply.
- Click Save at the top of the console messages.
To limit the flow of LTPA cookies to SSL only on Liberty:
-
Add the following parameter to the
configOverrideFilessection of yourvalues.yamlfile<webAppSecurity ssoRequiresSSL="true"/> -
Perform a Helm upgrade to apply your changes.
- Log in to the WebSphere Integrated Solutions Console (
-
Ensure both DX and Leap use the same LTPA keys.
- Export the LTPA keys from WAS:
- Log in to the WebSphere Integrated Solutions Console (
your-domain.com/ibm/console) as an administrator. - Click Security > Global security > LTPA.
- In the Cross-cell single sign-on section, enter values for the following fields:
- Under Password, enter and confirm a secure password. You will require this password later.
- Under Fully qualified key file name, specify a name for the file that holds the exported keys (for example,
ltpa.keys).
- Click Export keys.
- Log in to the WebSphere Integrated Solutions Console (
- Look for the exported
ltpa.keysin your DX core pod.- In your cluster, run
kubectl exec -it <your-dx-core-pod-name> -- sh. - Run
find / -name ltpa.keysto find the location of the ltpa.keys file, e.g./opt/HCL/profiles/prof_95_CF229/ltpa.keys. - Run
cat <ltpa.keys-location>to print the file's contents into the terminal.
- In your cluster, run
- Copy the content of the exported LTPA key file into a file named
ltpa.keysin your cluster. This file will be used to create the Kubernetes secret. - Exit the DX Core pod shell by running
exit. -
Run the following command in your cluster to create the Kubernetes secret:
kubectl create secret generic my-custom-ltpa-key --from-file=/path/to/ltpa.keys --namespace=<namespace> -
Update
ltpa-keyin the Leap custom Helmvalues.yamlfile, then run a helm upgrade:configuration: leap: customSecrets: ltpa-key: my-custom-ltpa-key -
Look for
ltpa.keysin your Leap pod (steps are similar to those that you did to find it in the DX pod). Check that its contents are the same as the ltpa.keys exported in DX. Note the location of the ltpa.keys file for the next step. -
Update the LTPA
keysFileNameandkeysPasswordparameters by adding this line to theconfigOverrideFilessection of your Leapvalues.yamlfile:<ltpa keysFileName="/path/to/ltpa.keys" keysPassword="<myLtpaKeyPassword>" /> -
Perform a Helm upgrade to apply your changes.
Note
For more details on using custom secrets as key file, refer to Using custom secrets as key file.
See the resulting
values.yamlfile after adding the<webAppSecurity ssoRequiresSSL="true"/>and<ltpa keysFileName="/path/to/ltpa.keys" keysPassword="<myLtpaKeyPassword>" />lines to theconfigOverrideFilessection:### Leap custom values file configuration: leap: configOverrideFiles: mycustomoverride: | <server description="leapServer"> <webAppSecurity ssoRequiresSSL="true"/> <ltpa keysFileName="/path/to/ltpa.keys" keysPassword="<myLtpaKeyPassword>" /> <federatedRepository id="leapRepo"> <primaryRealm name="defaultWIMFileBasedRealm" allowOpIfRepoDown="true"> <participatingBaseEntry name="o=defaultWIMFileBasedRealm" /> </primaryRealm> </federatedRepository> <basicRegistry id="leapRegistry" realm="defaultWIMFileBasedRealm" ignoreCaseForAuthentication="true"> <user id="<my-user-id>" name="uid=<my-uid>,o=defaultWIMFileBasedRealm" password="<my-password>" /> </basicRegistry> </server> - Export the LTPA keys from WAS:
-
Restart HCL Leap and HCL DX. You should now be able to log in to DX and open Leap without having to log in again.