Lesson 5: View verification points and object maps
In this lesson, you will learn how to view and modify the properties of verification points and object maps.
View verification points
About this task
Procedure
- In Test UI, verify that your script, Classics.java, is still the active script in the Java™ Editor.
-
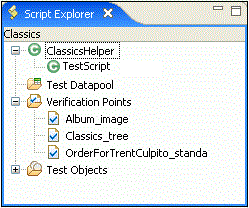
The three verification points you recorded should be listed in the Script Explorer to
the right of the script. If necessary, click the plus sign (+)
next to Verification Points to expand the list.

-
Double-click Classics_tree.
This is the first verification point that you recorded, on the list of composers. The Verification Point Editor starts; you can update verification point data for future playbacks.
Updating verification points: Data verification points have six possible display types. This is a Data (tree) verification point. The object type is a tree, in this case, a javax.swing.JTree. To edit the data in this tree, double-click any of the sub-items in the tree to open a small edit box where you can make changes. Use the check boxes beside each item to indicate whether you want this item to be tested in future playbacks. To learn more about using the Verification Point Editor, see the Test UI Help. - Close the Verification Point Editor.
View object maps
About this task
Procedure
-
In the Script Explorer, expand the Test Objects folder.
The first item, Private Test Object Map, is the object map for this script. The individual objects listed under Private Test Object Map are references to objects that were acted on during recording.
-
Double-click Private Test Object Map (
 ) to open it.
Object map types: When you record a script, Test UI creates an object map for the application under test. Each script is associated with an object map file. The map file can be private -- associated with one script exclusively -- or shared among many scripts. When you recorded the script, Test UI used the default setting (private map). The object map contains properties for each object, and you can easily update the information in one central location. Then, any scripts that reference that object also share the updated information.
 -
Expand the top-level object
Java: Frame: logFrame1: javax.swing.JFrame.The frame object includes the logon dialog. The radio buttons, password fields, and action button are listed beneath the frame object.
-
Click one of the objects.
Notice that the recognition properties are displayed in the grid below the object tree. The object map also provides a quick way to add object references to a script. In the object map menu, you can click to add objects. You can also perform other operations from the object map, such as changing the weight of a recognition property and editing recognition properties and values. We'll perform several advanced procedures using the object map later in the tutorial.
-
In the object map menu, click .
The Clear State On Close command is a toggle menu item and should be on by default, so you will be clearing it. If it were left on, all objects would be accepted when you close the map. We want to do that in a later step when we return to the object map to make changes.
- Close the object map. Do not save any changes you may have made.