Creating a project
Before you begin
About this task
After you launch Test Integrations and APIs, you must create a new project, provide a name for your project and save it on your local drive. The following instructions are applicable for the Windows™ OS.
Procedure
- Launch the Integration Tester application from your desktop.
- Select Create Project and click OK.
- Enter a name for the project in the Project Name field.
-
Click Browse and select a location to save the project.
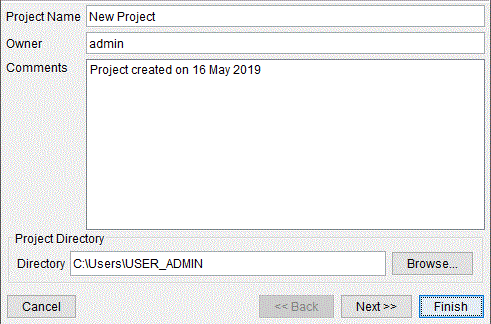
If you do not browse and select a location, the project is saved in the default location, which is your home directory. For example, the default location is C:\Users\USER_ADMIN as shown in the following image.
-
Click Finish.
When you create or open a project, the Test Integrations and APIs Home page is displayed. The Home page contains several interactive guides that walk you through some of the most common tasks that you can accomplish with Test Integrations and APIs. The Home page also contains links to some useful information resources.
Results
The new project is created.
What to do next
Importing the Swagger definition of phonebook sample API from Test Virtualization Control Panel
You must add a Swagger file to your project that defines a REST API as an external synchronization source. Therefore, you create a project to run a test in Test Integrations and APIs by importing a Swagger definition of an API.
Before you begin
You must have created a project as described in Creating a project. Your project must be open in Test Integrations and APIs.
About this task
You model a system under test against which you run tests. Test Virtualization Control Panel provides some sample APIs that you can use while working with Test Integrations and APIs. You can use one of these sample APIs as the system under test.
Procedure
-
Open Test Virtualization Control Panel by
double-clicking the
 icon.
Note: When Test Virtualization Control Panel starts, you can see an orange icon. You must wait for it to change to green. If the icon remains red, you must troubleshoot and fix the issue. For more information, see Starting and stopping DevOps Test Virtualization Control Panel.
icon.
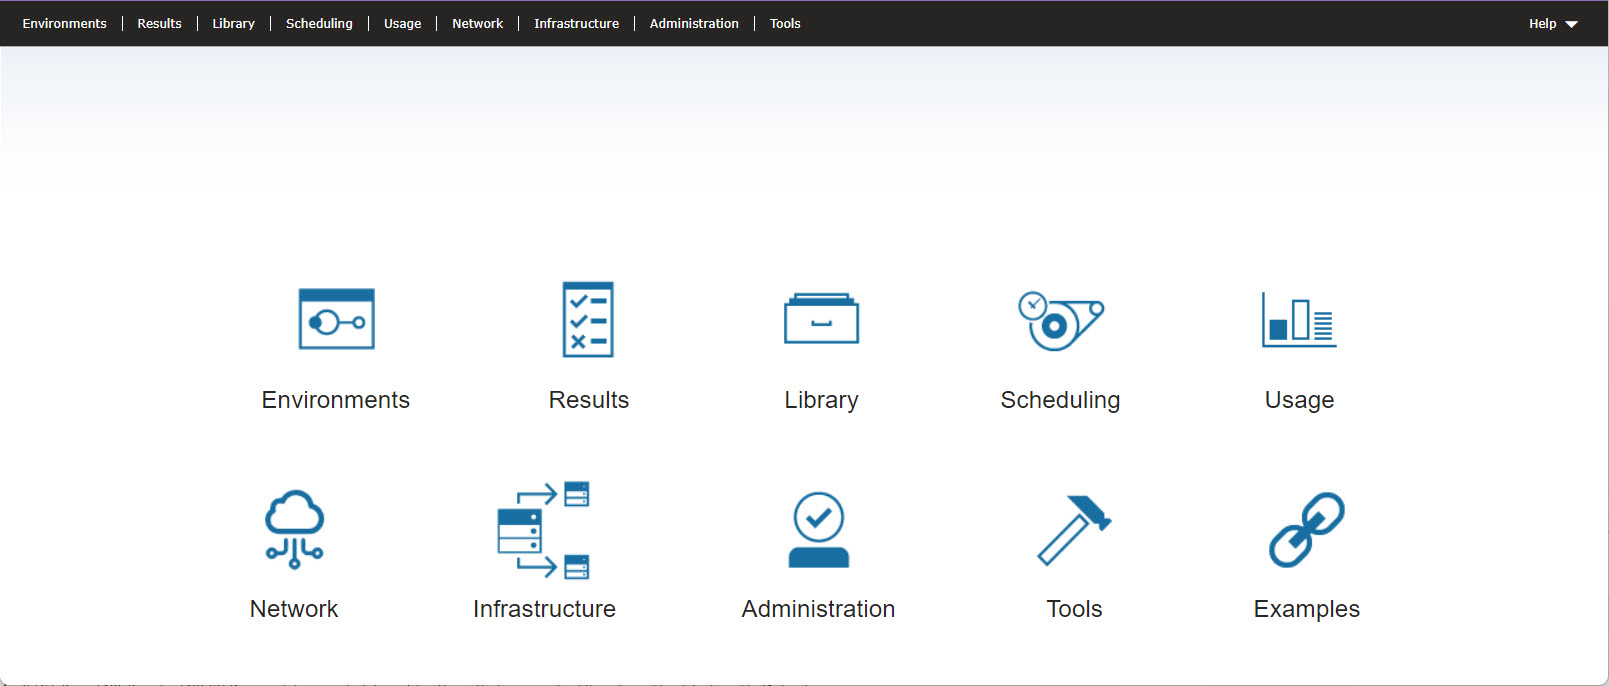
Note: When Test Virtualization Control Panel starts, you can see an orange icon. You must wait for it to change to green. If the icon remains red, you must troubleshoot and fix the issue. For more information, see Starting and stopping DevOps Test Virtualization Control Panel.The Test Virtualization Control Panel Home page is displayed.
-
Click the Examples icon.
Under the REST examples section, you can see an example of a REST Phonebook described with a Swagger definition. This Phonebook API provides a RESTful interface through which HTTP clients can retrieve information about the phone book contacts, and update or delete them.
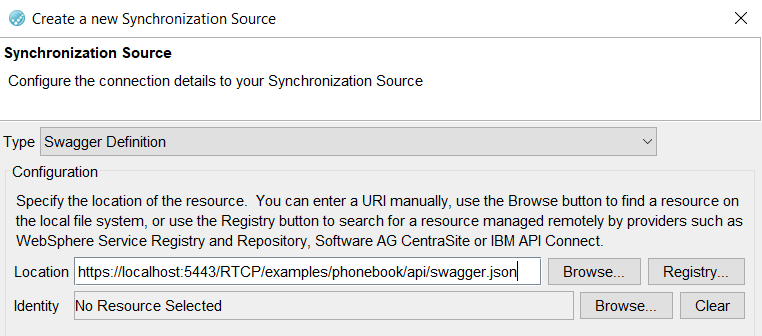
- Right-click Phonebook Swagger Definition and copy the URL, which is https://localhost:5443/RTCP/examples/phonebook/api/swagger.json.
-
Return to the Test Integrations and APIs window and
navigate to .
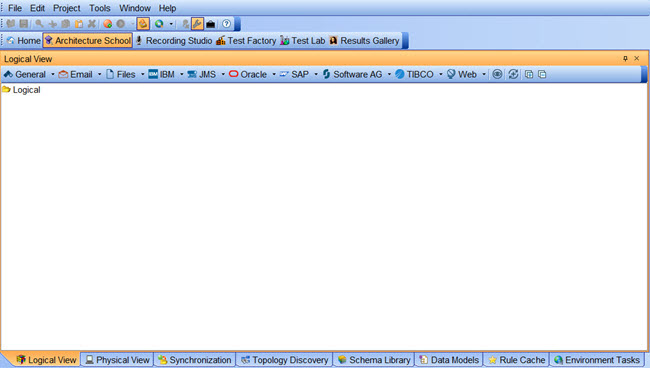
The canvas on which you model the system is displayed.
-
Paste the URL onto the canvas either by clicking or by clicking the Paste icon in the toolbar.
The Create a new Synchronization Source window is displayed.
- Click Next.
Results
You have successfully created the Swagger definition in Test Integrations and APIs. The service components and operations are created in the background.
What to do next
Creating a test from the Swagger definition of the API
After you import a Swagger definition of an API into Test Integrations and APIs you can create a test and configure the operation and schema for the messages for the test, from the options available in the Swagger definition.
Before you begin
You must have imported the Swagger definition by following the steps in Importing the Swagger definition of phonebook sample API from Test Virtualization Control Panel.
Procedure
-
In the Generate Assets for Operations page of the
Create a new Synchronization Source window, select the
queryPhonebookTest check box under the Create
Tests column as shown in the following image.
This action creates a test for the
GET examples/phonebook/api/request based on the Swagger definition.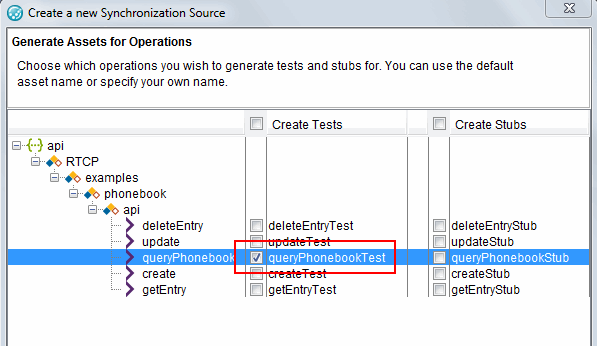
-
Click Next.
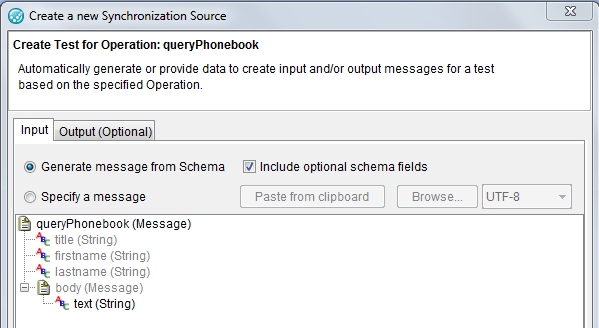
The Create Test for Operation: queryPhonebook window displays the schema fields for the test to be created, including those that are optional as shown in the following image. The optional fields are displayed in grey, which means that the values can be supplied to the service operation but are not mandatory.
-
Clear the Include optional schema fields check box.
The test to be created will then request for all of the entries of the Phonebook.
-
Click Next.
The Summary page shows the number of items created. There are 13 items which include service components, operations, and the JSON Swagger schema that represents the service described in the Swagger file. You can view the logical structure of the Phonebook sample API and the schema of the Swagger definition in the Test Factory perspective and the Schema Library, respectively.
-
Click Finish.
The test opens in the Test Factory perspective, which is used to create and edit tests and stubs. In this perspective, you can view the logical structure of the Phonebook sample API in the left pane.
To view the schema of the Swagger definition, open the Schema Library in the Architecture School perspective, and click JSON Schema in the left pane.
To view the message to be sent and the reply expected, double-click the Send Request and Receive Reply actions in the test. These actions only contain the message structure defined in the Swagger file, but do not have any data yet.
Results
You have configured a test based on the Swagger definition.
What to do next
You must run the test. See Running the test.
Running the test
You can run the test that you created based on the imported Swagger definition and verify the test result.
Before you begin
You must have created the test following the steps in Creating a test from the Swagger definition of the API.
If any action editor (of the Send Request or Receive Reply action) is open, you must close it.
Procedure
- Open the test in the test editor in the Test Factory perspective.
-
In the toolbar, click the Run icon or press
F5.
This action runs the test in the Test Lab perspective.
Results
When your run the test, the test attempts to verify the response it receives from the API against the structure and data values that are contained in the test. Because you created the test by importing a Swagger definition, and Swagger definitions only contain message structure and not the actual data, the test has nothing to verify the response. Hence, the test fails.
What to do next
You can modify the test based on the response received. See Modifying the test by basing it on the response data.
Modifying the test by basing it on the response data
You must take data values from the response that the test received when you ran the test. You must modify the test to use those values and verify the response received.
Before you begin
You must have run the test by following the steps in Running the test.
Procedure
-
Click any line in the test console that includes the phrase: Assertion
Failed.
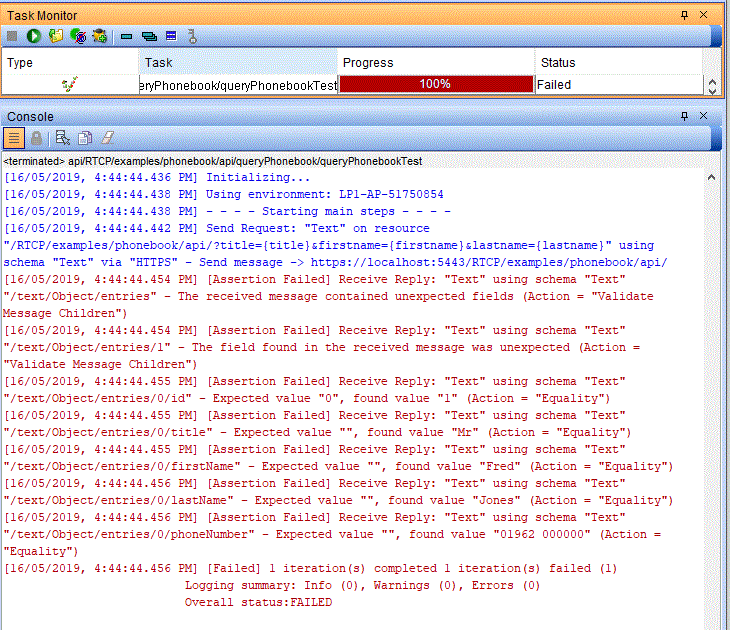
This action opens a window in which you can compare the expected message (on the left) with the actual message that was received (on the right).
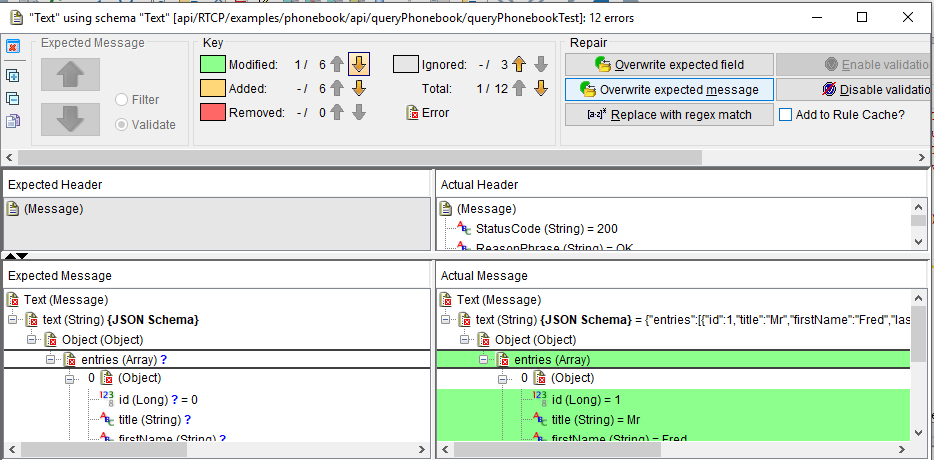
The test contains the structure of the message which was loaded from the Swagger definition, but does not contain any data against which the HTTP response can be verified. The panel at the bottom shows a list of the assertion failures.
-
Click Overwrite expected message.
This action replaces the expected message with the actual message received. Overwriting the expected message is just one of the several options to modify tests from an actual received message.
More options, including those to make the verification more flexible and tolerant of variation, are described in Viewing message differences to repair validation errors.
-
To save the changes and run the test again, click Close and
Re-run.
Results
The test finishes successfully.
What to do next
Viewing messages and actions
After running tests successfully, you can view requests and responses messages and their associated actions of send and receive, respectively. You can use the action editor to view the messages at a later time without running the tests again.
Before you begin
You must have run the tests successfully by following the steps in Modifying the test by basing it on the response data.
About this task
You can view the messages received by the test and also view the messages that the test sends to the API being tested.
Procedure
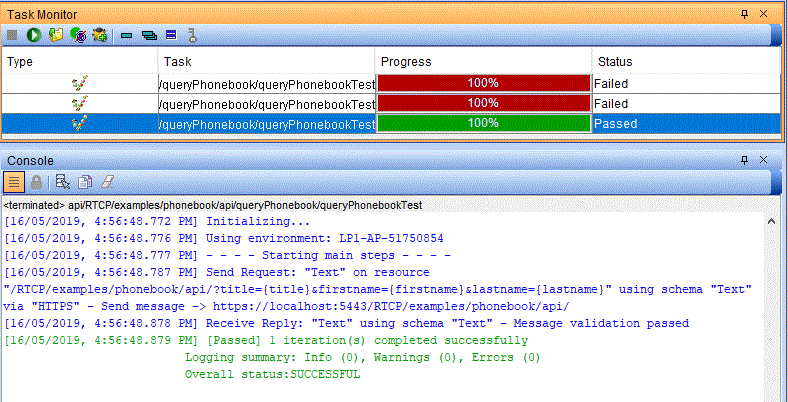
- To view the message that was received by the test when it ran, click the line that contains the Receive Reply: phrase.
-
To view the message that the test sent to the API being tested, click the
Send Request: phrase.
-
Right-click the line that contains the Receive Reply:
phrase and click Open Action.
This action opens the Test Factory perspective, and the test and action editors. You can then view the data that was saved in the Receive Reply: action. This data was used to validate the response received from the API when the test was run.
You can similarly view the data for the Send Request: action. You can see the data that was used in the request sent by the test to the API.
- Close the test and action editors.
Results
You have viewed the data that was exchanged in the test with the API under test. You can return to this action editor through the test editor in the Test Factory perspective at a later time without having run the test first.
What to do next
- Open the Test Factory perspective.
- In the tree on the left, right-click the queryPhonebook
operation, and click .
This action creates a new test for the operation and automatically creates request and response actions by using the information of the Message Exchange Pattern of the operation which was imported from the Swagger definition.
You must create stubs (virtual services) that can substitute the dependencies of your system under test. See Creating and running a stub.
To run tests as part of continuous integration or continuous delivery pipeline, see Running tests by using an Ant task.
To make the test more flexible in the number of entries it can receive and what data those entries can contain, you can use repeating elements and data sources. For details, see Repeating elements in messages.