Creating physical resources for Camel components
You must create physical resources for the logical connection that involves configuring the physical resources for the technology endpoints supported by the Camel component.
Before you begin
- Created a logical connection for the Camel component. See Creating logical Apache Camel component connections.
- Created trust stores and identity stores, if you want to use the SSL communications between HCL DevOps Test Integrations and APIs (Test Integrations and APIs) and the server where the technology endpoints of the Camel component are installed. See Identity stores and SSL.
- Started the services that you want to test.
For example, you must have started the FTP server instance on the computer where you have installed the FTP server for the Camel-FTP component.
About this task
You can configure the settings of the physical resource for a Camel Connection from the Physical View or from Step 3 if the New Camel Component configuration dialog is displayed to you in the Logical View.
Procedure
- Open the Physical View of the Architecture School perspective.
-
Click from the toolbar of the Physical View.
The New Camel Component configuration dialog is displayed.
-
Enter a name for the Camel
component in the Name field.
Note: Assigning a name can help you to identify the component if there are multiple Camel components in your project.
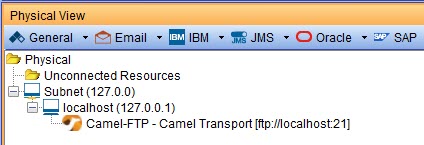
For example, you can name the physical resource for the FTP Camel component as Camel-FTP.
-
Click Settings and configure the basic settings for the
technology endpoints of the Camel
component based on the description in the following table:
Table 1. Camel Component: Settings tab Option Description Producer Base URI An Apache Camel URI to connect to the Producer configured in the Camel component.Note: You can refer to the Camel Component documentation for the URI syntax that you can provide in the URI for the Camel component.For example, the URI for the FTP component can be in the following format:ftp://[username@]hostname[:port]/directoryname[?options]The URI with the details can be:file://localhost:21
Host
The hostname or IP address of the computer that hosts the Producer configured in the Camel component.
For example, if the FTP server is installed as a local instance in the computer where Test Integrations and APIs is installed, you can enter:localhost
Port
The port on which the Producer configured in the Camel component is sending requests.
Specify the port that you have configured for the SSL communications, if you are using an SSL connection to the Producer.
For example, the port for the Producer can be 21 for the FTP server.
Consumer
Base URI An Apache Camel URI to connect to the Consumer configured in the Camel component.
For example, the URI for the FTP component can be in the following format:ftp://[username@]hostname[:port]/directoryname[?options]The URI with the details can be:file://localhost:21
Host
The hostname or IP address of the computer that hosts the Consumer configured in the Camel component.
For example, if the FTP server is installed as a local instance in the computer where Test Integrations and APIs is installed, you can enter:localhost
Port
The port on which the Consumer configured in the Camel component is receiving requests.
Specify the port that you have configured for the SSL communications, if you are using an SSL connection to the Consumer.
For example, the port for the Consumer can be 21 for the FTP server.
-
Click SSL and configure the secure socket layer (SSL) settings
for the Camel component, based on
the description in the following table:
Table 2. Camel Broker window: SSL tab Setting Description Use SSL
Select this check box to enable security for the communications. When you select this check box, the other controls on the SSL tab are made available for selection.
Server certificates to trust
Select one of the following menu items:After you define the identity stores, the available identity stores are displayed on the list.Option Description Trust All Accepts any certificates presented by the server, regardless of its validity. This option is the default option and assumes that you are focused on testing an application rather than the security of the server. New Defines a new identity store. Client identities to give to the server
Select one of the following menu items:After you define the identity stores, the available identity stores are displayed on the list.Option Description None If the server does not request an identity. New To define a new identity store. - Click Test Transport to verify that the connection works.
- Add properties to the message headers from the Headers tab, if the component you are testing facilitates such addition.
- Click OK.
Results
The physical resource of the technology endpoints of the Camel component is added to your project.

What to do next
You must add a service component in the Logical View. See Creating a service component.