Running suites on multiple browsers and devices
You can now configure a test suite to run across multiple web browsers and supported devices in one consolidated run. Instead of managing separate test runs for each browser and device, you can define all of your target browsers and devices within the configuration of the test suite. This simplifies cross-browser validation, saves time, and provides comprehensive report.
Before you begin
- Ensured that you are assigned a Team Space Owner, Project Owner, or Member with a Tester role to create or edit a test resource.
- Ensured that a suite is available in your project.
- Added tests or other suites to the suite.
About this task
- Chrome
- Firefox
- Edge
- Safari
| Device profile | Default browser |
|---|---|
| Phone (Small) | Edge |
| Phone (Medium) | Chrome |
| Phone (Large) | Edge |
| Phone (X-Large) | Chrome |
| Tablet (Small) | Edge |
| Tablet (Medium) | Chrome |
| Tablet (Large) | Edge |
| Tablet (X-Large) | Chrome |
Procedure
-
Log in to Test Hub.
The Projects page of the initial team space is displayed.
-
Click to open the project that contains the test assets.
The Overview page of the project is displayed.
-
Click .
The Test Editor page and the test navigator panel are displayed.
-
Double-click the .dts.yaml file in the list of Suites to
open the suite.
The tests or suites are displayed on the Suite Editor page.
-
Click the
 button, displayed on the Suite
Editor page.
button, displayed on the Suite
Editor page.
The Edit button appears only when no active edit branch is selected.
Alternatively, right-click the suite in the test navigator panel and select Edit.
The Edit branch dialog is displayed if there is no edit branch active. Otherwise, go to step 7 . -
Select your action to either select an existing Edit branch or create
an Edit branch:
- Perform the following steps to select an existing Edit
branch:
- Select Use an existing edit branch.
- Select an Edit branch from the Select
branch list if Edit branches already
exist for your repository.Note:A warning message is displayed if the Edit branch, which you selected, is behind the source branch. To update the selected edit branch and maintain synchronization with the source branch, you can select the Update branch option when switching checkbox.
- Click Ok.
- Perform the following steps to create the Edit branch:
- Select Create new edit branch.
- Enter a name for the Edit branch in the Branch Name field.
- Click Save.
- Perform the following steps to select an existing Edit
branch:
-
Click the Configure settings and data step.
The Settings pane is displayed.
- Select the required browser and device profiles from the Profile drop-down list.
-
Click
 to close the step details pane.
-
Click
 to save the changes.
-
Click the Try Now icon
 , and then select the Run all option.
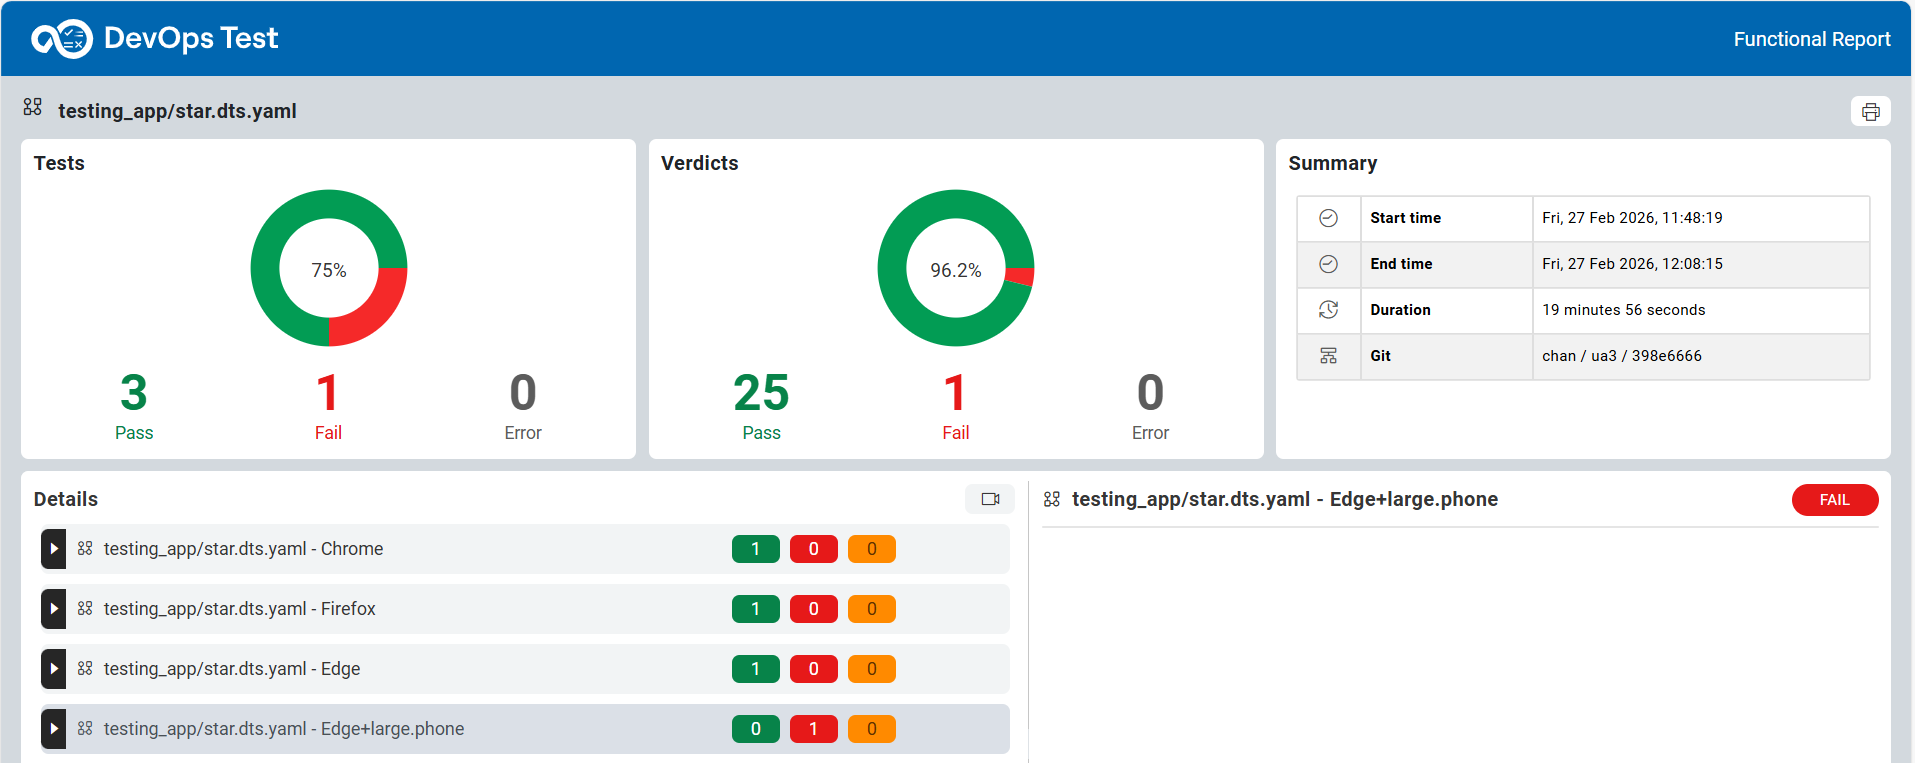
The Results tab displays the progress of the test run. After the test run is complete, the tab displays the verdict and links to view the functional report, test log, and results page.
, and then select the Run all option.
The Results tab displays the progress of the test run. After the test run is complete, the tab displays the verdict and links to view the functional report, test log, and results page.Alternatively, you can select the Run with option to choose specific browsers. You can select one or multiple browsers. The suite runs only on the selected browser for that run.
-
Click the Functional Report
 icon to open the report in a separate window.
The functional report displays the results of the test run for each configured browser.