Configuring and running log queries
When a test run is complete and a test log created, you can configure and run queries to view test log data in HCL DevOps Test Hub (Test Hub) for one test log result or for all the test log results in a project.
Before you begin
You must have completed the following tasks:
- Configured and run a test. See Test log queries.
- Opened the Queries page from the Results page or the navigation panel.
About this task
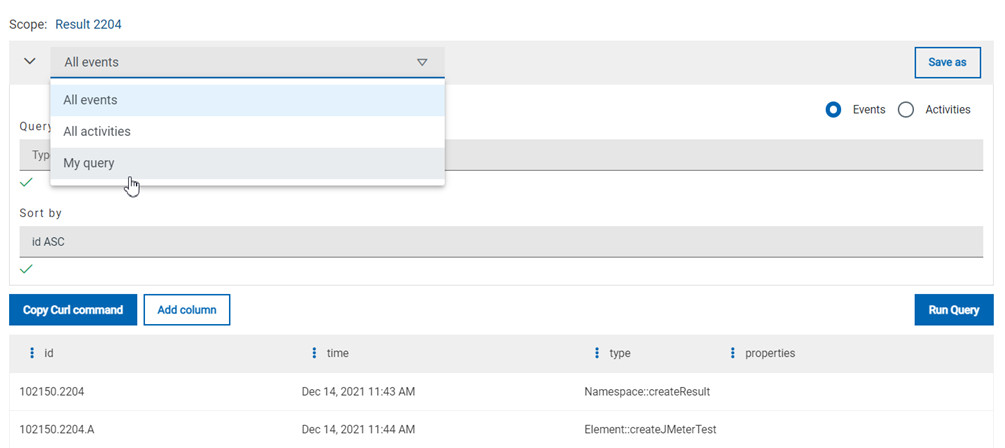
In the Queries page, you can configure a query and save it. You can customize the way the log data is displayed in the results table.
Procedure
- Click Events or Activites.
-
Enter properties and operators in the Query filters to
filter the list of events or activities.
Note: You can use the Ctrl-Space keyboard shortcut in this field to get the list of properties and operators that you can enter as filters to create your query.Example: Select Activities and enter 'type is JUnitTest' in Query filters.
- Click Run Query.
-
Perform the following steps to save a query:
- Click Save as.
- Enter a name to identify the new query and click Save.
Example: Enter 'My query'.The new query is displayed in the events and activities list. -
Perform any of the following actions to configure the results table:
- Enter a property followed by the ASC operator
or DESC in Sort by to
sort the data in the table.Note: ASC is used to sort the data from the lowest value to the highest value and DESC to filter the data in a descending order. You can use the Ctrl-Space keyboard shortcut to assist you. If you enter a combination of sort criteria, separate them with commas.Example: Click the Sort by field, press Ctrl-Space and select in the list 'time' and enter 'ASC'.
- Click the action menu
 in a column of the table to change the column display, and
then perform any of the following actions:
in a column of the table to change the column display, and
then perform any of the following actions:- Click Insert new column, enter a field name in Search new column and click Add.
- Click Move to move a column before or after another one in the table.
- Click Remove to remove a column from the table.
- Follow these steps to add a column to the end of the table:
- Click Add column. Result: A window opens.
- Enter a field name in Search new column.
- Click Add.
- Click Add column.
- Enter a property followed by the ASC operator
or DESC in Sort by to
sort the data in the table.
- Click Save to save the configuration of the results table.
-
Follow these procedures to manage your query after it is created:
- Click the action menu that is next to the Save button and
select Reset if you have just modified a
query and you want to undo your modification.
- Click the action menu and select Delete to
delete the new query from the Events and
activities list.
- Click Copy Curl command if you want to export
a query. Note: The curl command is copied to the clipboard. You can paste it in a command interface to use the query in an external tool.
- Click the action menu