
Verifying your customization
 In this step of the tutorial,
you verify your customization by running the Data Load utility in
WebSphere Commerce Developer.
In this step of the tutorial,
you verify your customization by running the Data Load utility in
WebSphere Commerce Developer.Procedure
- Open WebSphere Commerce Developer.
 Ensure that your WebSphere Commerce
Server is stopped before you run the Data Load utility.For more information about stopping your server, see Starting and stopping WebSphere Commerce Test Server.
Ensure that your WebSphere Commerce
Server is stopped before you run the Data Load utility.For more information about stopping your server, see Starting and stopping WebSphere Commerce Test Server.-
Click Run > Run Configurations.
The Run Configurations dialog displays.
-
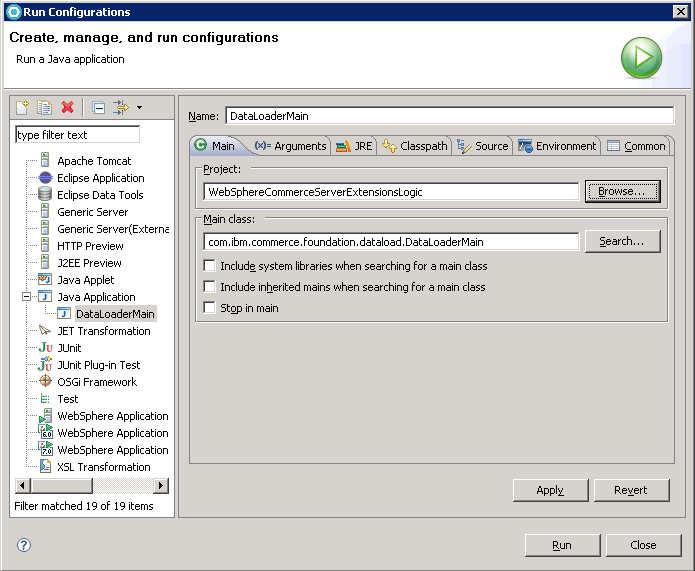
Create a Java Application configuration.
Double-click the Java Application on the left panel. On the Main tab, enter the following information:
- In the Name field, type a name for your configuration.
- In the Project field, enter the project WebSphereCommerceServerExtensionsLogic.
-
In the Main class field, enter the class name
com.ibm.commerce.foundation.dataload.DataLoaderMain.
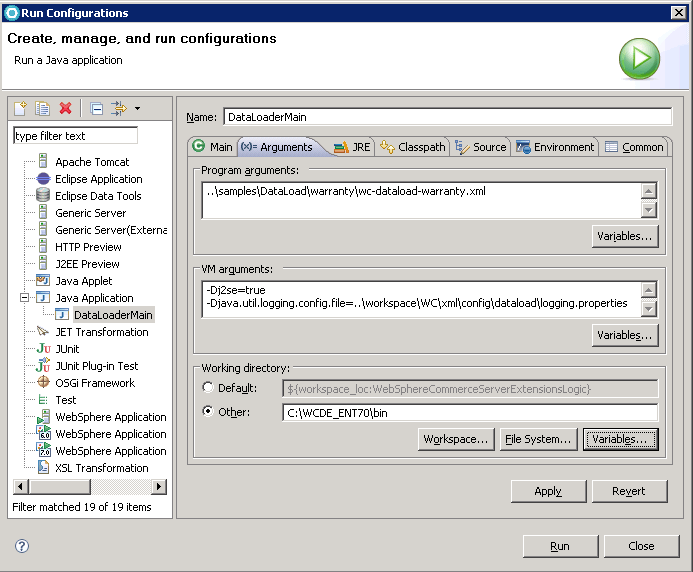
- Click the Arguments tab; then enter
the following information:
- In the Program arguments field, enter ..\samples\DataLoad\Member\Password\wc-dataload.xml.
- In the VM arguments field, set
the following parameters
- -Dj2se
- Sets the Java platform type to J2SE. Set the value for the parameter to true.
- -Djava.util.logging.config.file
- Sets the JVM parameter. Set the value of the parameter to ..\workspace\WC\xml\config\dataload\logging.properties.
- In the Working directory field,
enter the WCDE_installdir/bin directory.
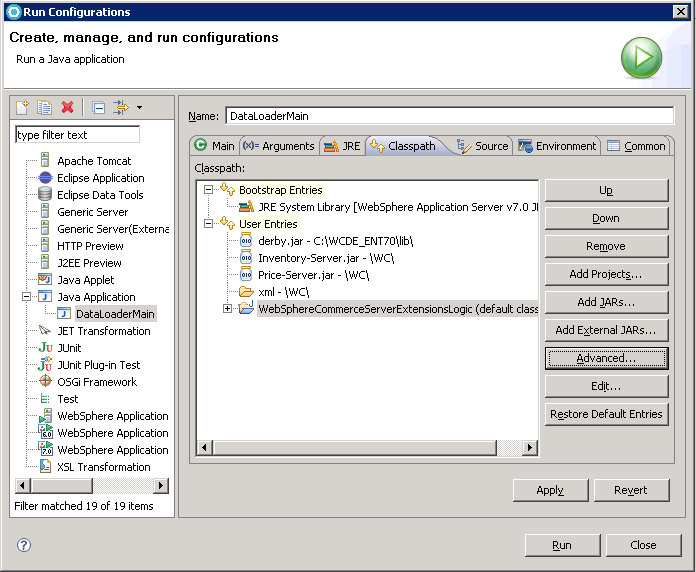
- Click the Classpath tab; then click User
Entries and add the following class path information:
- Click Add External JARs, then browse
to the location of the JDBC driver JAR file for the specific database you are using. Click
Open.
 WCDE_installdir\lib\derby.jar
 db2_installdir\java\db2jcc4.jar
 oracle_installdir\jdbc\lib\ojdbc6.jar
 - Click Advanced > Add Folder, then click OK. Navigate to WC > xml, then click OK.
- Click Add External JARs, then browse
to the location of the JDBC driver JAR file for the specific database you are using. Click
Open.
- Click Run.
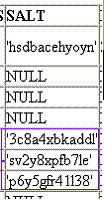
- Verify your results by running the following SQL statement:
The USERREG database table displays the content that you specified in your CSV file.Select * from userreg
- Open your store in an internet browser.
- Click Sign In and log on to the
store with the following user credentials:
User name Password jacobsmith shopper1 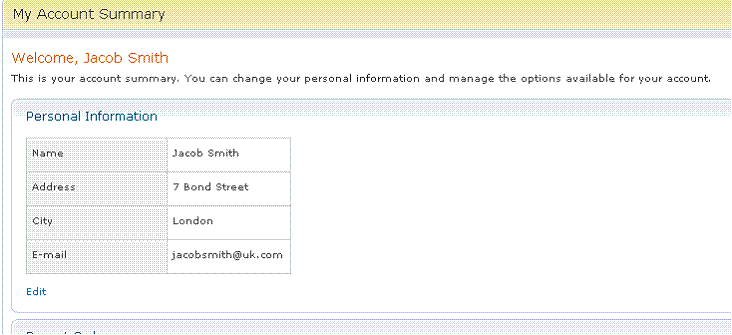
This user information is defined in the MemberDataload_Password.csv file and loaded into the WebSphere Commerce database.