Configuring Tenants
To configure a tenant,
- On the Tenants page, click
 next to the tenant you want to
configure.
next to the tenant you want to
configure.
.png)
- An additional configuration screen appears with a list of
default services configured for a tenant. The services marked with a
check
 under the Services
box indicate their successful provisioning.
under the Services
box indicate their successful provisioning.
Figure 2. Figure 32 - Configured Services for a tenant 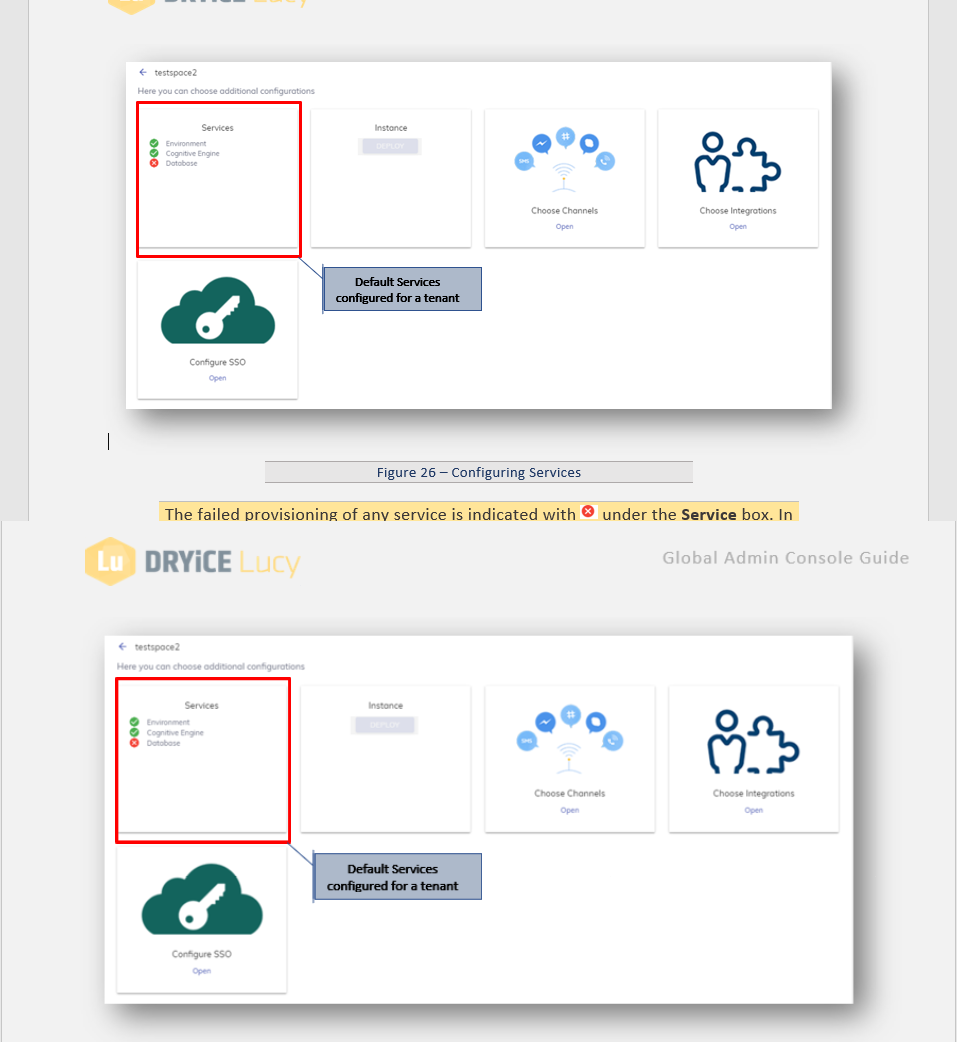
The failed provisioning of any service is indicated with
 under the Service box.
In such a situation, the user must either perform the above
steps carefully or raise a support ticket to troubleshoot the issue. You
cannot deploy the failed services.
under the Service box.
In such a situation, the user must either perform the above
steps carefully or raise a support ticket to troubleshoot the issue. You
cannot deploy the failed services.Figure 3. Figure 33 - Configuring Instance 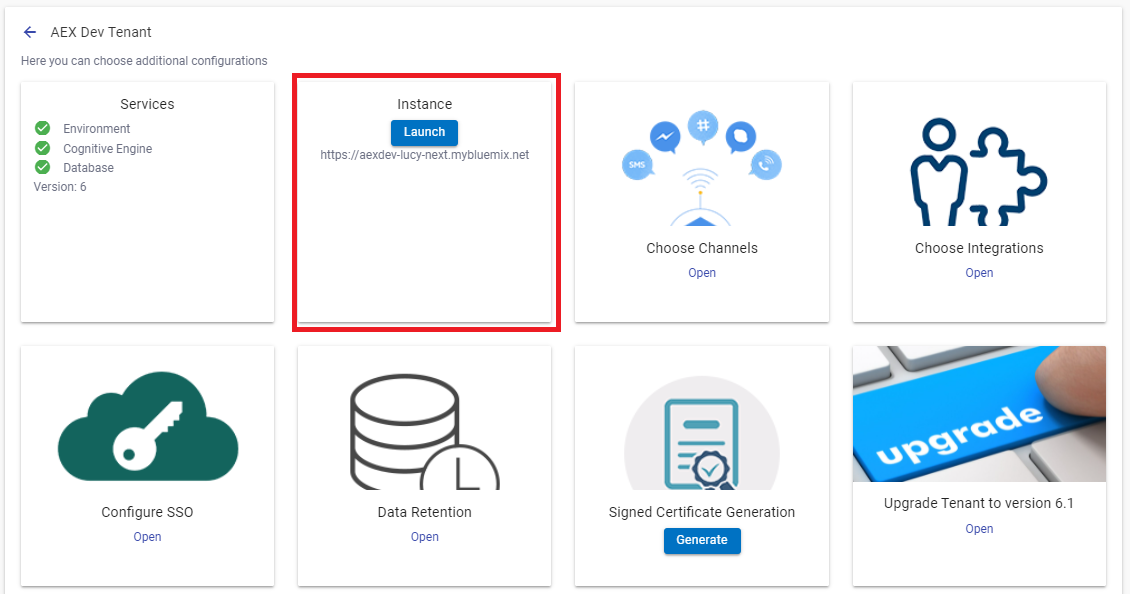
- Once all the services indicate
 ,
,
 button will be enabled in the
Instance box as shown in Figure 33 - Configuring Instance.
button will be enabled in the
Instance box as shown in Figure 33 - Configuring Instance.
- Click
.png) button to start the
deployment of the instance. The
deployment is done automatically, and it takes a few minutes to
configure.
button to start the
deployment of the instance. The
deployment is done automatically, and it takes a few minutes to
configure. - After the successful deployment, the
.png) button changes to
button changes to  button. A BigFix AEX chat instance
URL is
generated below the
button. A BigFix AEX chat instance
URL is
generated below the .png) button as
shown in Figure 33 - Configuring
Instance
.
button as
shown in Figure 33 - Configuring
Instance
.
Figure 4. Figure 34 – Redirected to BigFix AEX Chat Instance 
For additional configuration, refer to the BigFix AEX Configuration Guide and the subsequent steps.
- Click
- After successful deployment of the services and instance, it’s time to configure the channels.
- BigFix AEX is an omni-channel application that can work with several communication channels.
- For example, you might want to provide a Skype virtual assistant conversation facility for your application users. To provide the Skype facility, you must configure your chat instance to work with Skype so that your application users can interact with BigFix AEX by sending chat messages with their mobile devices.
- You can also use more than one communication channel in an application, such as Microsoft Teams, Telegram, slack, and so on, to enhance the customers’ experience.
How to configure the communication channels?
To enable multiple channels for an instance,
- Click Open in the Choose Channels box as shown in Figure 33 - Configuring Instance.
- It opens the list of channels available for the configuration based on billing template customization.
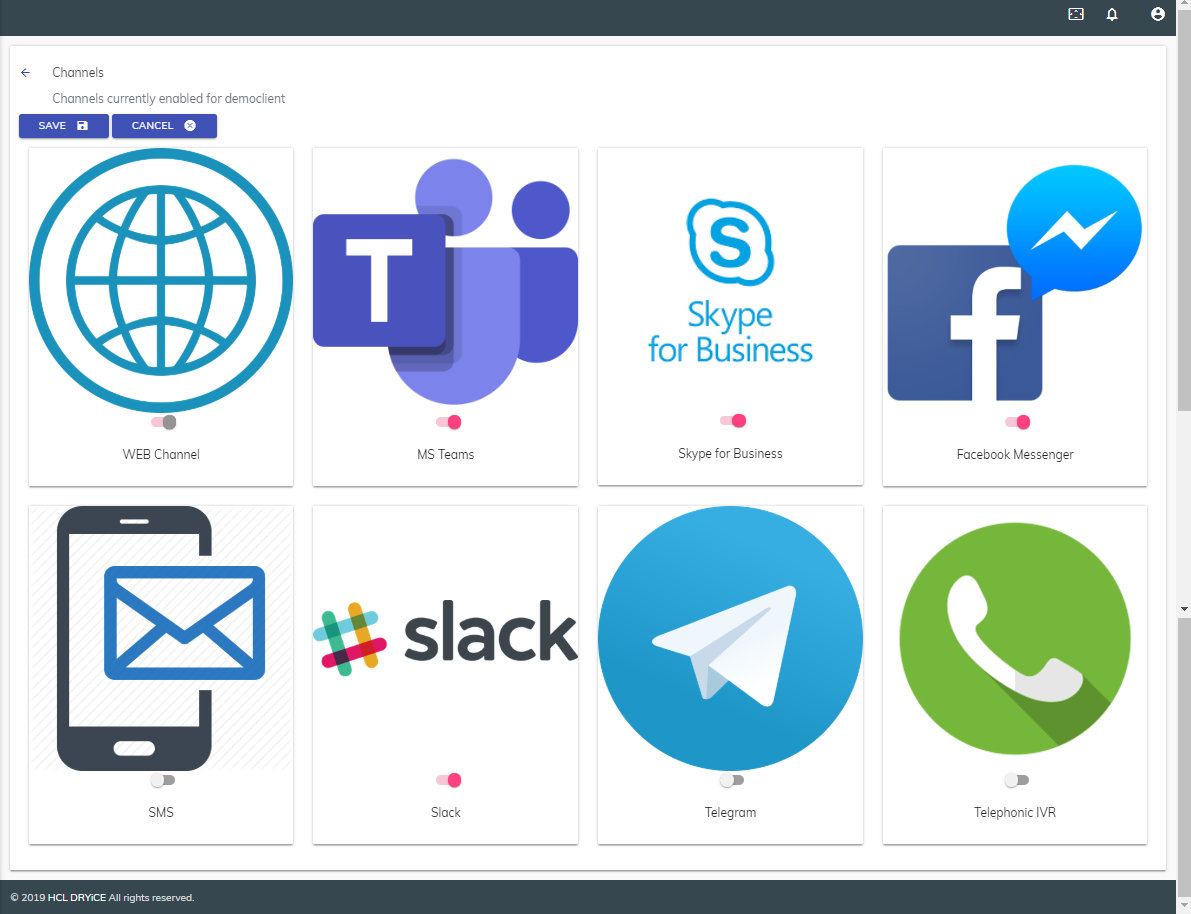
The web channel is the primary channel for all the tenants and is always enabled with respect to BigFix AEX. The remaining channels are optional add-ons.
- Use the toggle (
 ) button to enable
the channels that you need.
) button to enable
the channels that you need. - To initiate the channel configuration in the
instance, click on the logo of a selected channel. It activates the
 button with a support link.
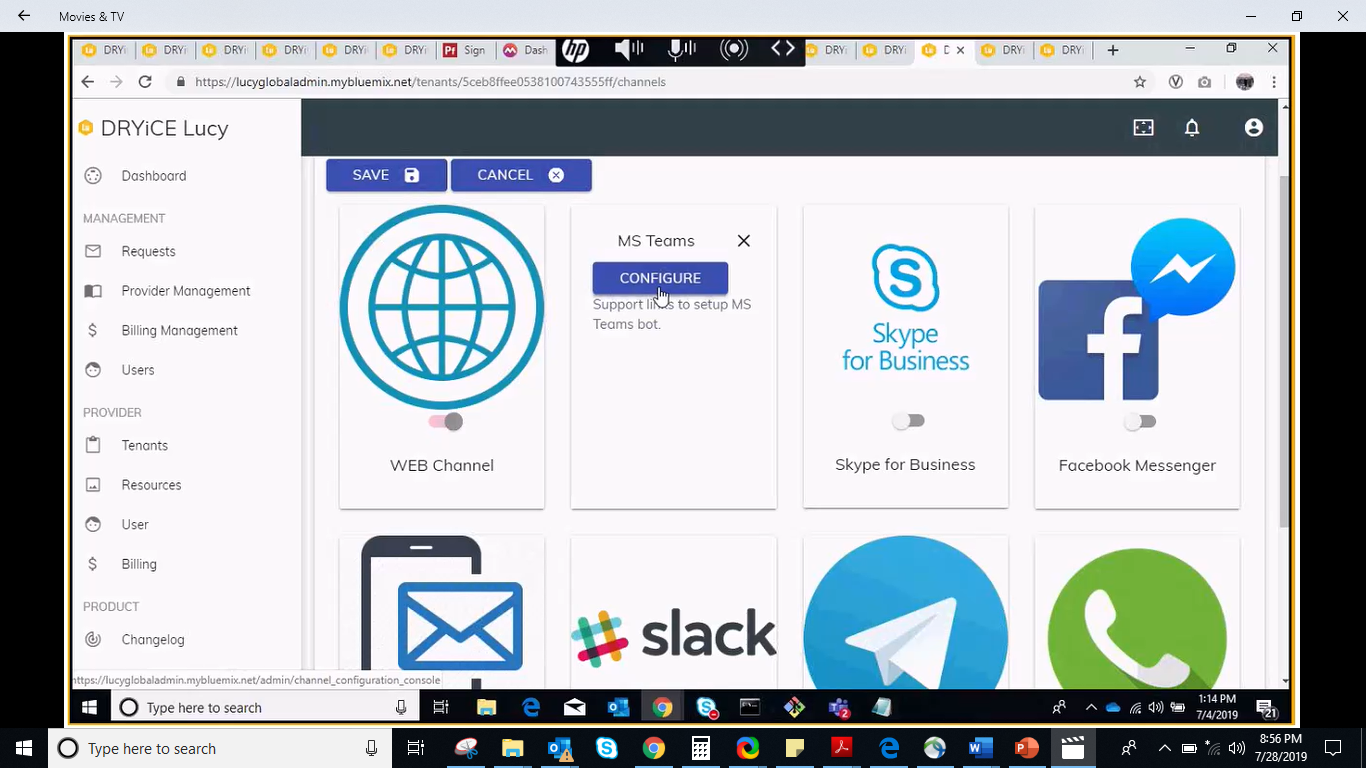
- Click
.png) button. It re-directs you to BigFix AEX Cognitive
Console respective tenant.
button. It re-directs you to BigFix AEX Cognitive
Console respective tenant.
For further steps of channel configuration, refer to the BigFix AEX Configuration Guide. A user with access to configure channels will be able to configure the channel through the Cognitive Console.
- Click SAVE to add the channel as part of the instance configuration or click CANCEL to discard changes.
Before you move to the subsequent step, get the API credentials from the integration instance to communicate with the tenant instance.
How to set up integrations for a Tenant?
The next step is to configure the integrations.
- Click Open in the Choose Integrations box as shown in Figure 33 - Configuring Instance.
- It lists all the readily available, out-of-the-box
connectors that can integrate with
BigFix AEX chat instance, such as ITSM, HR, or Service Desk
Queuing.
Figure 7. Figure 37 – Setup Integrations 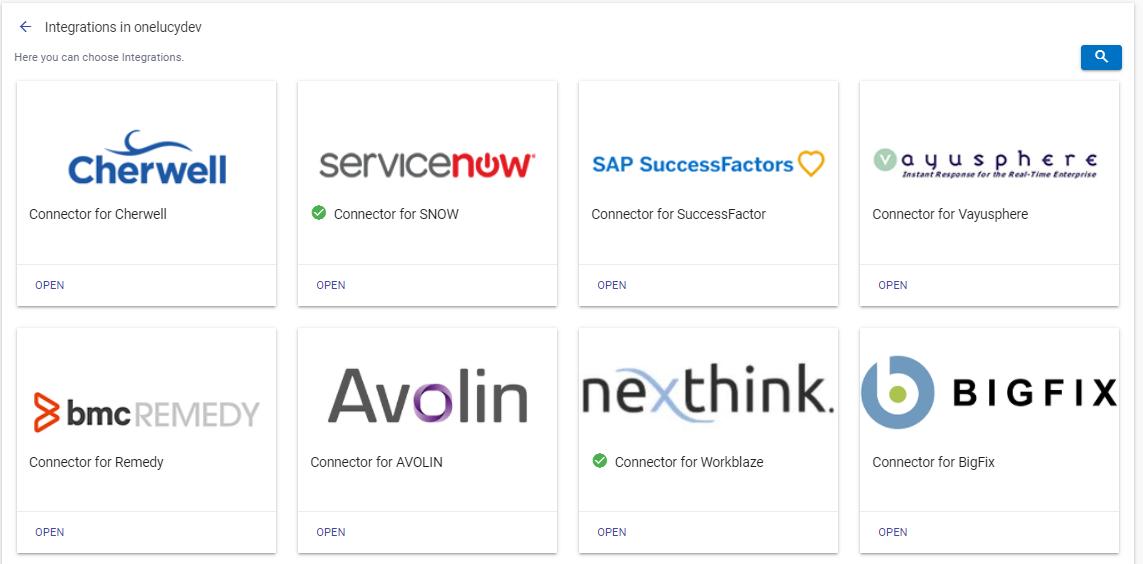
- To configure the integration connectors with the tenant instance, go to the integration that you want to configure and click Open.
- It opens a new page and asks you to enter the API
credentials provided by the instance integration to be used
as a connector for the integration.
Figure 8. Figure 38 - API credentials for integration instance 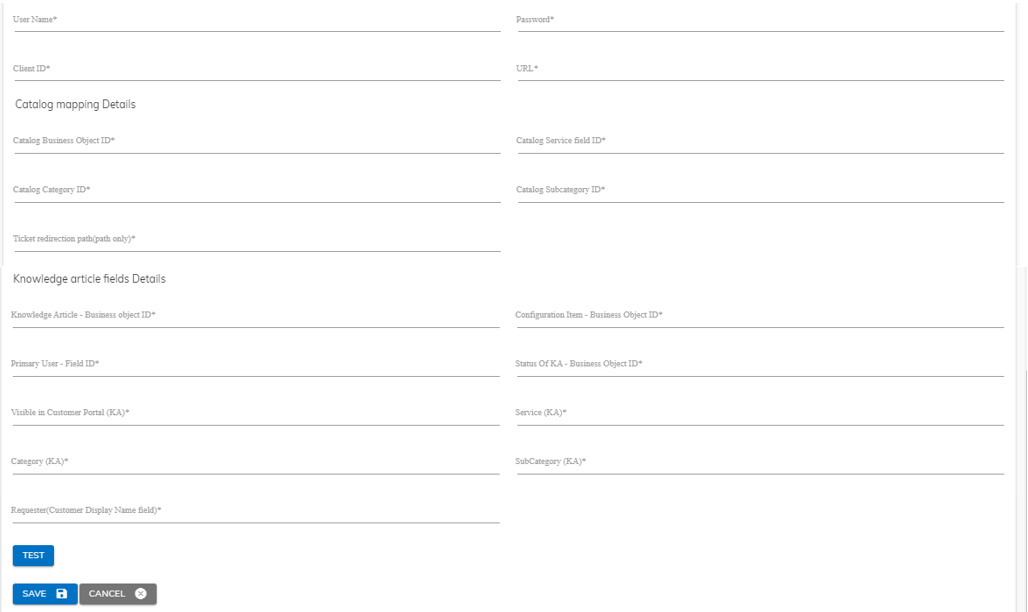
- Fill in the following details to communicate with the tenant instance.
UserName
Password
Client ID
URL
- To verify the details, click the
 button.
 - On successful validation, the
.png) button changes to
button changes to  button.
 - Click Save to update detail.
- It re-directs you to the Integrations screen.
.png)
- On successful integration,
 icon
appears on the integration box.
icon
appears on the integration box.
How to configure the Tenant specific SSO?
On successful creation of the tenant and their respective instance, the tenant can either use the HCL SSO or BigFix AEX’s User Management System mechanism to login into their instance. Initially, a tenant is not able to use their own SSO login credentials. In such a scenario, it is required to configure the customer specific SSO so that the other users of the organization can automatically login using their AD (Active Directory) instead of creating a new user.
To configure the tenant specific SSO,
- Click OPEN on the Configure SSO box as shown in Figure 33 - Configuring Instance.
- The Register SSO page is displayed.
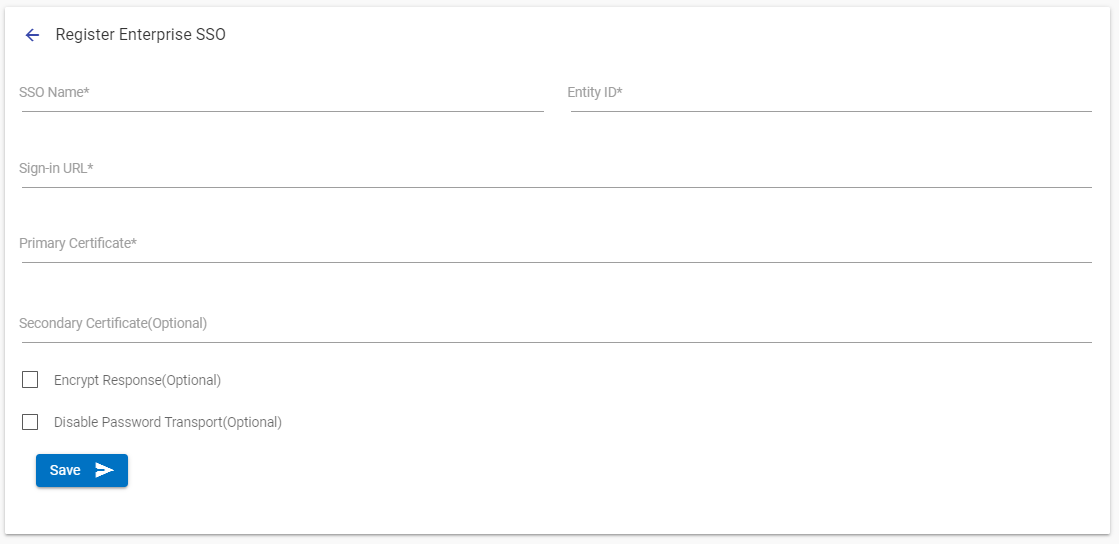
Before you start the SSO configuration, contact the provider and get the SAML metadata file to fetch the required details for configuration. The SSO will use RSA-SHA256 as the algorithm to process the certificates. The AD of the provider environment assigns a unique email ID to each user. The AD must have the name ID format as "urn:oasis:names:tc:SAML:1.1:nameid-format:emailAddress” schema string.
- In the Register SSO section, specify the following information:
| Field | Description |
| SSO Name | The name you assign to your SAML configuration. |
| Entity ID | The globally unique name for an SAML identity provider. |
| Sign-In URL | The URL that the user is redirected to for authentication. It is hosted by your SAML identity provider. |
| Primary Certificate | It is used for signing and validating SAML assertions and is issued by your SAML identity provider. All providers are different, but you might be able to download the signing certificate from your identity provider. The certificate must be in .pem format. |
| Secondary Certificate (Optional) |
The backup certificate that is issued by your SAML identity provider. It is used when the signature validation fails with the primary certificate. If the signing key remains the same, App ID does not block authentication for expired certificates. |
| Encrypt Response (Optional) | This option enables additional encryption on the SAML requests from the SP end. The certificate for this can be found on the downloaded metadata. |
| Disable Password Transport (Optional) | This feature disables the recognition authentication class on Password Transport. |
- To configure SSO with an instance, click Submit. A Download button will appear from where the Service Provider (SP) metadata can be downloaded for performing application registration on the AD side.
- When prompted to confirm that you want to create the new SSO configuration for the tenant and remove the default provider SSO configuration, click YES.