Implementing Discover in Flutter
To implement HCL Discover in Flutter, complete the following steps:
Procedure
-
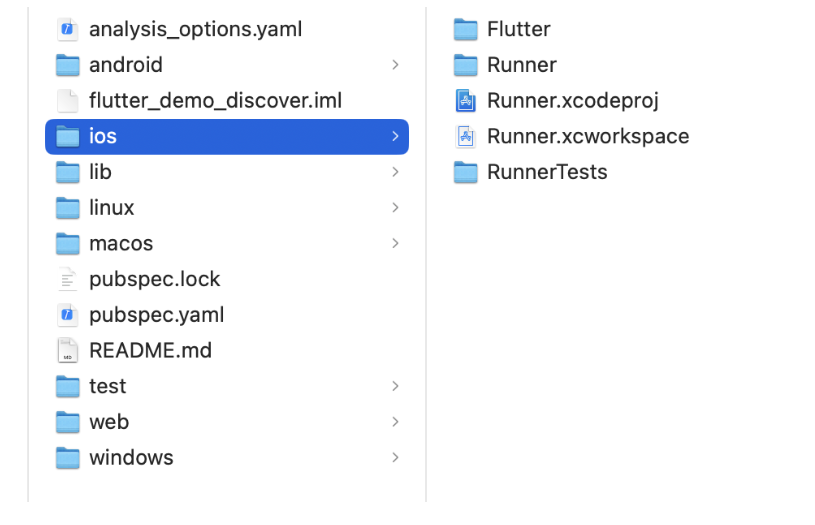
Use the command prompt to create a project in Flutter and save the project in
the required loaction.
The system creates two folder structures: one for Android and one for iOS.
-
Development Environment: To integrate SDK into your app, you need a
standard Flutter environment.
Supported versions are 3.2 or later versions.
- Mobile App Compatibility: The Discover SDK functions on end-user devices having Android 5.0 (API level 21) to Android 14 (API level 34) or iOS version 12.0 or later versions.
-
Flutter SDK supports the following features:
- Captures and logs Client State and Screen Views.
- UI Events and Screen Blur and Replay Gestures
-
The following DCFApplicationHelper iOS APIs are available for Dart
Language:
- (
void)enableDiscoverFramework; - (
void)disableDsicoverFramework; - (
void)requestManualServerPost; - (
BOOL)startNewDCFSession; - (
NSString*)currentSessionId; - (
BOOL)setConfigurableItem: (NSString*)configItem value: (id)value; - (
id)valueForConfiguralbeItem: (NSString*)configItem; - (
id)defaultValueForConfigurableItem: (NSString*)valueforName: (NSString*)name;
- (
-
Flutter supports both Android tool and iOS tool for running the
application.
-
Perform the following steps:
- Open the iOS folder structure in XCode.
- Run the initial project with Simulator to build an error-free project.
-
Perform the following steps:
-
Build the App in the Simulator.
-
Build the App in the Simulator.
-
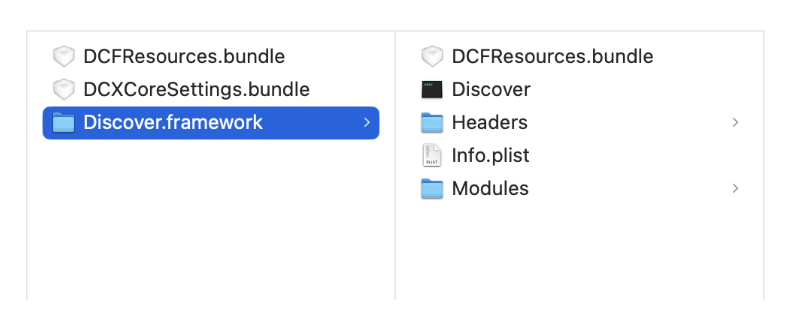
Perform the following steps:
-
Add the Discover enable code sippet as shown in the following
example:

-
Add the Discover enable code sippet as shown in the following
example:
-
The iOS project requires the following frameworks:
CFNetwork.frameworkCoreGraphics.frameworkCoreLocation.frameworkCoreTelephony.frameworkFoundation.frameworkSystemConfiguration.frameworkUIKit.frameworkWebKit.framework
-
Perform the following steps:
-
In the Run Editor, add the Debug Scheme.
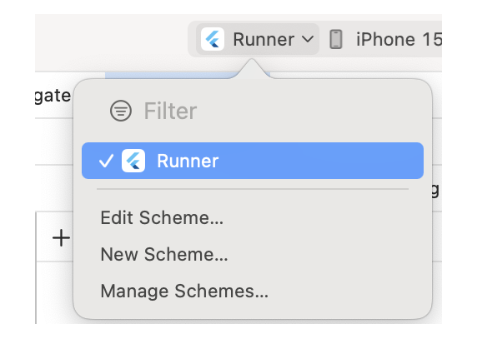
-
To generate logs and session ID, add the following debug logs with
value = 1.
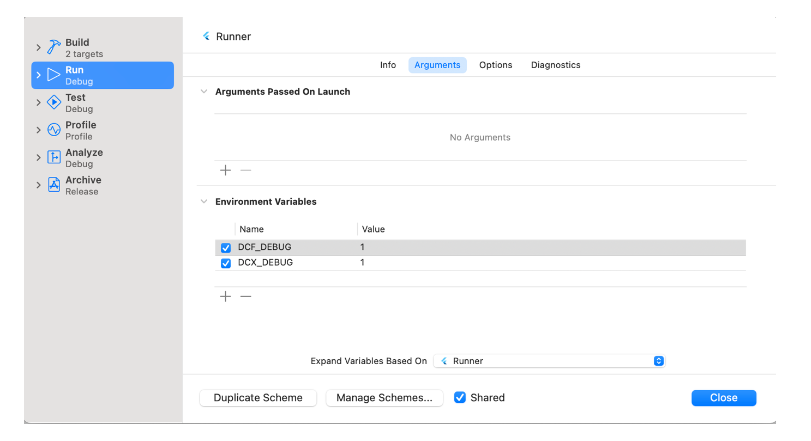
-
In the Run Editor, add the Debug Scheme.
-
Run the project.
The project generates Discover Enable Logs along with Session ID as shown in the following example:

-
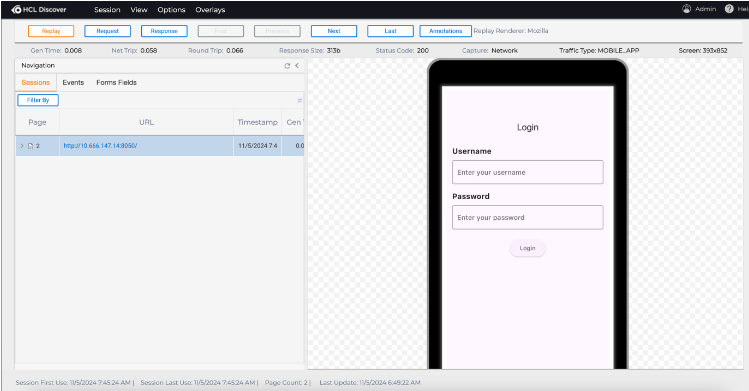
Within Discover Basic configuration, add the Post Message URL and generate the
Session ID.
-
Run the App.
The system successfully generates the Session ID.

-
Generate the basic payload with a Base64 image by clicking the UI Events within
the Sample App having the following JSON format:
JSONOut:{"sessions":[{"startTime":1731474115930,"id":"5DE9ECA3ACD007A592A2ACAE6E463F01","clientEnvironment":{"osType":"iOS","height":2556,"osVersion":"17.2","deviceHeight":852,"width":1179,"pixelDensity":3,"mobileEnvironment":{"orientationType":"PORTRAIT","advertisingId":"N/A","deviceId":"a933a48e2d067bc2fb227e629fa6d8b8","locale":"en-US","deviceModel":"iPhone","appName":"flutter_demo_discover","manufacturer":"Apple Inc.","language":"English (United States)","totalStorage":494384795648,"freeStorage":194001379328,"appVersion":"1","totalMemory":17179869184},"orientation":0,"deviceWidth":393},"messages":[{"layout":{"name":"UIPredictionViewController","class":"","controls":[{"zIndex":500,"subType":"UIView","tlType":"image","id":"4327773088","position":{"y":0,"x":0,"width":393,"height":852},"idType":-3,"image":{"height":852,"value":"A8D0E5142D659A20FD1898F5A59F9857","mimeExtension":"png","type":"image","base64Image":"/9j/4AAQSkZJRgABAQAA2ADYAAD/4QCARXhpZgAATU0AKgAAAAgABQESAAMAAAABAAEAAAEaAAUAAAABAAAASgEbAAUAAAABAAAAUgEoAAMAAAABAAIAAIdpAAQAAAABAAAAWgAAAAAAAADYAAAAAQAAANgAAAABAAKgAgAEAAAAAQAABJugAwAEAAAAAQAACfwAAAAA/+0AOFBob3Rvc2hvcCAzLjAAOEJJTQQEAAAAAAAAOEJJTQQlAAAAAAAQ1B2M2Y8AsgTpgAmY7PhCfv/AABEICfwEmwMBIgACEQEDEQH/xAAfAAABBQEBAQEBAQAAAAAAAAAAAQIDBAUGBwgJCgv/xAC1EAACAQMDAgQDBQUEBAAAAX0BAgMABBEFEiExQQYTUWEHInEUMoGRoQgjQrHBFVLR8CQzYnKCCQoWFxgZGiUmJygpKjQ1Njc4OTpDREVGR0hJSlNUVVZXWFlaY2RlZmdoaWpzdHV2d3h5eoOEhYaHiImKkpOUlZaXmJmaoqOkpaanqKmqsrO0tba3uLm6wsPExcbHyMnK0tPU1dbX2Nna4eLj5OXm5+jp6vHy8/T19vf4+fr/xAAfAQADAQEBAQEBAQEBAAAAAAAAAQIDBAUGBwgJCgv/xAC1EQACAQIEBAMEBwUEBAABAncAAQIDEQQFITEGEkFRB2FxEyIygQgUQpGhscEJIzNS8BVictEKFiQ04SXxFxgZGiYnKCkqNTY3ODk6Q0RFRkdISUpTVFVWV1hZWmNkZWZnaGlqc3R1dnd4eXqCg4SFhoeIiYqSk5SVlpeYmZqio6Slpqeoqaqys7S1tre4ubrCw8TFxsfIycrS09TV1tfY2dri4+Tl5ufo6ery8/T19vf4After Successful generation of the JSON payload and Base64image, it is logged into the Server. -
Check the replay with the given Post Message URL address.