Managing User Access
From Clara Control Panel > Access Manager you can map your Clara user with the access information for the following product environments:
- Workload Automation
- Workload Automation for Z
- Universal Orchestrator (UnO)
- Dynamic Workload Console (DWC)
- HERO
As you start chatting with Clara, you must add the access information for the product environments that you want to manage with Clara. Valid credentials or API key are needed to invoke the REST APIs of the target product environment, thus enabling Clara to run actions on your behalf. Also, to run actions on your behalf, Clara may need to access the Dynamic Workload Console and HERO.
If you ask Clara to run actions on your product environments but your access information have not been added yet, or are invalid, Clara alerts you and suggests to open the Access Manager page to add or modify login information.
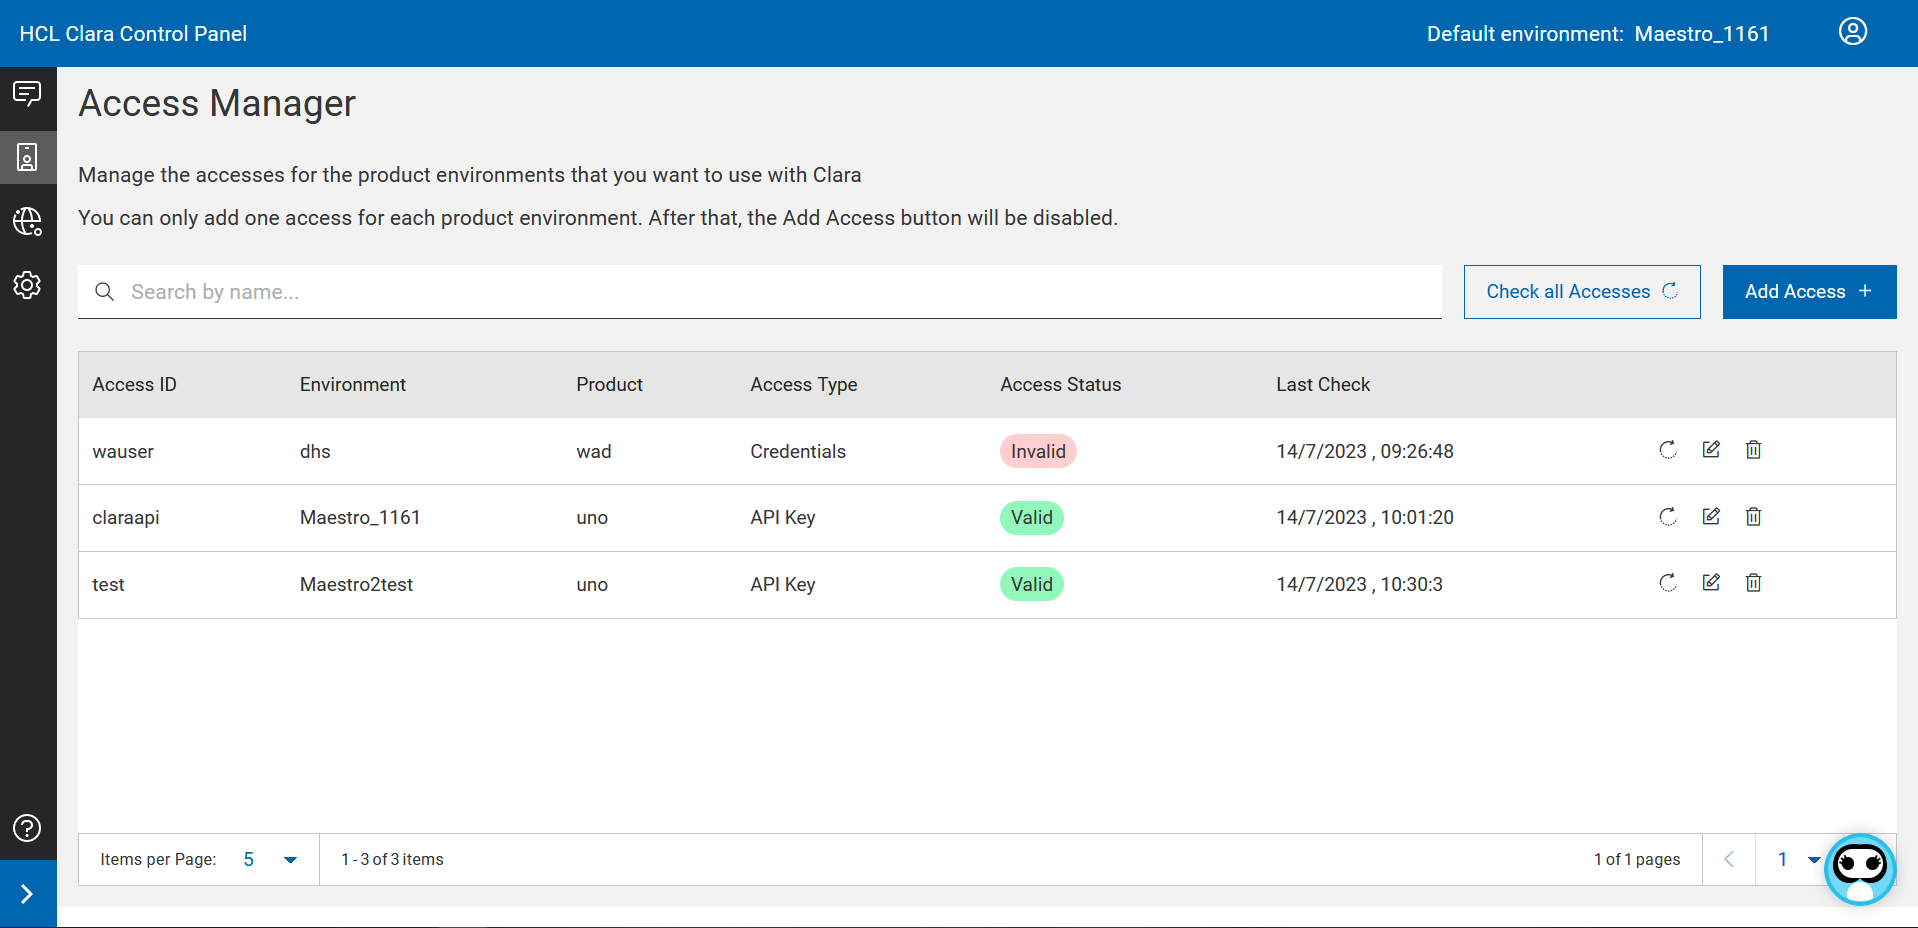
In the Access Manager main page, you can find the following information:
-
Access ID - An access identifier for your product environment.
-
Environment - The name of the product environment (for example, PROD1 or DWC1) as defined in Clara Control Panel > Environments. DWC environments that you may have defined in association with WAd environments are also listed in this column if you have added an access for them.
-
Product - The product that you want to manage with Clara. It can be: WAd | WAz | UnO | HERO.
-
Access Type - Can be Credentials or API Key.
-
Access Status - For each product environment, the status of your access. It can be one of the following:
-
Unknown - Clara has not tried to access your product environment yet, or she tried but was not able to connect.
-
Valid - Clara was able to access your product environment successfully.
-
Invalid - Clara was not able to access you product environment.
-
-
Last check - Date and time of your last successful access.
Actions you can run on each user access are:
-
Check Access - to check if your user credentials or API Key are valid.
-
Edit Access - to modify a user access.
-
Delete Access - to delete the user access.
If the status of some user accesses is Unknown, click the button Check all Accesses to validate all accesses and update their status.
To add a user, click the button Add Access. For details, see Adding an access.
Adding an access
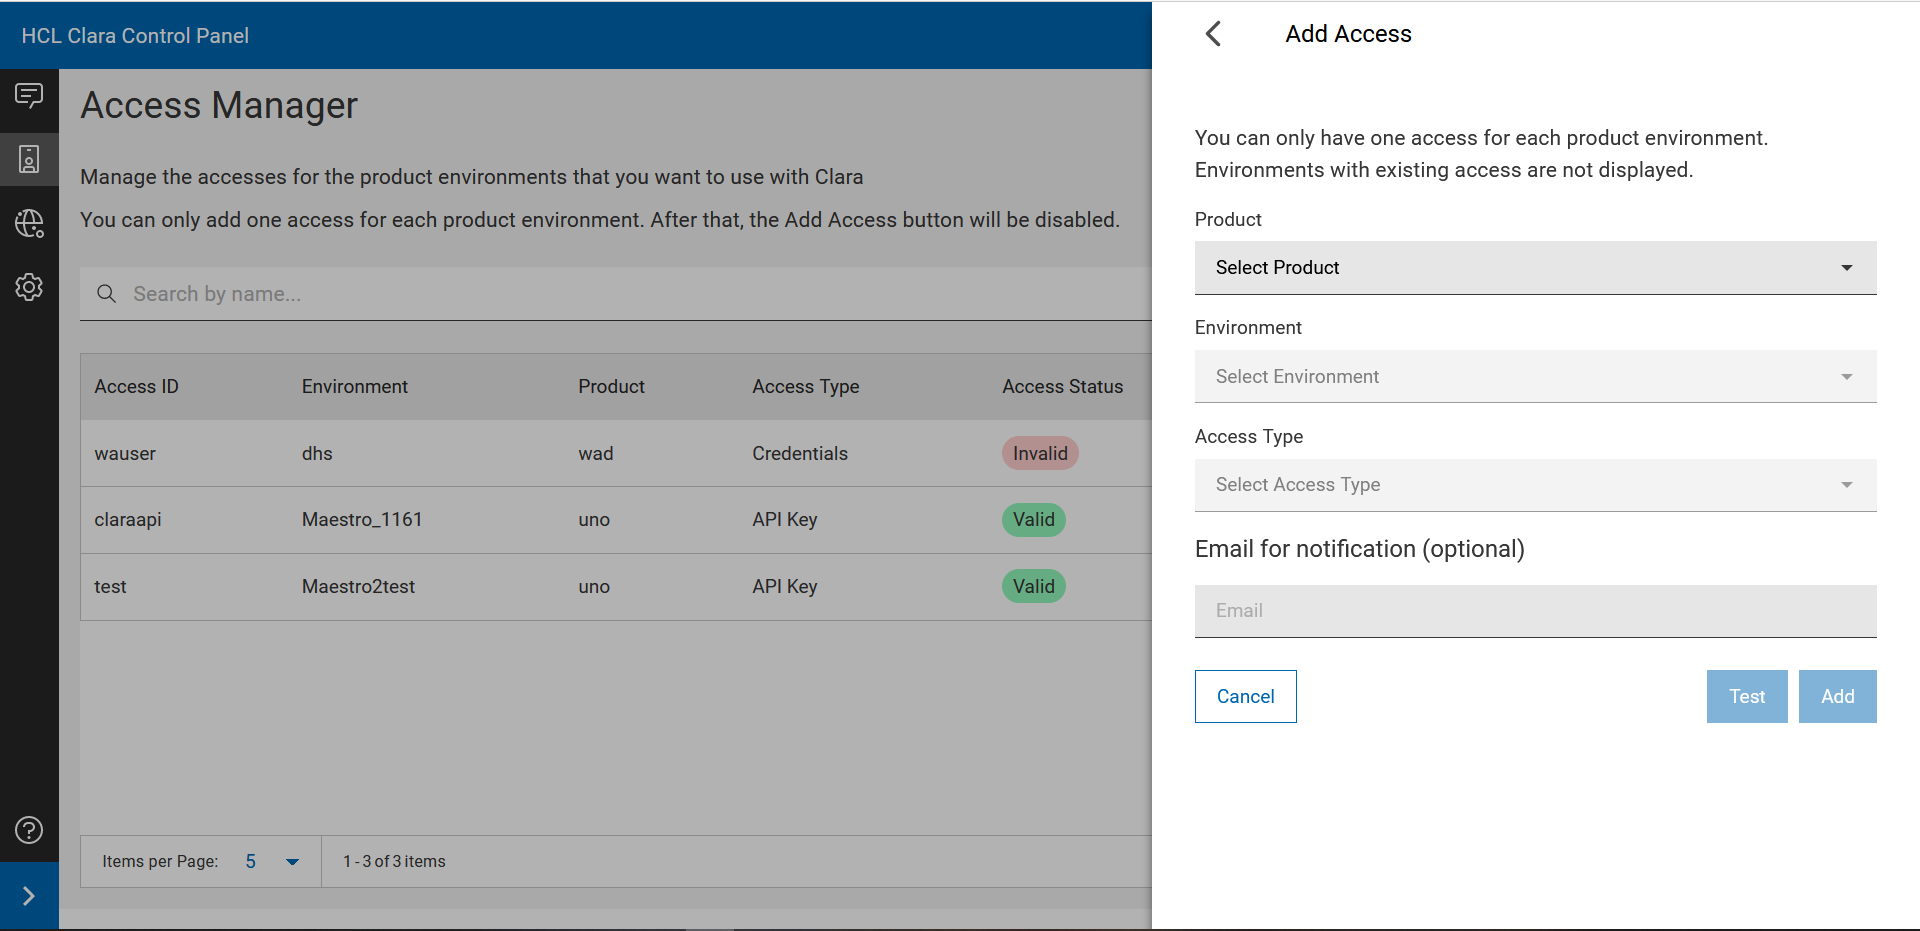
You can add an access for the product environments that you want to manage with Clara. You can only add one access for each product environment. After that, the Add Access button will be disabled.
To add an access, run the following steps:
-
From the Access Manager main page, click the button Add Access.
-
The Add Access side panel opens:
-
Select a value for Product and Environment. Environments with an access already added are not selectable. If in Clara Control Panel > Environments you have specified some DWC environments in association to WAd environments, you can select them in the Environment drop-down list and provide the relative access information.
-
Select the type of access to the environment:
- Credentials
- API Key (not available for HERO and DWC)
-
If you select Credentials, provide the Username and Password you use to authenticate to the specified environment.
-
If you select API key, provide the API Key and API Key Name that you use to authenticate to the specified environment.
-
Provide your e-mail address to receive notification e-mails from Clara.
-
Click Test to check the access information.
-
If the access information is valid, click Add.
-
If it is not possible to check the access because, for example, the connection with the target environment is down, you can save the new access with an unknown status and verify it later on.
-
You can save the access even if it is invalid, and modify it later on.
Checking an access
Besides checking all accesses at one time by clicking the Check all Accesses button, you can check a single access.
Run the following steps:
-
From the Access Manager main page, select the Check action for the access that you want to verify.
-
Clara verifies your access. A notification appears on the Access Manager page with the verification result.
-
If you need to modify your access, select the Edit action.
Editing an access
To edit an access, run the following steps:
-
From the Access Manager main page, select the Edit action for the access that you want to modify:
-
The Edit Access side panel opens:
-
Modify the access information and, if needed, the e-mail for notification.
-
Click Test to check the access.
-
If the access is valid, click Save.
-
You can save the access even if its status is invalid or unknown. You can modify the access later on.
Deleting an access
To delete an access, run the following steps:
-
From the Access Manager main page, click the Delete action for the access that you want to remove.
-
In the confirmation panel, click the Delete button to permanently remove the access from the system.