Upgrading Clara
You can upgrade your Clara installation from V1.0.0.6 or above to V2.0.0.0.
Before upgrading Clara, if you have modified the Knowledge Base of your previous installation by adding custom FAQs and you want to export them, run the following steps:
From Clara Administration Console (https://<Clara_machine_IP>/botAdministrator/index.html), export the FAQs into a .csvl file by clicking the Export button.
Delete all the FAQs except your custom ones and save the file.
Upgrade procedure
Run this procedure if you want to migrate your previously defined Keycloak settings and users:
Install Clara V2.0.0.0 by following the installation procedure.
Open Keycloak administration console at the link https://<IP:PORT>/keycloak/auth/admin by using the following credentials:
userid=admin
password=Hclsolutions00
Modify the login settings:
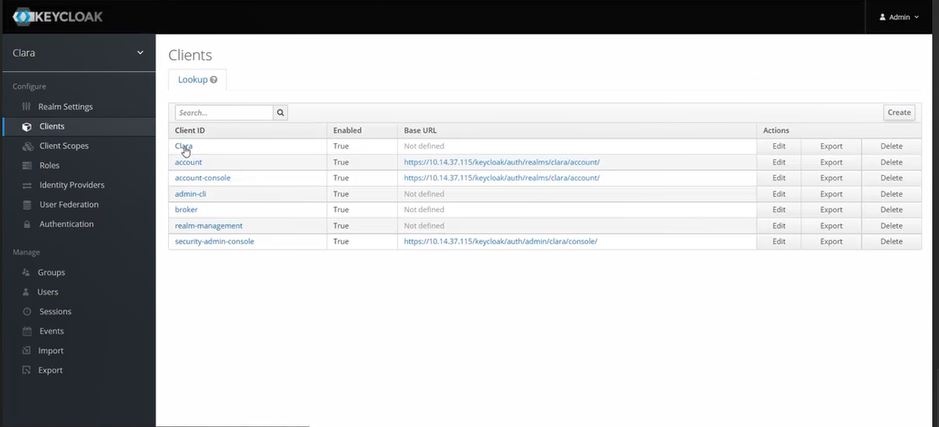
From Keycloak left-hand sidebar, from the Configure section, select Clients
Select Clara as Client ID
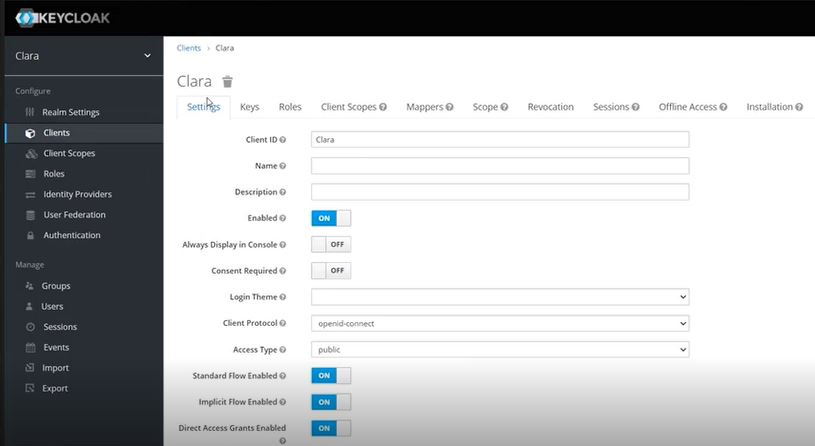
From the Settings tab, set Access Type to public.
Modify the login theme:
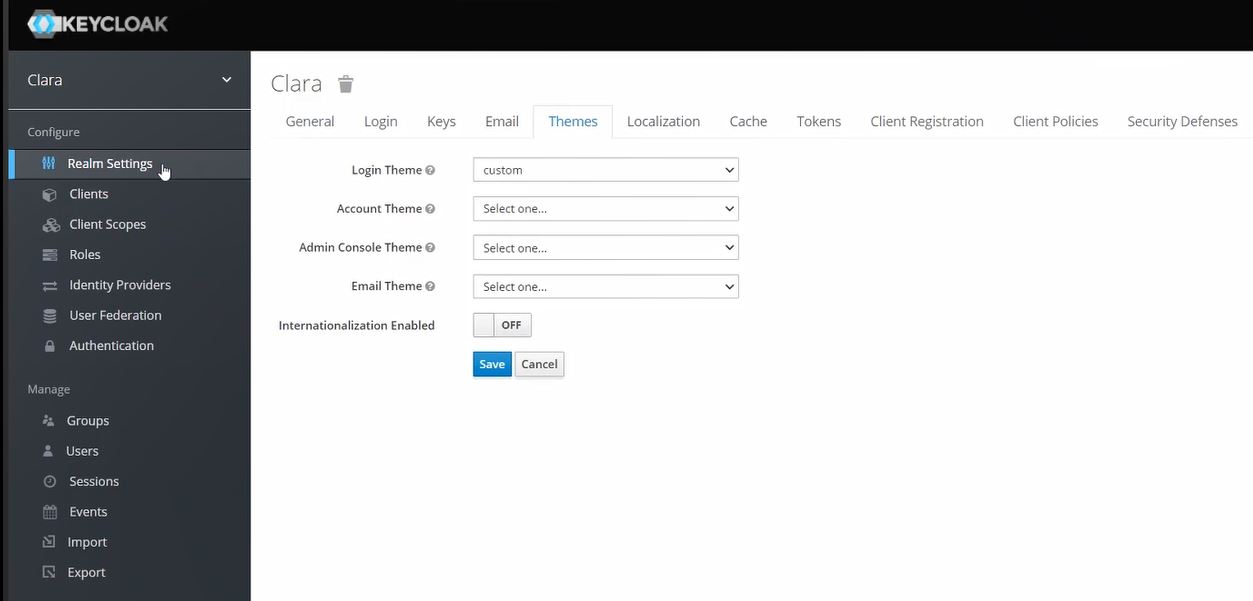
From Keycloak left-hand sidebar, from the Configure section, select Realm Settings
From the Themes tab, set Login Theme to custom.
Add the new role: clara-admin:
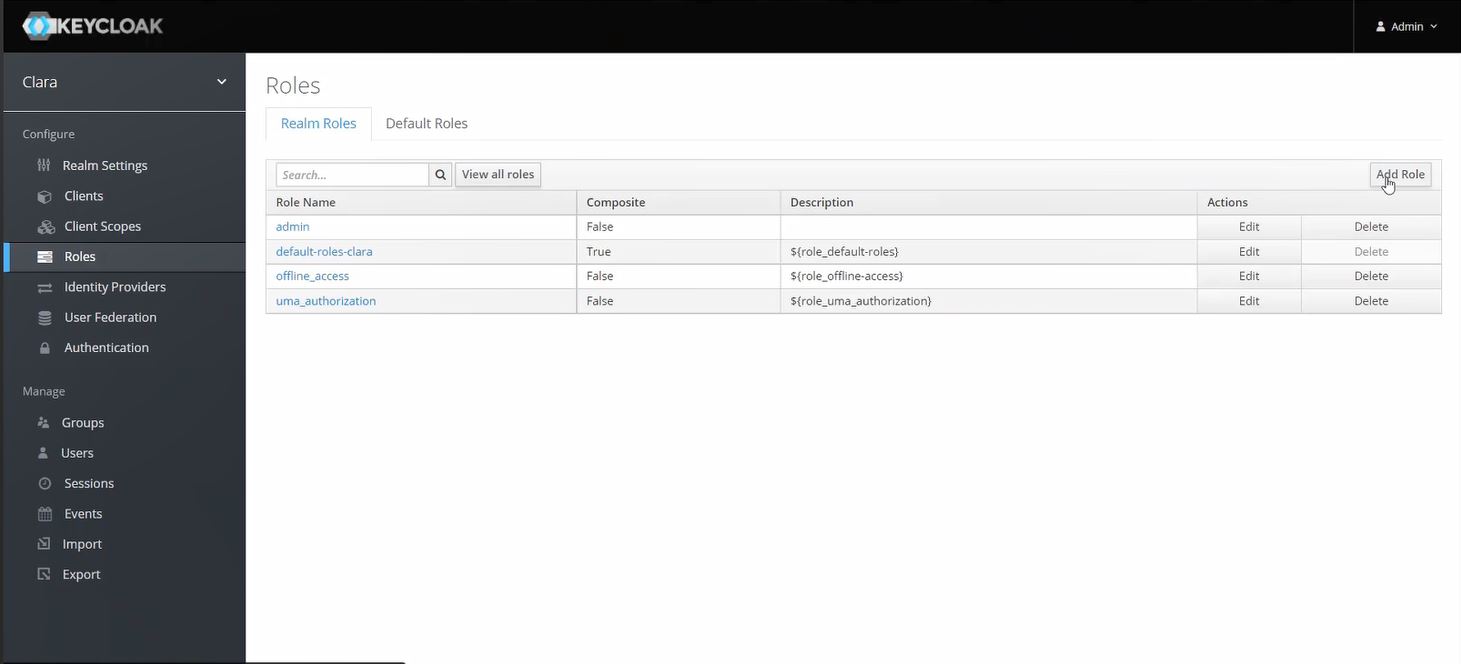
From Keycloak left-hand sidebar, from the Configure section, select Roles
From the Realm Roles tab, click Add Role
Set Role Name to clara-admin
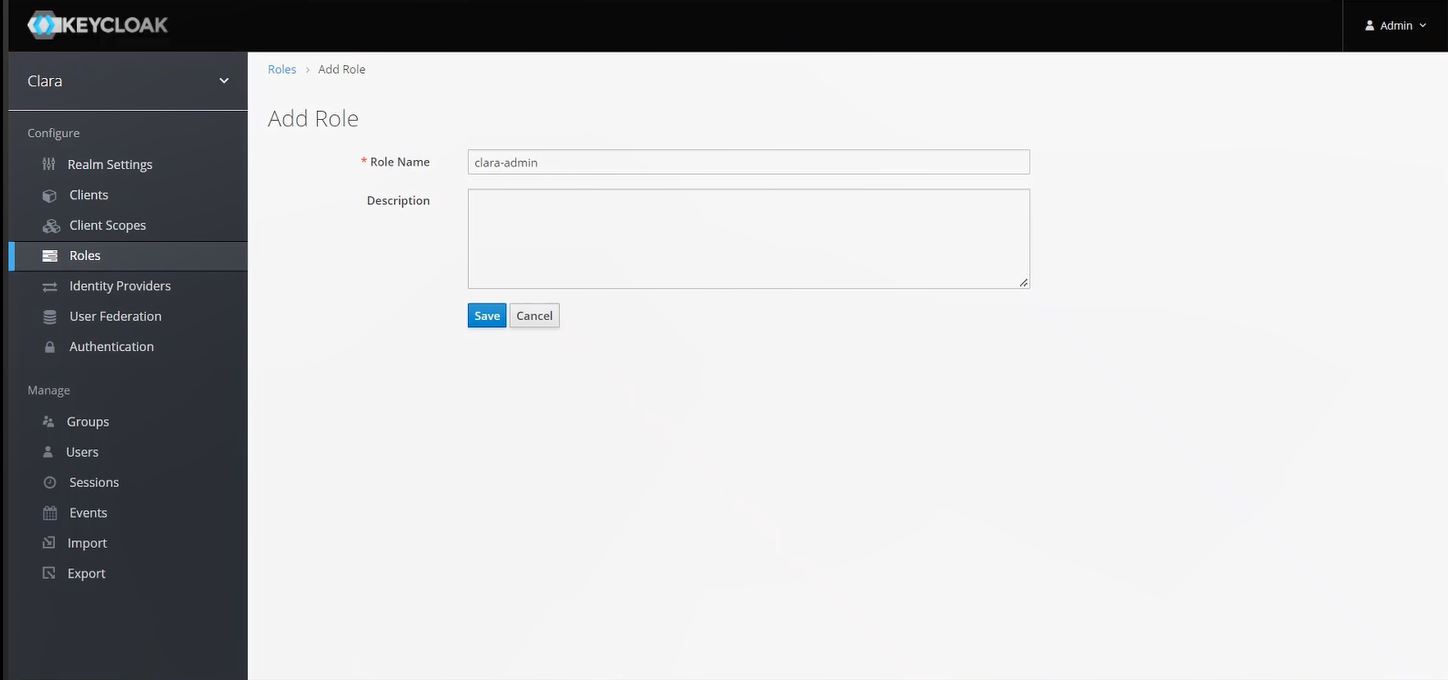
Click Save
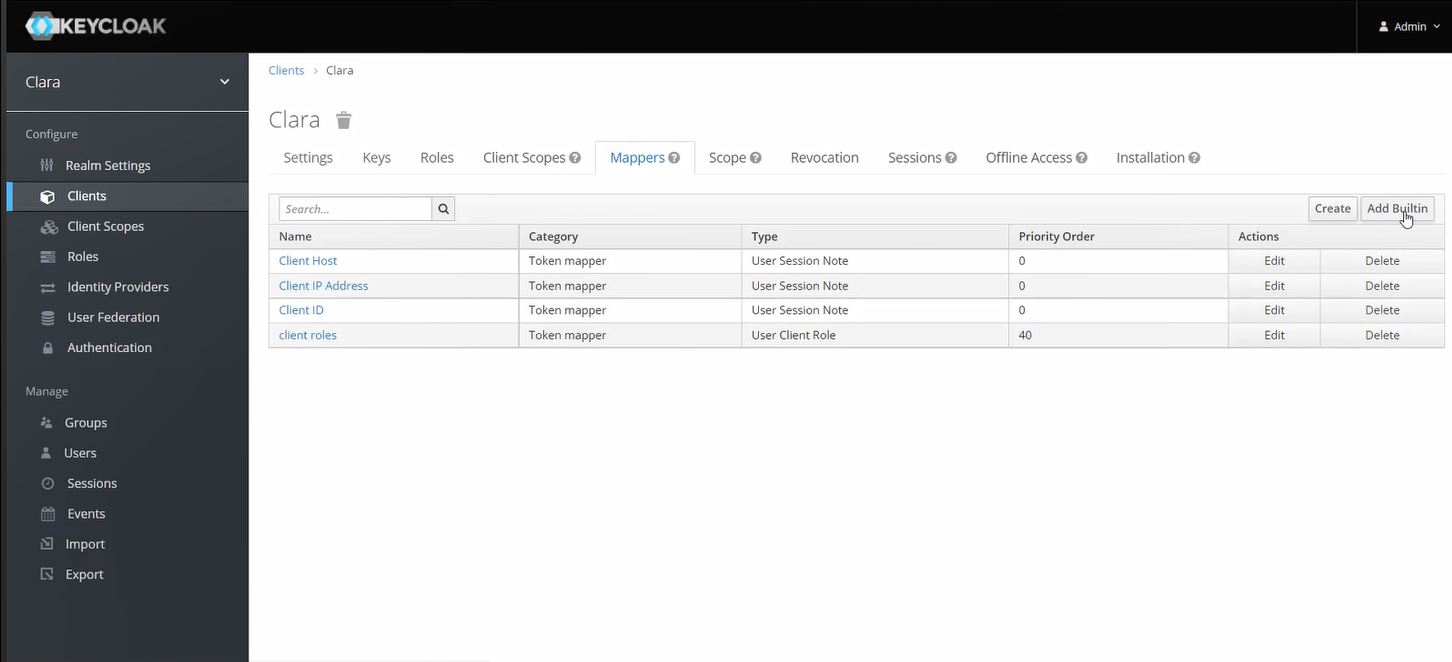
Modify the Realm token:
From Keycloak left-hand sidebar, from the Configure section, select Clients > Clara
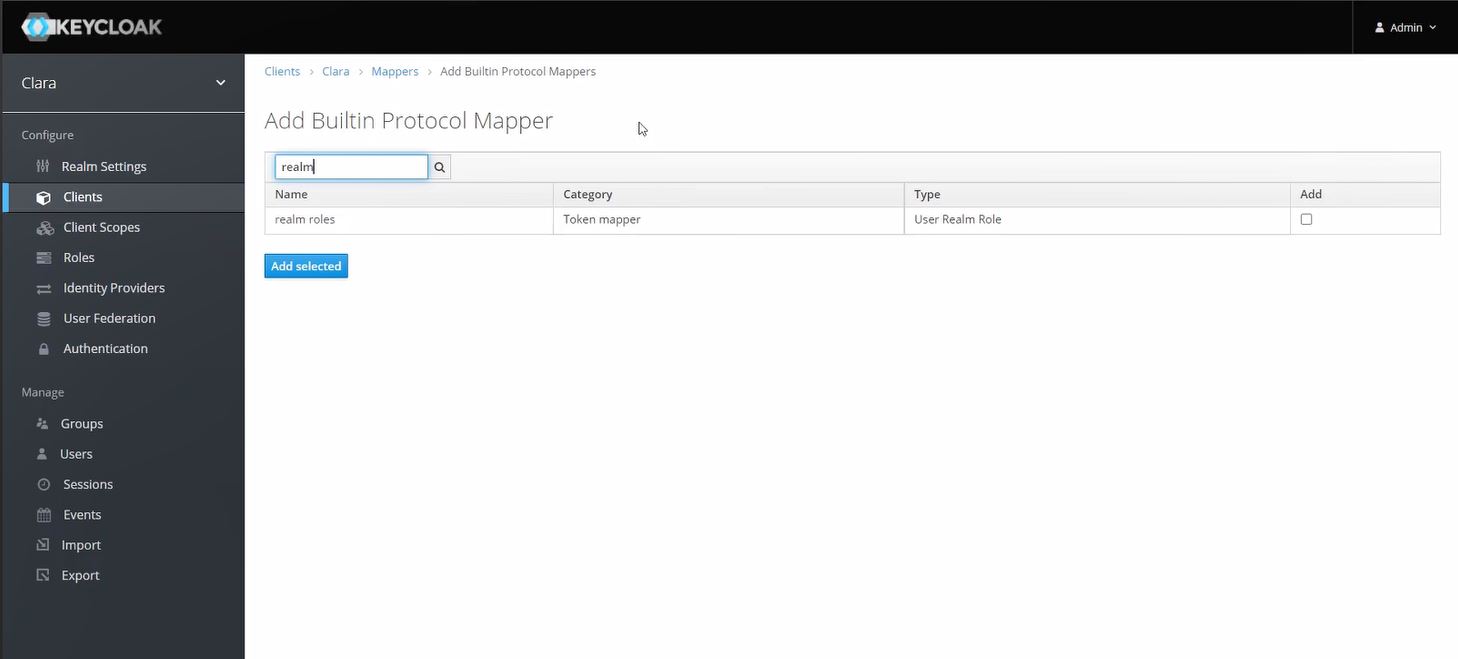
From the Mappers tab, click Add Builtin
Search for realm roles and click Add selected
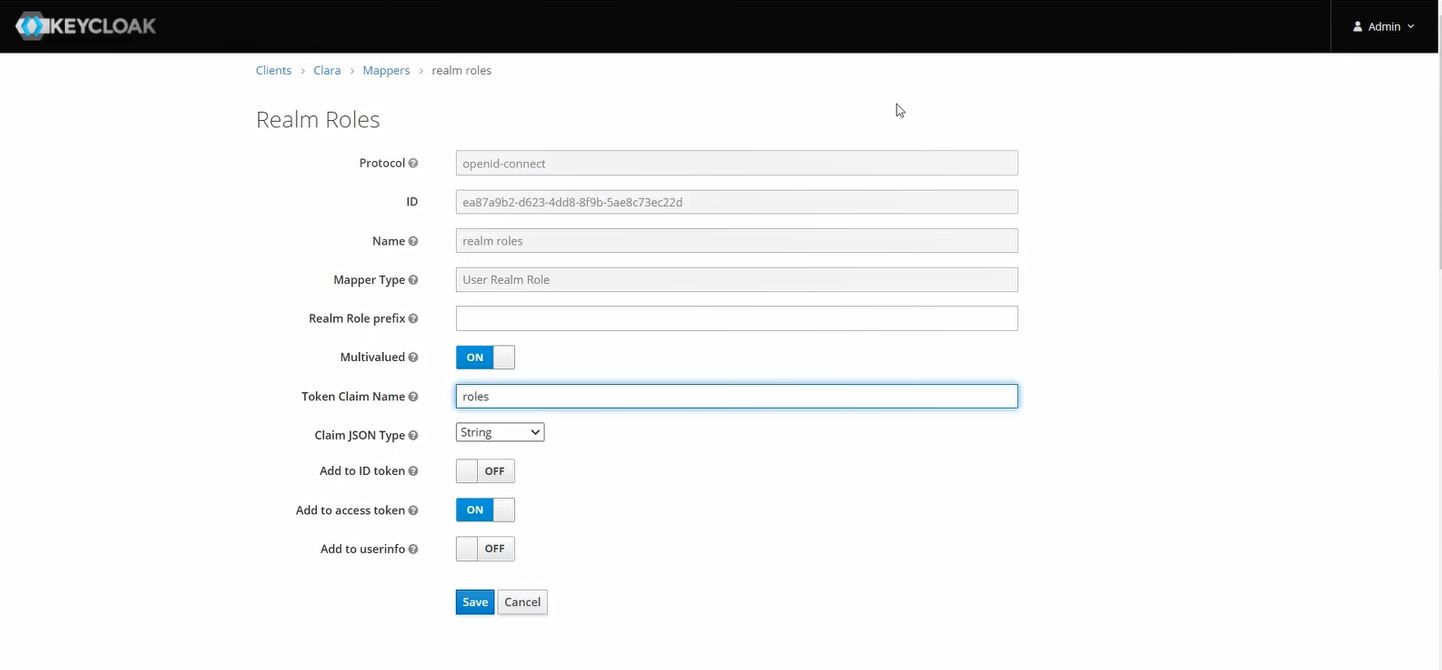
From the Mappers tab, click the Edit action for realm roles
Set the Token Claim Name to roles
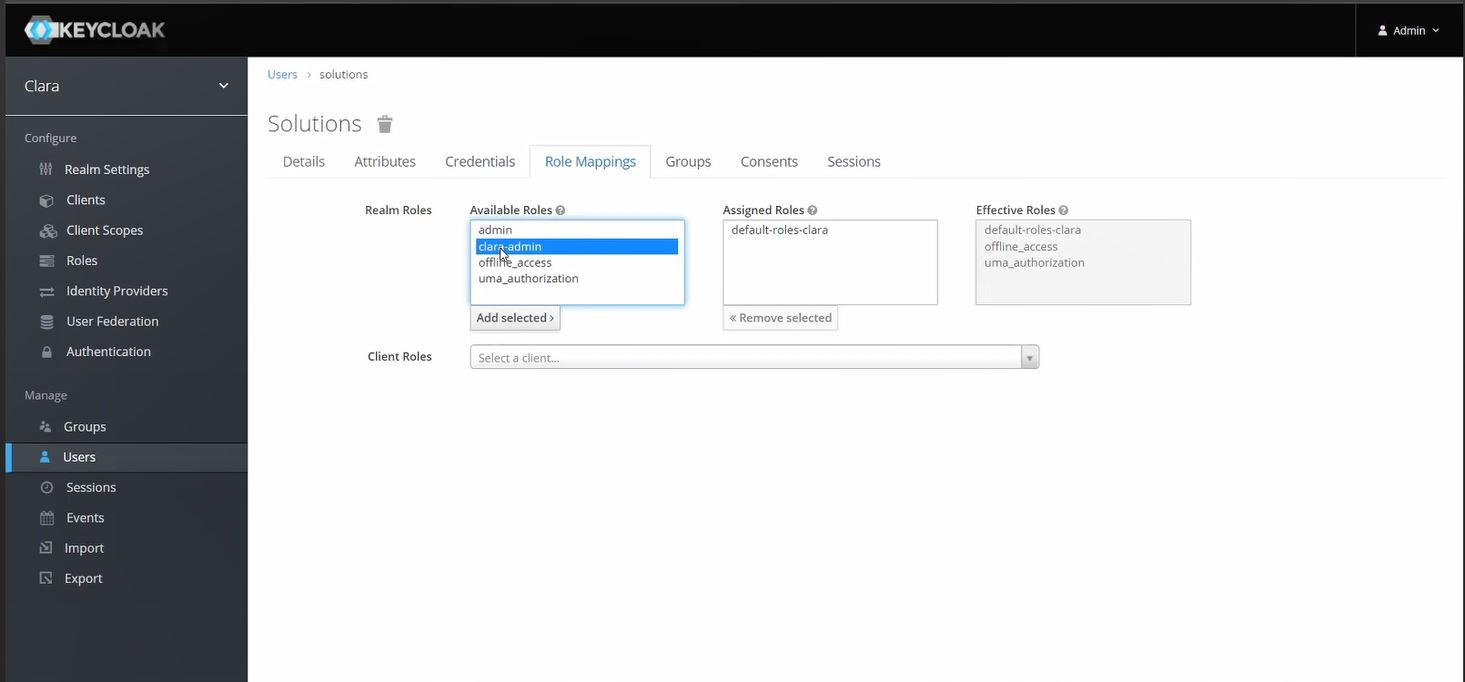
Assign the new role clara-admin:
From Keycloak left-hand sidebar, from the Manage section, select Users
Search for the user you want to give the clara-admin role and click the Edit action

From the Role Mappings tab, in the Available Roles list, select clara-admin and click Add selected
You can now login to Clara with your migrated users
After the upgrade, from Clara Dashboard > Manage Intents, you can import the .csv file containing the custom FAQs exported from your previous installation.