Resource Monitoring Agents
For testing, you would need many hosts. For example, you might have one host with the application server, another host with the database server, and some hosts to apply the user load. Due to network or firewall issues, sometimes, it becomes difficult for multiple hosts to connect to each other. Resource Monitoring Agents are installed on the target hosts so that they can establish a connection with HCL OneTest™ Server to gather resource statistics of the target host.
The agents always try to connect with the server through the HTTPS protocol. You must install the agent and start it. From the Resource Monitoring Service page in HCL OneTest™ Server, you can copy the command lines to download files and to run the agents. When you stop the agent, the data sources that you have already added persist but the live data will not be available.
The following tasks explain how you can install, configure and start the Resource Monitoring Agents.
Connecting agents to the Resource Monitoring Service
You must install the Resource Monitoring Agents on the target host for which you want to collect the performance statistics. The agents must be run to establish a connection with the Resource Monitoring service.
Before you begin
- The Resource Monitoring Service does not require access to the agent host but the agent must reach the service host over HTTPS.
- For Linux Performance monitoring, the agent must run on the Linux target.
- For Windows Performance monitoring, the agent must run on the Windows target or on a Windows host that is configured to access the performance monitoring data of the Windows target.
- For Docker monitoring, the agent must run on a target where Docker is installed.
About this task
This task applies to Java and Docker agents. However, the command lines used to install agents are different from Java and Docker agents. You can find the command lines and instructions in HCL OneTest™ Server in the Resource Monitoring Agents page. Moreover, an additional step must be performed for Docker agents, before you start the Docker agents, you must build a Docker image by using a dedicated command line.
Procedure
- In HCL OneTest™ Server click the Set up agents to extend Resource Monitoring service link on the Resource Monitoring page to access the Agents page. It displays a page where you can find the instructions and command lines to download, set up, and run the agents.
-
To download the agent, click Download jar file
for a Java agent or Download Docker file for a
Docker agent.
You can also use the curl and wget commands to download the agent without accessing the Resource Monitoring web UI. For more facility, use the code snippets to copy and fill in the command lines with the valid offline token and the jar or docker file name.
curl -O -J https://hostName/rm/agent-jar wget --content-disposition https://hostName/rm/agent-jar - This step applies to Docker agents only, copy the build command line and paste it in your console to build a Docker image.
-
To run your agent, copy the appropriate command line respectfully to
your environment system with the code snippets. In your console, points
to the directory path that contains the agent jar file, paste the
command line :
On Windows:
set HCL_ONETEST_OFFLINE_TOKEN=(Enter your offline token here)
java -jar (Enter the name of the downloaded jar file here) --serviceUrl=https://hostName/rm --projectId=<project_id>
On Linux:sudo HCL_ONETEST_OFFLINE_TOKEN=(Enter your offline token here) java -jar (Enter the name of the downloaded jar file here) --serviceUrl=portNumber/rm --projectId=<project_id>
Results
What to do next
Starting the RM Agent as a service on Windows
To ensure that the Resource Monitoring Agent starts by itself when the host is restarted, you can set up the environment in such a way that the Resource Monitoring Agent can be started as a service.
Before you begin
- Java 8 installed on the host.
- HCL OneTest™ Server added to the PATH environment variable.
- An offline token to connect the agent securely with appropriate permissions. You can create an offline token from the User menu of the Resource Monitoring page or you can re-use your active offline token. The token expires if it is not used for a month.
Procedure
- Download the latest release of winsw. You can choose to download WinSW.Net2.exe or WinSW.Net4.exe depending on the version of .Net framework that you already have on the host Windows.
- Create a folder on your local hard drive like RMAgent-winservice.
- Copy the downloaded executable to this new folder and rename the file to RMAgent-winservice.exe.
- Create a new text file in the same folder and name it RMAgent-winservice.xml.
-
To set up the offline token, copy and adapt the following content to this new
RMAgent-winservice.xml file:
<service> <id>RMAgent-winservice</id> <name>Resource Monitoring Agent</name> <description>This service runs the Resource Monitoring Agent.</description> <executable>java</executable> <env name="HCL_ONETEST_OFFLINE_TOKEN" value="(Enter your offline token here"/> <arguments>-jar %BASE%\RMAgent.jar --serviceUrl=https://<service-host>/rm --projectId=<projet-id> --autoUpgradeDownloadThen=execute:cmd,/c,start,%BASE%\auto-upgrade.bat</arguments> <onfailure action="restart" delay="10 sec"/> <logmode>rotate</logmode> </service>Note:- Replace <service-host> by the host name of the host that runs HCL OneTest™ Server.
- Replace <project-id> which is the number you'll find after /projects/ in the browser's URL when browsing to this project.
- Create a new text file in the same folder and name it auto-upgrade.bat.
-
To upgrade the agent jar file automatically, copy the following content to this new file:
@echo off for /f "tokens=*" %%a in ('dir /b /od %BASE%\com.hcl.test.rm.agent-*.jar') do set newest=%%a %BASE%\RMAgent-winservice.exe stop del %BASE%\RMAgent.jar mklink %BASE%\RMAgent.jar %BASE%\%newest% %BASE%\RMAgent-winservice.exe start - Start the command prompt as an administrator and change the directory to the newly created directory RMAgent-winservice.
- Download the agent jar file from the Resource Monitoring web page and save it to the same directory.
-
In the command prompt, type the following command to create a symbolic link named
RMAgent.jar to the agent jar file:
mklink RMAgent.jar com.hcl.test.rm.agent-<version-and-datetime>.jar -
Type the following commands:
RMAgent-winservice installRMAgent-winservice start - In the Services Windows application, you can check whether the service is up and running.
-
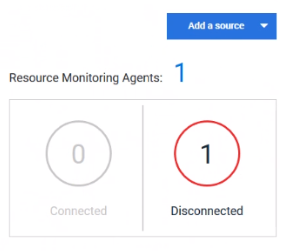
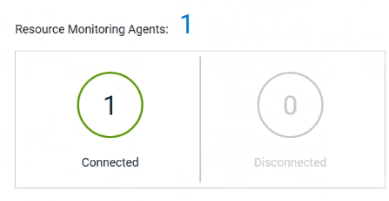
You can see in the Resource Monitoring page whether the Resource Monitoring Agent is
disconnected or connected.
What to do next
Starting the RM Agent as a service on Linux
To ensure that the Resource Monitoring Agent starts by itself when the host is restarted, you can set up the environment in such a way that the Resource Monitoring Agent can be started as a service.
Before you begin
- Java 8 installed on the host.
- HCL OneTest™ Server added to the PATH environment variable.
- An offline token to connect the agent securely with appropriate permissions. You can create an offline token from the User menu of the Resource Monitoring page or you can re-use your active offline token. The token expires if it is not used for a month.
About this task
This topic relies on systemd services that is the default on most modern Linux distributions. Other ways may require adaptations of the instructions but the provided script will be a good basis in most cases.
Procedure
- Create a folder on your local hard drive like /opt/RMAgent-linuxservice.
- Download the agent jar file from the Resource Monitoring web page and save it to the same directory.
- Create a new file /etc/systemd/system/RMAgent-linuxservice.service.
-
Add the following content to this new file:
[Unit] Description = Resource Monitoring Agent After = network.target [Service] Type = forking ExecStart = /opt/RMAgent-linuxservice/RMAgent-linuxservice.sh start ExecStop = /opt/RMAgent-linuxservice/RMAgent-linuxservice.sh stop Restart = on-failure RestartSec = 10 [Install] WantedBy = multi-user.target -
Create another file /opt/RMAgent-linuxservice/RMAgent-linuxservice.sh.
#!/bin/sh #!/bin/sh # Update the 3 following variables with the Server's host name, project id and offline token: SERVICE_URL=https://<hostname>/rm PROJECT_ID=<project-id> export HCL_ONETEST_OFFLINE_TOKEN=<offline-token> ARGS="--serviceUrl=$SERVICE_URL --projectId=$PROJECT_ID --autoUpgradeDownloadThen=exitFailure" SCRIPT=$(readlink -f "$0") RMAGENT_HOME=$(dirname "$SCRIPT") # Ensure we're using the latest downloaded jar file PATH_TO_JAR=`ls -t $RMAGENT_HOME/com.hcl.test.rm.agent-*.jar | head -1` if [ -z "$PATH_TO_JAR" ] then cd $RMAGENT_HOME && { curl -k -O -J $SERVICE_URL/agent-jar; cd -; } PATH_TO_JAR=`ls -t $RMAGENT_HOME/com.hcl.test.rm.agent-*.jar | head -1` if [ -z "$PATH_TO_JAR" ] then echo "Start the server at $SERVICE_URL to allow download of the latest agent jar file" echo "Exiting..." exit 1 fi fi SERVICE_NAME="Resource Monitoring Agent" #Pid file will reside in this script’s folder PATH_TO_PID=$RMAGENT_HOME/RMAgent-pid #Log file will reside in this script’s folder PATH_TO_LOG=$RMAGENT_HOME/RMAgent.log case $1 in start) echo "Starting $SERVICE_NAME ..." if [ ! -f $PATH_TO_PID ]; then nohup java -jar $PATH_TO_JAR $ARGS >> $PATH_TO_LOG 2>&1 & echo $! > $PATH_TO_PID echo "$SERVICE_NAME started ..." else echo "$SERVICE_NAME is already running ..." fi ;; stop) if [ -f $PATH_TO_PID ]; then PID=$(cat $PATH_TO_PID); echo "$SERVICE_NAME stopping ..." kill $PID; echo "$SERVICE_NAME stopped ..." rm $PATH_TO_PID else echo "$SERVICE_NAME is not running ..." fi ;; restart) if [ -f $PATH_TO_PID ]; then PID=$(cat $PATH_TO_PID); echo "$SERVICE_NAME stopping ..."; kill $PID; echo "$SERVICE_NAME stopped ..."; rm $PATH_TO_PID echo "$SERVICE_NAME starting ..." nohup java -jar $PATH_TO_JAR $ARGS >> $PATH_TO_LOG 2>&1 & echo $! > $PATH_TO_PID echo "$SERVICE_NAME started ..." else echo "$SERVICE_NAME is not running ..." fi ;; esacNote:- Replace <service-hostname> by the host name of the host that runs HCL OneTest™ Server.
- Replace <project-id> which is the number you'll find after /projects/ in the browser's URL when browsing to this project.
Results
Starting a Java Virtual Machine
To monitor the Resource Monitoring data from a Java Virtual Machine, you must start the Java Virtual Machine. Some parameters must be set in the command line before running the Java Virtual Machine.
Procedure
- In the command line that is used to run the Java Virtual Machine, enter The IP address of the JVM (local or remote host) and the IP port.
- Optional: You can optionally use authentication security data to launch the virtual machine. In this case, you must enter the name of the password file. You can also enter the name of a privilege file if needed.
Example
- Parameters used to launch a JVM without security:
-
java
-Dcom.sun.management.jmxremote
-Dcom.sun.management.jmxremote.port=9010
-Dcom.sun.management.jmxremote.local.only=false
-Dcom.sun.management.jmxremote.authenticate=false
-Dcom.sun.management.jmxremote.ssl=false
-jar MyapplicationFile.jar
- Parameters used to launch a JVM with authentication security:
-
java
-Dcom.sun.management.jmxremote
-Dcom.sun.management.jmxremote.port=9010
-Dcom.sun.management.jmxremote.local.only=false
-Dcom.sun.management.jmxremote.authenticate=true
-Dcom.sun.management.jmxremote.ssl=false
-Dcom.sun.management.jmxremote.password.file=jmxremote.password
-Dcom.sun.management.jmxremote.access.file=jmxremote.access (this command line is optional)
-jar MyapplicationFile.jar