Read this topic to learn how to install additional MDM services such as Windows,
Apple, Android and to configure the identity service.
About this task
For MDM servers that do not have all the three MDM components installed (Windows,
Apple, or Android), you can add the missing component. For example, a Windows MDM server
can use this work flow to add Apple MDM and / or Android MDM server capabilities and
vice versa. You can also configure the authentication method used by the identity
service for your organization through this screen.
Procedure
-
From the WebUI main page, select .
-
On the Modern Client Management page, click Admin.
-
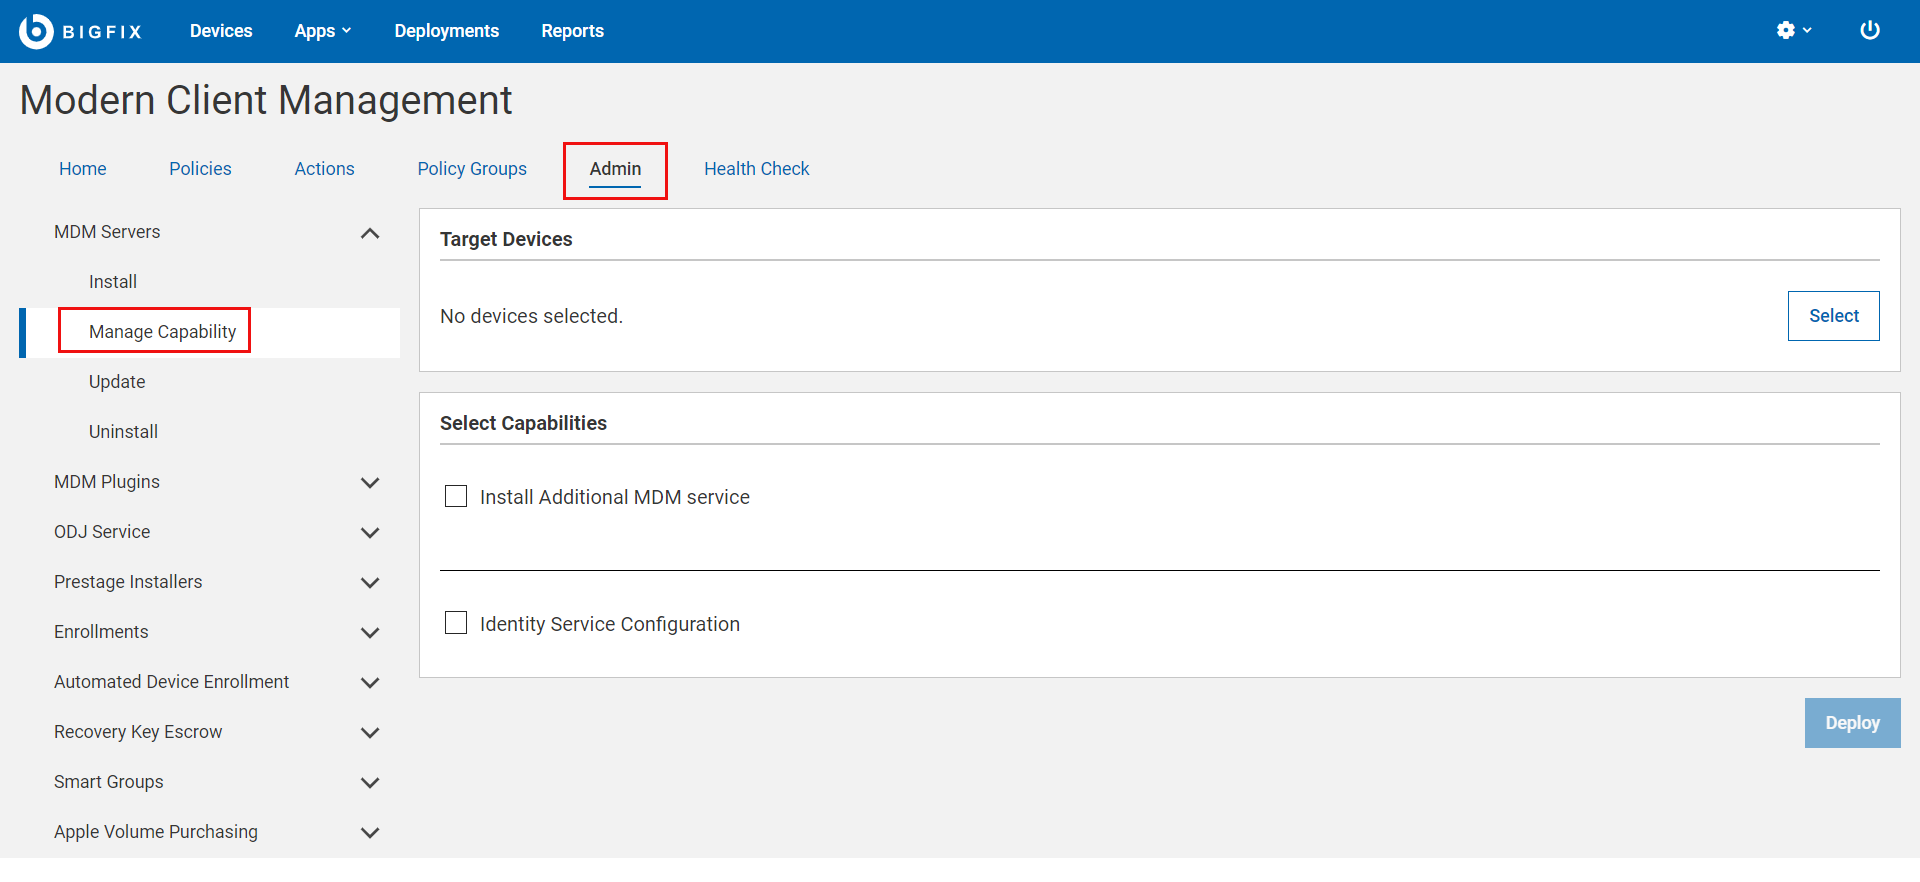
On the Admin page, select . The following page appears:

-
Click Select to select an MDM server on which you want
to install additional MDM service and/or configure the identity service. You
must select at least one option to deploy on an MDM server.
-
Install Additional MDM Service
-
Under the Select Capabilities section, select the Install
Additional MDM Service check box.
-
Select the Operating System.
- Windows
WNS Credentials: This field appears when you select
Windows as the operating system. Click Upload File and
browse through the file location to select the
wnscredentials.json file.
- Apple
- Apple Push Certificate and Key Content:
- Apple Push Key password: Enter the Apple Push
key password.
- Apple Push Certificate: Click Upload File and
browse through the file location to select the
Push PEM file.
- Apple Push Key: Click Upload File and browse
through the file location to select the
Push key file. For
information on how to obtain an Apple Push
Certificate for your MDM Server, see Generating APNs certificate.
- User Agreement for Mac MDM Enrollment: This is optional.
Enter welcome message text for an end user agreement.
The message entered here is displayed to the end users
to accept to proceed with enrollment of Apple devices
through the enrollment process. This allows the
organization to notify or warn device users of the terms
of enrolling their devices. This message can include,
for example, a warning about allowing remote management
of the device or helpdesk contact information.
- Android
For non G-Suite accounts, Android Server Admin
Credentials are required. For G-Suite accounts, the
Google G-Suite Credentials are required.
Note: Either the Android Server
Admin Credentials or the Google Gsuite Credentials
are required, not both. The UI stops you if you
try to enter both.
- Android Server Admin Username: Enter the user
name
- Android Server Admin Password: Enter the
password
For more information on how to generate
googlecredentials.json file,
see Enroll to Managed Google Play Accounts enterprise.or
Google GSuite Credentials: Click Upload
file and browse through the file location to select the
googlecredentials.json
file.
-
Identity Service Configuration
-
Under the Select Capabilities section, select the Identity
Service Configuration checkbox. ID Service options
appear for you to select.
-
Select ID Service
- No Auth: Select this option if you do not want any
authentication. This means anyone can enroll for MCM service
without having to identify themselves through user credentials.
- AD/Open LDAP
- Enable SAML: This is optional. Select this
check box to enable SAML-authentication configuration.
Note: With MCM v3.0, Okta
is supported. Instructions below pertain to
Okta-specific setup.
- LDAP URL: This is mandatory. Valid format is
https://<server>:<port>. For more information on
LDAP URL formats, see https://ldap.com/ldap-urls/
- LDAP Base DN: This is mandatory. Valid format
"dc=example,dc=org"
Note: Configuring
multiple Base DNs is not supported.
- LDAP Bind User: This is mandatory. The root point to
bind to the server. For example,
CN=LdapCreds,DC=mydomain,DC=mycompany,DC=com.
"user@example.org"
- LDAP Bind Password: This is mandatory. Enter a
string.
- Azure AD
- Enable SAML: This is optional. Select this checkbox to
enable SAML-authenticated enrollment.
- Azure Credentials: This is mandatory. Upload the
.json file with Azure AD
credentials in the following
format:
{ "client_id": "06b6d920-xxxx-xxxx-xxxx-73792306xxxx",
  "tenant_id": "31ac2431-xxxx-xxxx-xxxx-6215b1c2xxxx",
  "client_secret": "d7bc6b2e-xxxx-xxxx-xxxx-b5c681e5xxxx"
 }
For information on how to fetch
this information, refer to the BigFix Wiki
documentation at Azure AD
registration and configuration.
-
Click Deploy.
Note: The Deploy button is enabled only when all the
required parameters for the selected capabilities are provided without
errors.
Results
On top of the existing capabilities of the targeted MDM
server, the capabilities of the selected operating system are added. Authentication
method and the identity service are configured.
