Configure Database Settings
This task explains how to select a supported database type and provide the required connection details to configure the database in the BigFix UI Configuration Manager.
About this task
Procedure
-
Ensure you are on the Database Configurations screen,
which is step 2 of 7 in the BigFix UI Configuration Manager.
The screen prompts you to indicate an existing database or create a new one for the BigFix UI application. The user that you specify in this step must have authority to create a database if you want to create a new one with the Create Database (if it does not already exist) checkbox.
-
If the database is already configured, review the Current Database
Configurations summary.
The summary lists the following read-only values:
- Database host
- Database name
- Database username
- Database port
- Database type
- Database auth type
- Database SSL mode
- DSN
To change these values, click the here link in the
Click here to change your database configuration
text. To keep the current configuration, click Next. -
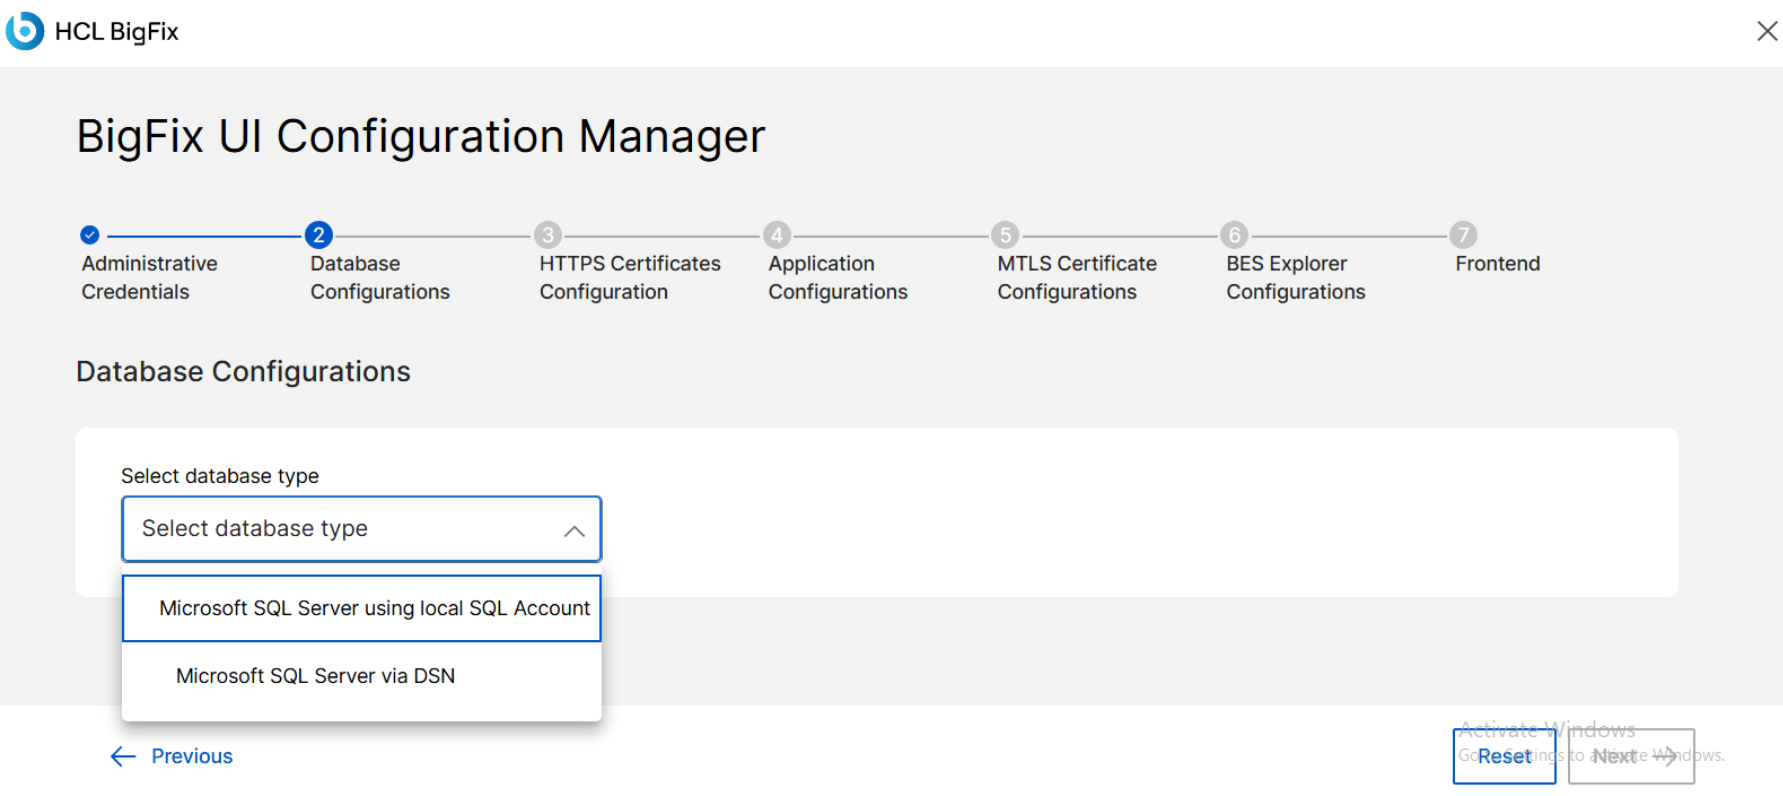
In the Select database type dropdown, click to view the
available options, and then select the database type:
- Microsoft SQL Server using local SQL Account
- Microsoft SQL Server via DSN
Note:Only Microsoft SQL Server is supported for database configuration. Select Microsoft SQL Server using local SQL Account to connect with a local SQL account. Select Microsoft SQL Server via DSN to connect with your own DSN string, which also supports Windows authentication. -
Review the database configuration fields that appear.
After selecting a database type, relevant configuration fields appear. For example:
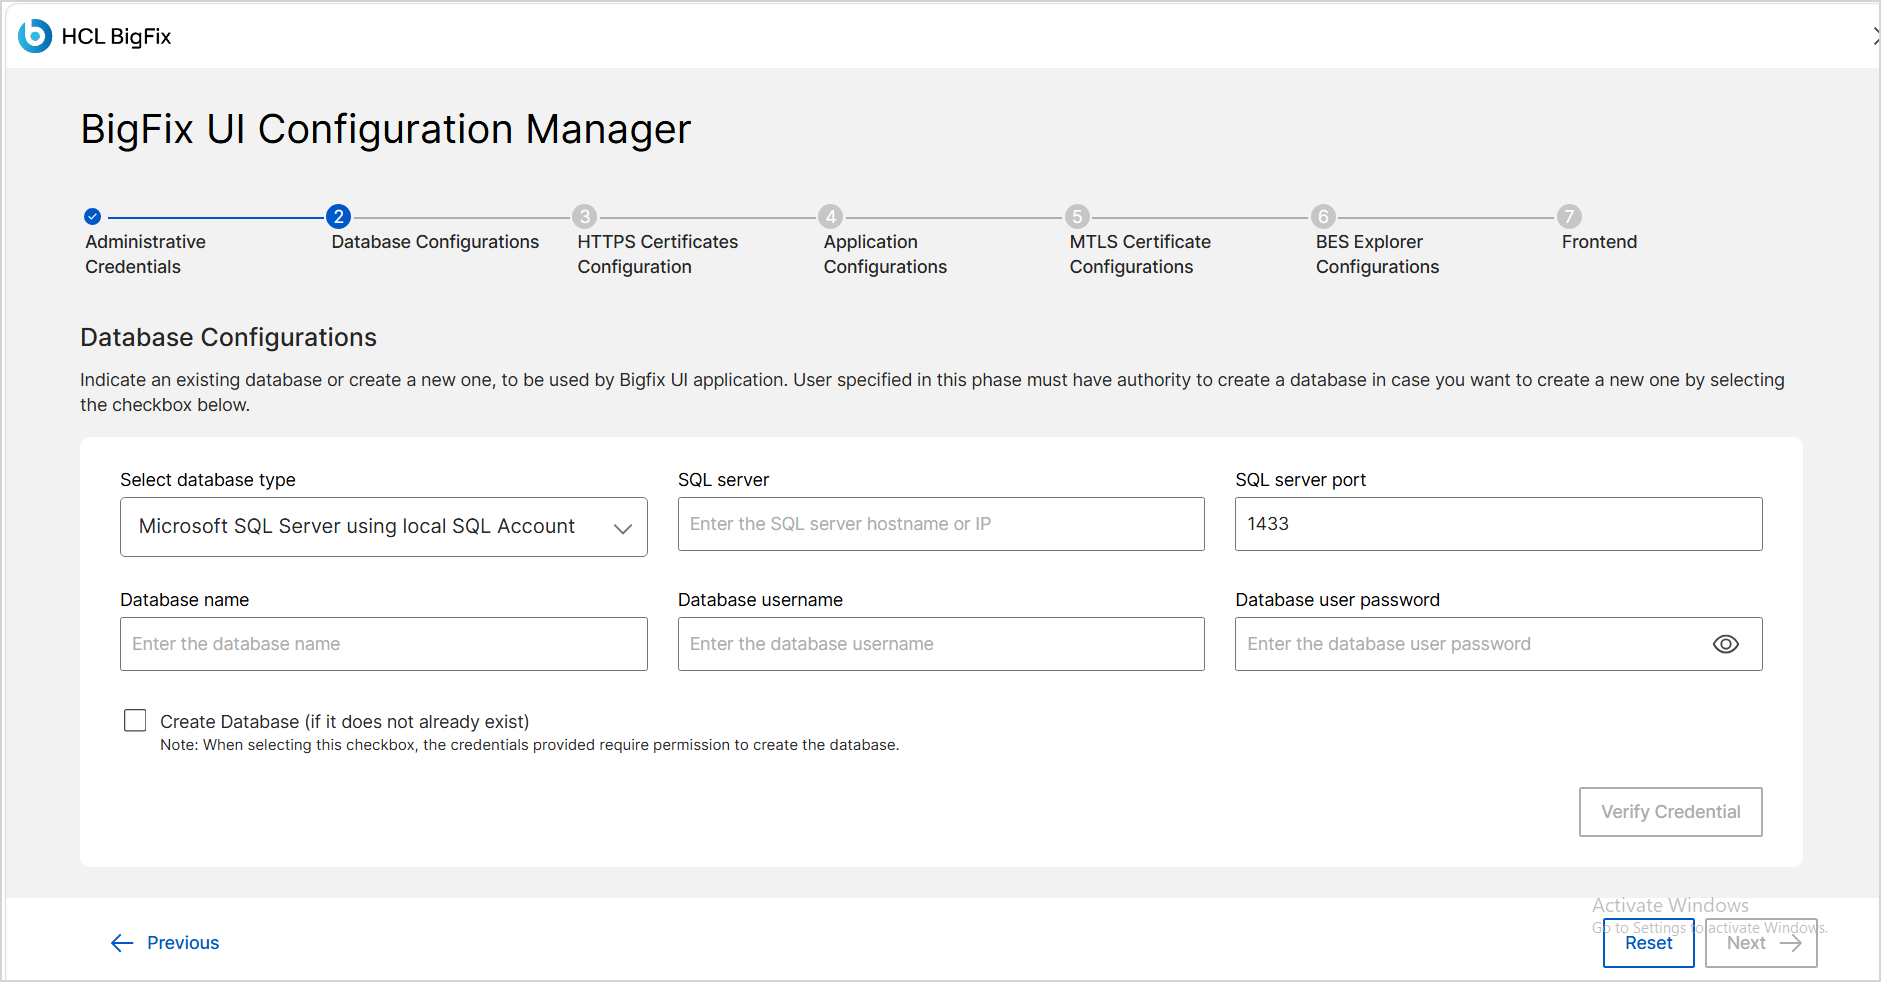
- Microsoft SQL Server using local SQL Account
displays fields such as:
- SQL server
- SQL server port (the default value is 1433)
- Database name
- Database username
- Database user password
-
Create Database (if it does not already exist) checkbox.
- Microsoft SQL Server via DSN shows the
DSN input field.
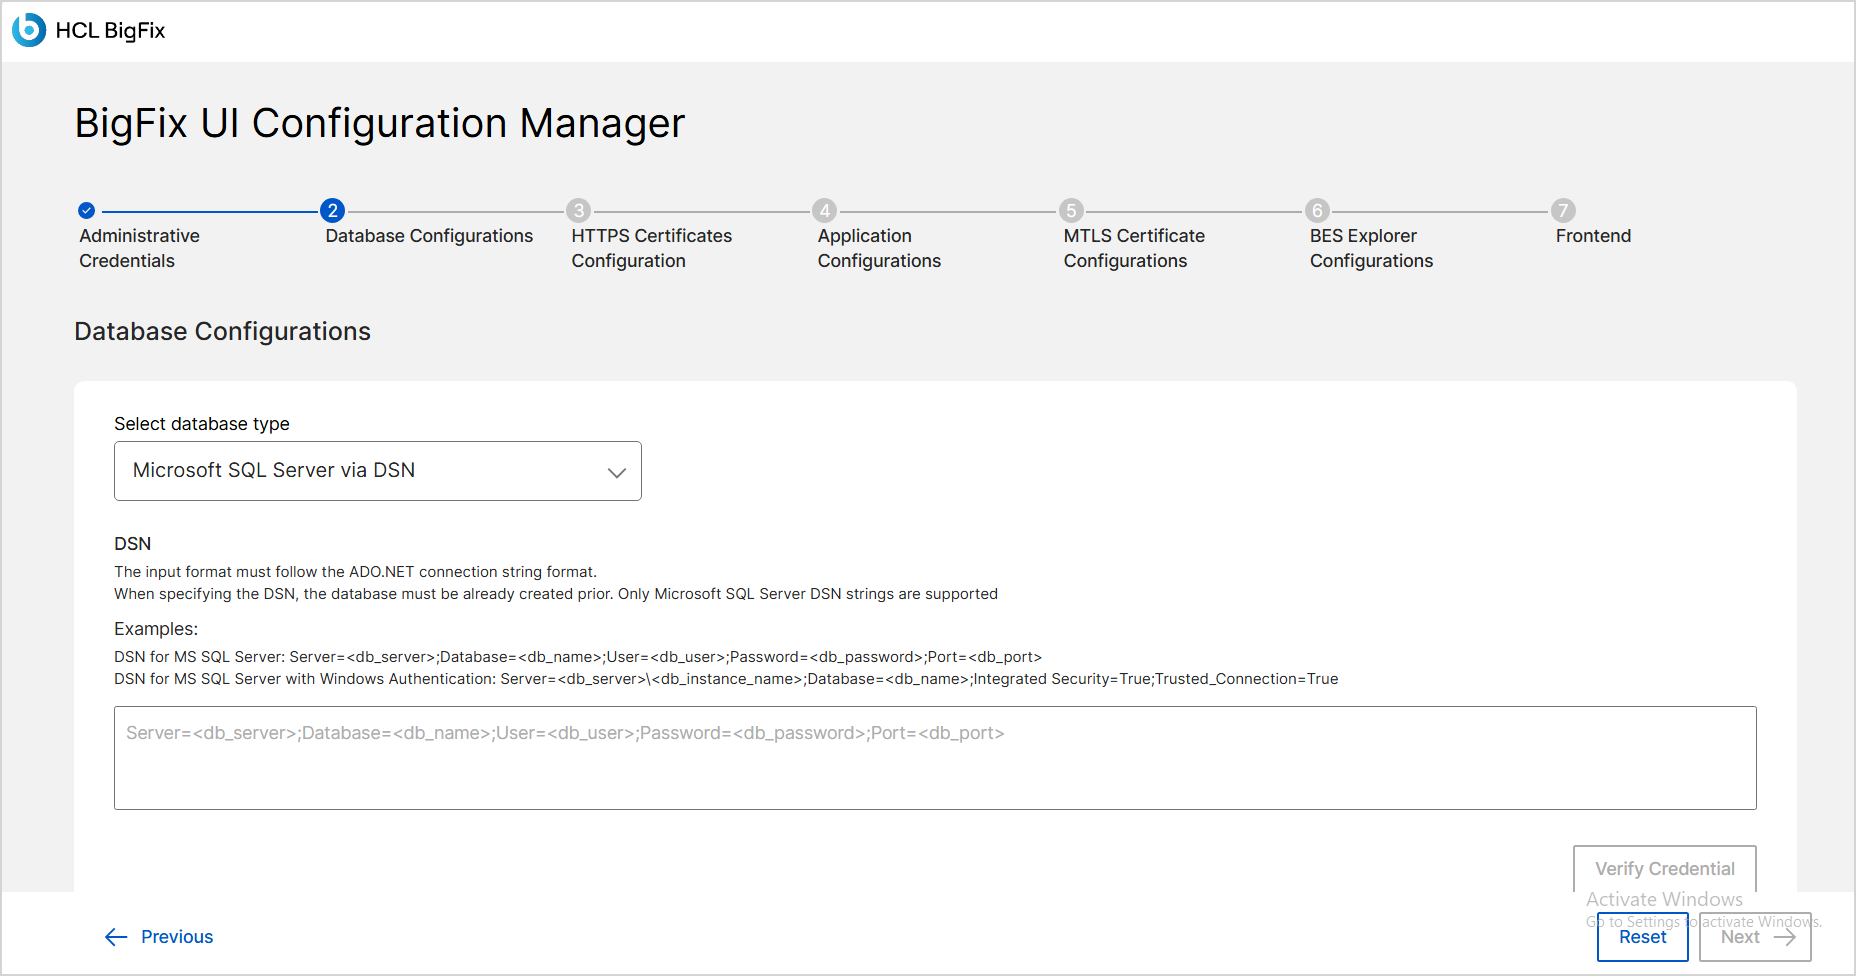
Important:When you select Microsoft SQL Server via DSN, create the database before you run the setup. The DSN string must follow the ADO.NET connection string format. Only Microsoft SQL Server DSN strings are supported.The screen shows the supported DSN formats. Use one of the following:
-
SQL Server authentication:
Server=<db_server>;Database=<db_name>;User=<db_user>;Password=<db_password>;Port=<db_port> -
Windows (Microsoft Integrated) authentication:
Server=<db_server>\<db_instance_name>;Database=<db_name>;Integrated Security=True;Trusted_Connection=True
- Microsoft SQL Server using local SQL Account
displays fields such as:
-
If the selected database does not exist, Select the Create Database
(if it does not already exist) checkbox .
Note:When selecting this checkbox, the credentials provided require permission to create the database.
-
Enter the database configuration details.
Fill in the fields that appear based on your database type selection.
Note:All required fields must be completed before the Verify Credential and Next buttons are enabled. -
Once all mandatory fields are completed, click Verify
Credential to validate the database connection.
If verification is successful, a success message such as "Credentials verified successfully." is displayed.
If verification fails, an error message is shown (e.g., "Invalid credentials or connection timeout. Please check your inputs.")
Problematic fields are highlighted if possible.
-
If there is an error, click Reset button to clear all
the entered information.
When you click the Reset button, a confirmation dialog appears with the options:
- Reset: Clears all data entered in the form.
- Cancel: Closes the dialog and keeps the entered data.
If you want to exit the setup process, click the X icon in the top-right corner of the screen.
-
Confirm the database configuration.
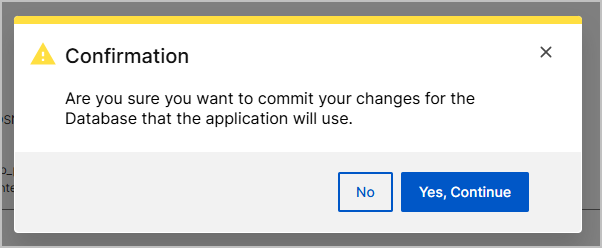
A Confirmation dialog appears with the message
Are you sure you want to commit your changes for the Database that the application will use.
- Click Yes, Continue to commit the database configuration.
- Click No to close the dialog and return to the form without committing the changes.
- After the successful database configurations, click the Next button to proceed to the HTTPS Certificates Configuration screen, which is step 3 of 7 in the BigFix UI Configuration Manager.